
Campus Configuration
Before allocating students to hostels, you must configure the master data that defines your campus amenities and visitor policies. This ensures that facility charges and security requirements are standardized.
Hostel Configuration
Effective campus management requires a structured hierarchy of your physical infrastructure. In OpenEducat, this is organized as Buildings > Floors > Rooms > Beds. You must define these elements in order, as each level depends on the existence of the parent structure.
Buildings
The Building is the highest level of the hostel hierarchy. It defines the overall capacity and location.
Navigation: Campus > Configuration > Hostel Configuration > Buildings
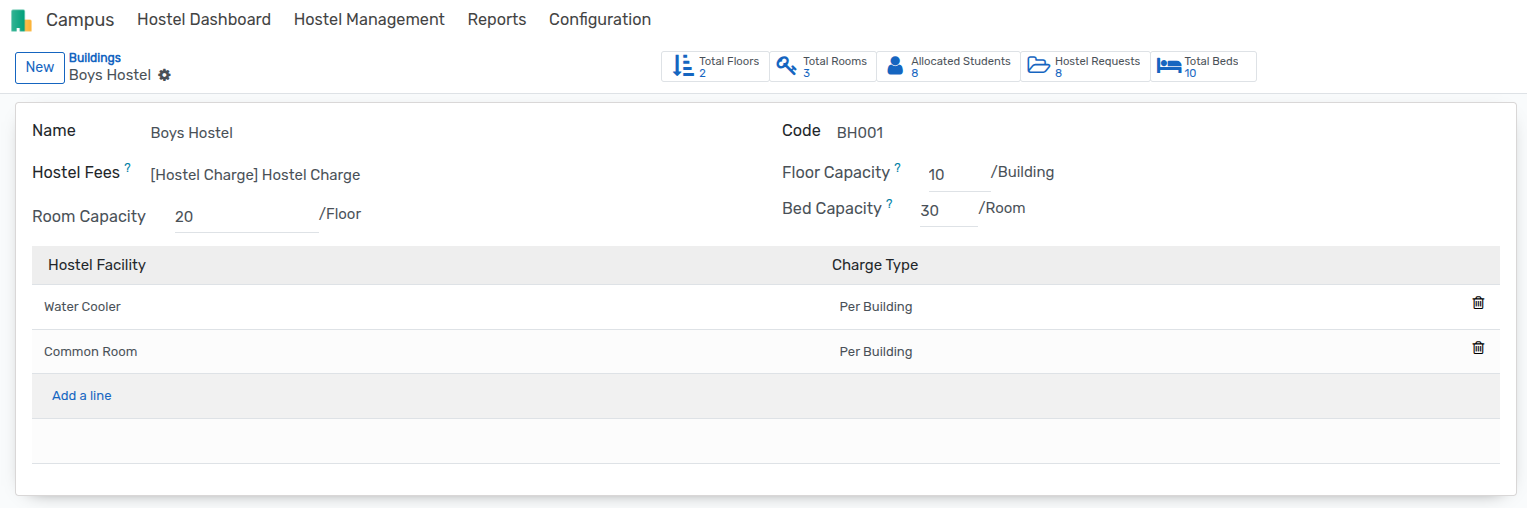
Creating a Building:
Click New.
Name: Enter a descriptive name (e.g., « North Wing Hostel »).
Code: Enter a unique identifier (e.g., « NW-H »).
Capacities:
Floor Capacity: Maximum number of floors allowed.
Room Capacity: Maximum number of rooms allowed per floor.
Bed Capacity: Maximum number of beds allowed per room.
Hostel Fees: Select the product representing the rental fee. This product will be used for invoicing.
Facilities: Add the amenities available in this building (e.g., Wi-Fi). You can specify if the charge is per building, floor, room, or bed.
Floors
Once a building is created, you must partition it into Floors.
Navigation: Campus > Configuration > Hostel Configuration > Floors
Click New.
Name: Enter the floor name (e.g., « Ground Floor », « 1st Floor »).
Building: Select the parent building.
Code: Enter a unique floor code.
Save the record.

Rooms
Rooms are the actual living spaces located on specific floors.
Navigation: Campus > Configuration > Hostel Configuration > Rooms
Click New.
Room Number: Enter the unique room number (e.g., « 101 »).
Building & Floor: Select the appropriate building and floor.
Bed Configuration:
The system tracks Total Beds, Occupied Beds, and Available Beds.
Ensure the number of beds you plan to add does not exceed the building’s defined bed capacity.

Beds
The Bed is the fundamental unit for student allocation. Students are assigned to a specific Bed (or Berth).
Navigation: Campus > Configuration > Hostel Configuration > Beds
Click New.
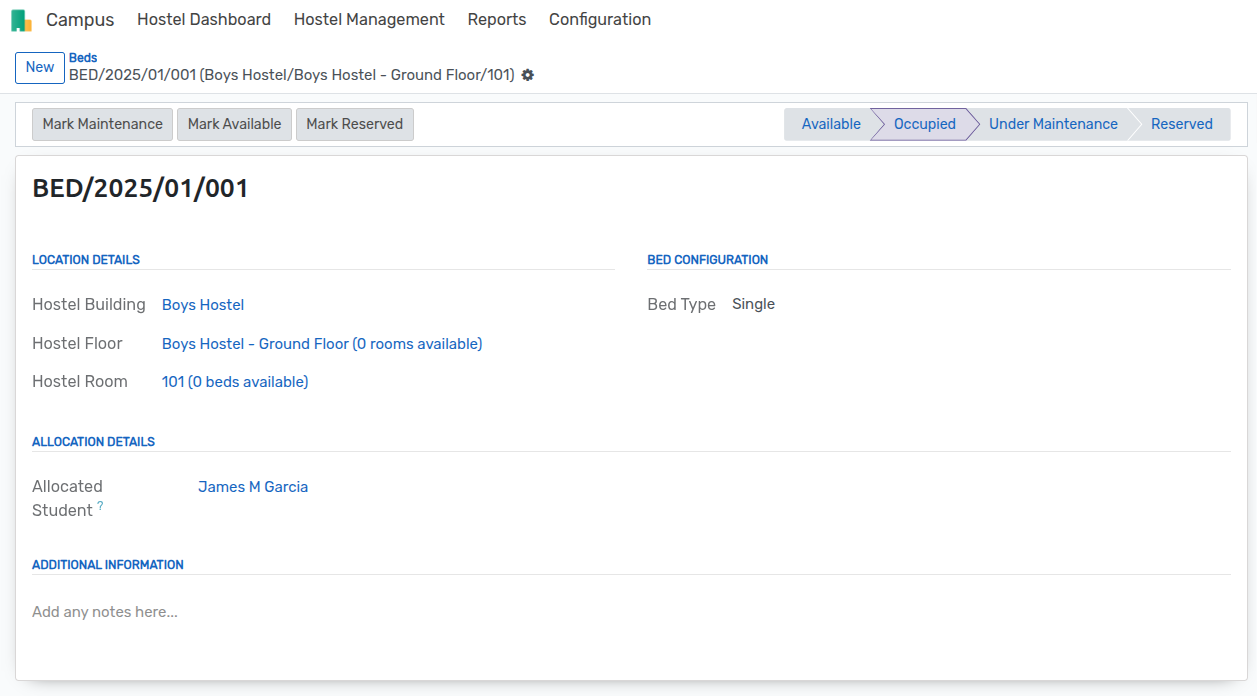
Name: The bed name is automatically generated on save using a sequence (e.g., BED/2026/01/001).
Location: specific Building, Floor, and Room.
Bed Type:
Single: A standard bed.
Bunk: A split bed with multiple berths.
Status: The system automatically updates the status (Available, Occupied) based on allocation requests.
Note
For Bunk Beds, you may need to define specific berth positions (e.g., Upper/Lower).

Monitoring Bed Status
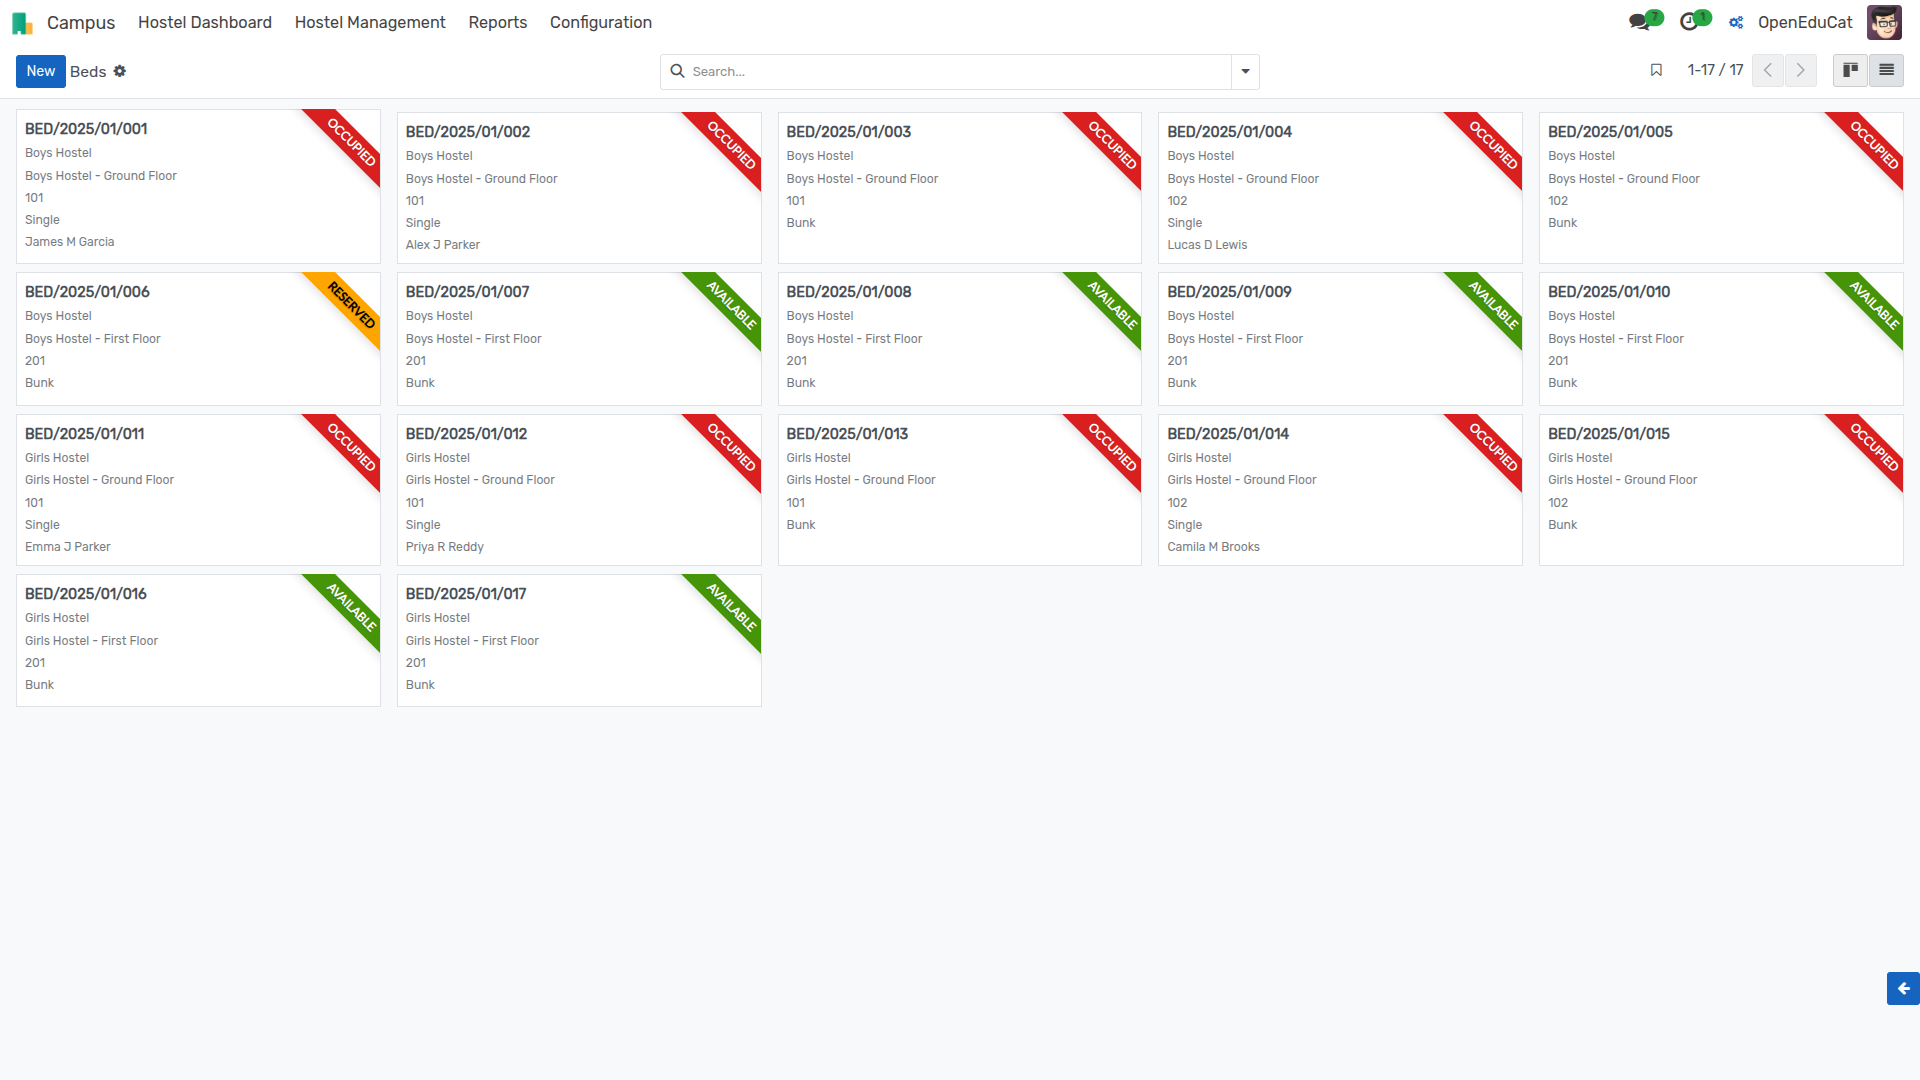
To get a real-time visual overview of bed occupancy across all buildings, use the Kanban view.
Navigation: Campus > Configuration > Hostel Configuration > Beds (Switch to Kanban View)
Green: Available
Red: Occupied
Filter: Use the search bar to filter by Building, Floor, or Room type.
Facilities
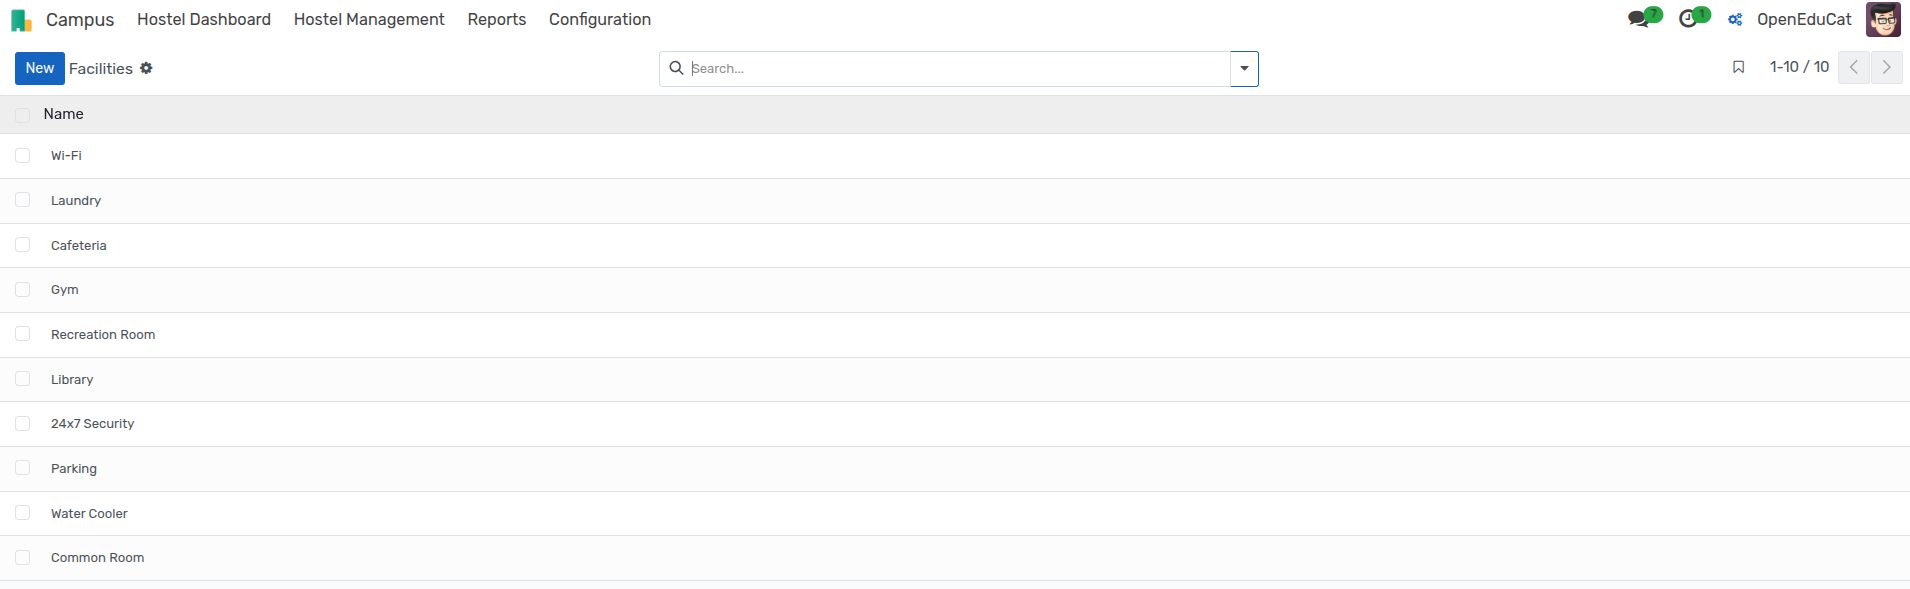
Define the amenities and services available in your hostels, such as Wi-Fi, Air Conditioning, or Laundry. These can later be linked to specific buildings with associated charges.
Navigation: Campus > Configuration > Hostel Configuration > Facilities
Click New.
Name: Enter the name of the facility (e.g., « High-Speed Wi-Fi »).
Save the record.
Berth Types
If your hostels use bunk beds, define the specific berth positions (e.g., Lower Berth, Upper Berth) to manage specific bed assignments.
Navigation: Campus > Configuration > Hostel Configuration > Berth Types
Click New.
Name: Enter the berth type name.
Code: Enter a short code for reference.
Visitor Configuration
To effectively track visitors, configure the types of identification and relationships allowed.
ID Proof Types
Define acceptable forms of identification for visitors.
Navigation: Campus > Configuration > Visitors Configuration > ID Proof Types
Click New.
Name: Enter the ID type (e.g., « Passport », « Driving License », « National ID »).
Save the record.

Relations to Student
Define the relationship types between visitors and students (e.g., Parent, Sibling, Guardian).
Navigation: Campus > Configuration > Visitors Configuration > Relation to Student
Click New.
Name: Enter the relationship name.
Save the record.
