
Configuring Notifications
Every notification the framework sends is described by one
push.notification.config record. This page covers the global
master switch, walks through the config form field by field, and
closes with a worked example.
Master switch
Navigate to and either
scroll to the Push Notifications section or type Push
Notifications in the search box at the top of the page:
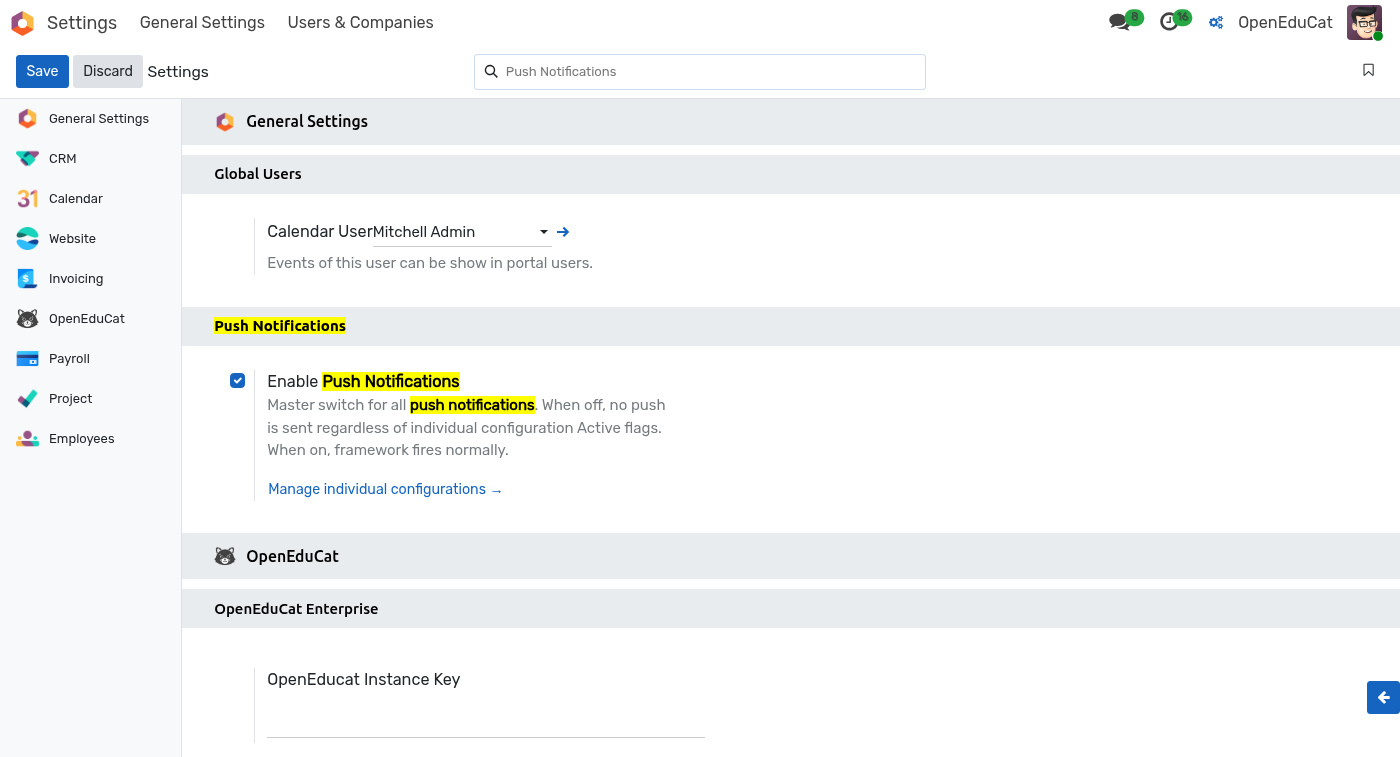
Enable Push Notifications — master switch. When on (the default), every active
push.notification.configrecord fires as normal. When off, no notifications are dispatched regardless of any individual configuration’s own Active flag — useful for a maintenance window or during a large data import.Manage individual configurations — direct link to the configurations list covered in the next section.
Click Save after toggling.
Nota
The switch is stored as the push_notification.enabled system
parameter. Reading or writing it from a script is straightforward
for automation:
env['ir.config_parameter'].sudo().set_param(
    'push_notification.enabled', 'False')
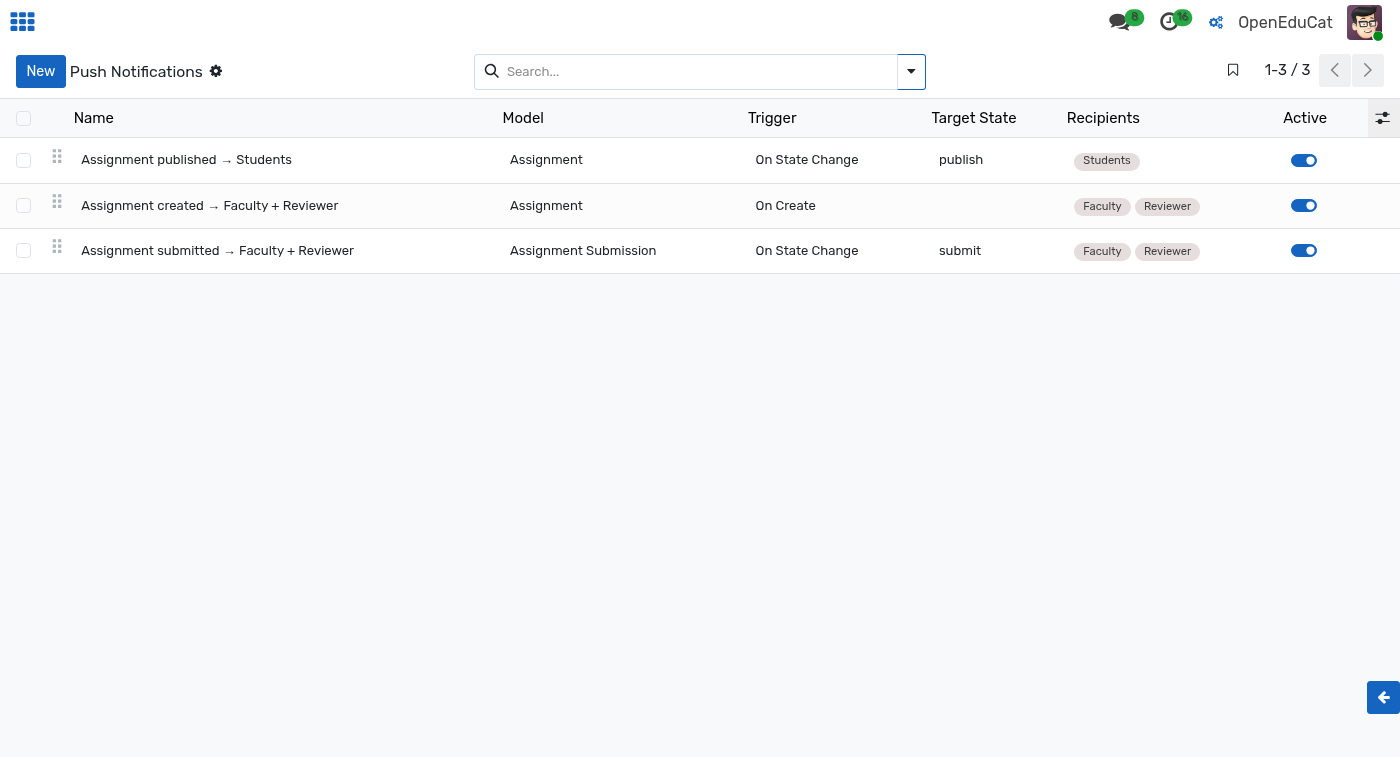
Configuration list
To open the list, enable developer mode and navigate to .
Creating a configuration
Click New on the list view.
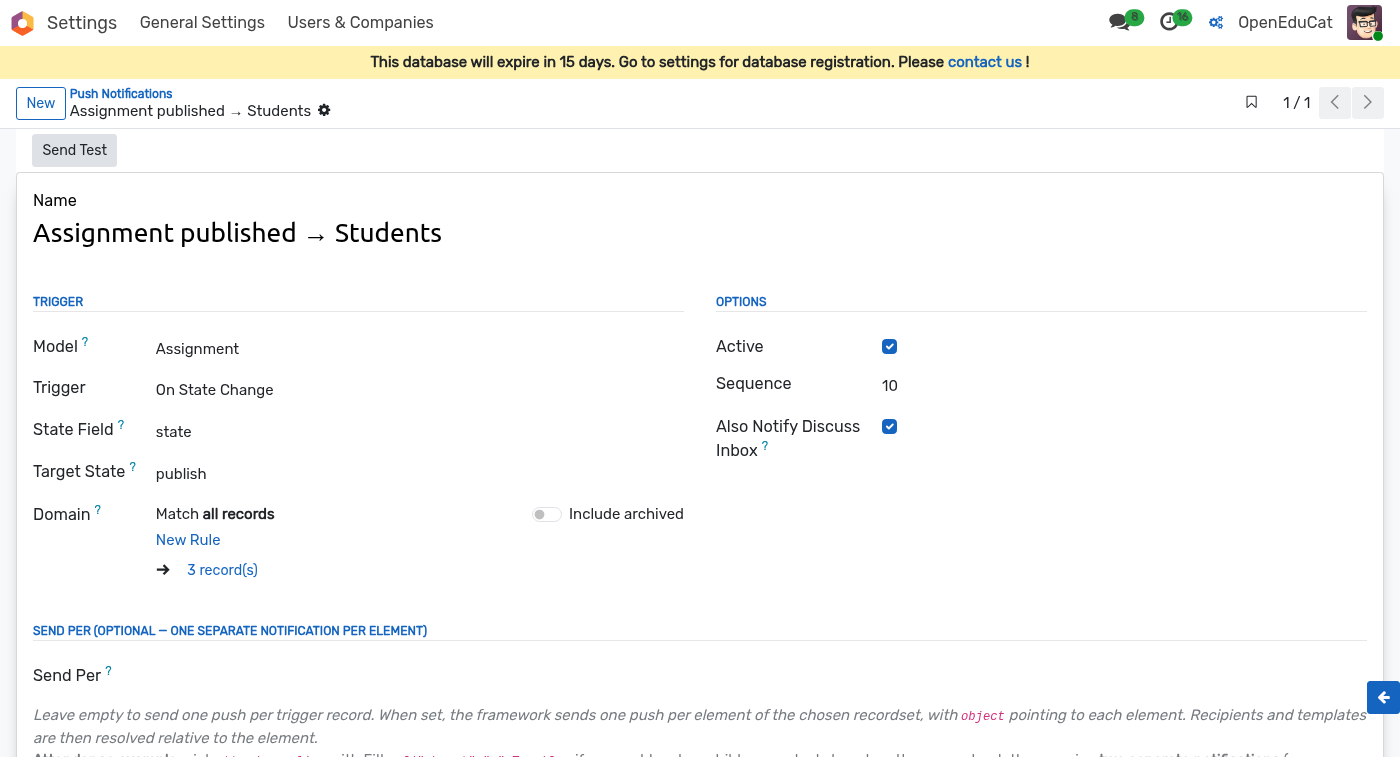
Identity
Name — internal label shown in the list view. Example:
Fees invoice created → student and parents.Active — uncheck to keep the record but stop the trigger firing. Useful when temporarily silencing notifications during data imports.
Trigger
Model — the source
ir.modelthe trigger listens on (e.g.account.movefor invoices,op.examfor exam records). Stored asmodel_id.Trigger — one of:
On Create — fires when a new record is created.
On Write — fires when any of the tracked fields is modified.
On State Change — fires only when a specific field changes to a specific value.
State Field — visible when Trigger is On State Change. Pick the field to watch (typically a Selection like
state).Target State — the value that field must reach for the notification to fire. Example:
donefor a payment,postedfor an invoice. Stored asstate_to.Domain — optional rule builder. Narrows the trigger further with a standard Odoo domain, evaluated on the record. Example:
move_type = out_invoice. Records that fail the domain do not send.
Options
Active — uncheck to keep the record but stop the trigger from firing.
Sequence — ordering when multiple configs match the same event. Lower numbers dispatch first (useful only when you also use fanout, see below).
Also Notify Discuss Inbox — when on, the same message is also posted to each recipient’s Discuss inbox as a fallback in case the push envelope is dropped by the browser. Stored as
notify_inbox.
Send Per (optional fanout)
By default one push is sent per triggering record. Turn on Send
Per to fan out into ONE push per element of a related recordset,
with object re-bound to each element.
Send Per — a dotted path from the triggering record to a
one2manyormany2many. Stored asfanout_path. Example on anaccount.moveconfig:line_idsproduces one push per invoice line.Send Per Domain — optional domain to narrow which elements get their own push. Example:
[('display_type', '=', False)]to skip section / note lines. Stored asfanout_domain.
Recipients and content templates then resolve against each element
individually, so {{ object.name }} in the title becomes the
element’s name, not the triggering record’s.
Content
Title and body support Jinja-like {{ object.field }} interpolation.
The record that fired the trigger is available as object; the
Odoo environment is available as env.
Title — short line shown as the notification heading. Example:
New invoice: {{ object.name }}
Body — the notification body text (2–3 lines maximum on most browsers). Example:
An invoice of {{ object.currency_id.symbol }} {{ object.amount_total }}
has been generated for {{ object.partner_id.name }}.
Recipients
Recipients are computed from paths rooted at the triggered record.
Each row in the Recipients table is one entry on
recipient_line_ids — a push.notification.recipient with a
Path (dotted field chain from the record to a
res.users or res.partner) and an optional short Name
shown as a badge in the config list.
Examples for an account.move invoice:
partner_id.user_ids— the invoice’s customer’s login users.partner_id.parent_id.user_ids— for a student partner, their parent’s users (assumesparent_idmaps parent-of-student).invoice_user_id— the assigned salesperson.
Multiple rows are additive; a user reached by more than one path still receives a single notification.
Click-through URL
Portal URL Template — the URL the browser opens when the user taps the notification. Supports the same
{{ object.field }}interpolation. Common patterns:/my/invoices— jump to the recipient’s invoice list./my/invoices/{{ object.id }}— jump to the specific record.
The template resolves at send time, so per-record links stay accurate even if the record is renumbered.
Testing a configuration
Open the configuration form.
Click Send Test in the header — the framework picks a representative record of the trigger model and dispatches the resulting notification to the currently logged-in user (subject to your own subscription being active on this browser).
Inspect DevTools to confirm the payload was received; watch the browser toast for the rendered title/body.