
Gestión de tarifas
Configurar tarifas
Configuration of fees helps you to provide the start up data of fees according to the courses of an institute.You can also configure fees elements of the particular Fees Terms. To configure the fees, follow the below steps :-
Go to SIS ‣ Configuration ‣ Fees Term.
Click on New to create a new fees term.
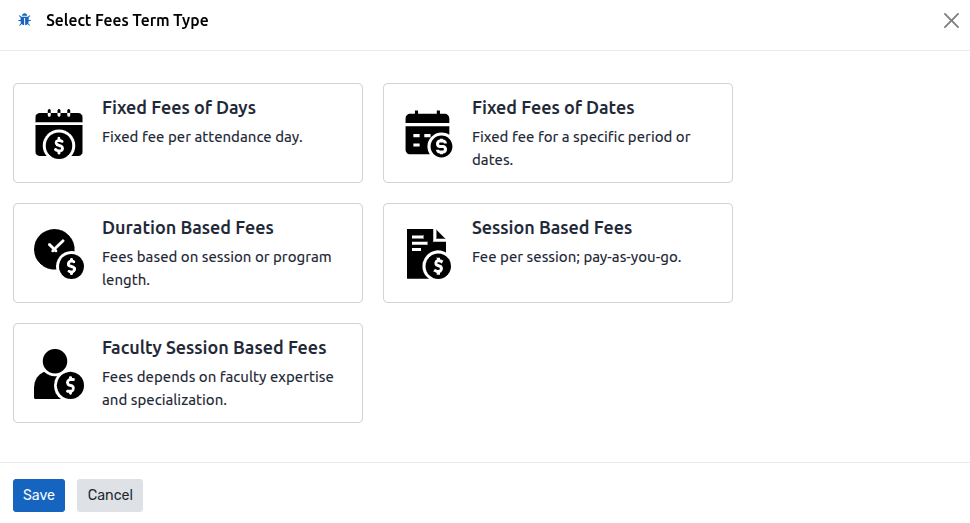
Select any Fees Term Type and click on
savebutton.
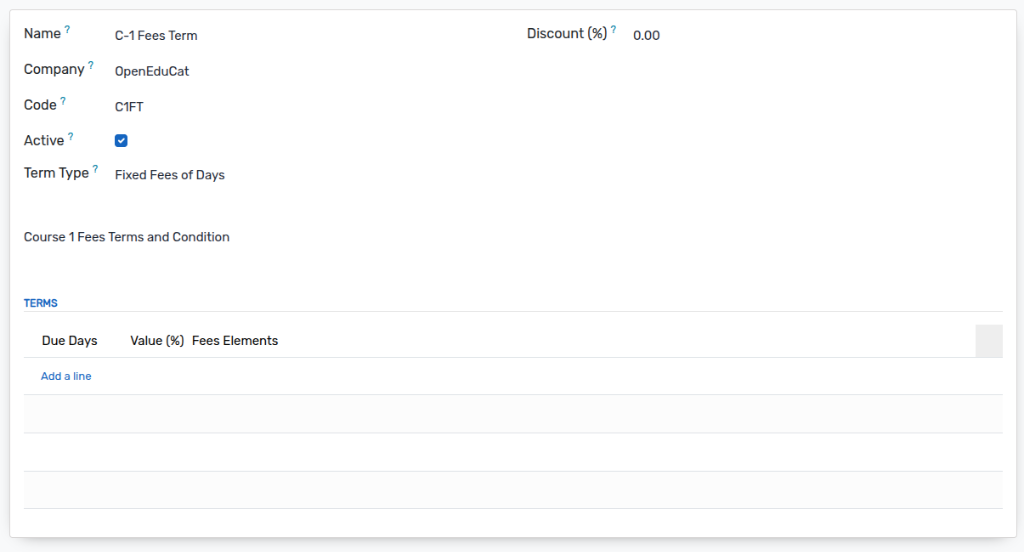
Detalles del formulario de tarifas
Name :- Set name of the new fees term.
Code :- give unique code.
Activo: establezca verdadero o falso si el plazo de tarifas está actualmente activo o no.
Discount (%) :- Set discount percentage for particular fees term.
Term Type :- Indicates the selected term type (e.g., Fixed Fees of Days, Duration Based Fees, etc.).
Description :- Set description or terms and condition of new fees term.
Terms :- Set due days, value (%) of fees for next due date, and fees elements.
Elementos de tarifas: - Puede dividir los términos de las tarifas estableciendo los elementos de las tarifas.
Para configurar los elementos de tarifas de los Términos de tarifas, siga los pasos a continuación: -
Go to SIS ‣ Configuration ‣ Fees Term ‣ Edit ‣ Fees Elements.
Click on Fees Elements, Wizard will open to create fees elements. You can also define Fees Reminder Lines within the same popup to configure when and how payment reminders should be sent out.
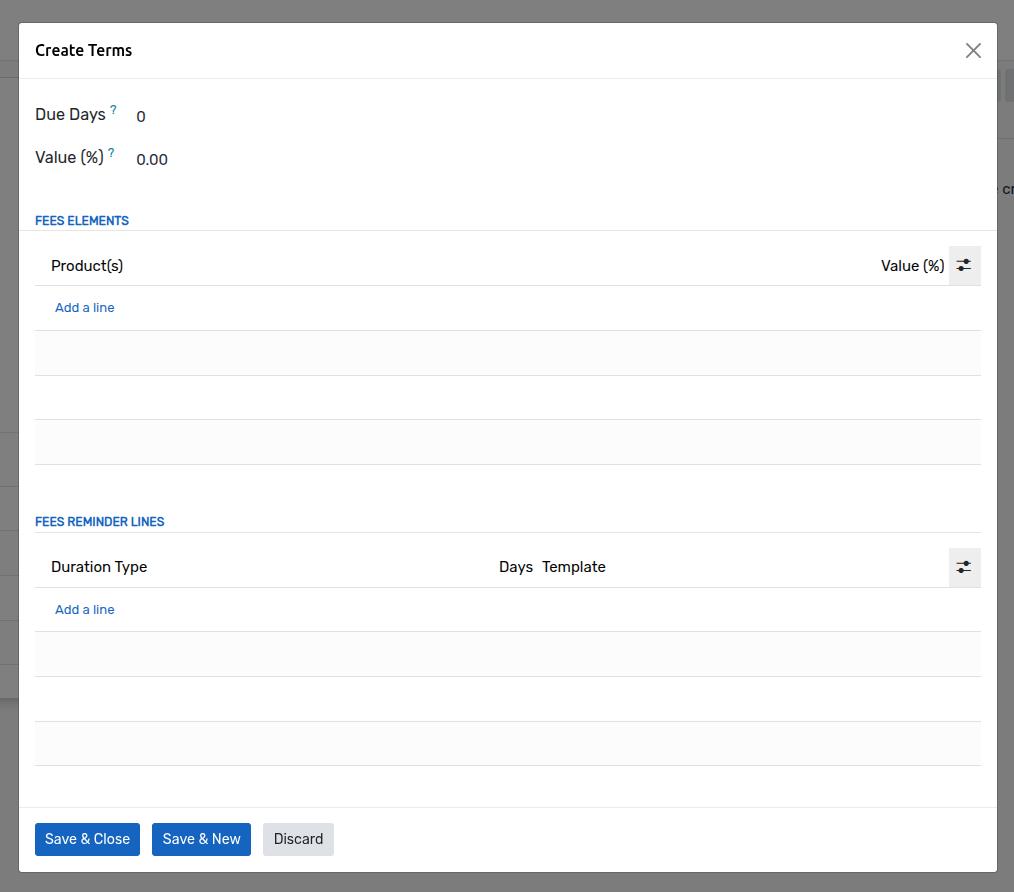
If you have selected Fixed Fees Of Dates by Term Type then select Due Date.
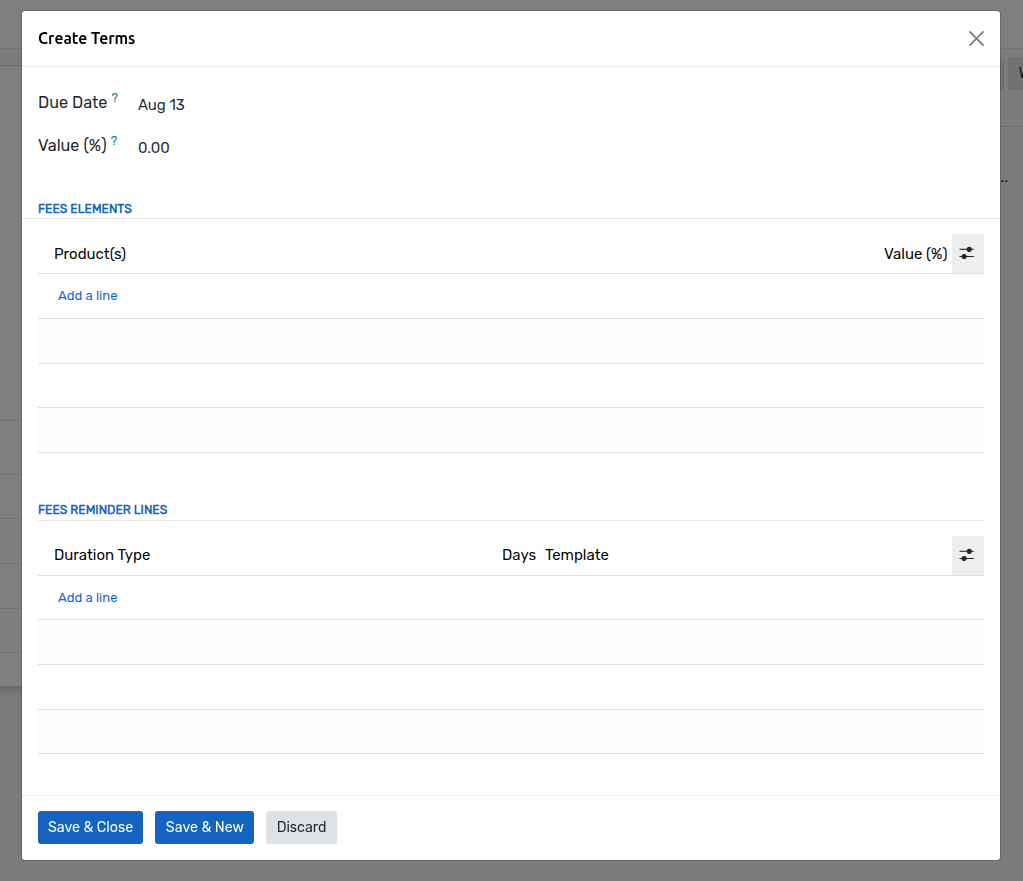
Haga clic en Elementos de tarifas y podrá crear elementos de tarifas según sus requisitos.
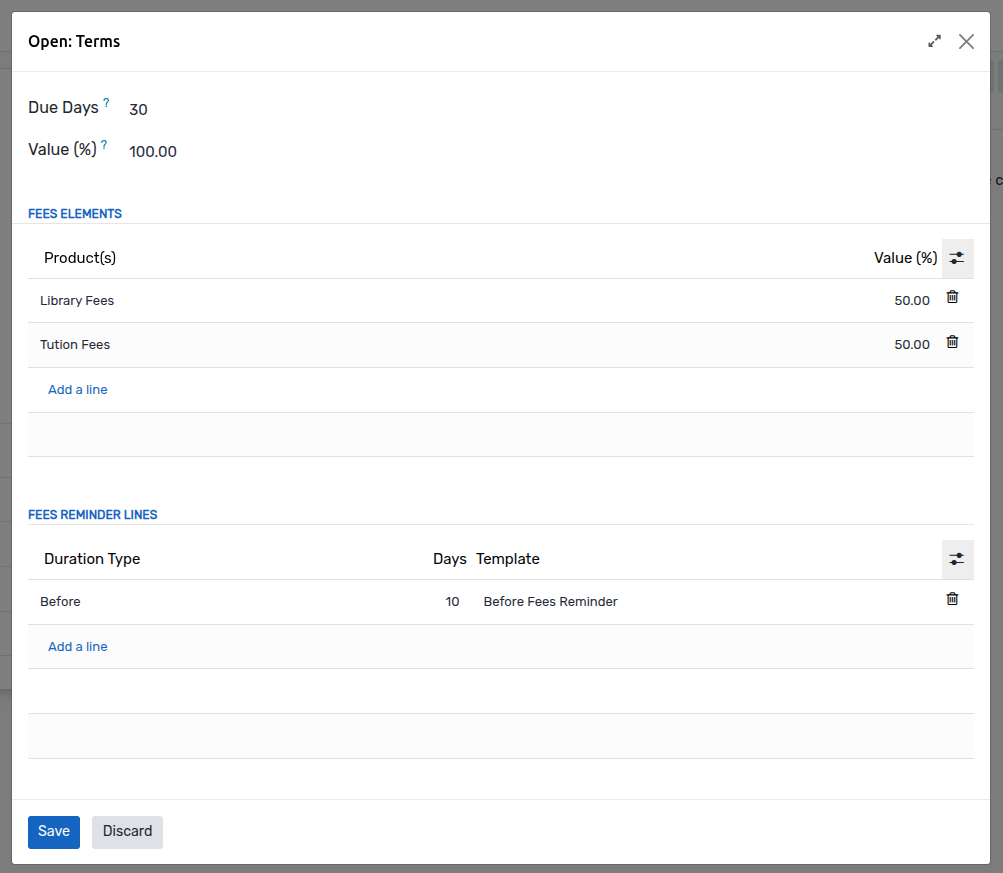
También puedes crear otros elementos de tarifas.
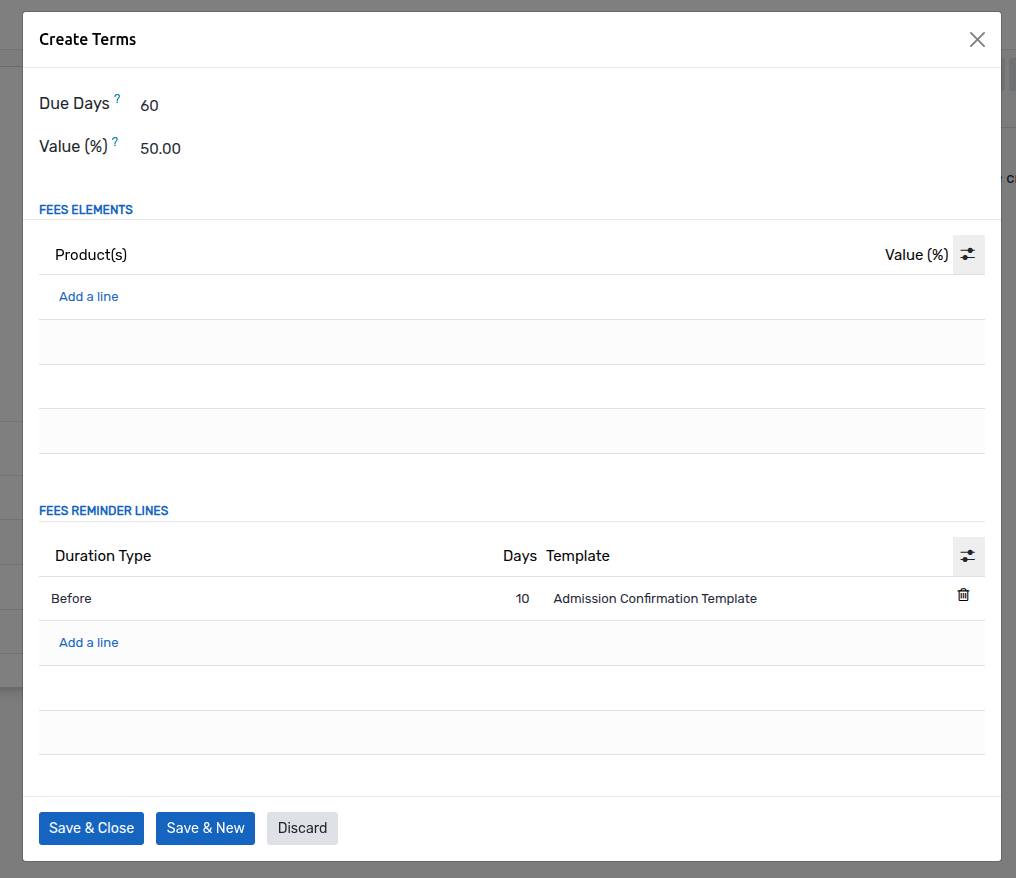
Here the configured terms and fees elements are visible in the Fees Term.
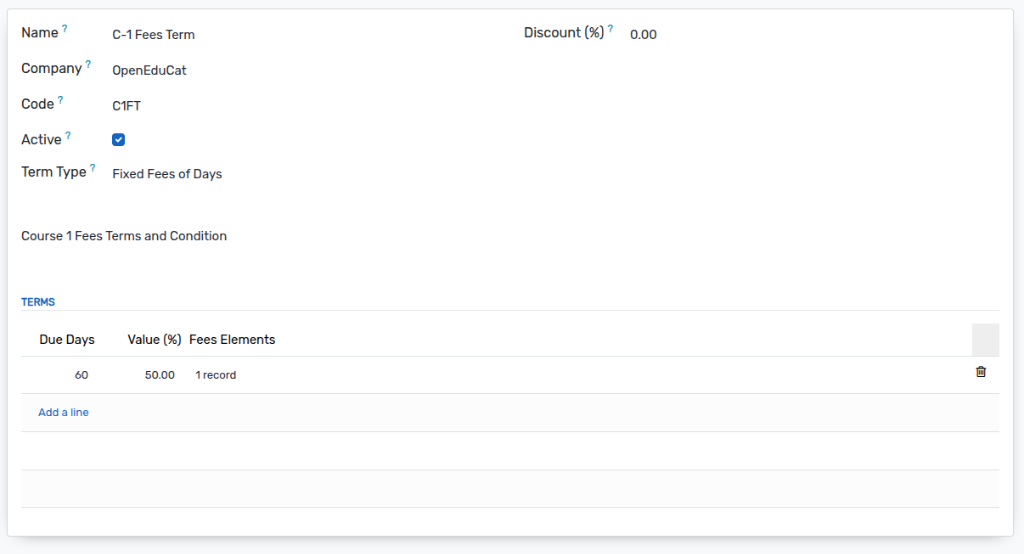
If you have selected Duration Based Fees by Term Type then select Duration like days, week, month, years etc..
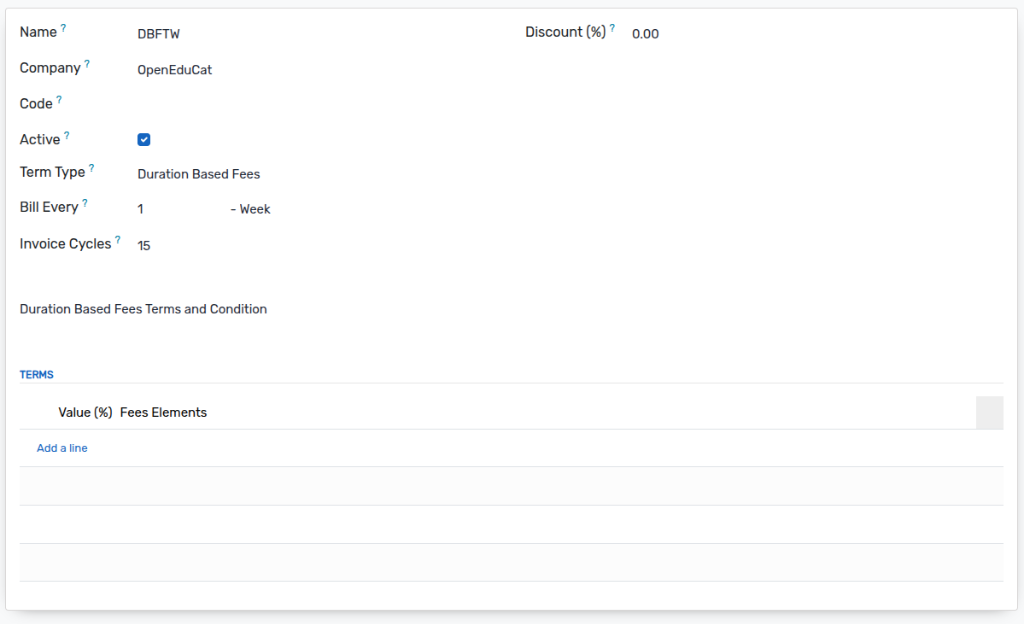
Tipo de término: seleccione el tipo de término Tarifas basadas en la duración en el menú desplegable.
Bill Every :- Select option in bill every field when you want to create a invoice from Bill Every Day, Every Week, Every Month or Every Year.
Ciclos de factura: - Establezca el número de caducidad después del número de facturación.
Go to Students ‣ General ‣ Student Course Detail and select the particular student.
Aquí puede ver los ciclos de facturación, la factura generada, la fecha de la próxima factura y la fecha de la factura anterior.
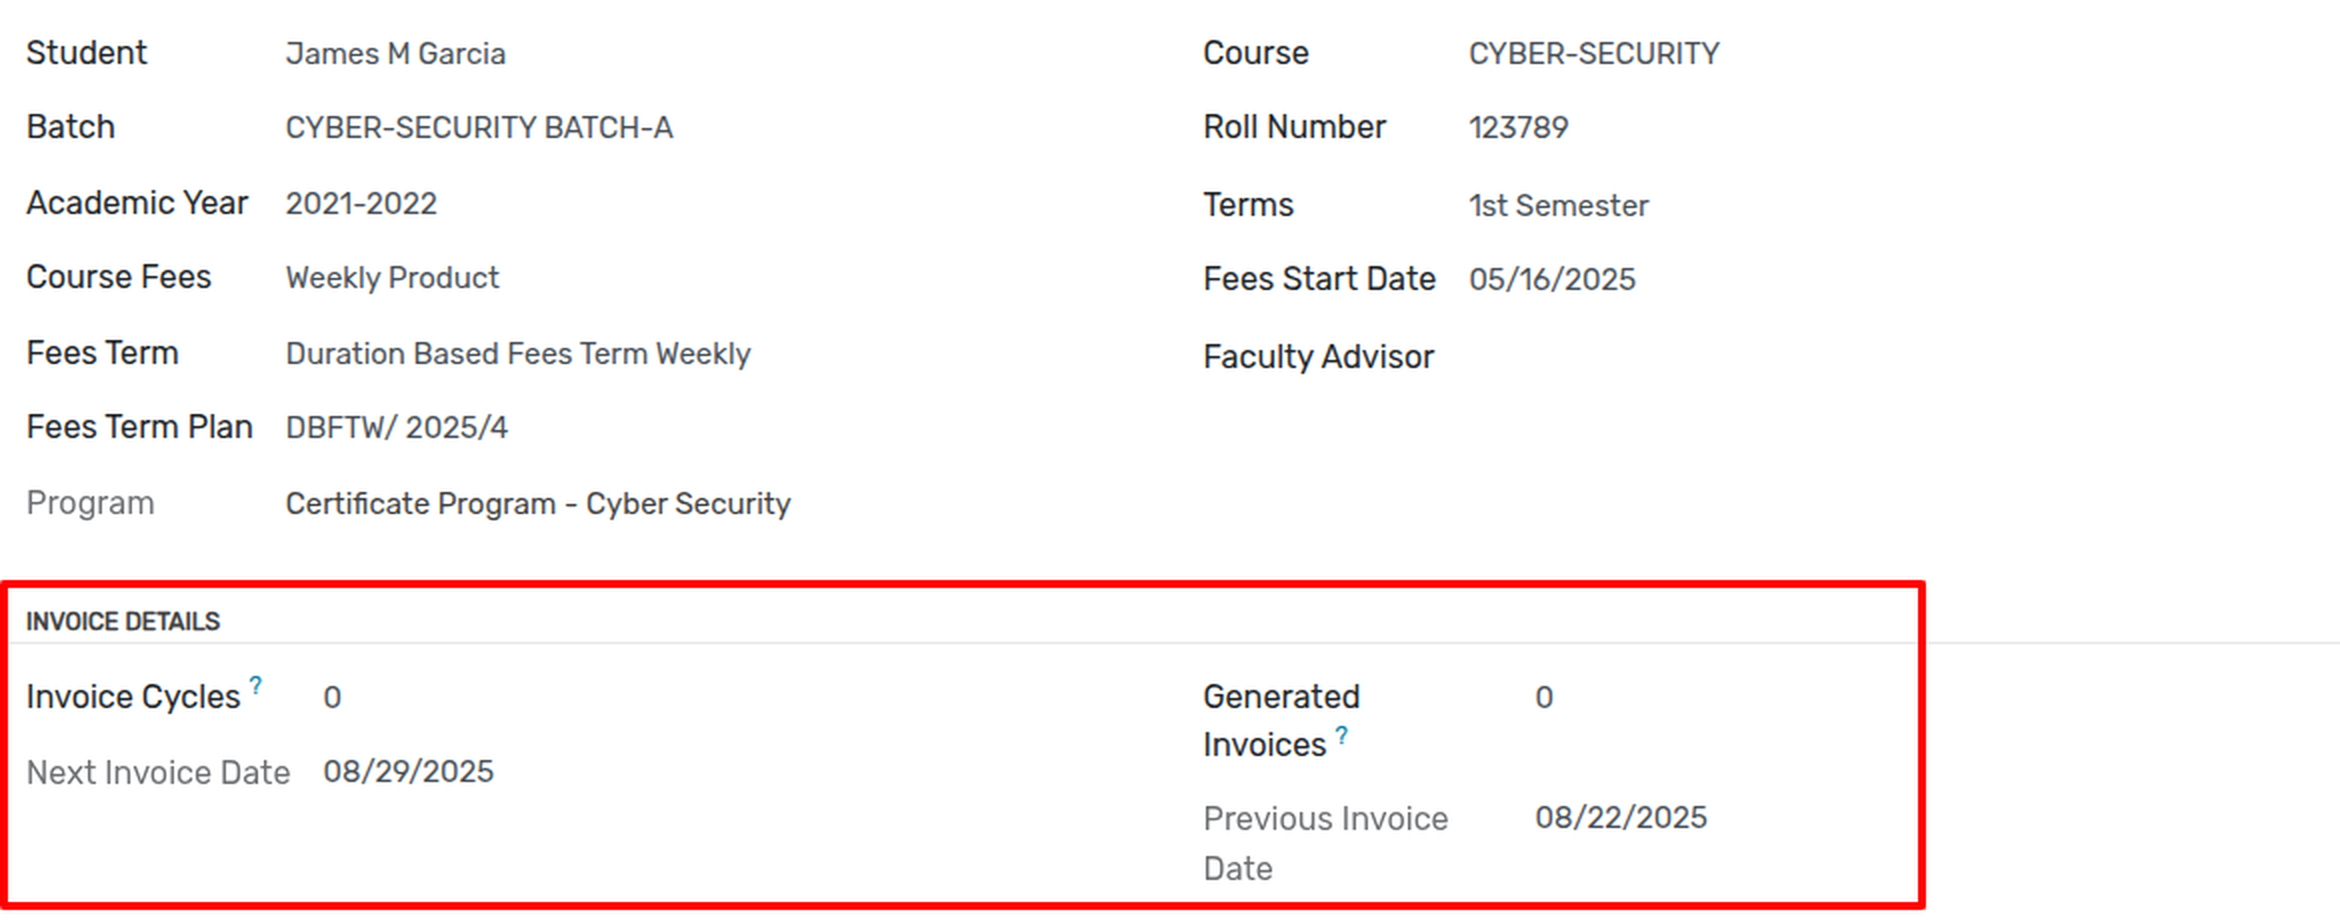
Fecha de inicio de tarifas: - Seleccione Datos de inicio de tarifas. De lo contrario, este valor predeterminado se tomará como Fecha actual.
Ciclos de factura: - Mostrará el total de ciclos de factura.
Facturas generadas: - Mostrará el número total de facturas generadas.
Fecha de la próxima factura: mostrará la fecha de la próxima factura.
Fecha de factura anterior: mostrará la fecha de factura anterior.
If you have Session Based Fees by Term Type like how many sessions you have to attend.
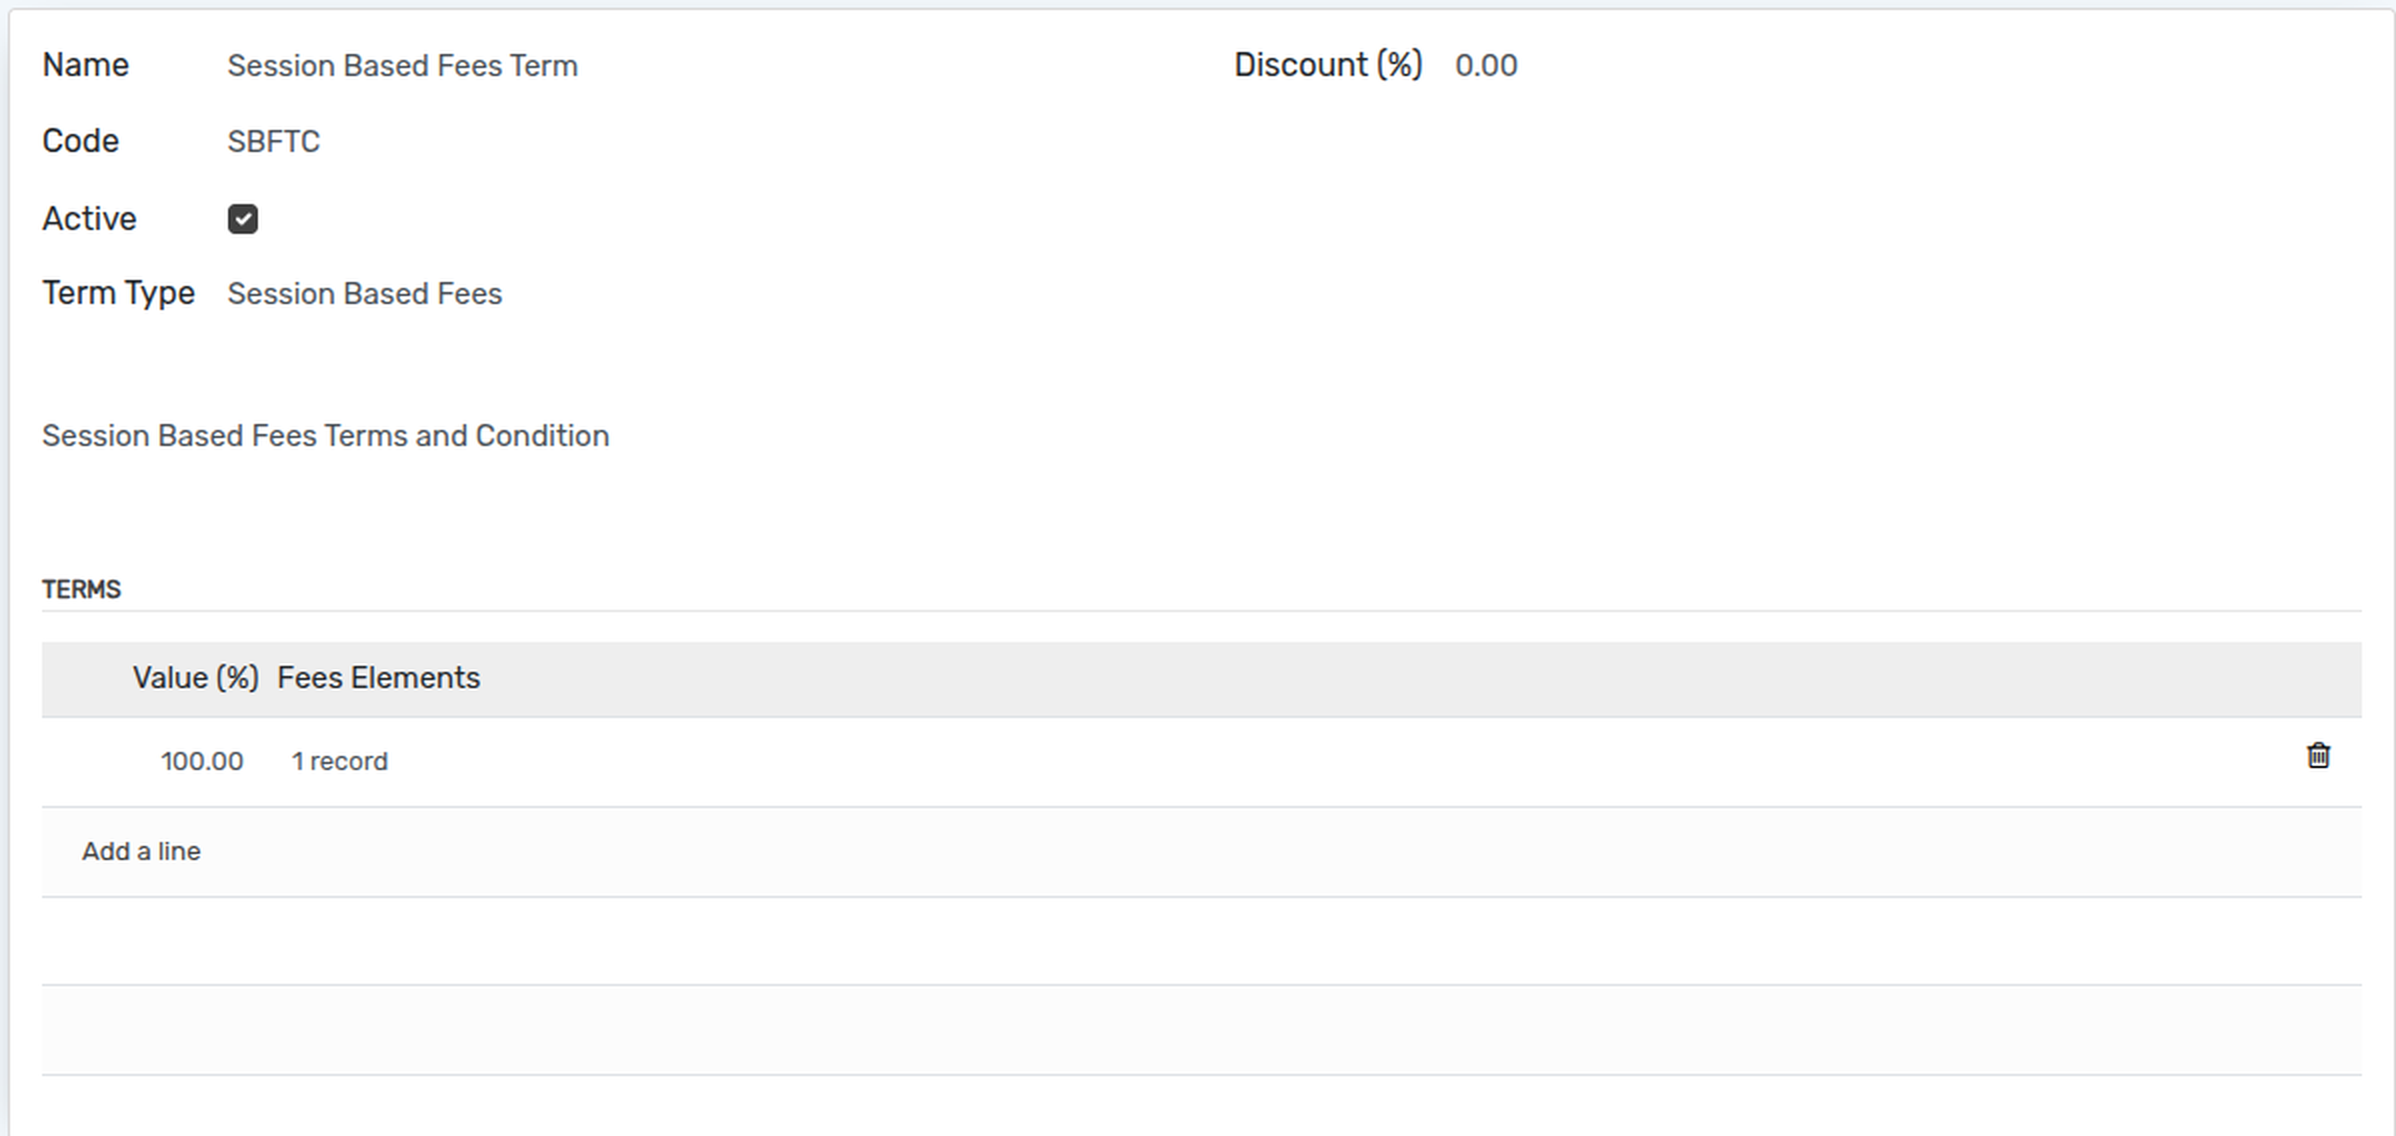
Tipo de término: seleccione el tipo de término Tarifas basadas en sesión en el menú desplegable.
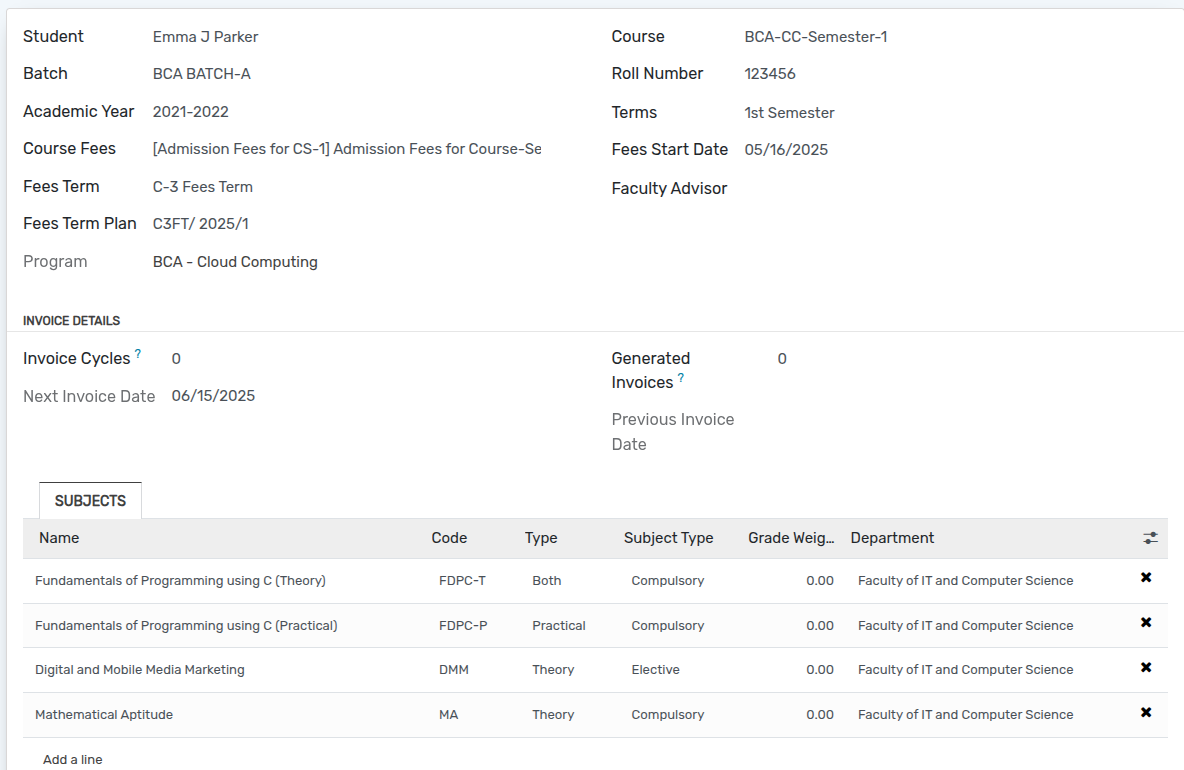
Go to Students. Click on New to create a new
student.
Once a student is created and admitted to a course, a fee plan is generated automatically. The student can also be admitted dynamically from the portal side.
You can also create student admissions from the backend. To do this, follow the steps below:-
Go to Admission page and click on New in Admission.

Go to Class Attendances –> Attendance –> Sheets.
Click on New to create a attendances sheet.
Después de seleccionar Registrarse y Sesionar, haga clic en el botón Inicio de Asistencia.
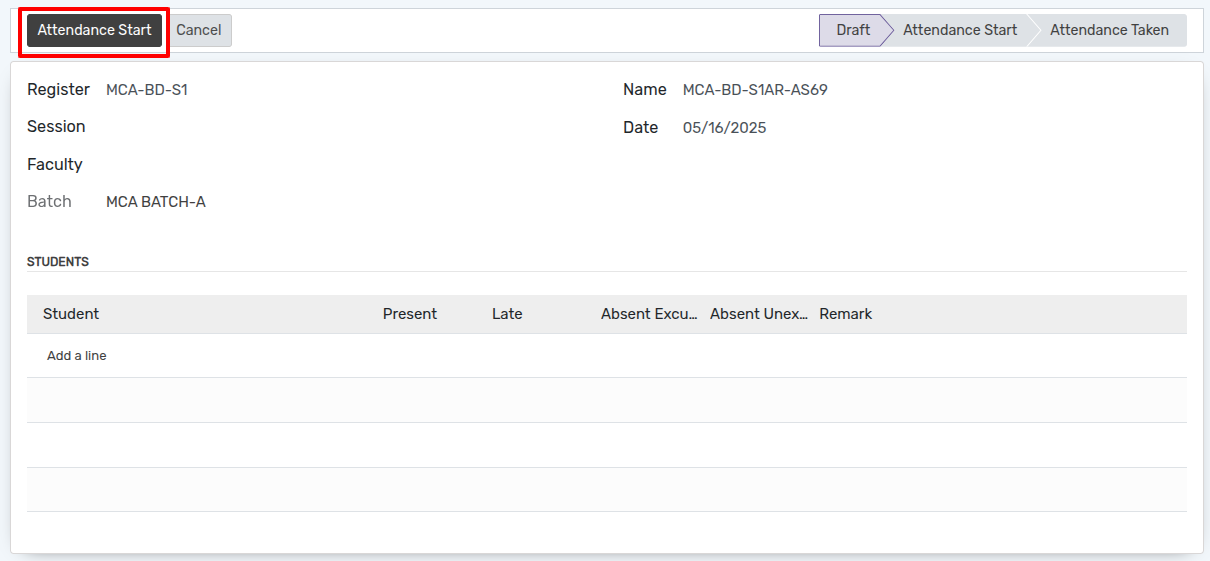
Después de hacer clic en ese botón, el usuario puede ver la lista de estudiantes según el registro y la sesión.
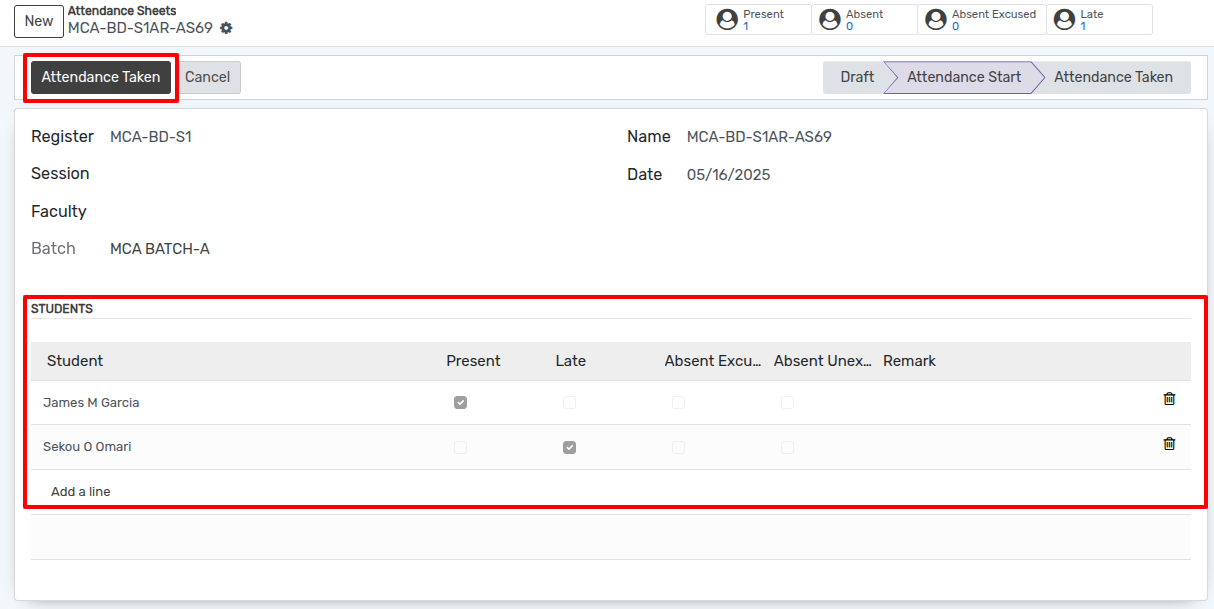
Haga clic en el botón Asistencias tomadas.
La factura se generará únicamente cuando se realice la asistencia.
If you have Faculty Session Based Fees by Term Type its like which faculty takes how many lectures.
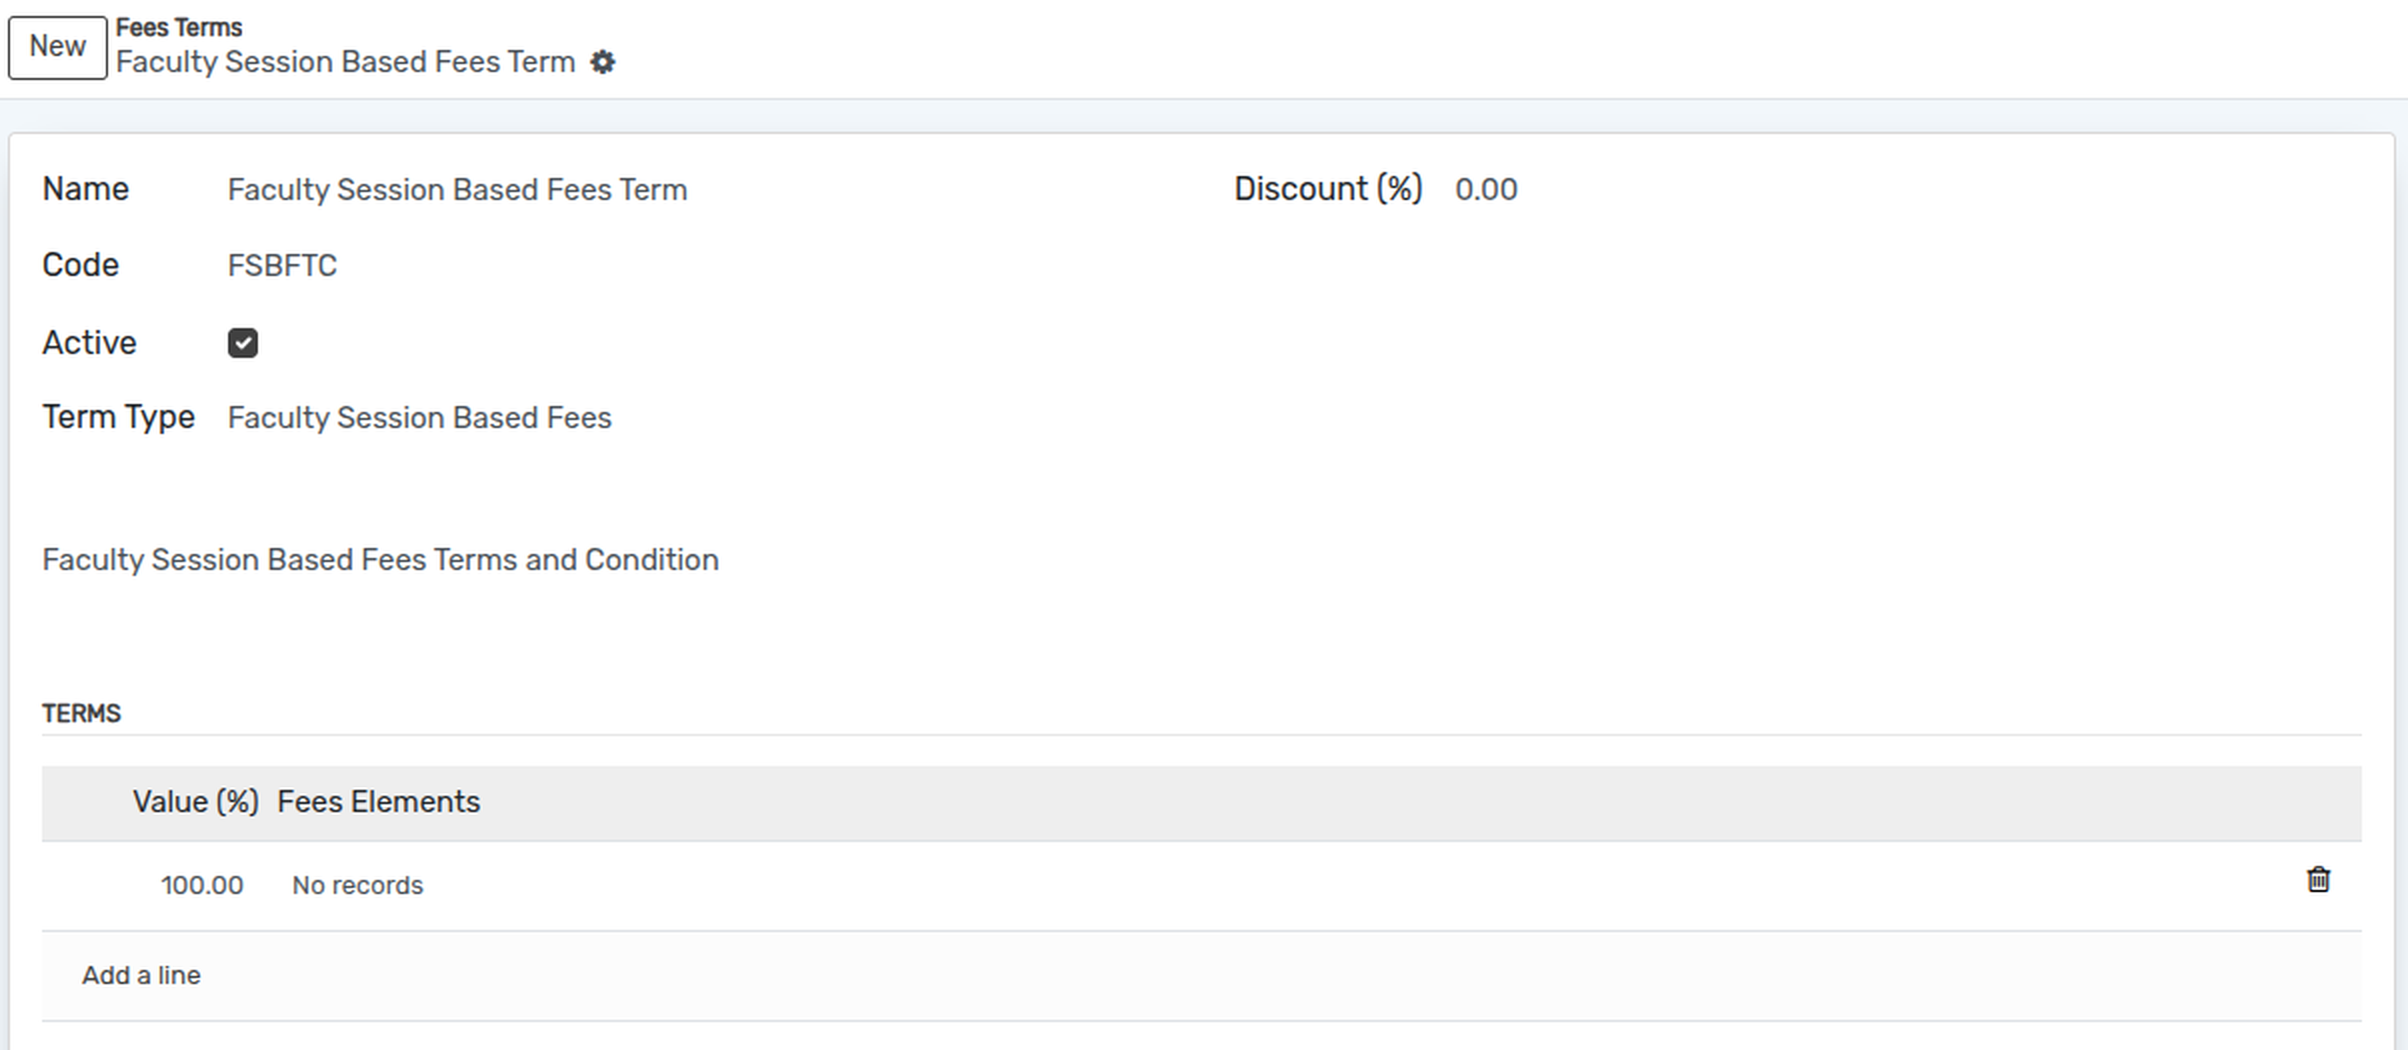
Tipo de término: seleccione el tipo de término Tarifas basadas en sesiones docentes en el menú desplegable.
Go to Faculties and select the particular faculty.
Go to page subject cost and click on Add a Line.
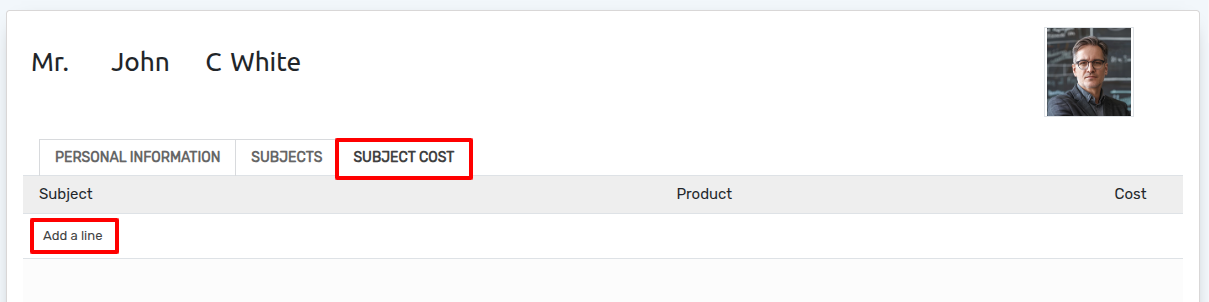
Asunto: - Seleccione el asunto de la lista.
Producto: - Seleccione el producto de la lista.
Costo: - Se establecerá automáticamente según el producto seleccionado.
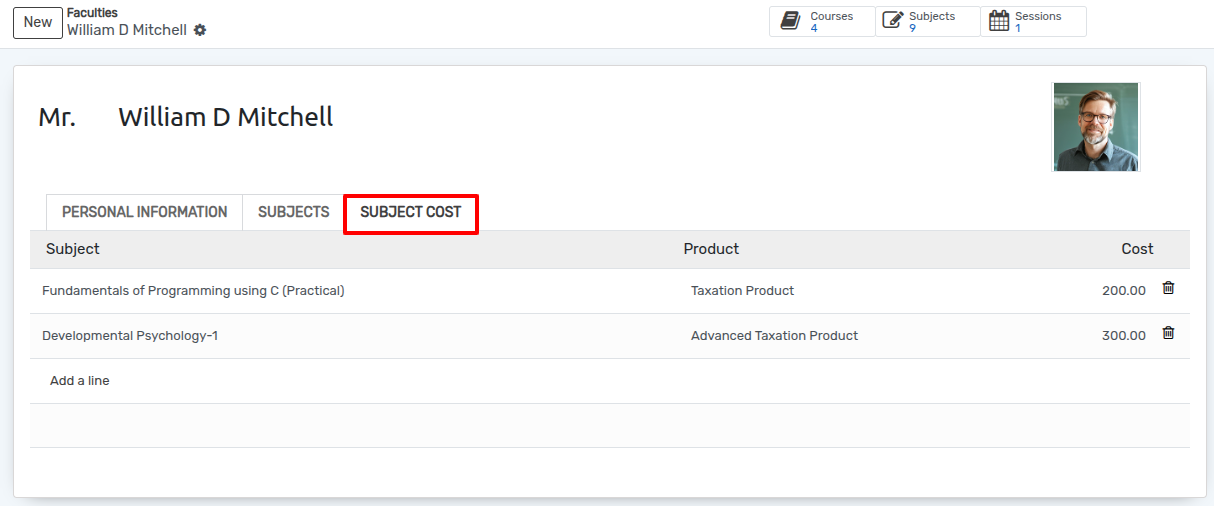
La factura se generará únicamente cuando se realice la asistencia.
Creación de facturas
To create the invoice of the fees collection of the student, follow the
below steps :- Go to Students.
To create invoice,click on invoiced button.

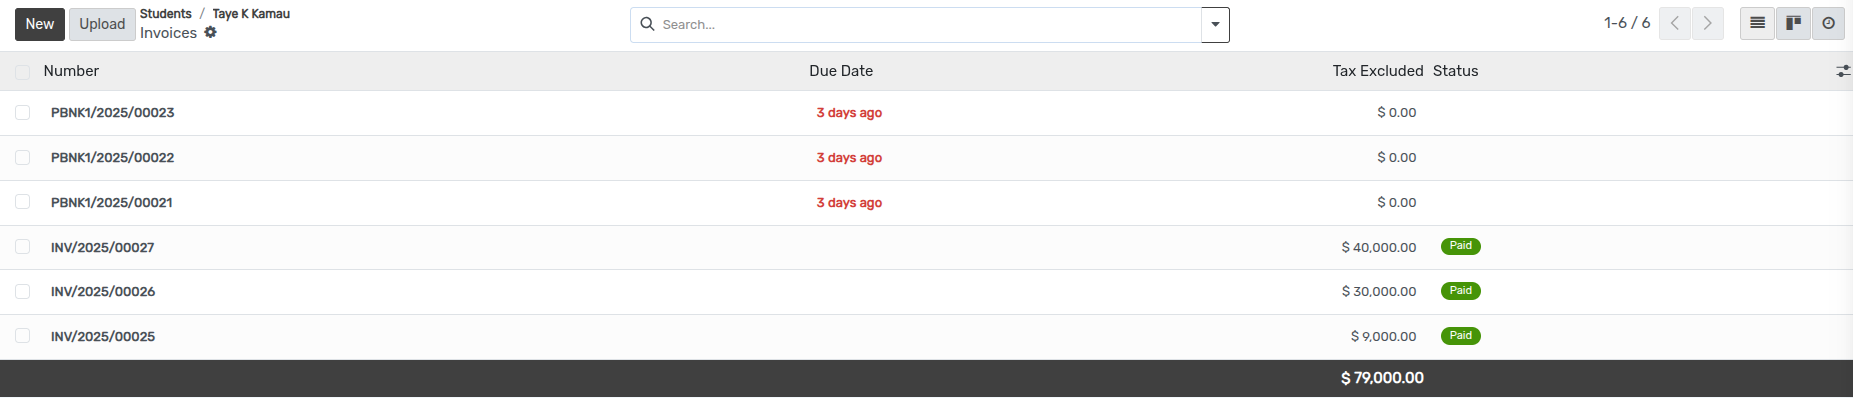
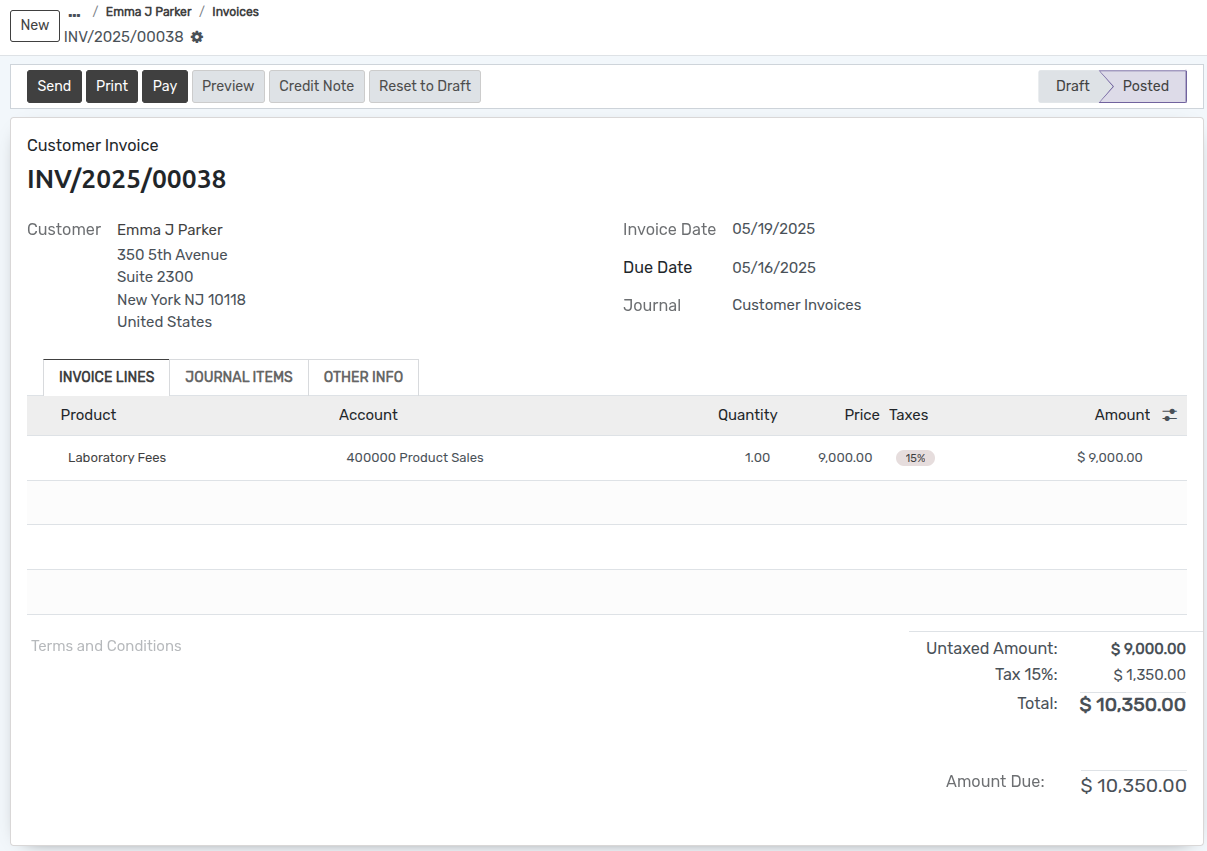
Click on pay button and wizard will open to pay fees.
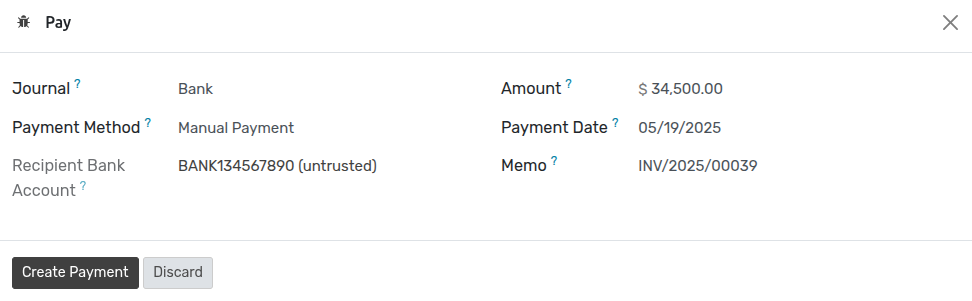
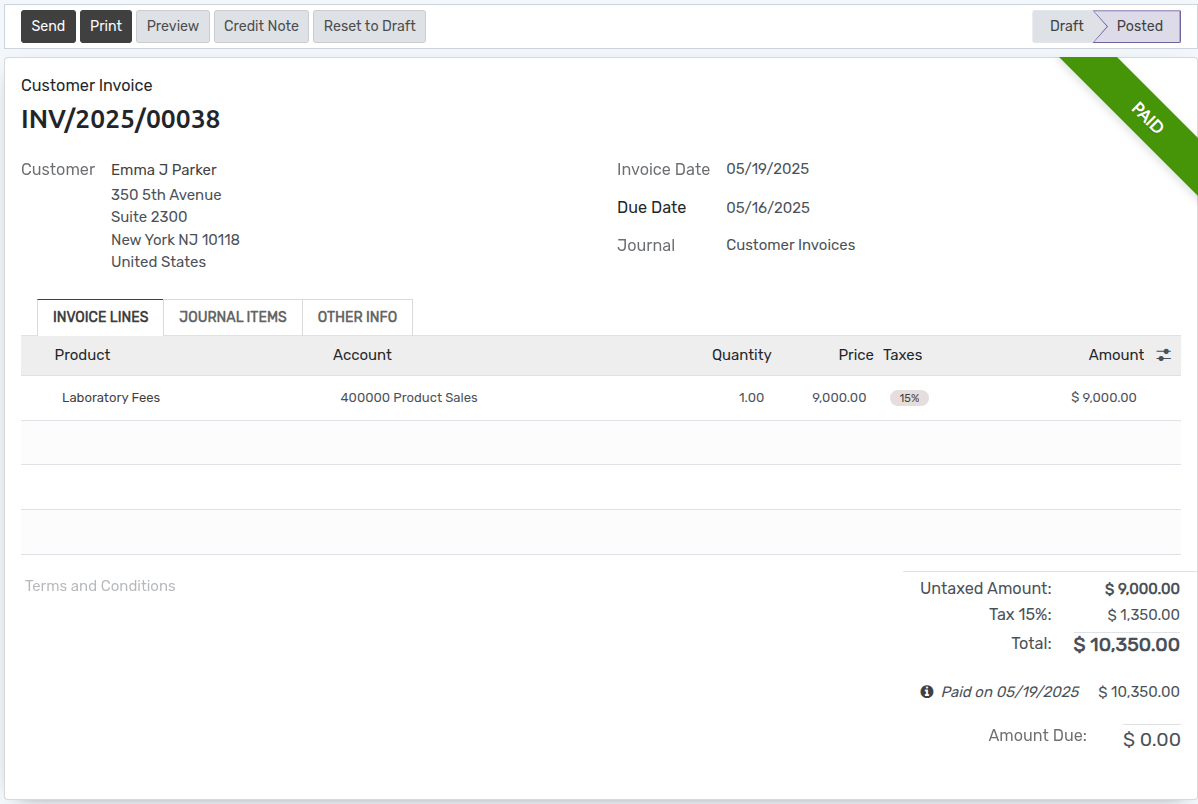
Haga clic en Crear pago. Los detalles de la factura se muestran como se muestra a continuación.
Fees Plan
Once a student is created and admitted to a course, a Fees Plan is generated automatically based on the applied Fees Term. The Fees Plan keeps track of the total amount, paid amount, and remaining amount for the student.
To view or manage the generated fees plans:
Go to SIS ‣ General ‣ Fees ‣ Fees Plan.
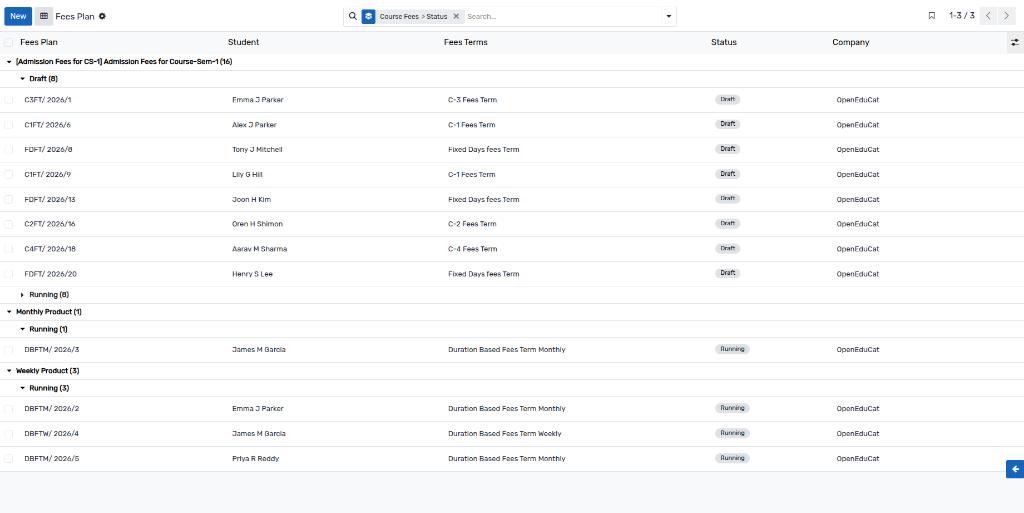
Here you can see the list of all generated fees plans for students.
The fees plan contains the total fees and the breakdown of installment lines (Fees Plan Lines).
The state of a fees plan progresses through Draft, Running, Done, and Cancel.
Administrators can use the Send Reminder to Student button to email payment reminders for running fees plans.
You can generate a PDF Fees Report from the Print menu to get a detailed analysis of the student’s fee plan.
Fees Plan Lines
Fees Plan Lines represent the individual installments or scheduled payments generated from the main Fees Plan.
Go to SIS ‣ General ‣ Fees ‣ Fees Plan Lines.
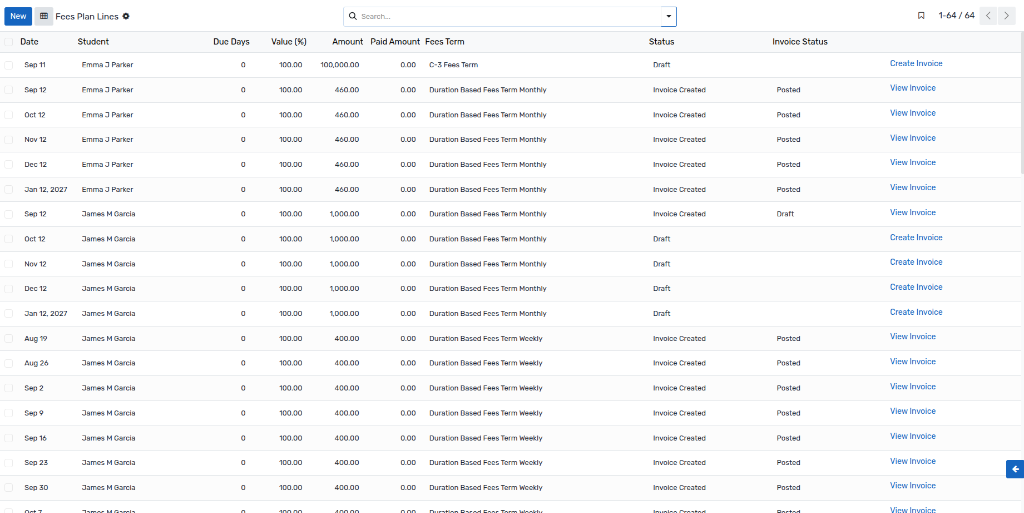
This view provides a detailed list of all payment installments, their due dates, and amounts.
Administrators can click the Create Invoice button on a Draft line to generate the corresponding invoice in accounting.
Once the invoice is generated, you can click View Invoice to open the associated invoice directly.
Fees Statements in Student Portal
Students and parents can easily track their fee records and payments through the web portal.
When logging into the portal, a Fees Statements card displays on the portal home page, which redirects to the Invoices & Bills page to manage all fees and dues.
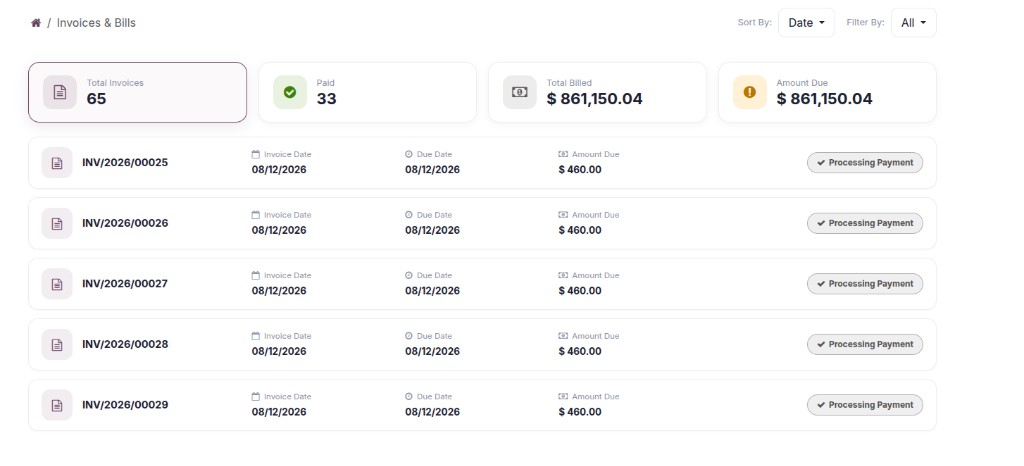
In the Student Profile (accessible via My Account ‣ Students ‣ Select Student), a dedicated Fees tab is available.
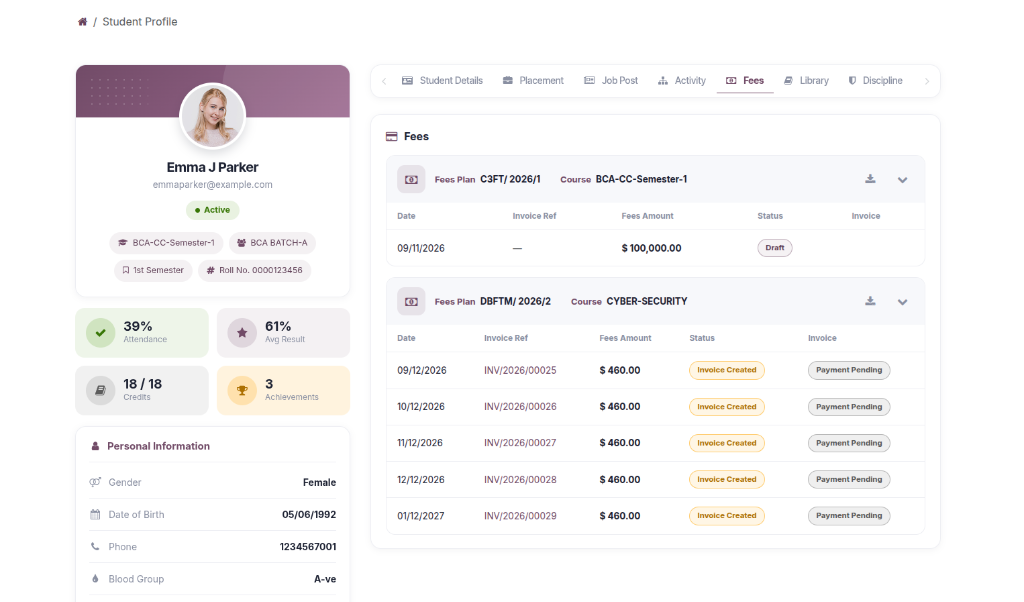
The Fees tab lists all assigned Fees Plans, the status of each installment, the invoice references, and provides a direct link to download the Fees Report as a PDF.