
إدارة الرسوم
تكوين الرسوم
Configuration of fees helps you to provide the start up data of fees according to the courses of an institute.You can also configure fees elements of the particular Fees Terms. To configure the fees, follow the below steps :-
Go to SIS ‣ Configuration ‣ Fees Term.
Click on New to create a new fees term.
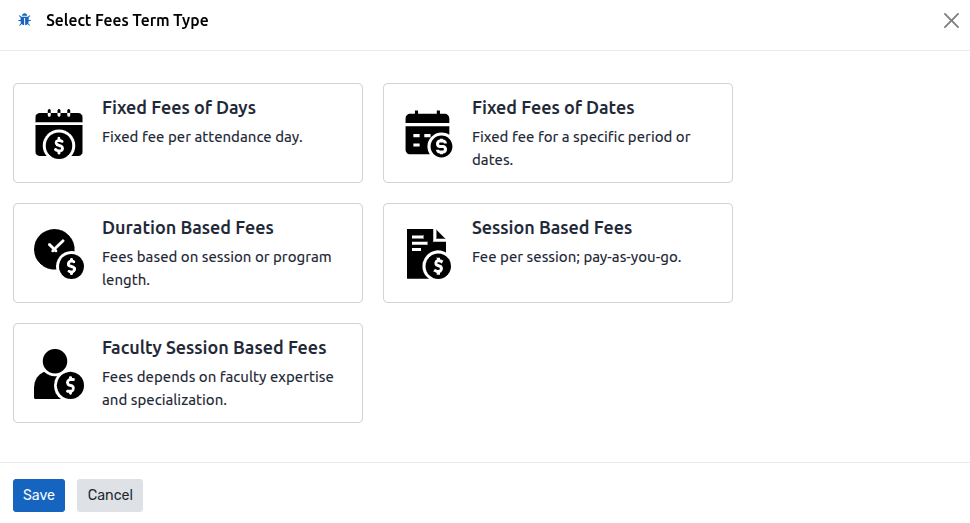
Select any Fees Term Type and click on
savebutton.
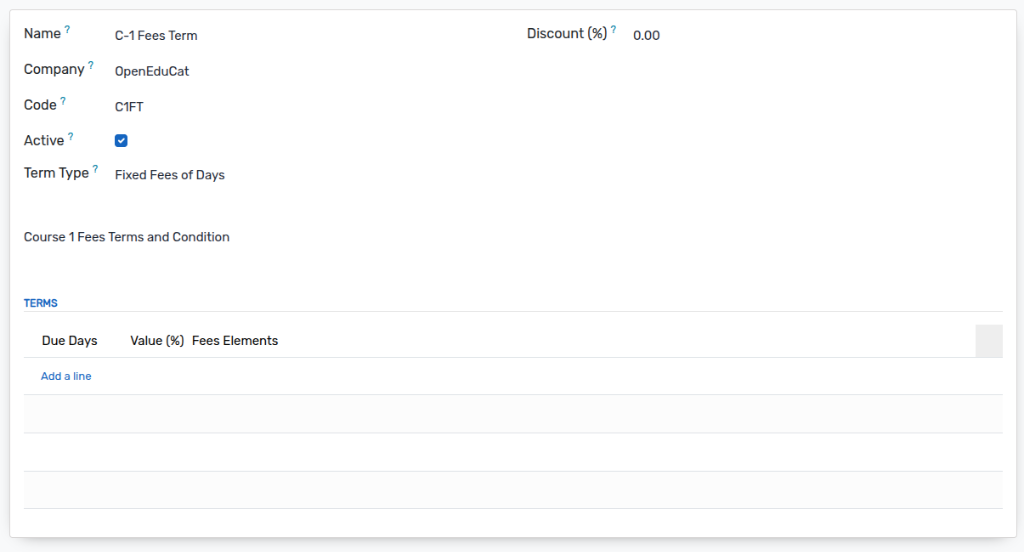
تفاصيل نموذج الرسوم
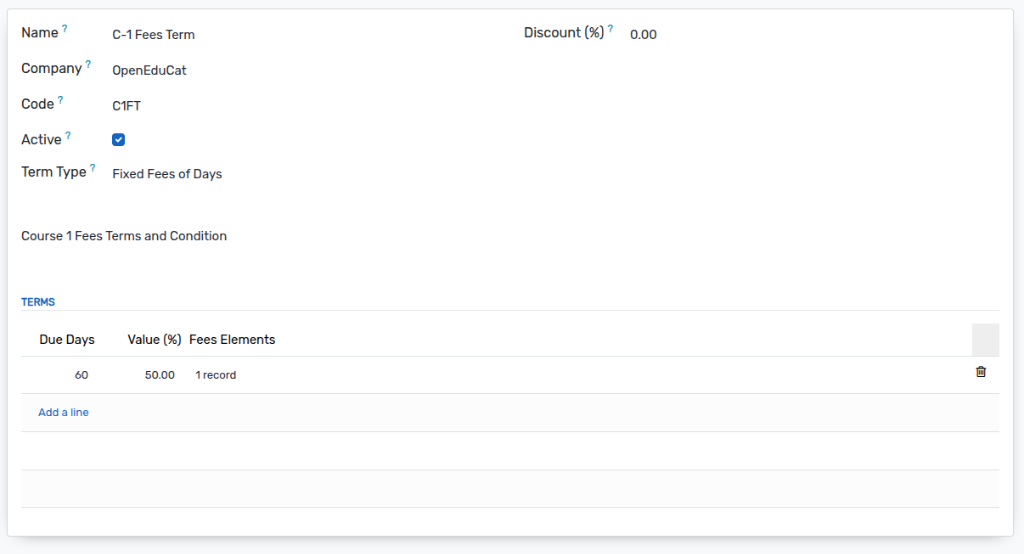
Name :- Set name of the new fees term.
Code :- give unique code.
نشط: - اضبط صواب أو خطأ سواء كانت مدة الرسوم نشطة حاليًا أم لا.
Discount (%) :- Set discount percentage for particular fees term.
Term Type :- Indicates the selected term type (e.g., Fixed Fees of Days, Duration Based Fees, etc.).
Description :- Set description or terms and condition of new fees term.
Terms :- Set due days, value (%) of fees for next due date, and fees elements.
عناصر الرسوم:- يمكنك تقسيم شروط الرسوم عن طريق تحديد عناصر الرسوم.
لتكوين عناصر الرسوم في شروط الرسوم، اتبع الخطوات التالية:-
Go to SIS ‣ Configuration ‣ Fees Term ‣ Edit ‣ Fees Elements.
Click on Fees Elements, Wizard will open to create fees elements. You can also define Fees Reminder Lines within the same popup to configure when and how payment reminders should be sent out.
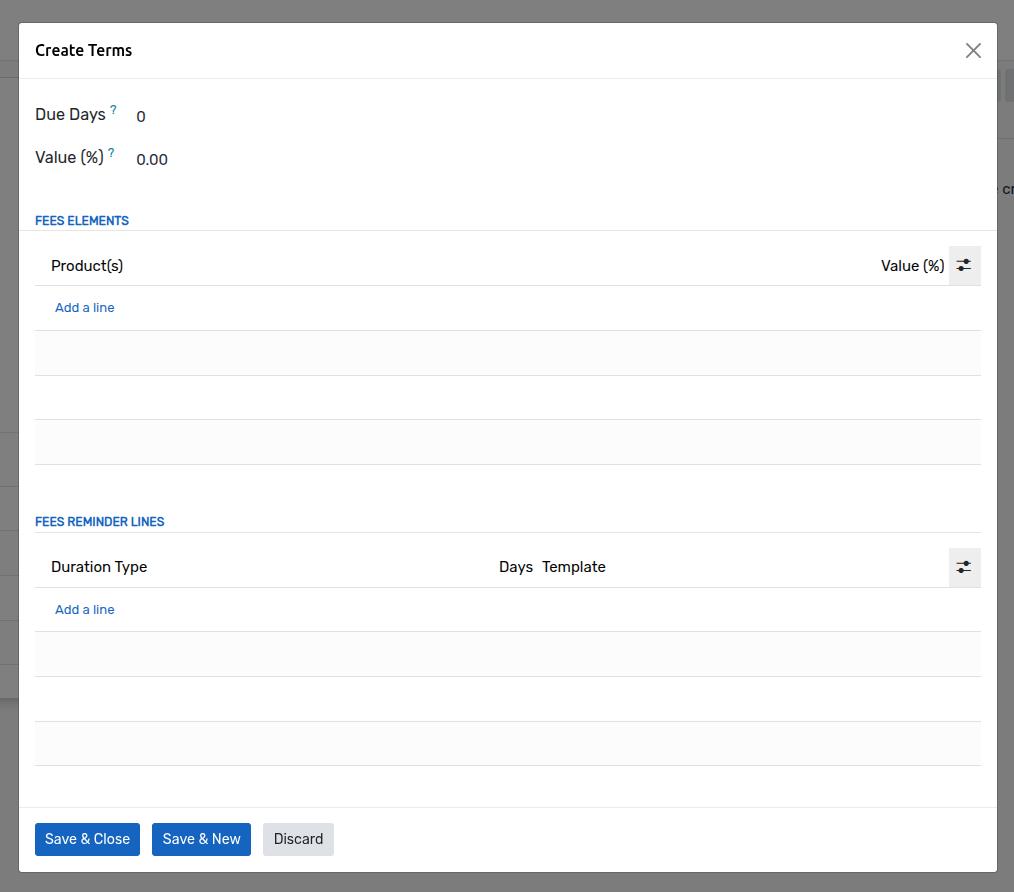
If you have selected Fixed Fees Of Dates by Term Type then select Due Date.
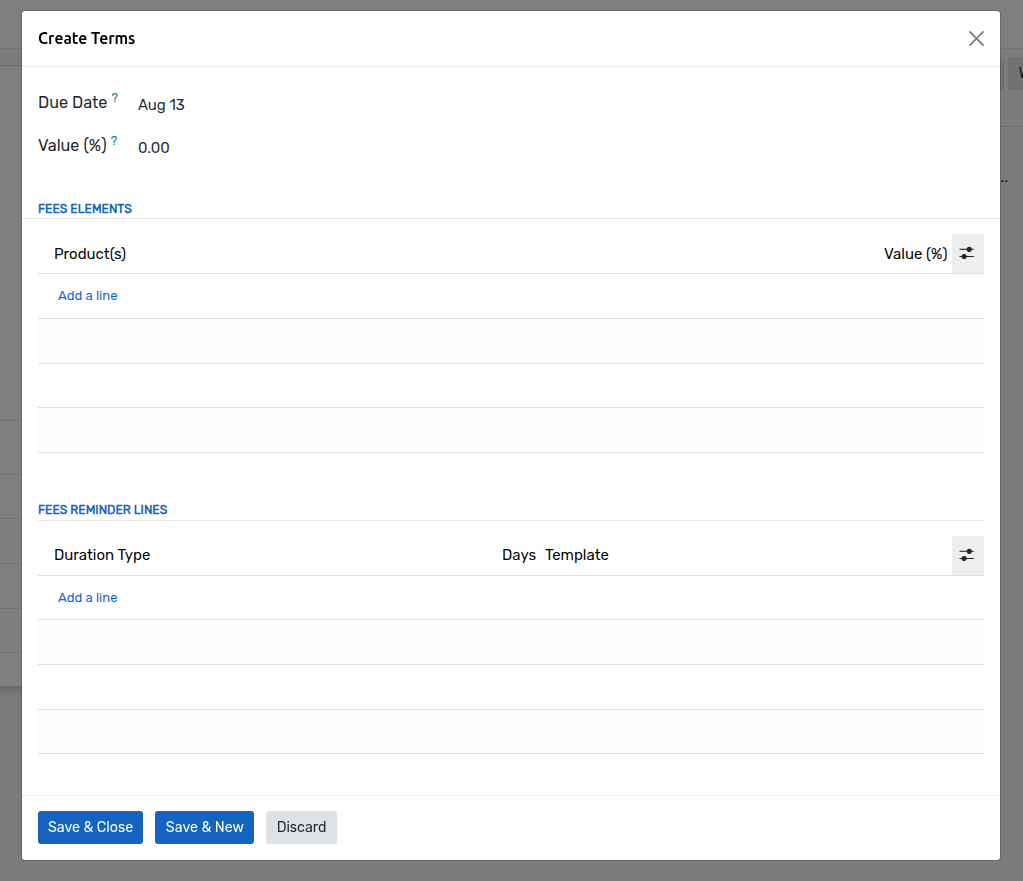
اضغط على عناصر الرسوم ويمكنك إنشاء عناصر الرسوم حسب متطلباتك.
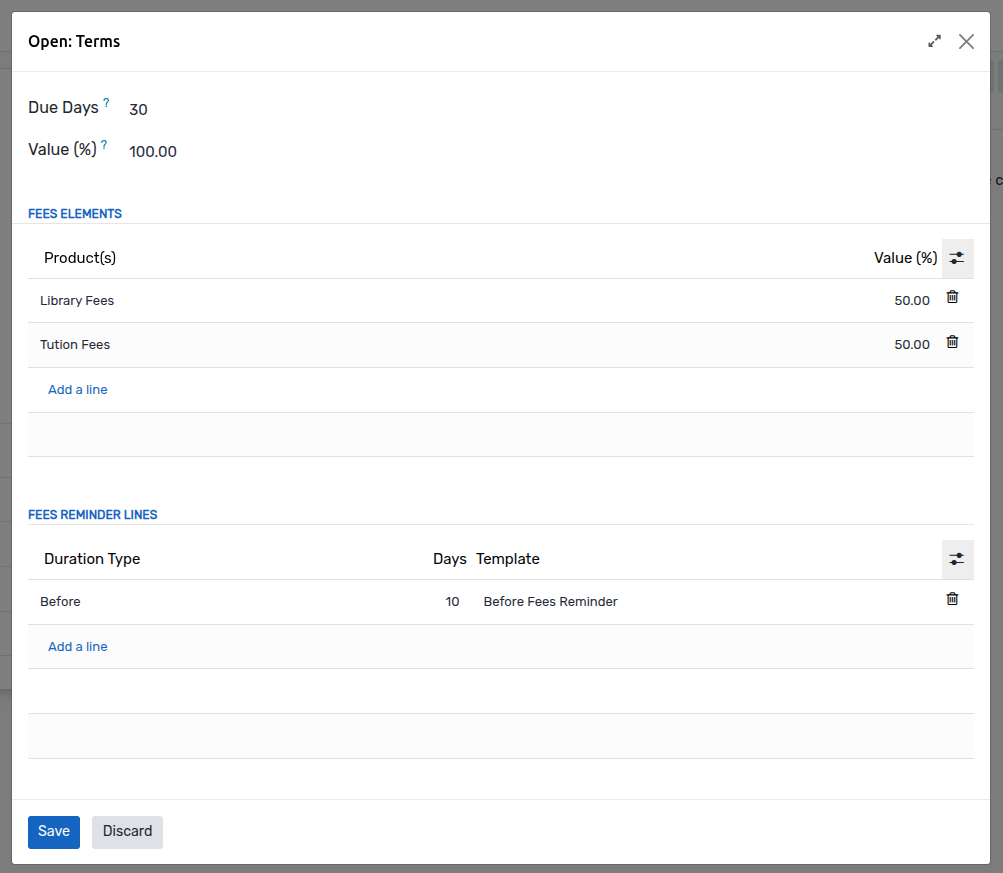
يمكنك إنشاء عناصر الرسوم الأخرى أيضًا.
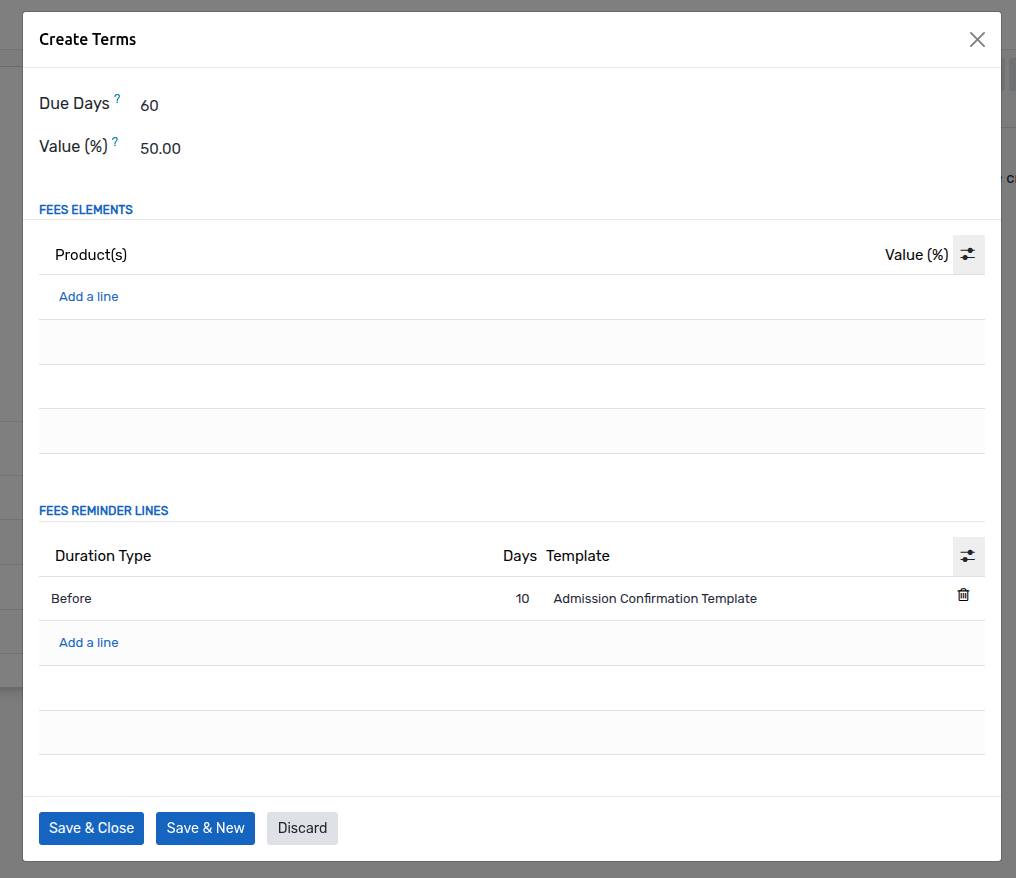
Here the configured terms and fees elements are visible in the Fees Term.
If you have selected Duration Based Fees by Term Type then select Duration like days, week, month, years etc..
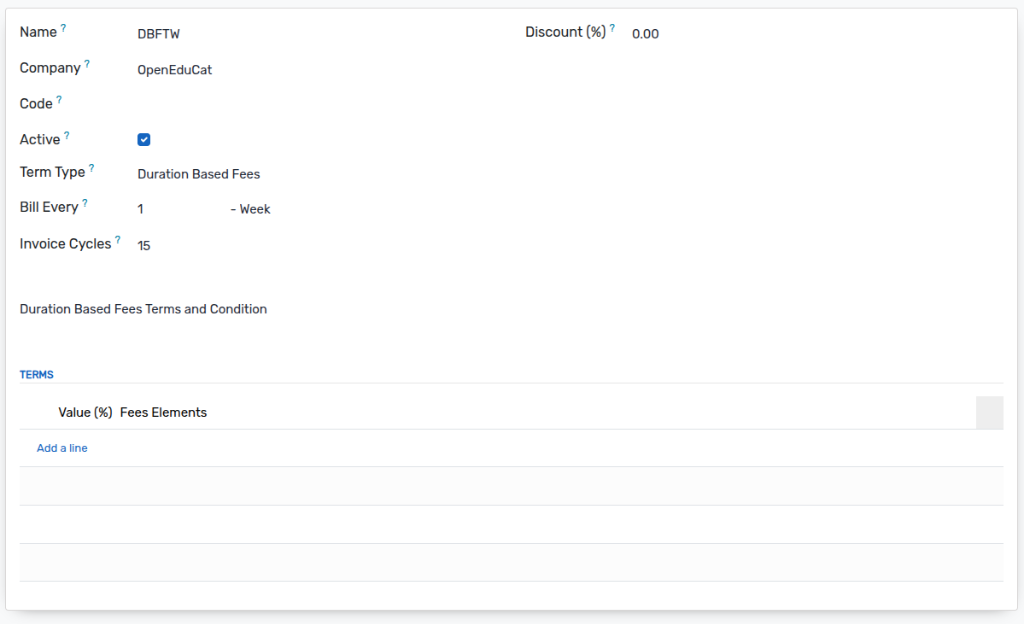
نوع المصطلح: - حدد نوع مصطلح الرسوم على أساس المدة من القائمة المنسدلة.
Bill Every :- Select option in bill every field when you want to create a invoice from Bill Every Day, Every Week, Every Month or Every Year.
دورات الفاتورة: - قم بتعيين عدد انتهاء الصلاحية بعد عدد الفواتير.
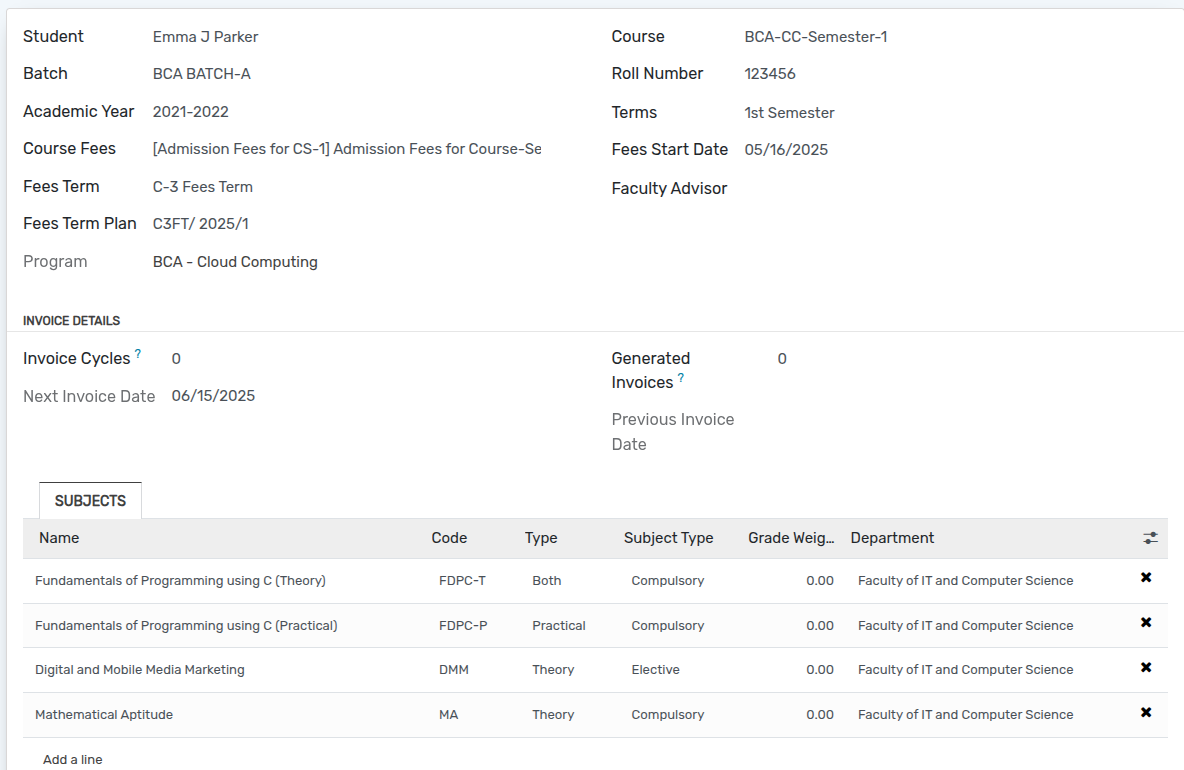
Go to Students ‣ General ‣ Student Course Detail and select the particular student.
هنا يمكنك رؤية دورات الفاتورة والفاتورة التي تم إنشاؤها وتاريخ الفاتورة التالية وتاريخ الفاتورة السابقة.
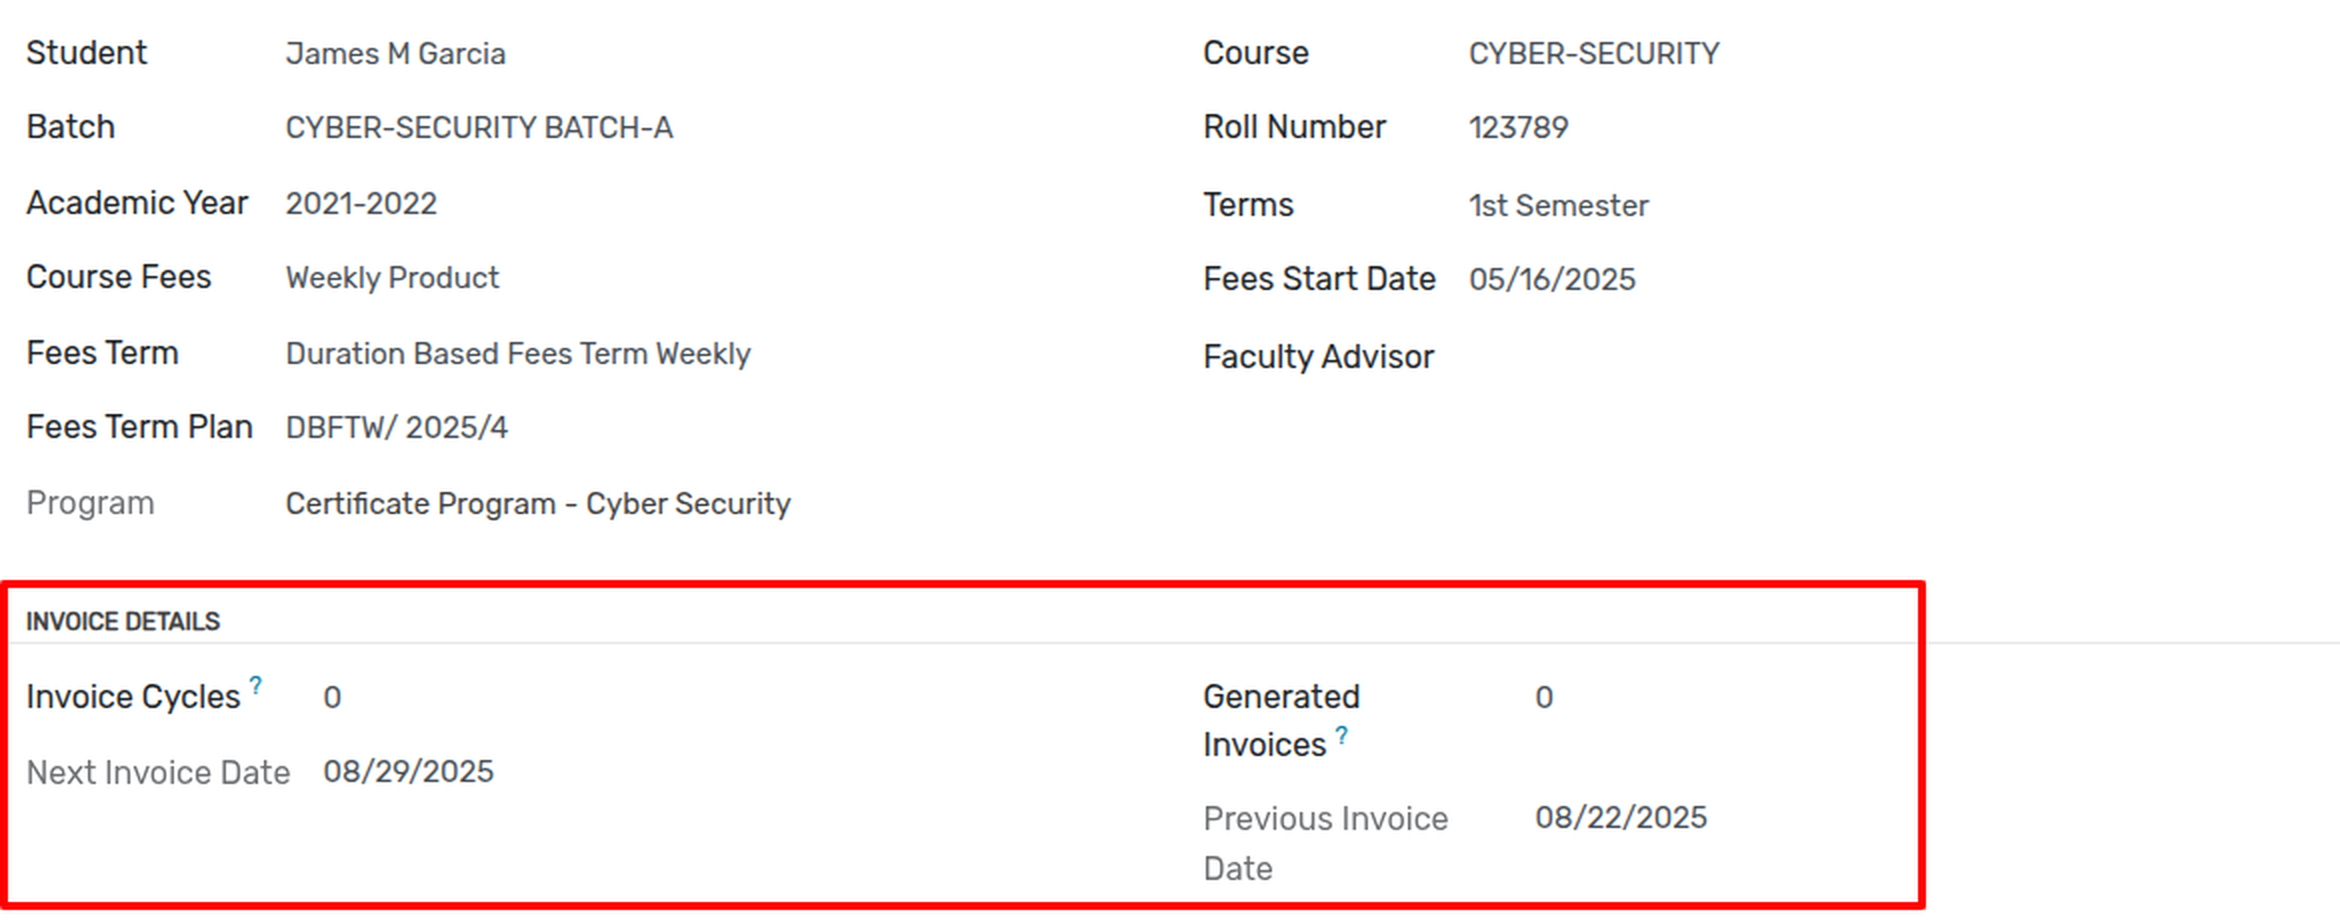
تاريخ بدء الرسوم: - حدد بيانات بدء الرسوم. إذا لم يكن الأمر كذلك، فسيتم أخذ هذا التاريخ الافتراضي.
دورات الفاتورة:- يعرض إجمالي دورات الفاتورة.
الفواتير التي تم إنشاؤها:- سيتم عرض العدد الإجمالي للفواتير التي تم إنشاؤها.
تاريخ الفاتورة التالية: - سيتم عرض تاريخ الفاتورة التالية.
تاريخ الفاتورة السابقة:- يعرض تاريخ الفاتورة السابقة.
If you have Session Based Fees by Term Type like how many sessions you have to attend.
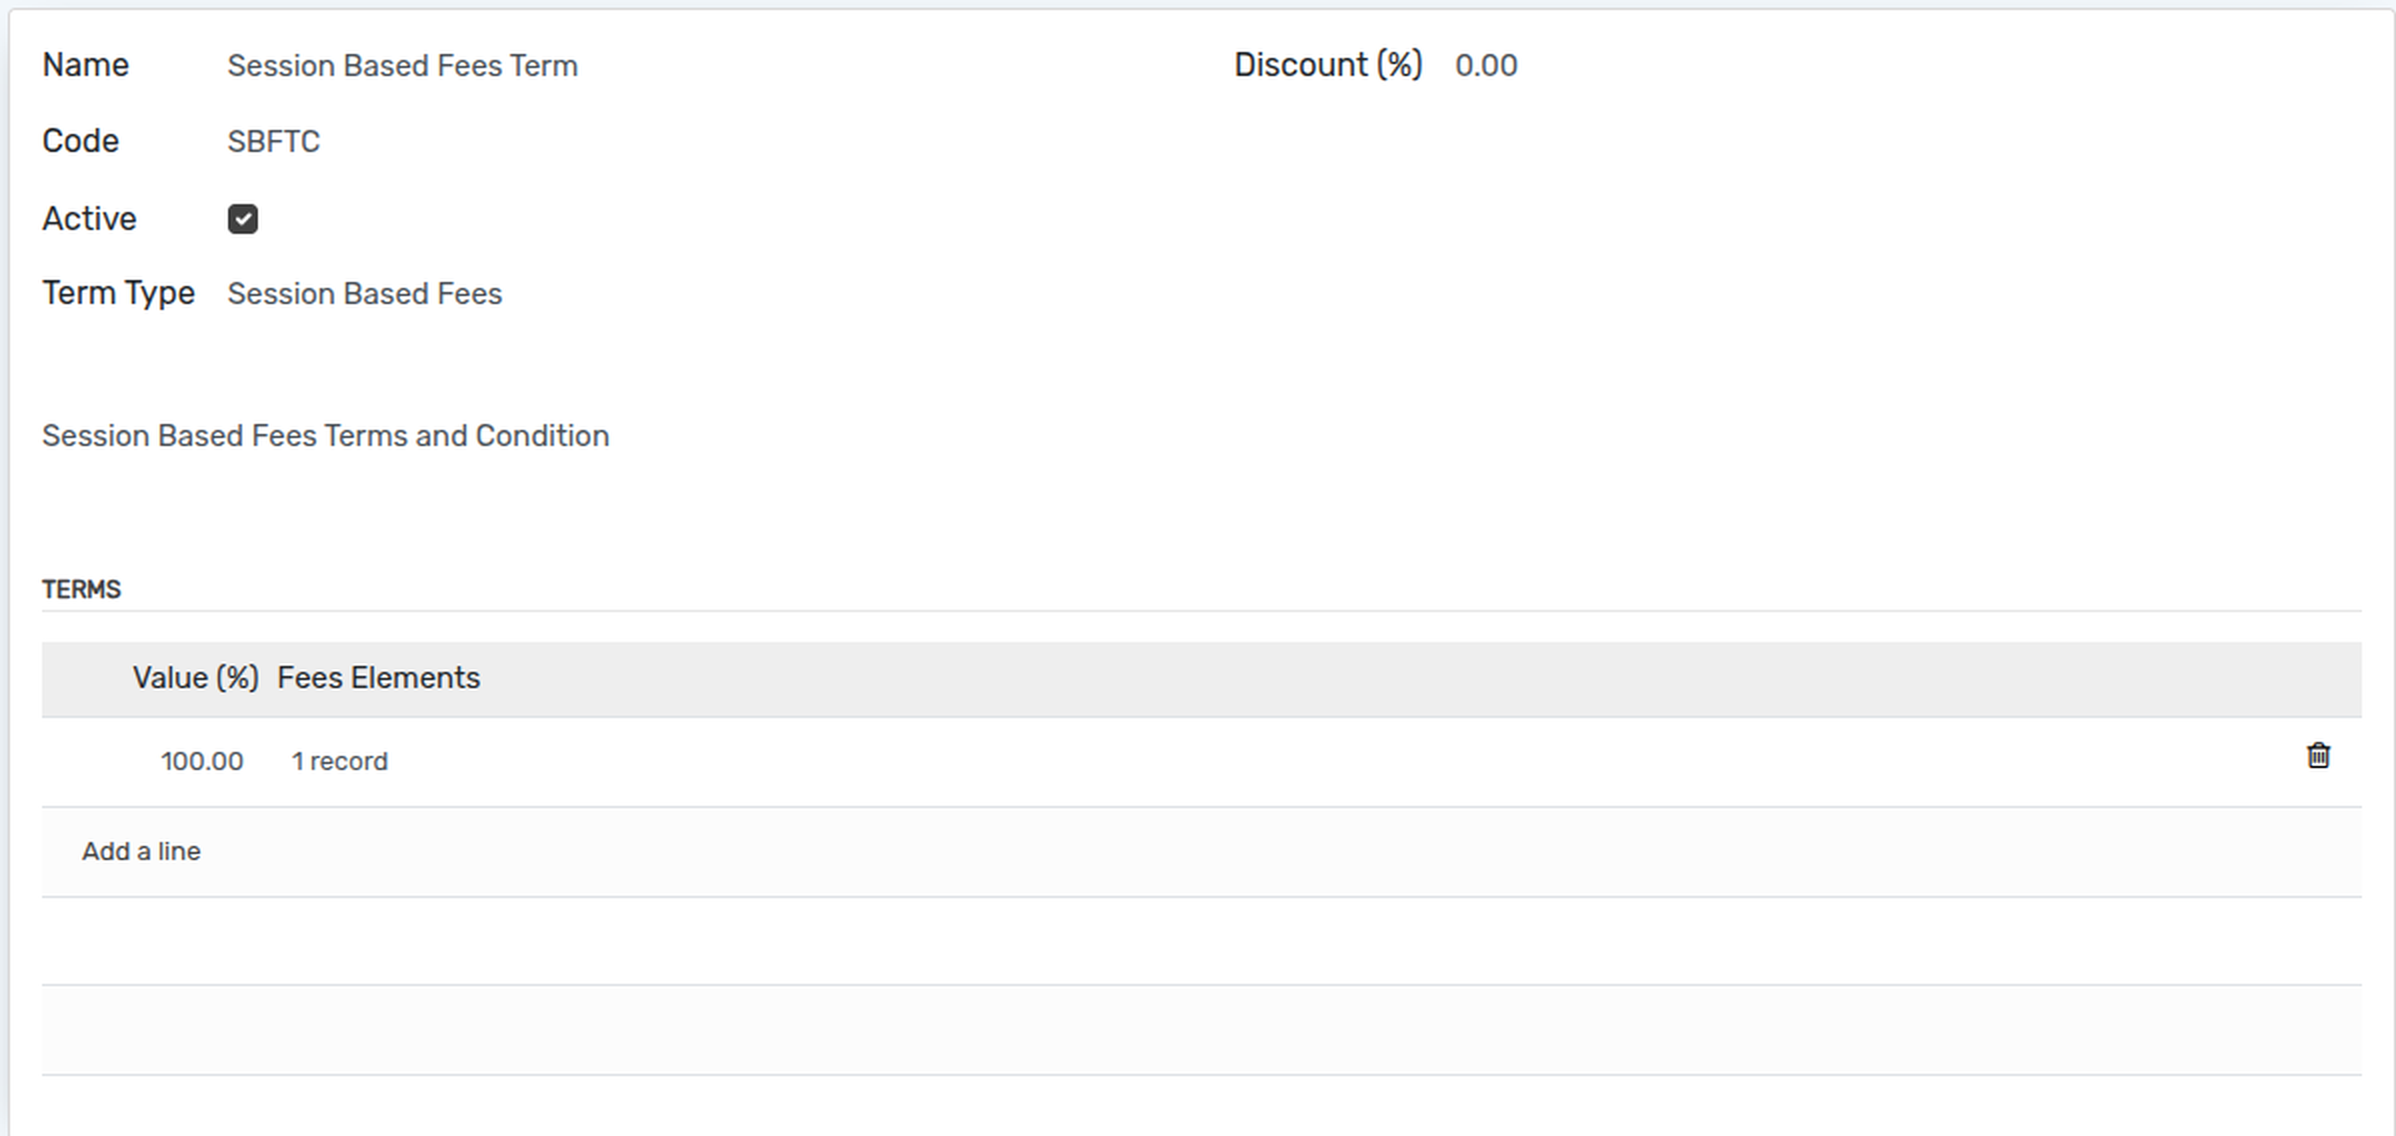
نوع المصطلح: - حدد نوع مصطلح الرسوم المستندة إلى الجلسة من القائمة المنسدلة.
Go to Students. Click on New to create a new
student.
Once a student is created and admitted to a course, a fee plan is generated automatically. The student can also be admitted dynamically from the portal side.
You can also create student admissions from the backend. To do this, follow the steps below:-
Go to Admission page and click on New in Admission.

Go to Class Attendances --> Attendance --> Sheets.
Click on New to create a attendances sheet.
بعد تحديد التسجيل والجلسة، انقر على زر بدء الحضور.
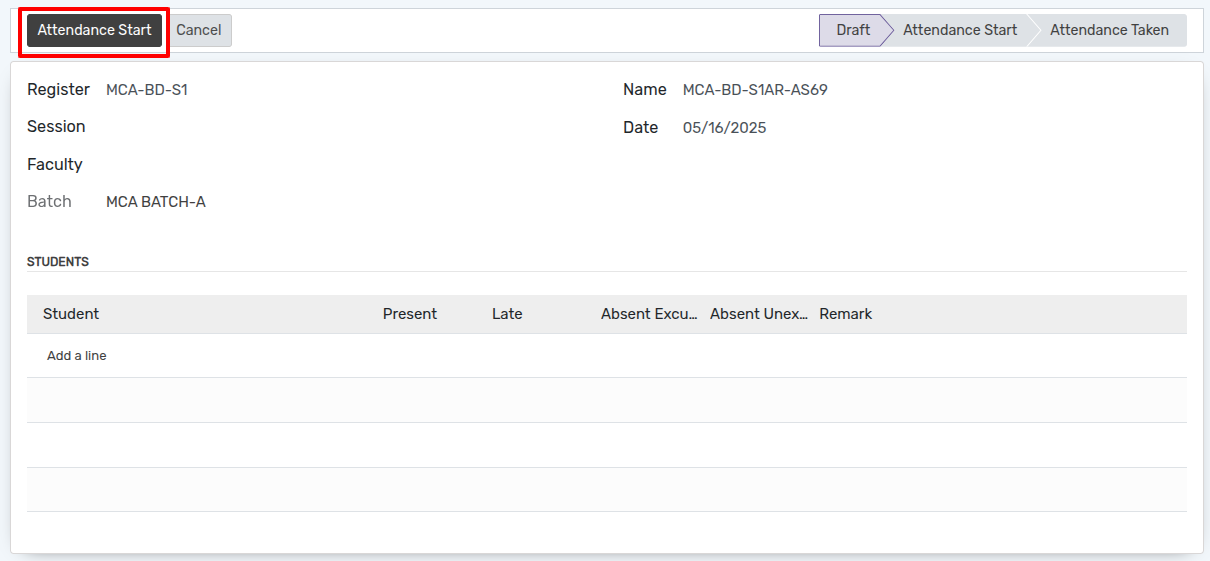
بعد النقر على هذا الزر، يمكن للمستخدم رؤية قائمة الطلاب بناءً على التسجيل والجلسة.
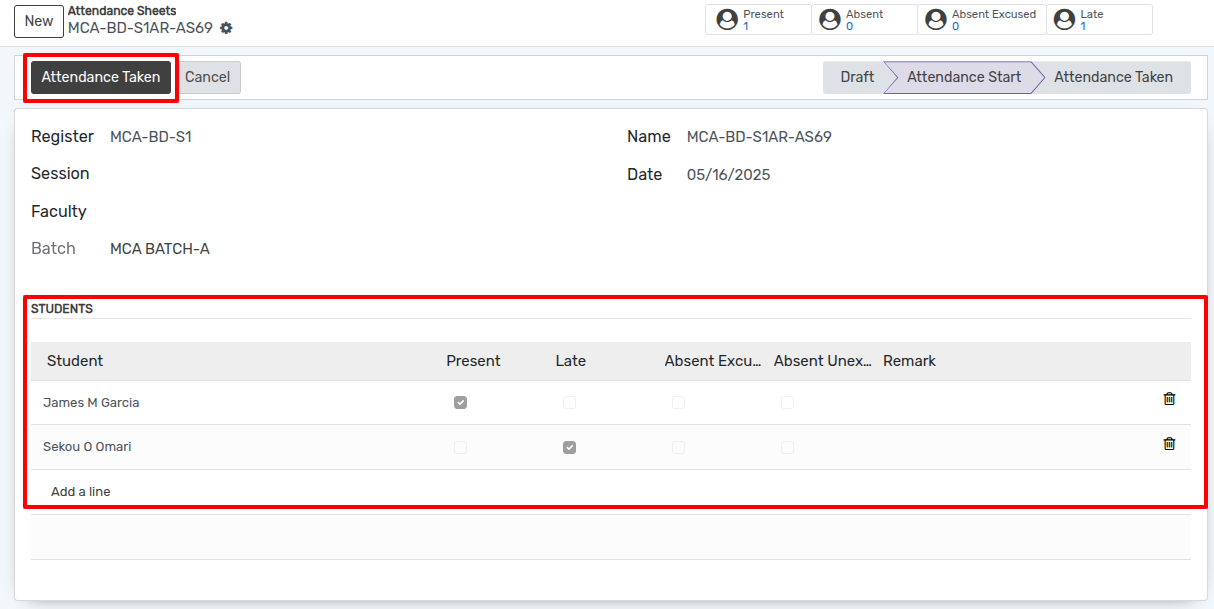
انقر على زر الحضور المأخوذ.
سيتم إنشاء الفاتورة فقط عند الحضور.
If you have Faculty Session Based Fees by Term Type its like which faculty takes how many lectures.
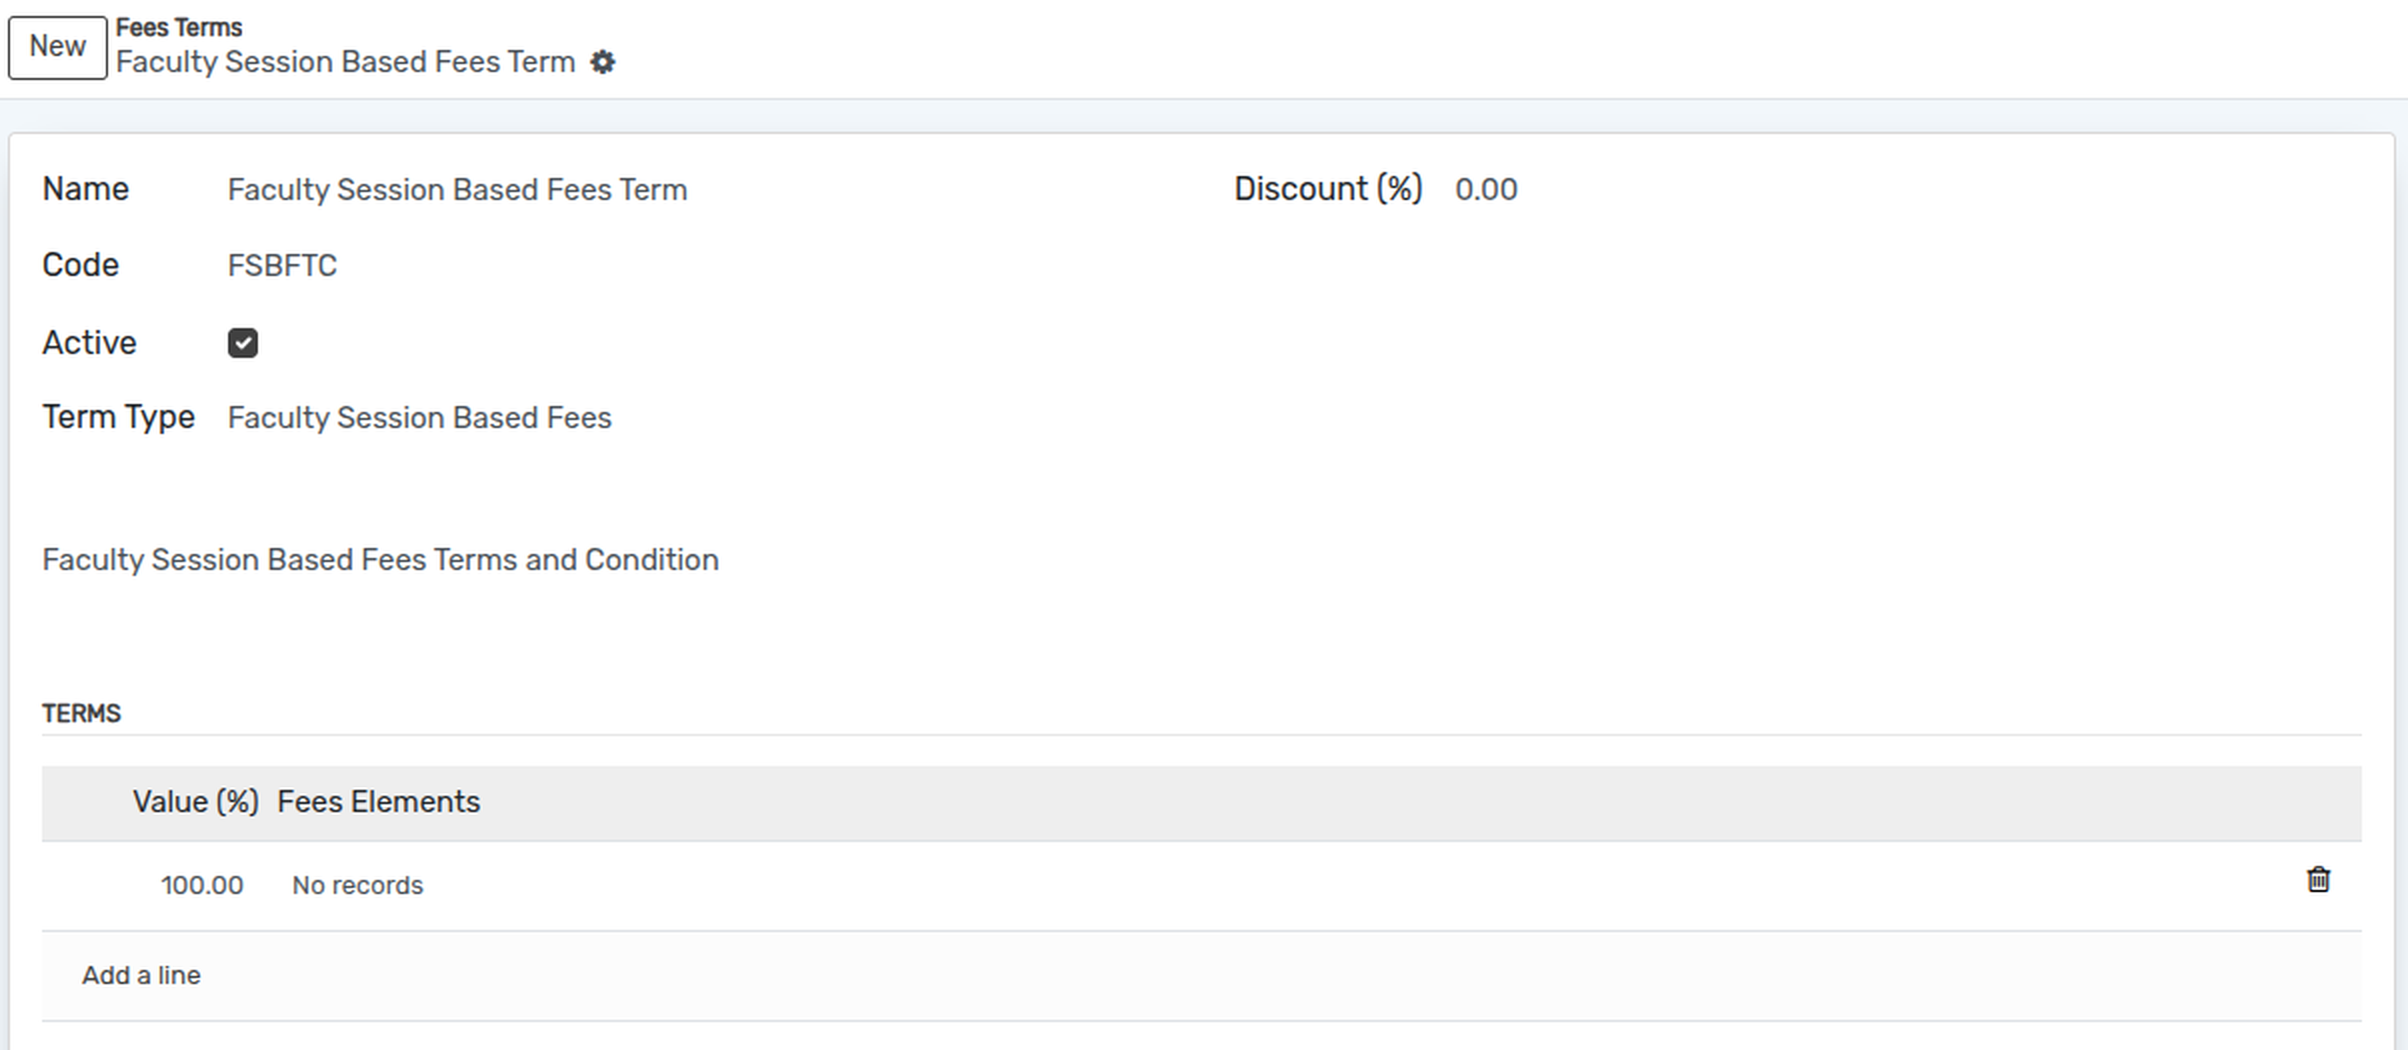
نوع الفصل الدراسي: - حدد نوع الفصل الدراسي القائم على الرسوم الخاصة بجلسات أعضاء هيئة التدريس من القائمة المنسدلة.
Go to Faculties and select the particular faculty.
Go to page subject cost and click on Add a Line.
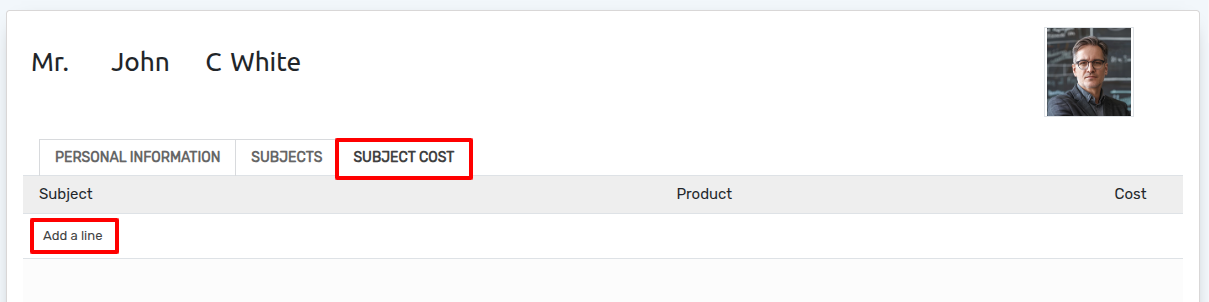
الموضوع:- اختر الموضوع من القائمة.
المنتج:- اختر المنتج من القائمة.
التكلفة: - سيتم ضبطها تلقائيًا بناءً على المنتج المحدد.
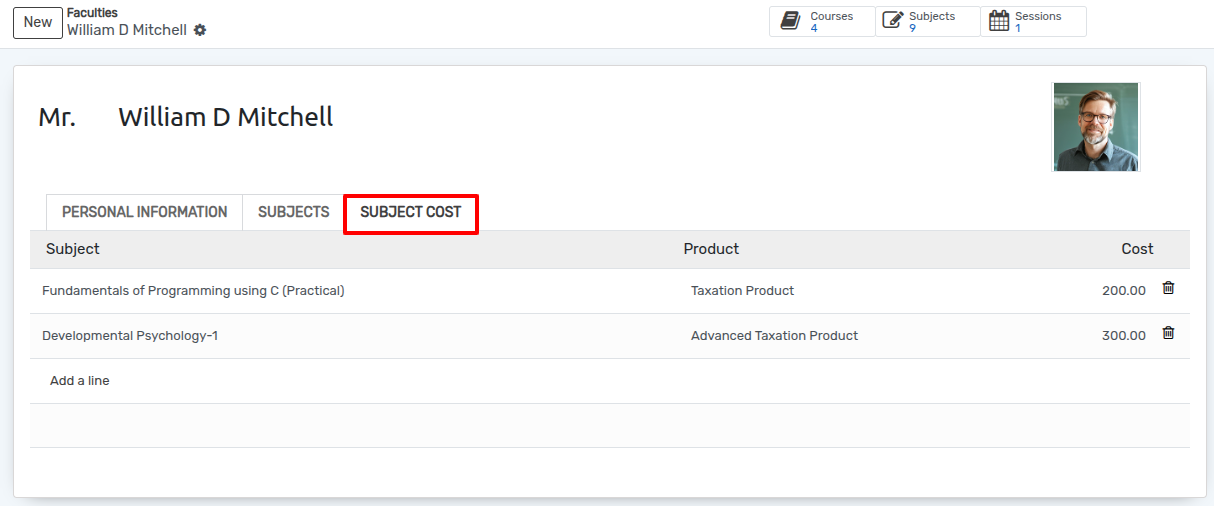
سيتم إنشاء الفاتورة فقط عند الحضور.
إنشاء الفاتورة
To create the invoice of the fees collection of the student, follow the
below steps :- Go to Students.
To create invoice,click on invoiced button.

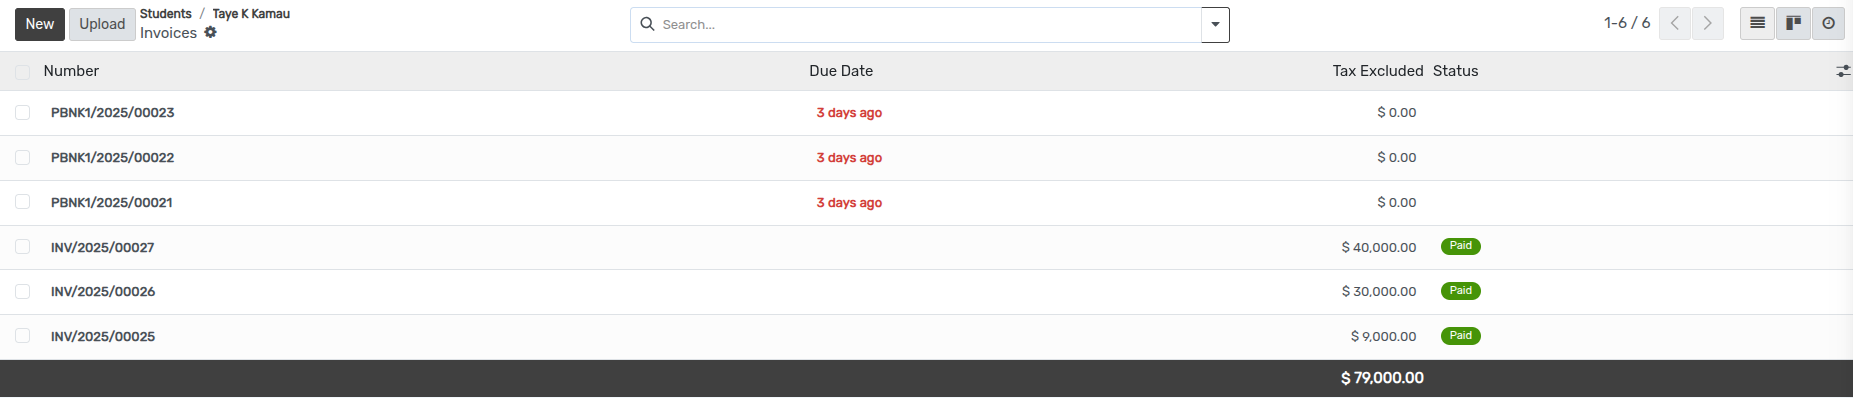
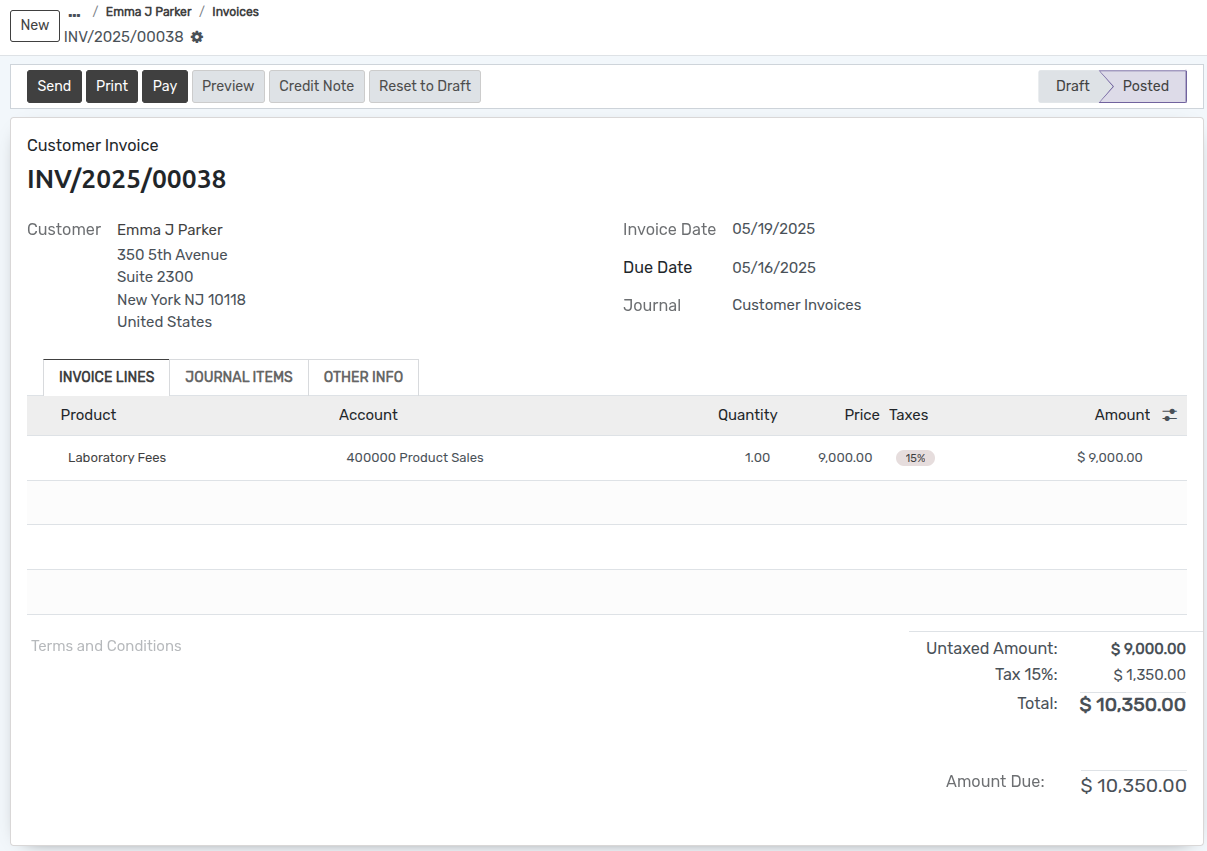
Click on pay button and wizard will open to pay fees.
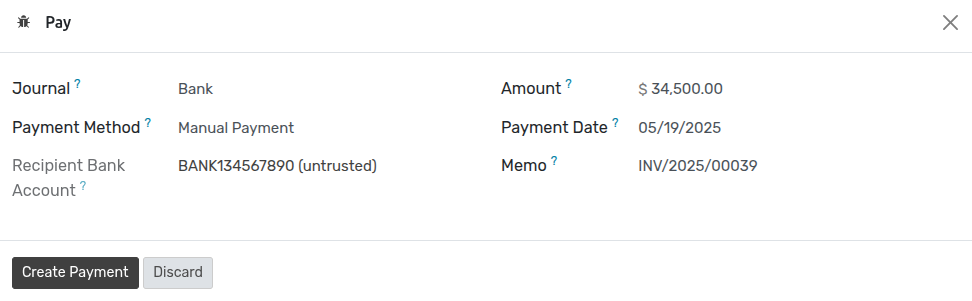
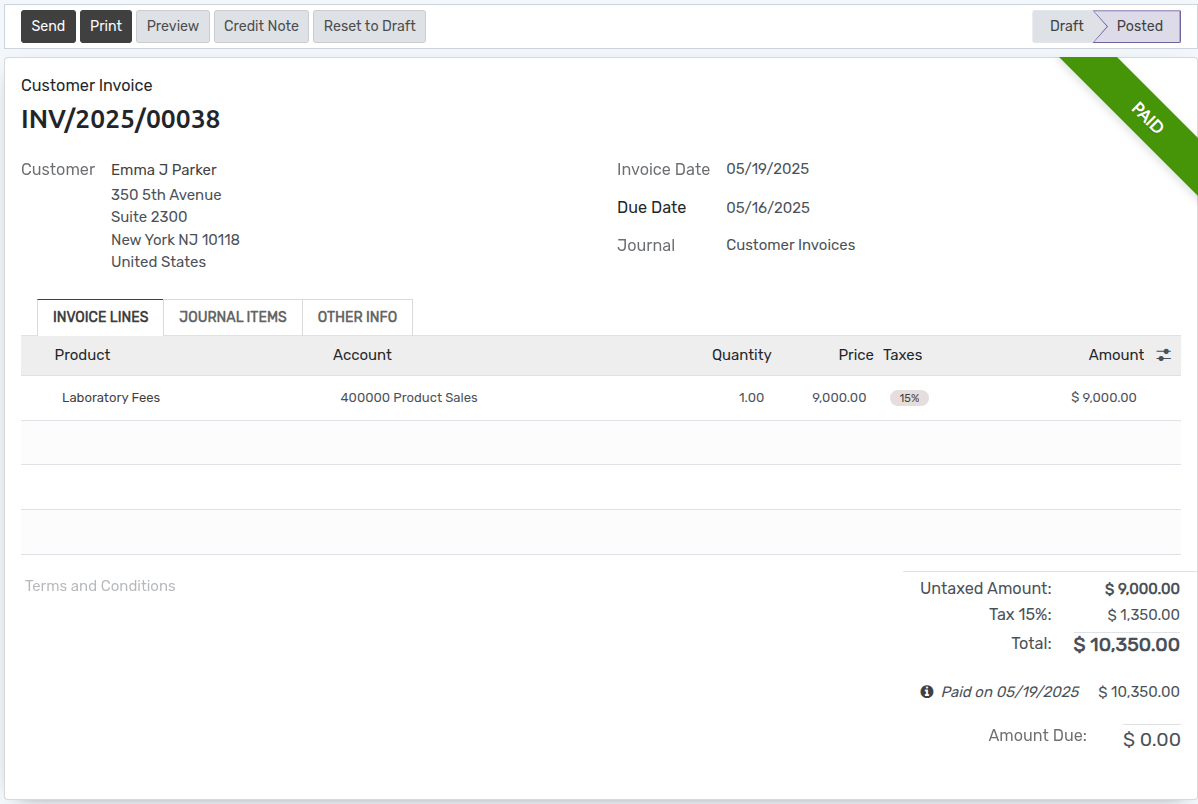
انقر على إنشاء الدفع. تظهر تفاصيل الفاتورة كما هو موضح في الصورة أدناه.
Fees Plan
Once a student is created and admitted to a course, a Fees Plan is generated automatically based on the applied Fees Term. The Fees Plan keeps track of the total amount, paid amount, and remaining amount for the student.
To view or manage the generated fees plans:
Go to SIS ‣ General ‣ Fees ‣ Fees Plan.
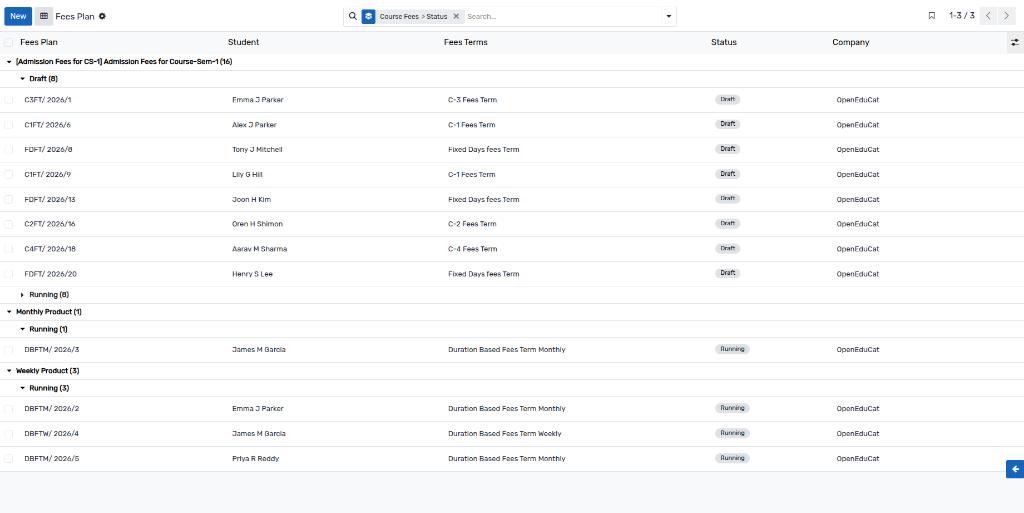
Here you can see the list of all generated fees plans for students.
The fees plan contains the total fees and the breakdown of installment lines (Fees Plan Lines).
The state of a fees plan progresses through Draft, Running, Done, and Cancel.
Administrators can use the Send Reminder to Student button to email payment reminders for running fees plans.
You can generate a PDF Fees Report from the Print menu to get a detailed analysis of the student's fee plan.
Fees Plan Lines
Fees Plan Lines represent the individual installments or scheduled payments generated from the main Fees Plan.
Go to SIS ‣ General ‣ Fees ‣ Fees Plan Lines.
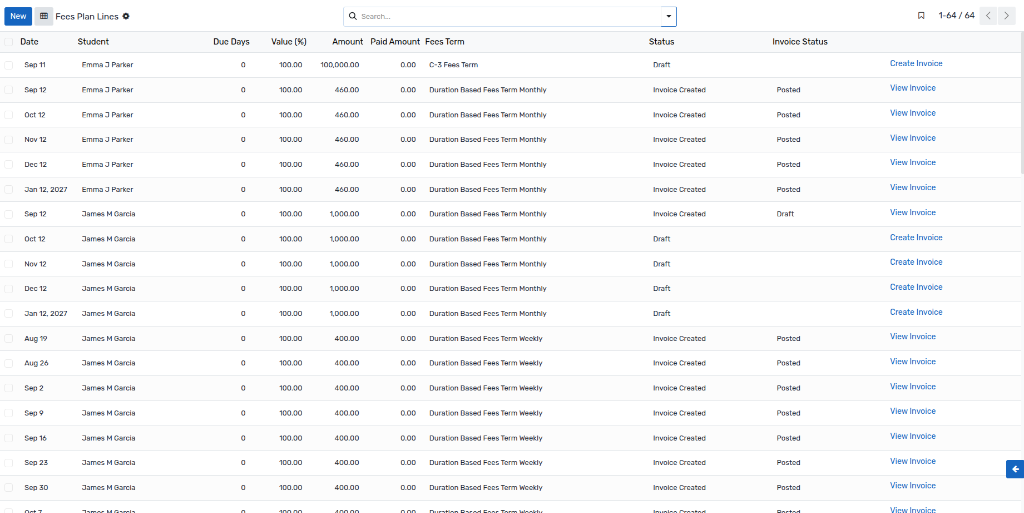
This view provides a detailed list of all payment installments, their due dates, and amounts.
Administrators can click the Create Invoice button on a Draft line to generate the corresponding invoice in accounting.
Once the invoice is generated, you can click View Invoice to open the associated invoice directly.
Fees Statements in Student Portal
Students and parents can easily track their fee records and payments through the web portal.
When logging into the portal, a Fees Statements card displays on the portal home page, which redirects to the Invoices & Bills page to manage all fees and dues.
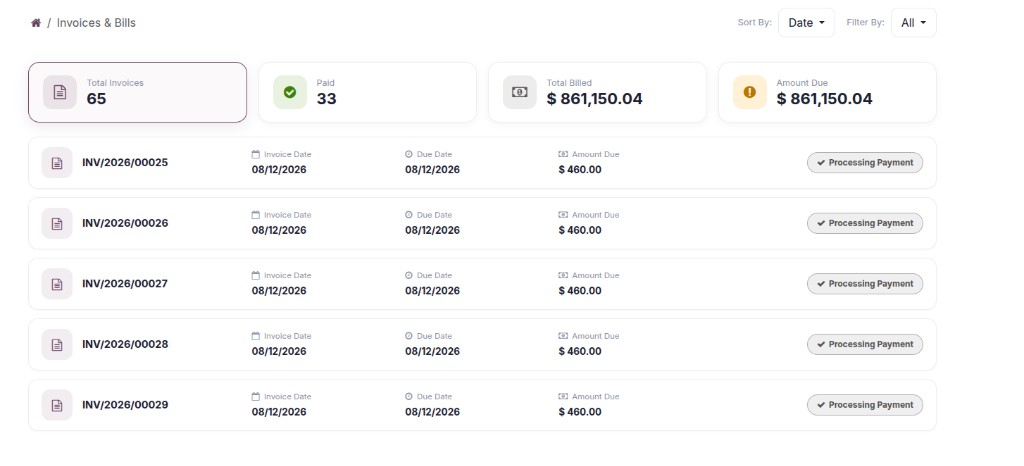
In the Student Profile (accessible via My Account ‣ Students ‣ Select Student), a dedicated Fees tab is available.
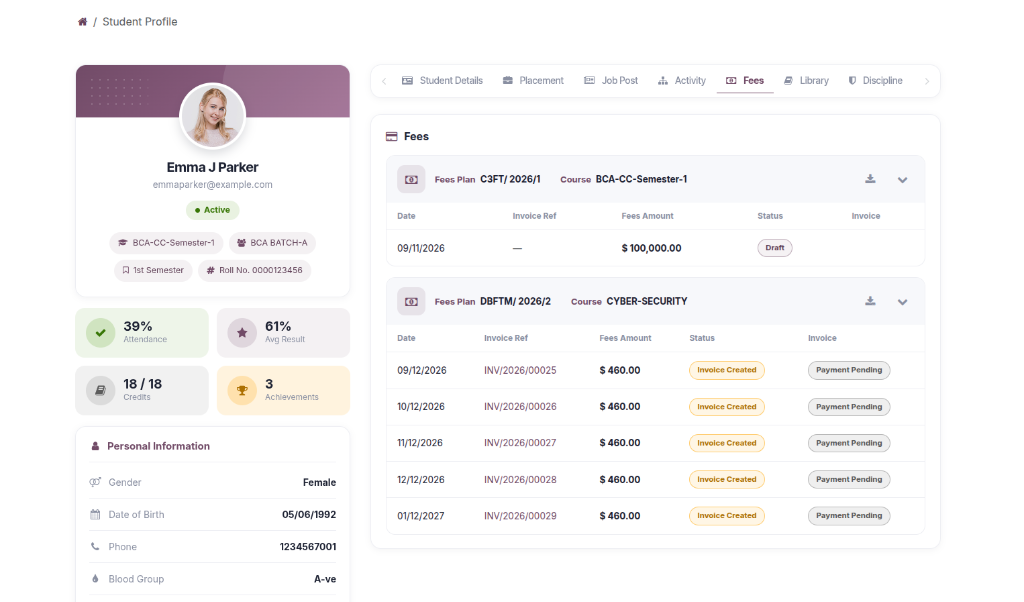
The Fees tab lists all assigned Fees Plans, the status of each installment, the invoice references, and provides a direct link to download the Fees Report as a PDF.