Student Mentor
OpenEduCat provide Student Mentor System To Assign Mentor And Mantess For Create The Meeting While Allocated Mantess can Join the Meeting.
Admin Dashboard
Admin can view all the students and their allocated mentors. Admin can also view all the meetings that Created By Mentor And Admin can Also Create a Mentor Allocation From Assigning Faculy.
Go To SIS ‣ General ‣ Mentorship Meetings.
All the Meeting Created By Mentor Are Listed in Mentor Meeting.

Go To SIS ‣ General ‣ Mentorship Allocation. Click on record to Approve or reject the Mentor Allocation Request.
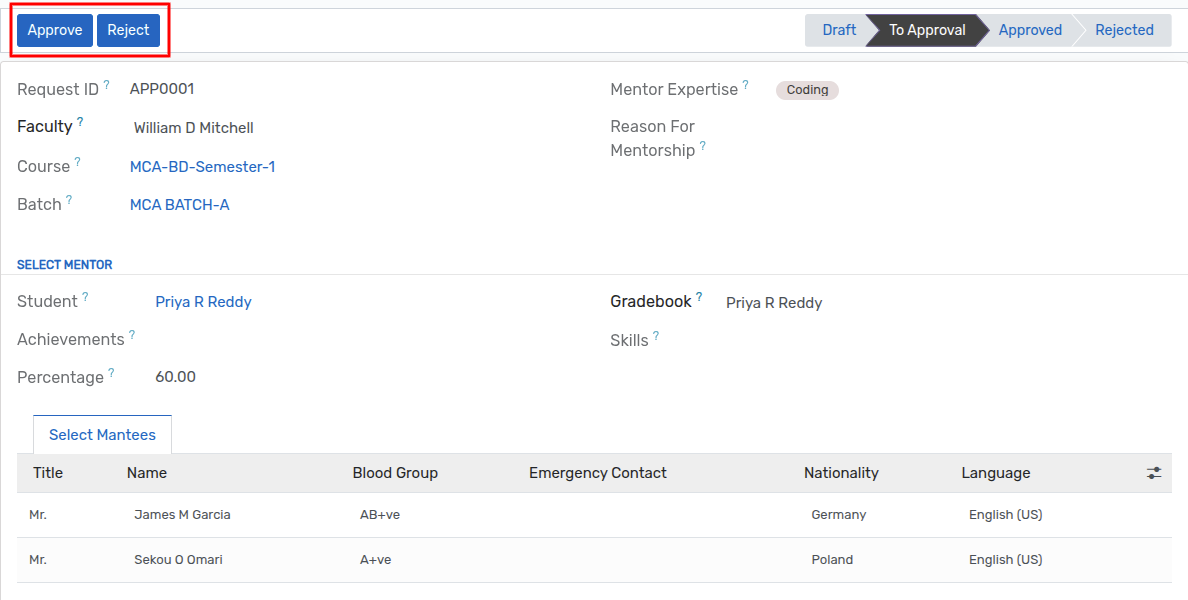
Click On
ApproveButton To Approve the Request Or Click onRejectto reject The request.Faculty will receive the notification of approval or rejection of the request.
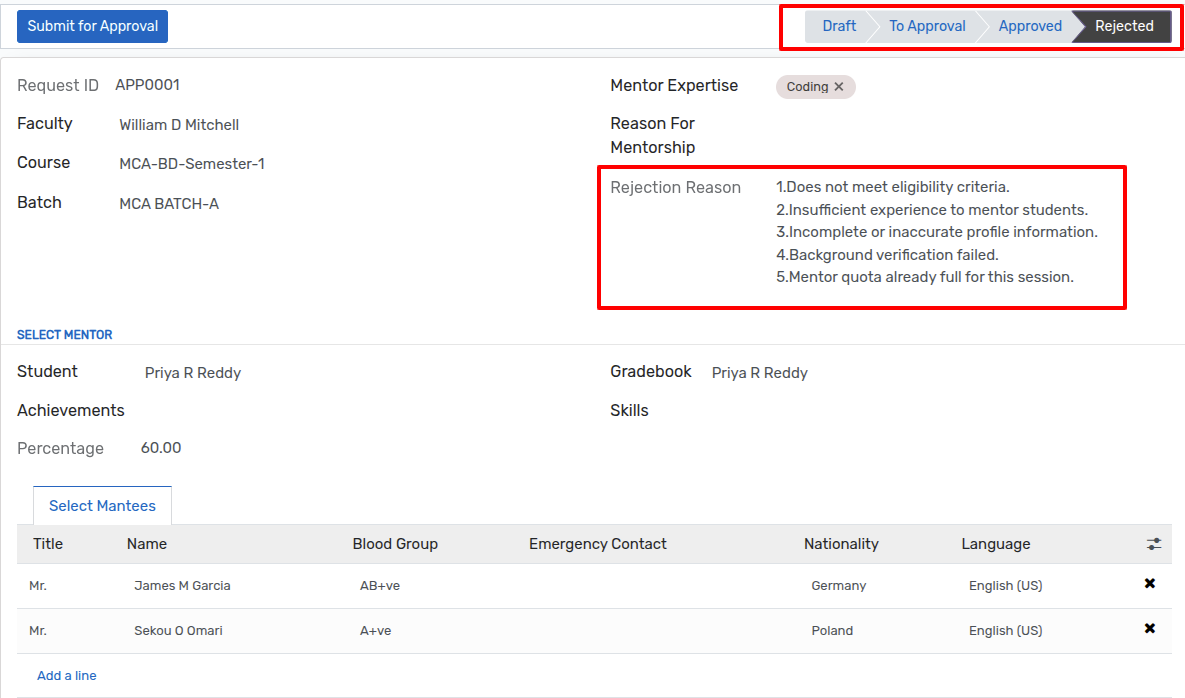
Admin have to give a Particular Reason For Rejecting The request
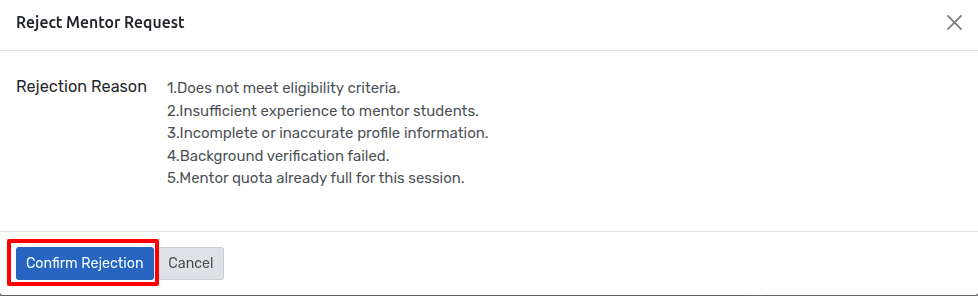
Click on
Confirm RejectionTo reject The Request.
Now, - Faculty Can View The Rejection Reason Why Admin Reject The Request. - When Faculty Reject The Request Faculty Can Edit the data.
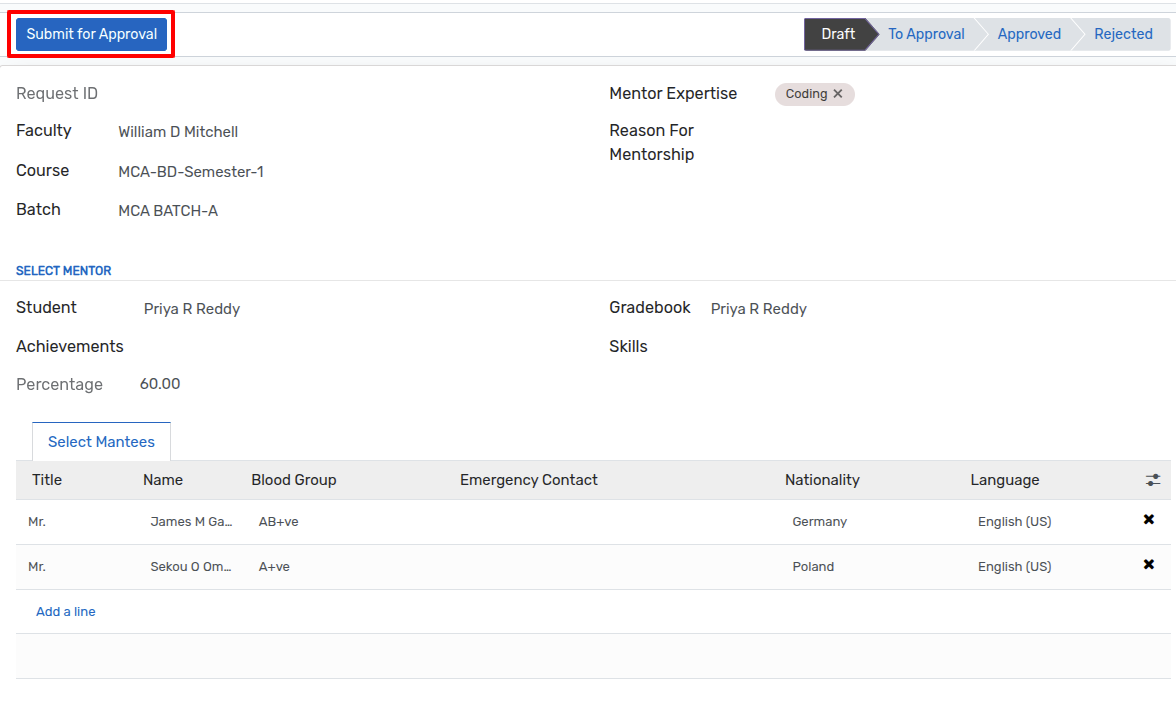
After Editing the Data Click on
Submit for Approvalto Approve The Request.When The Request is Approved The State Change on Both Dashbord Admin And Faculty.
Faculty Dashboard
Go To SIS ‣ General ‣ Mentorship Allocation. Click on Create to
Create a new Mentor Allocation.

Faculty Name : Select the Faculty Name for Allocate Mentor.
Course : Selete the Course Of that Particular faculty.
Batch : Select the Batch of that Course.
Reason For Mentorship : Add The particular reason Assign the Mentor.
Students : Select the Mantees For that Mentor.
Fill All the Details And Click On
Submit For Approval.
Mentorship Allocation Flow
1. Draft
When Mentor is allocated it will in
Draftstate.

2. To Approval
When faculty Send The Request For Approval It will be in
To ApprovalState.

3. Approved
When Admin Approve The Request It will be in
ApprovedState.

4.Rejected
When Admin Reject The Request It will be in
RejectedState.

Student Configuration
Login As A Mentor Student.
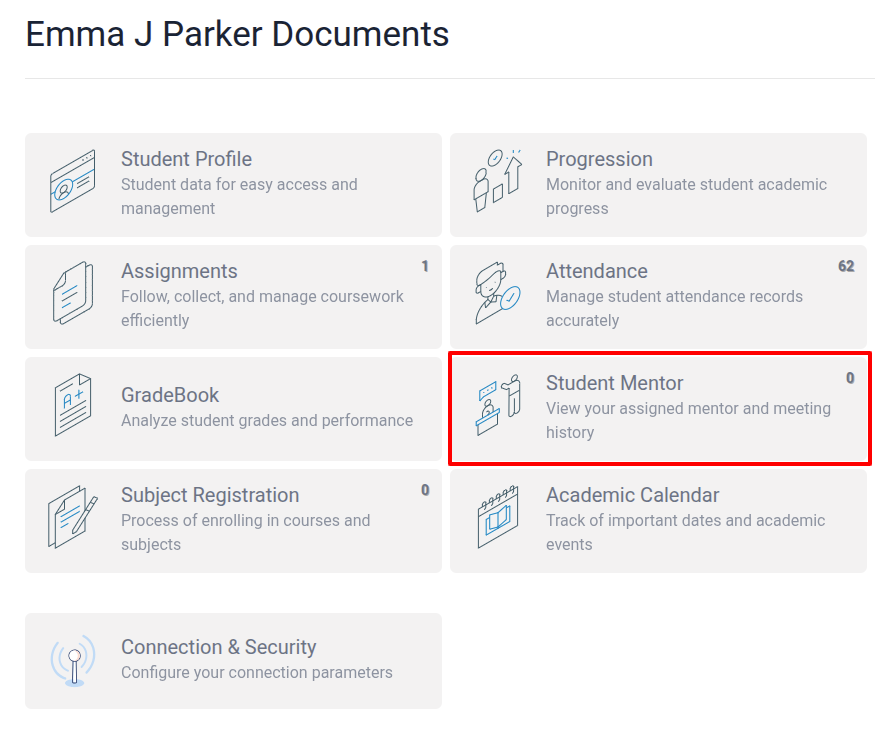
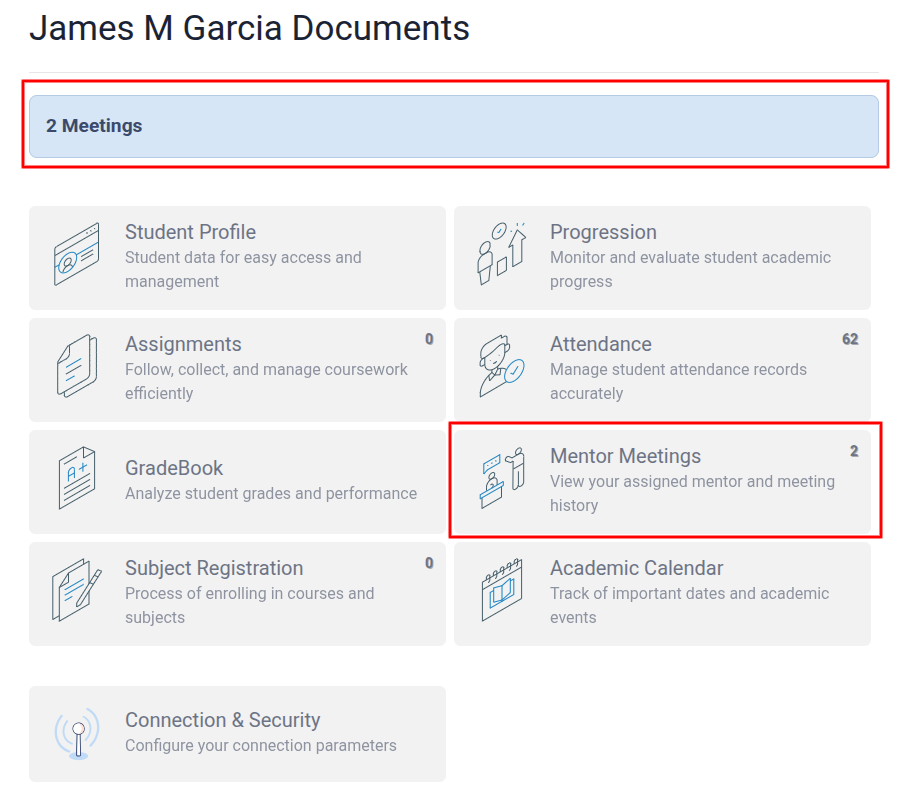
The Student Who Assign As A Mantee can Create The Meeting.
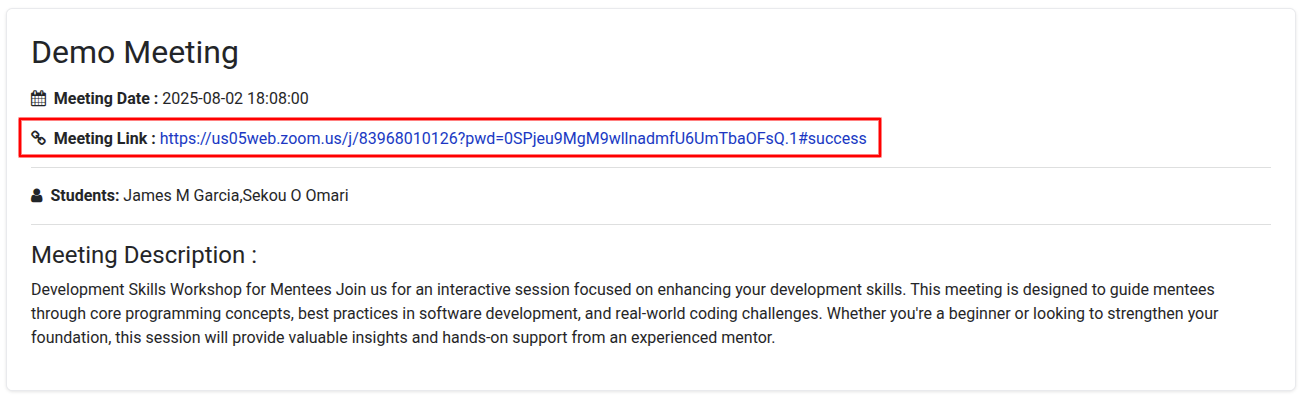
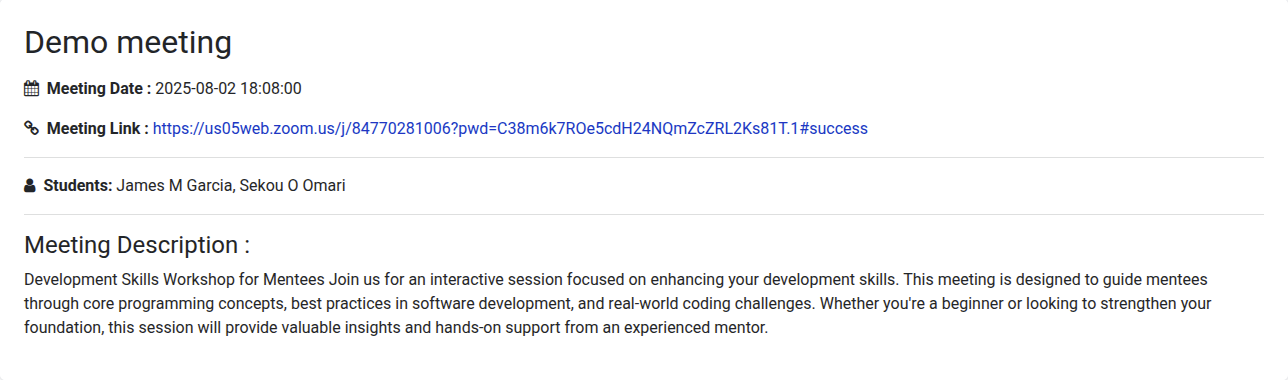
Allocated Mantees Can Join the Meeting That created By Mentor.
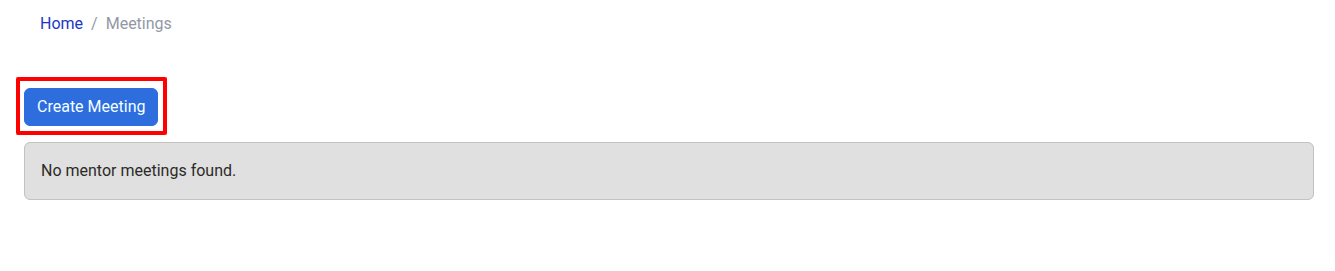
Click on Create Meeting to create the Meeting.
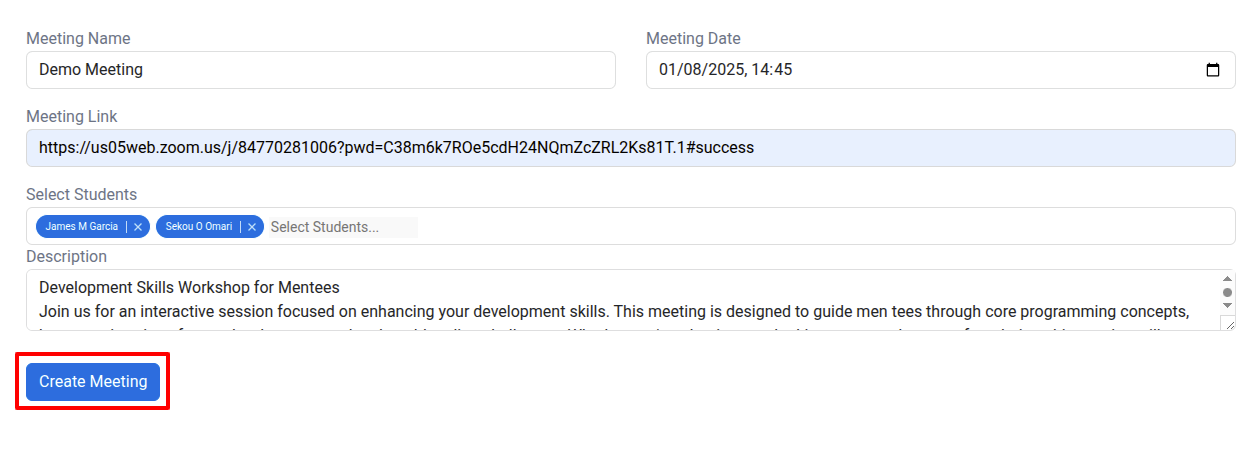
Fill All the Details And Click On Create Meeting For Create The meeting For Mantees.
Now , Mantees can See the Meeting And Can Join in Meeting Created By Their Mentor.

Admin Can Also Reschedule,Cancel and Done The Meeting.
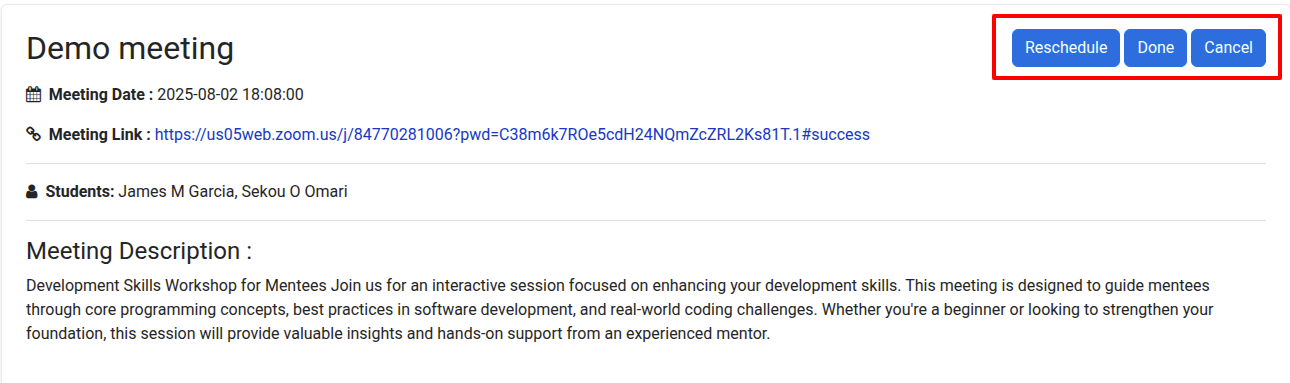
Click on
Reschedulefor rescheduling the meeting or else click onDoneorcancelto close the meeting.
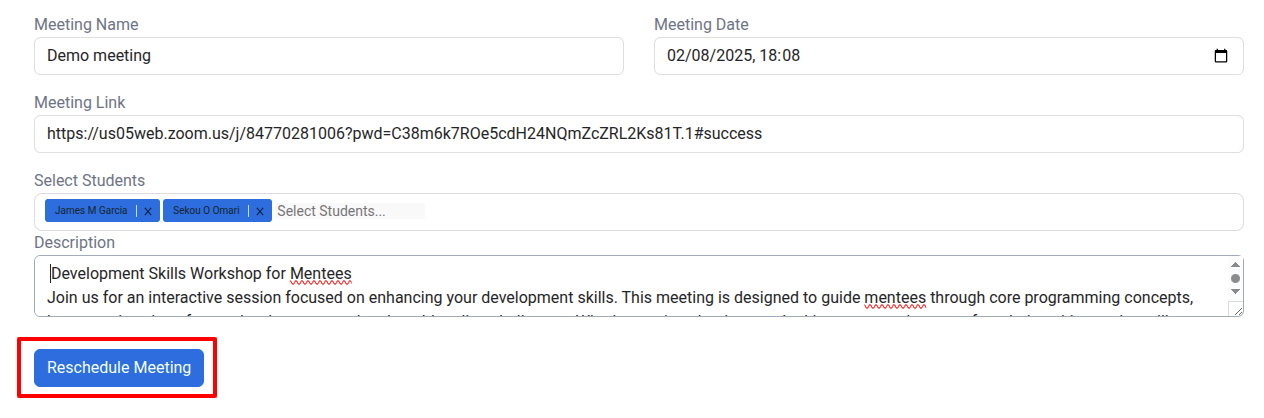
Click on Reschedule Meeting to Reschedule the meeting.
Mantees Can Join In meeting via The Link.