Examens OMR
Go To .
Click on New to create a new Exam.
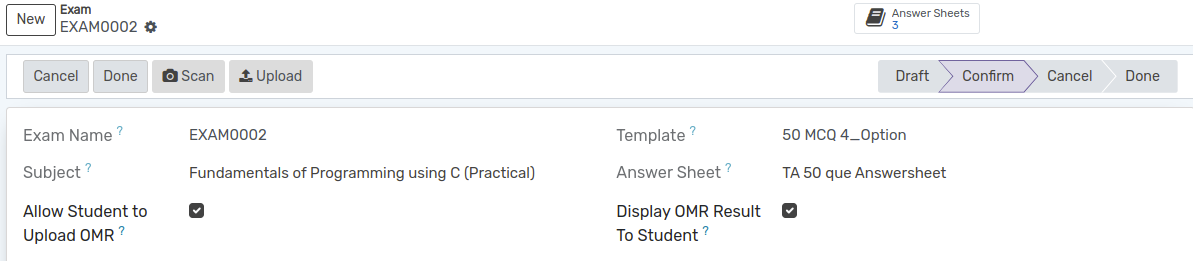
Nom de l’examen : - Il sera défini automatiquement.
Sujet : - Sélectionnez le sujet d’un examen particulier dans la liste déroulante.
Modèle : - Sélectionnez le modèle OMR dans la liste.
Feuille de réponses : - Sélectionnez la feuille de réponses dans la liste déroulante.
Now, click on Scan button for scan the OMR sheets of students using Mobile camera.
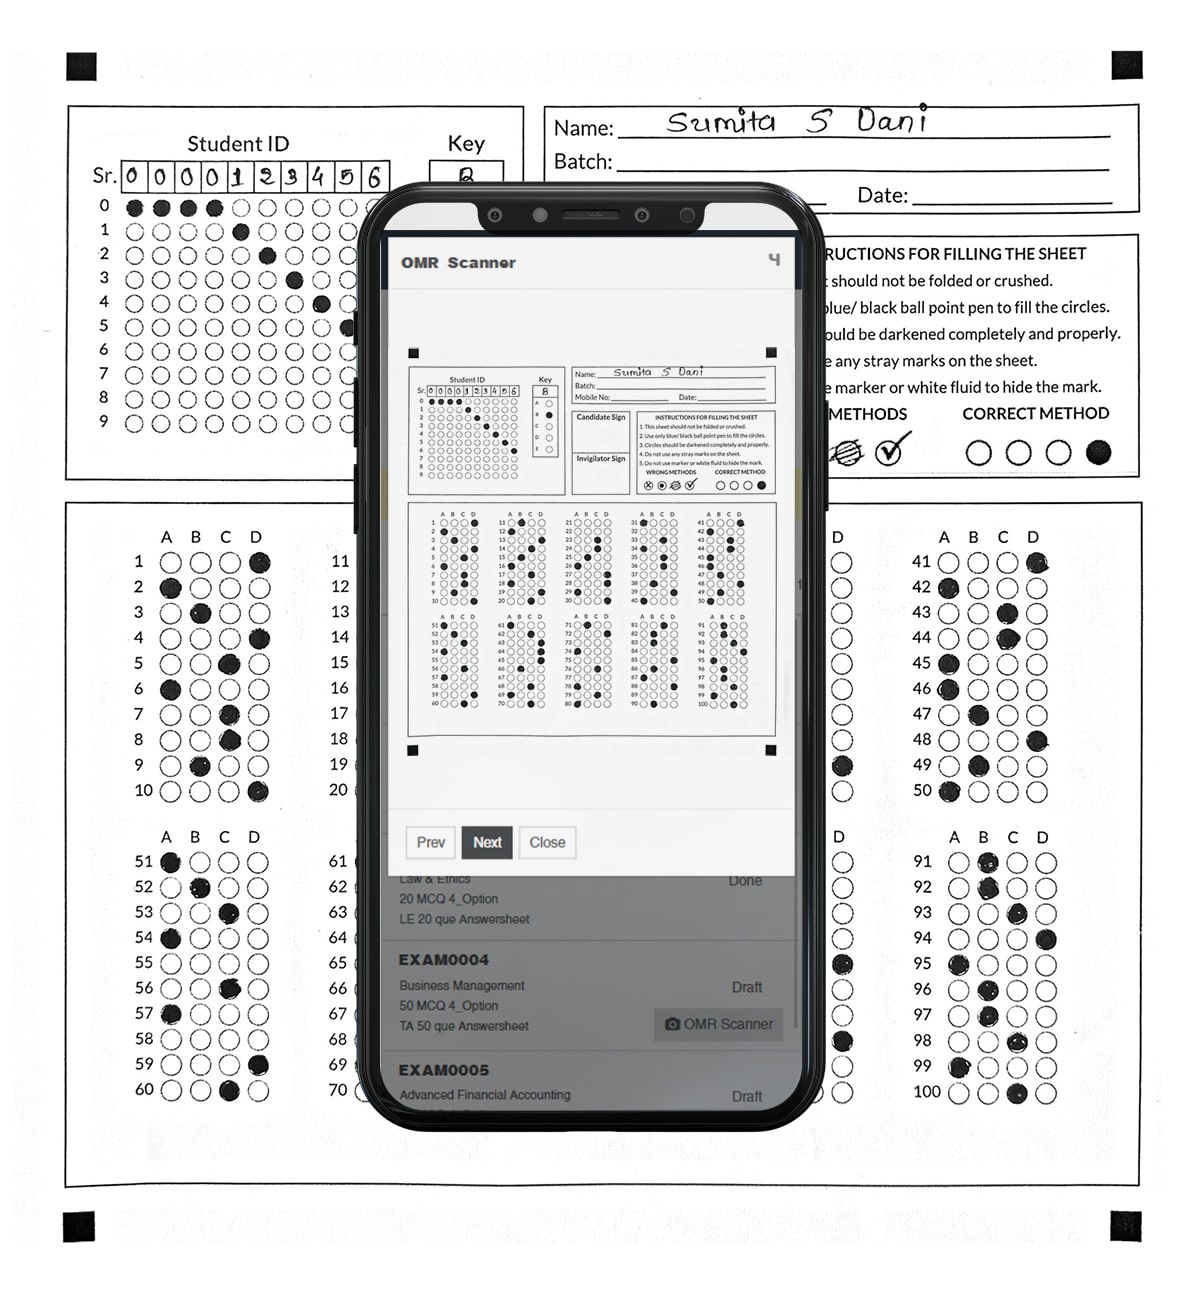
Also you can Upload Bulk Image From Upload Button.
Select Multiple Images From Your System And upload them.

It will print the OMR sheet for the selected exam.
In this way You can create multiple exams at a time.

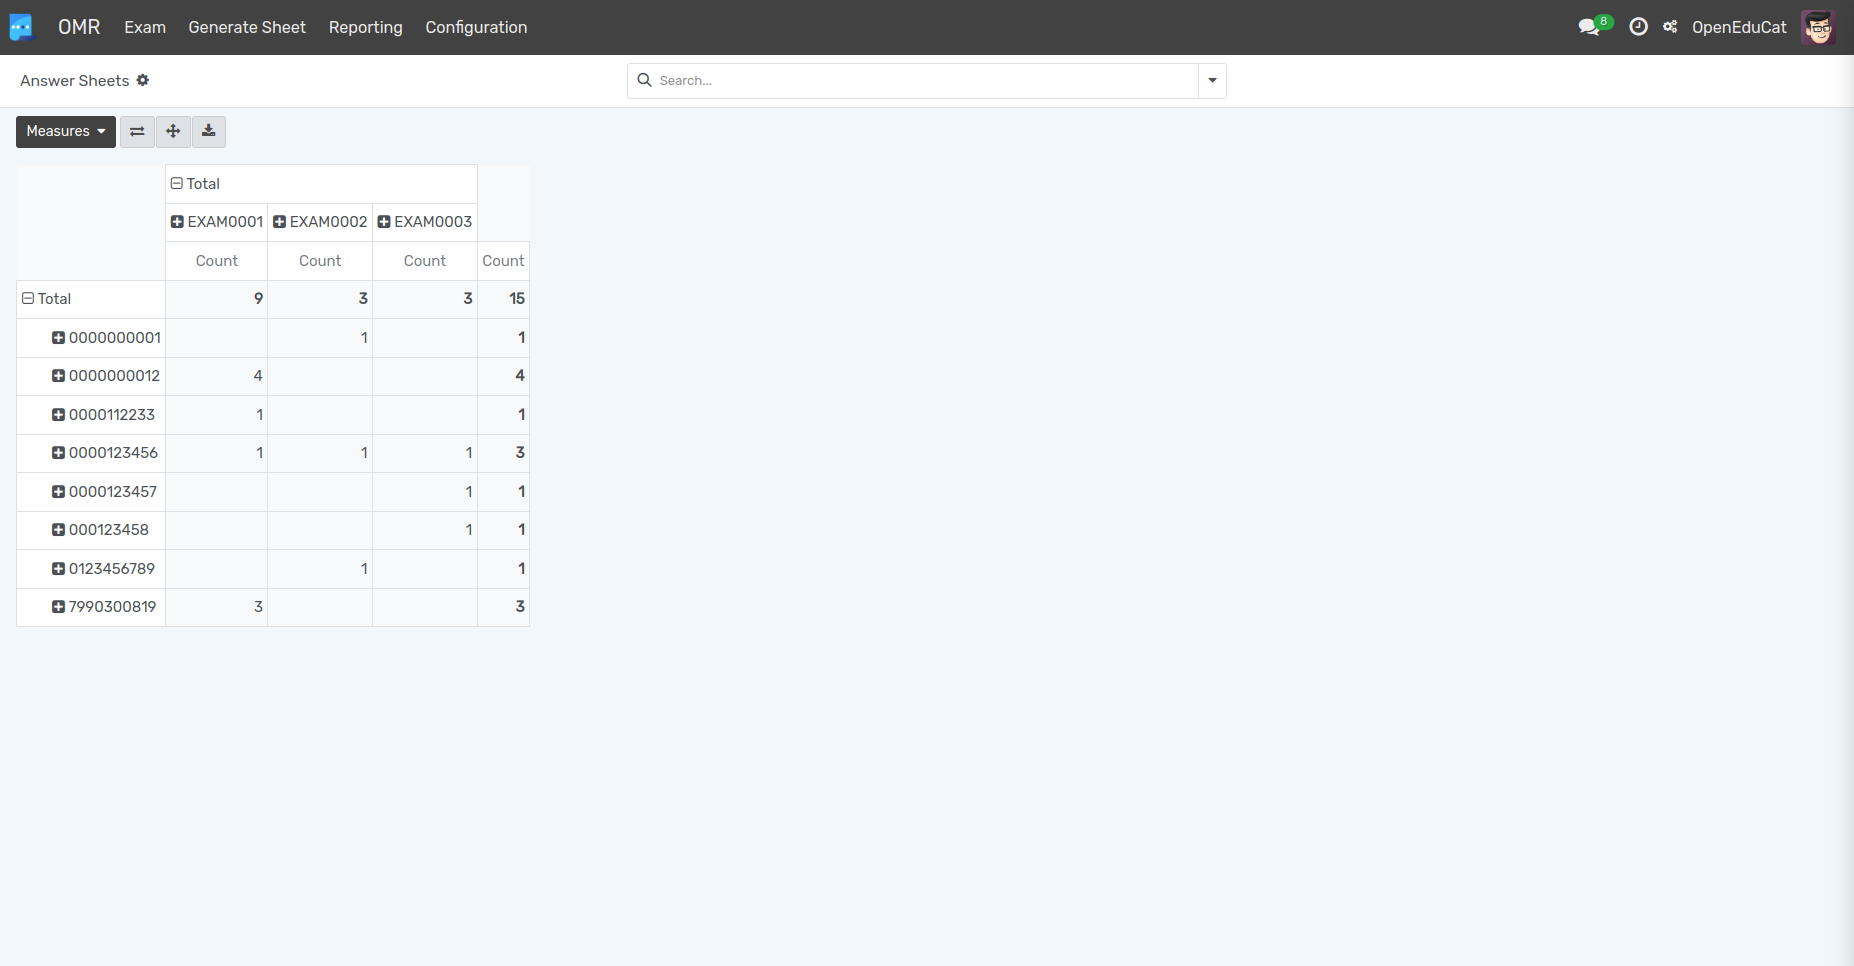
Go To .
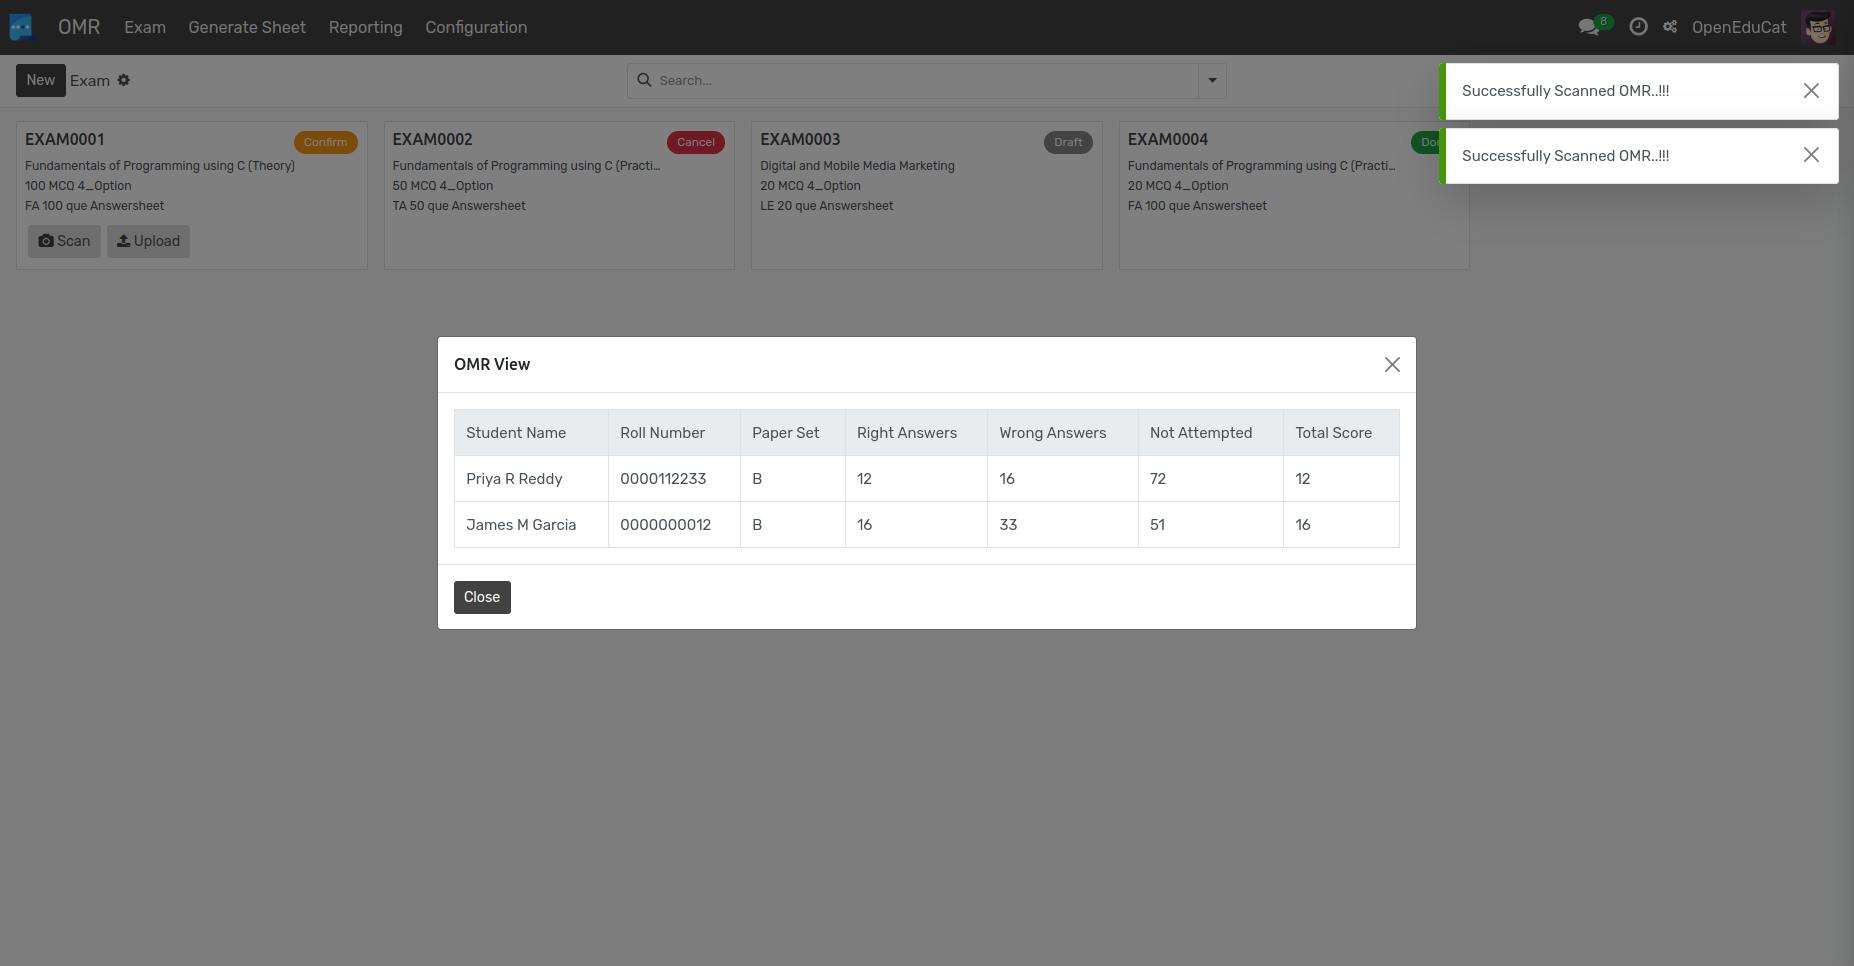
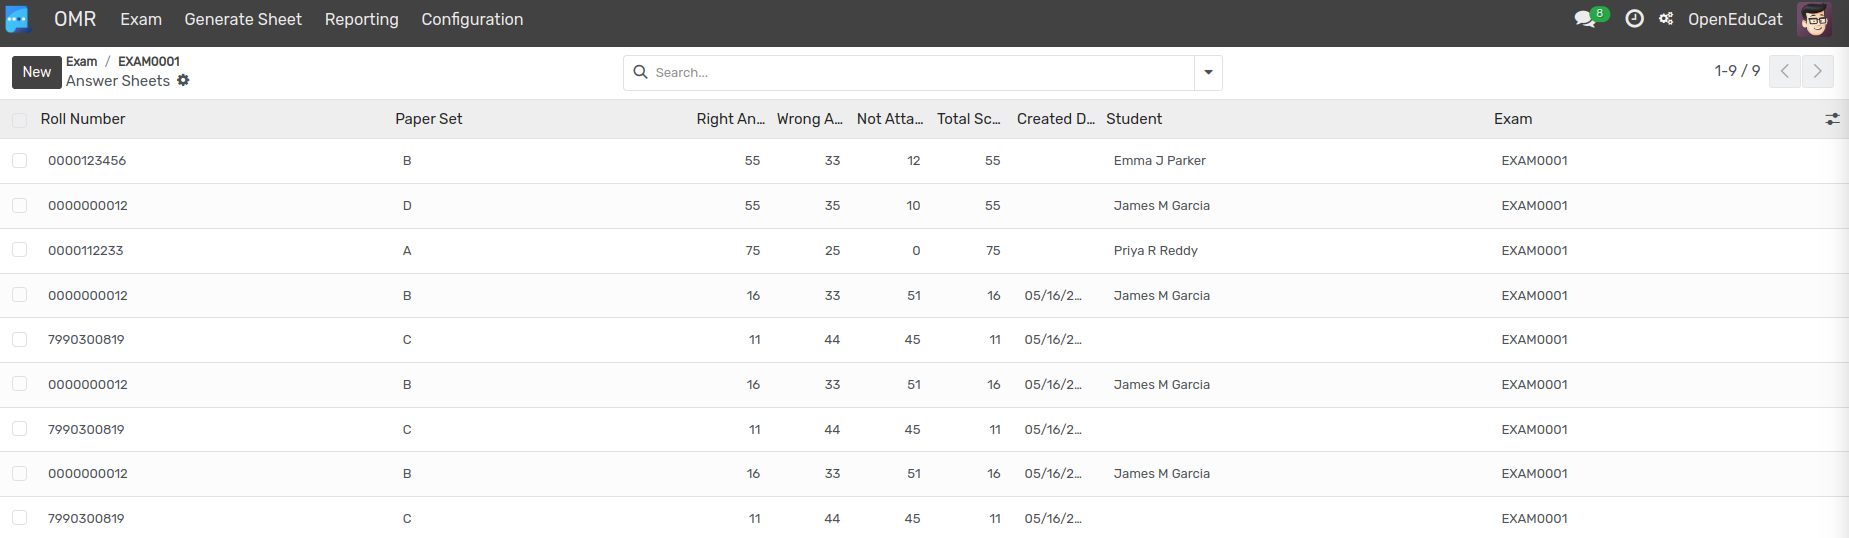
You can also see the OMR exam Results.
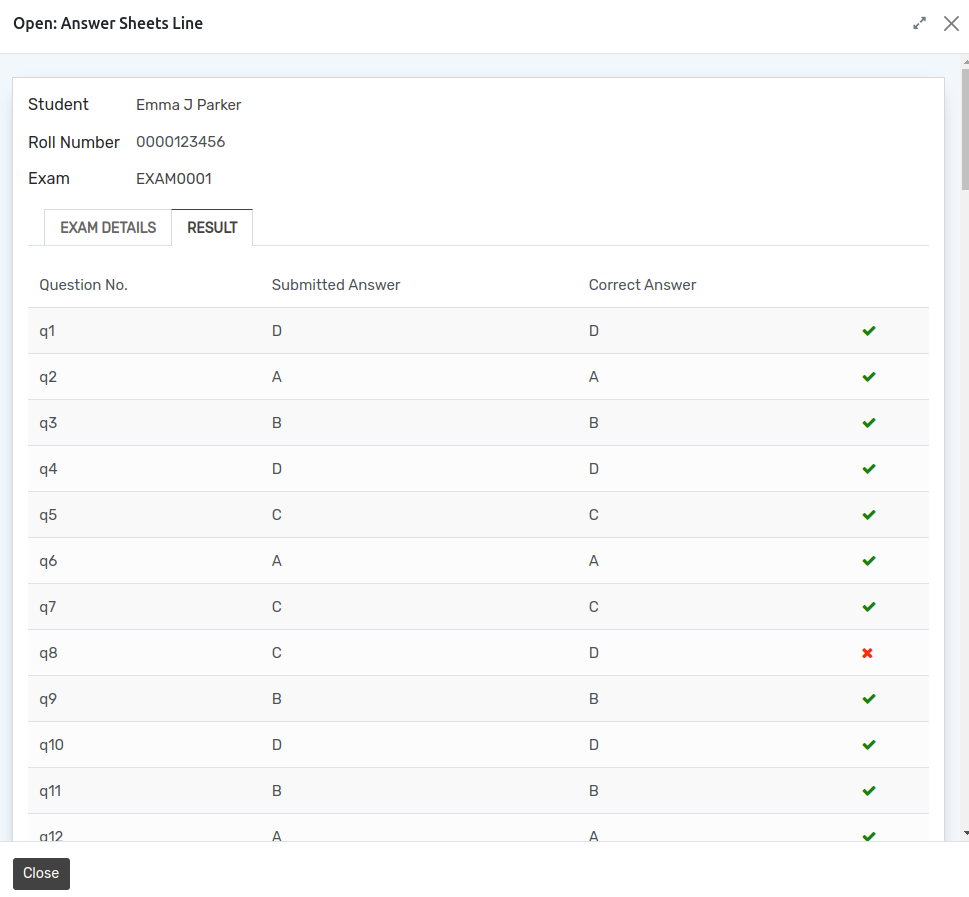
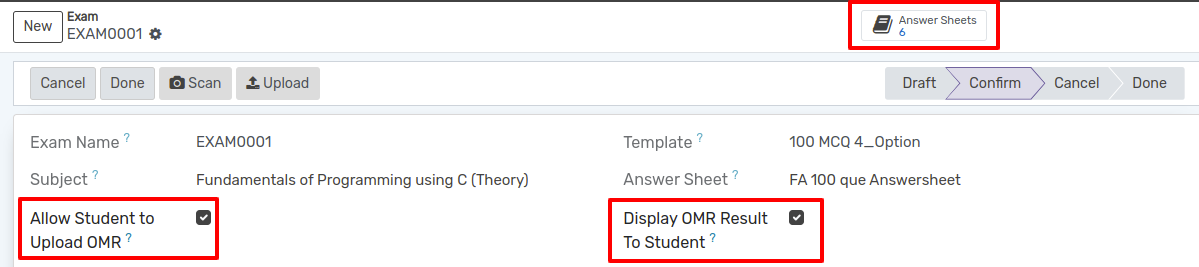
Also you can see the Answer Sheets From the Smart button.
If you want to see the OMR sheet on student profile note that you have to enable the both button that mention in the below image.
Go To .
You Can see the pivot table of the OMR exam.