Configuration de WhatsApp Business
How to register your business
Étape 1 : Accédez à https://business.facebook.com/
Step 2: Click the
Create Accountbutton located at the top-right corner of the page.Step 3: A pop-up window will appear prompting you to enter your business details.
Step 4: Fill in the required information and click
Sign Up.
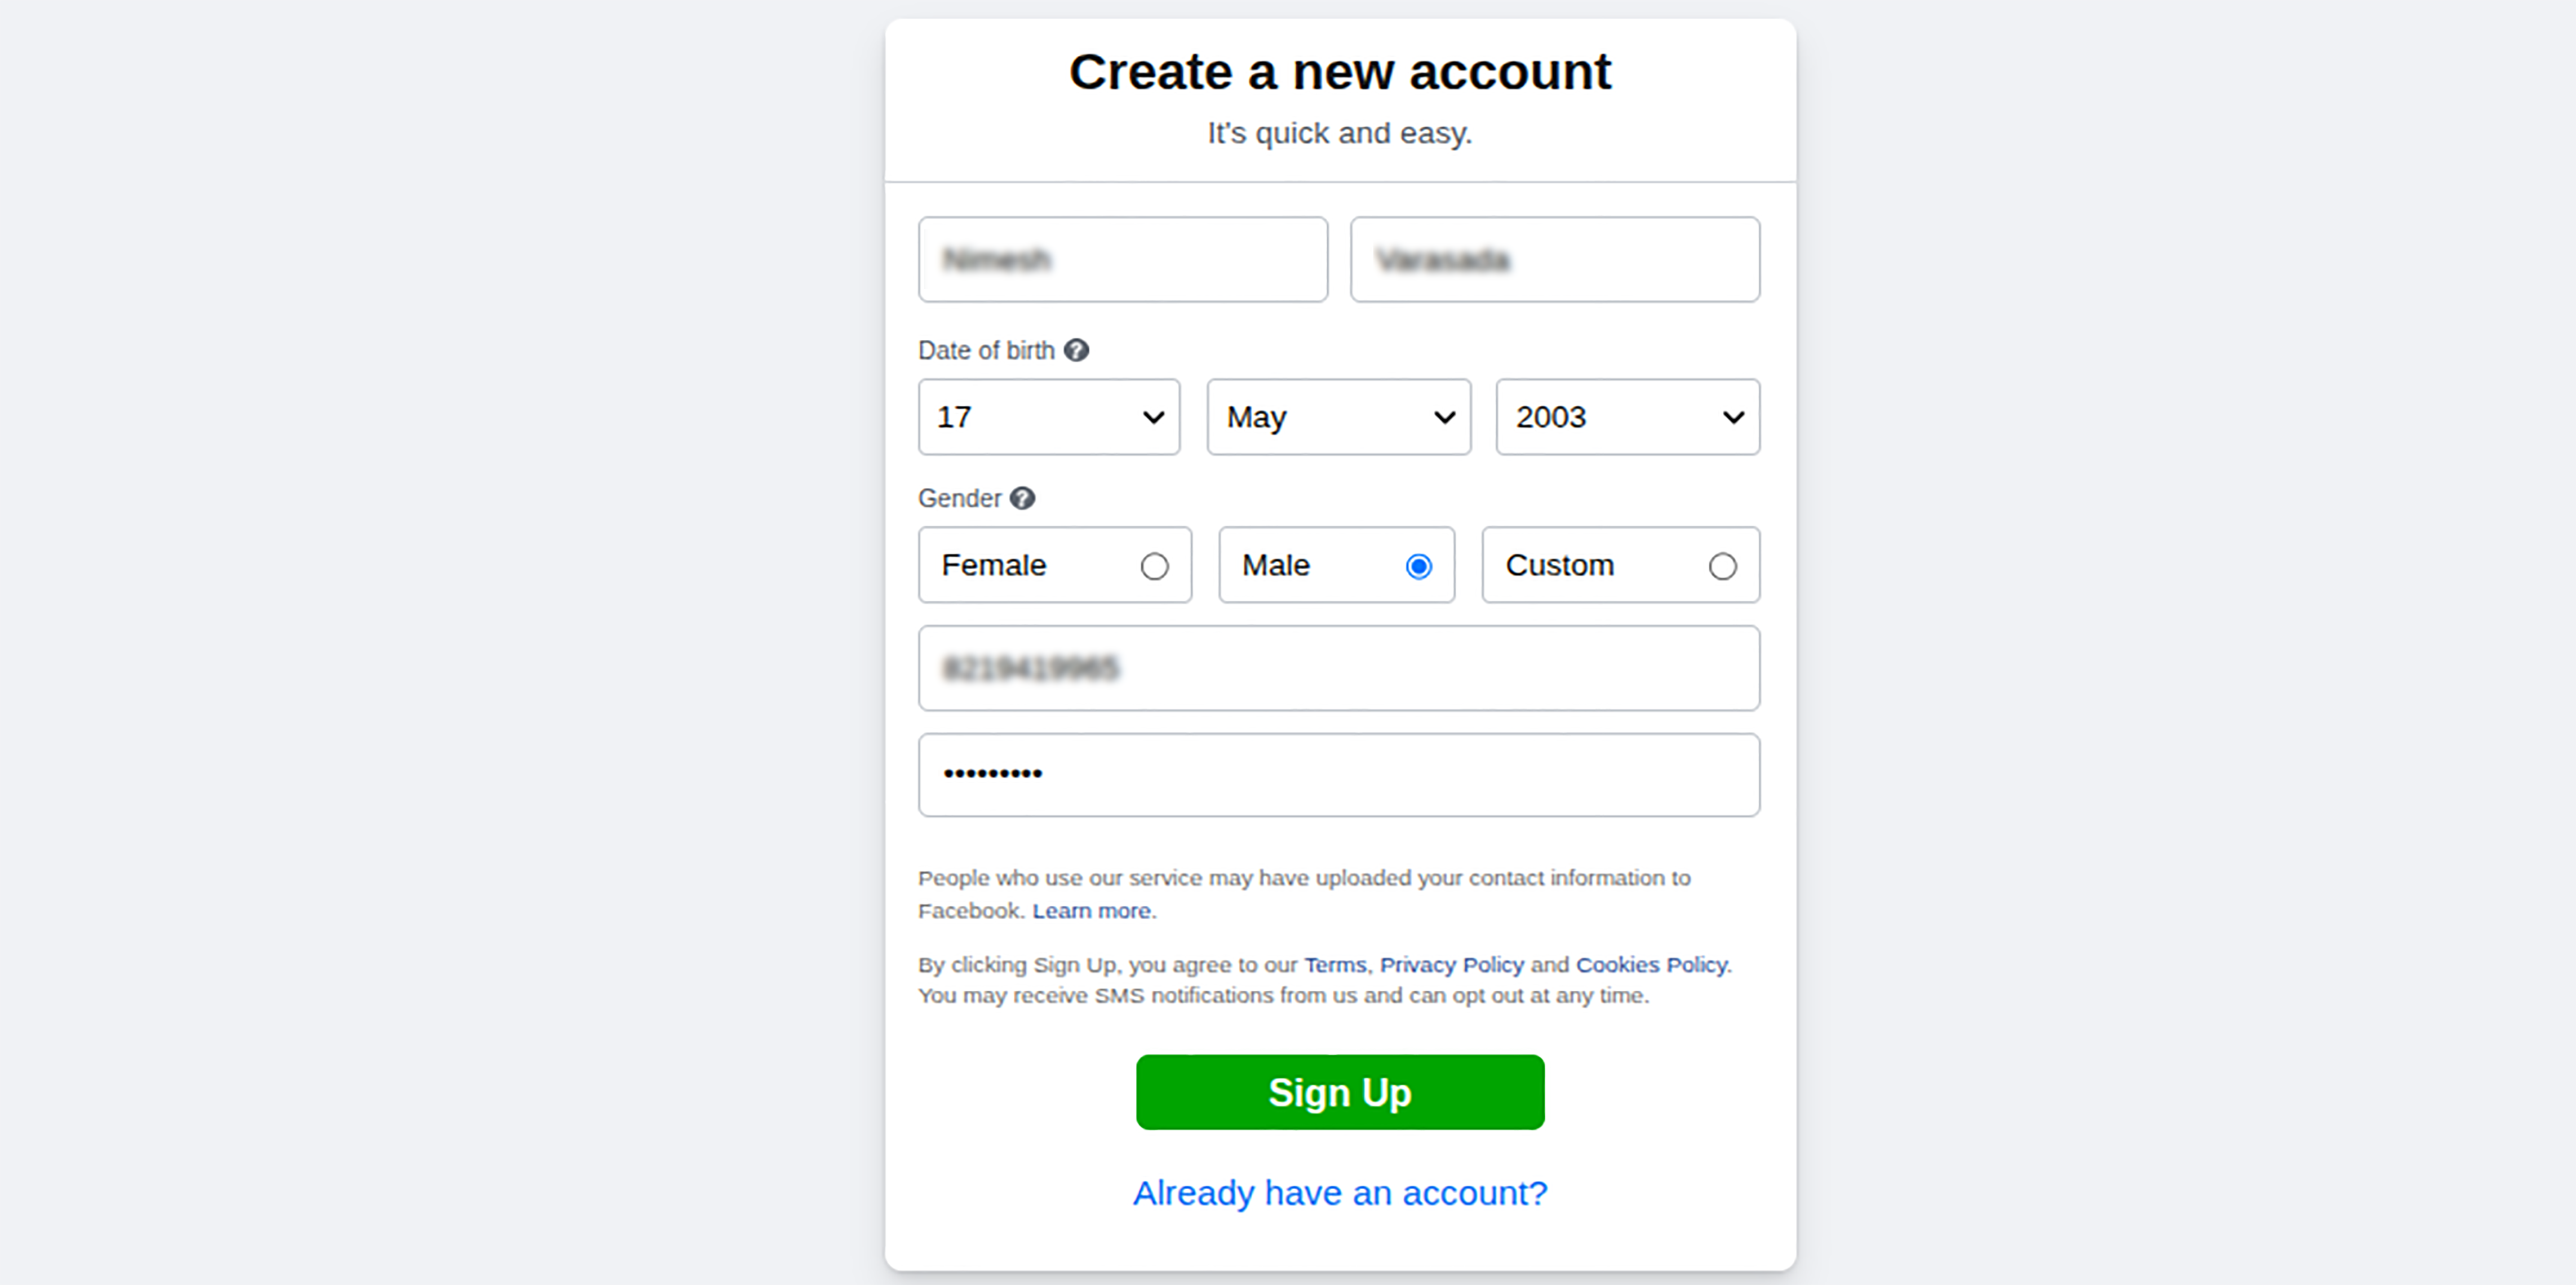
Step 5: After signing up, follow the on-screen instructions in the pop-up to complete your account setup.
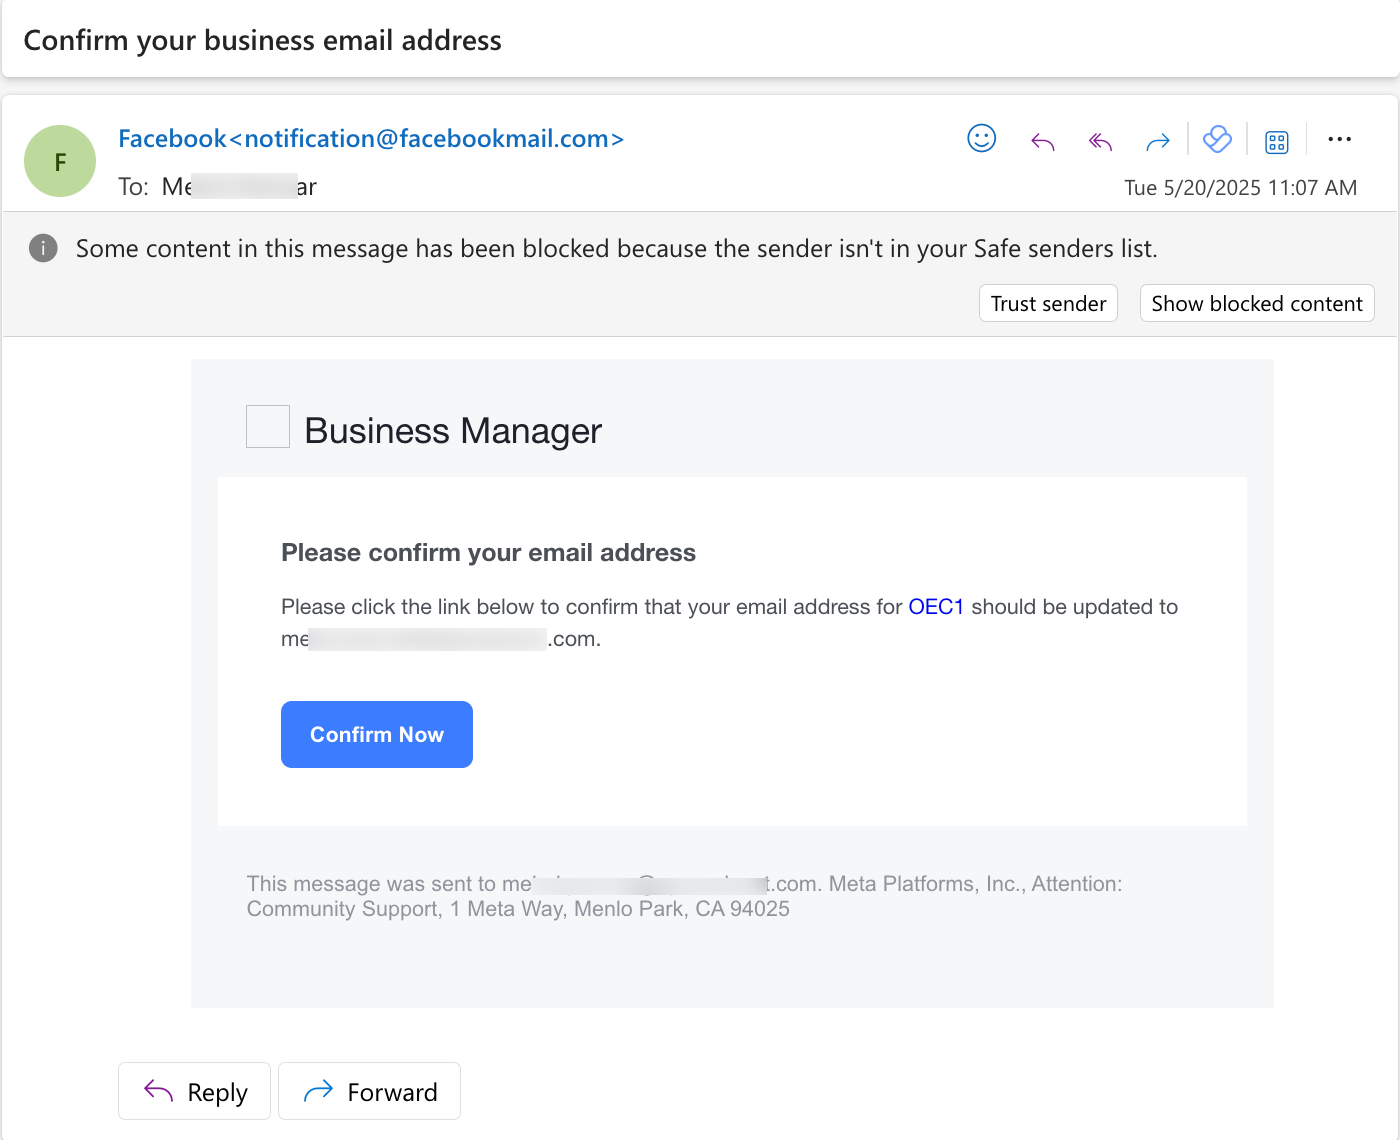
Step 6: Check your email inbox for a confirmation email from Facebook. Click
Confirm Nowto verify your account. (Note: If the confirmation email isn’t in your Primary inbox, check the Social or Promotions tab.)
Step 8: After clicking on the confirm button, you will be directed to the business settings page indicating that the business manager account has been created.
Étape 9 : Vous pouvez également consulter ceci https://www.facebook.com/business/help/1710077379203657?id=180505742745347
How to Create Meta Developer Account
Step 1: While logged into your Facebook account, navigate to https://developers.facebook.com/ and click Get Started.
Step 2: Verify your identity using your mobile number and country code.
Step 3: Confirm your email address, which will be used for developer notifications.
Step 4: When prompted to choose your role, select Developer.
Step 5: Once registration is complete, your Meta Developer account will be active. You can also refer to the official guide here: https://developers.facebook.com/docs/development/register
Create App in Meta
Note: Before starting, ensure you are logged into your Meta Developer account at https://developers.facebook.com/
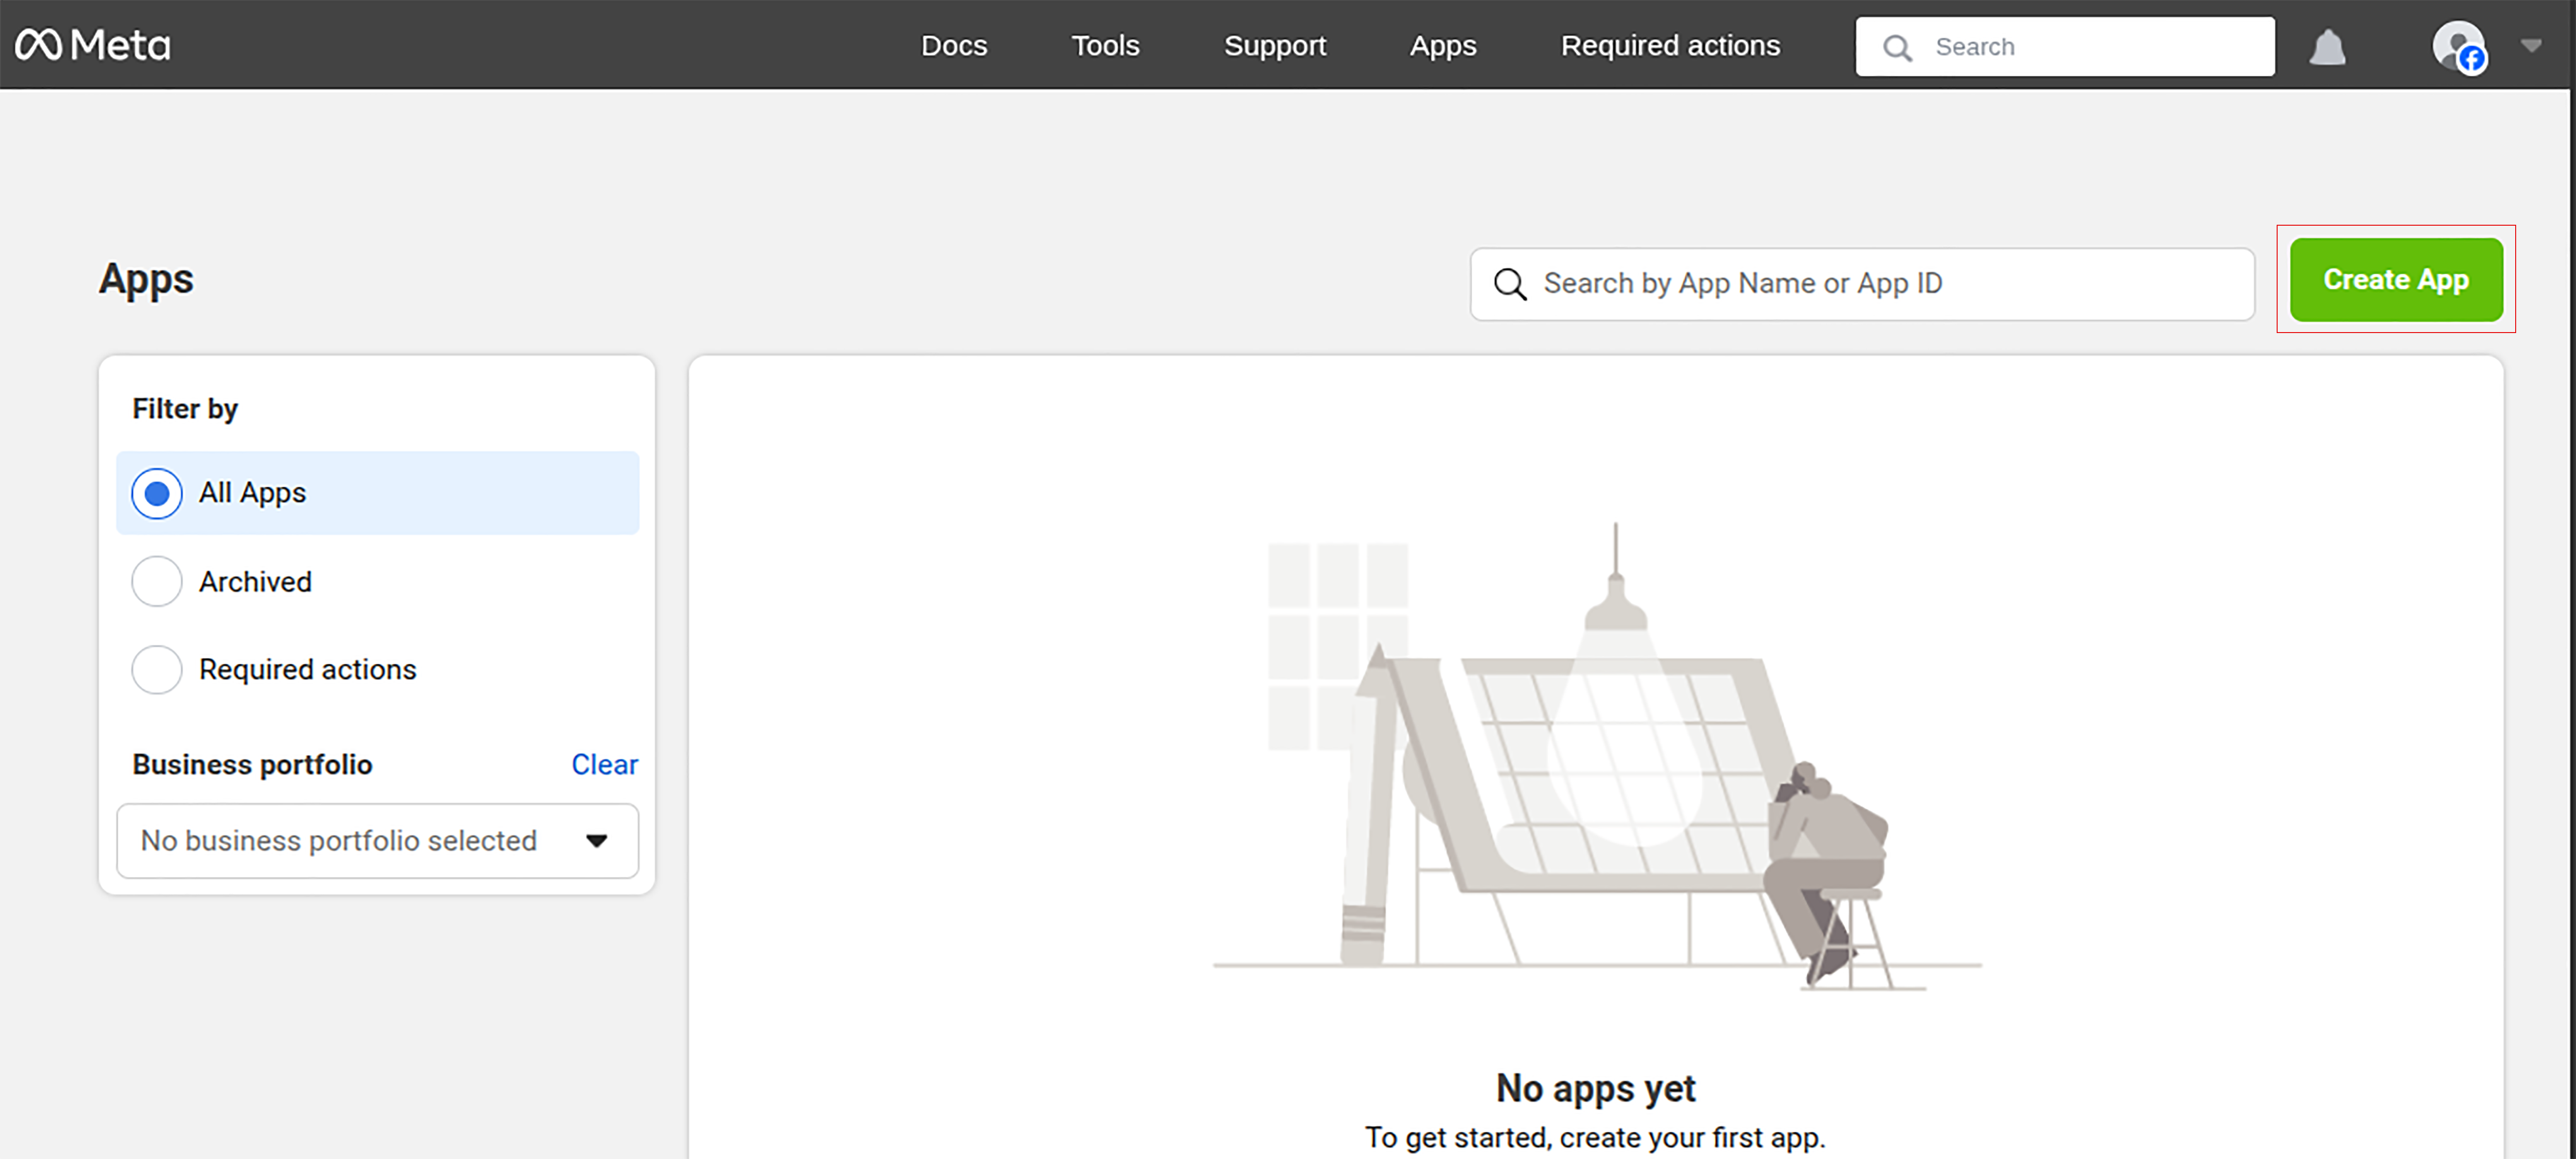
Step 1: Click on
My Appsin the top menu, then selectCreate App.
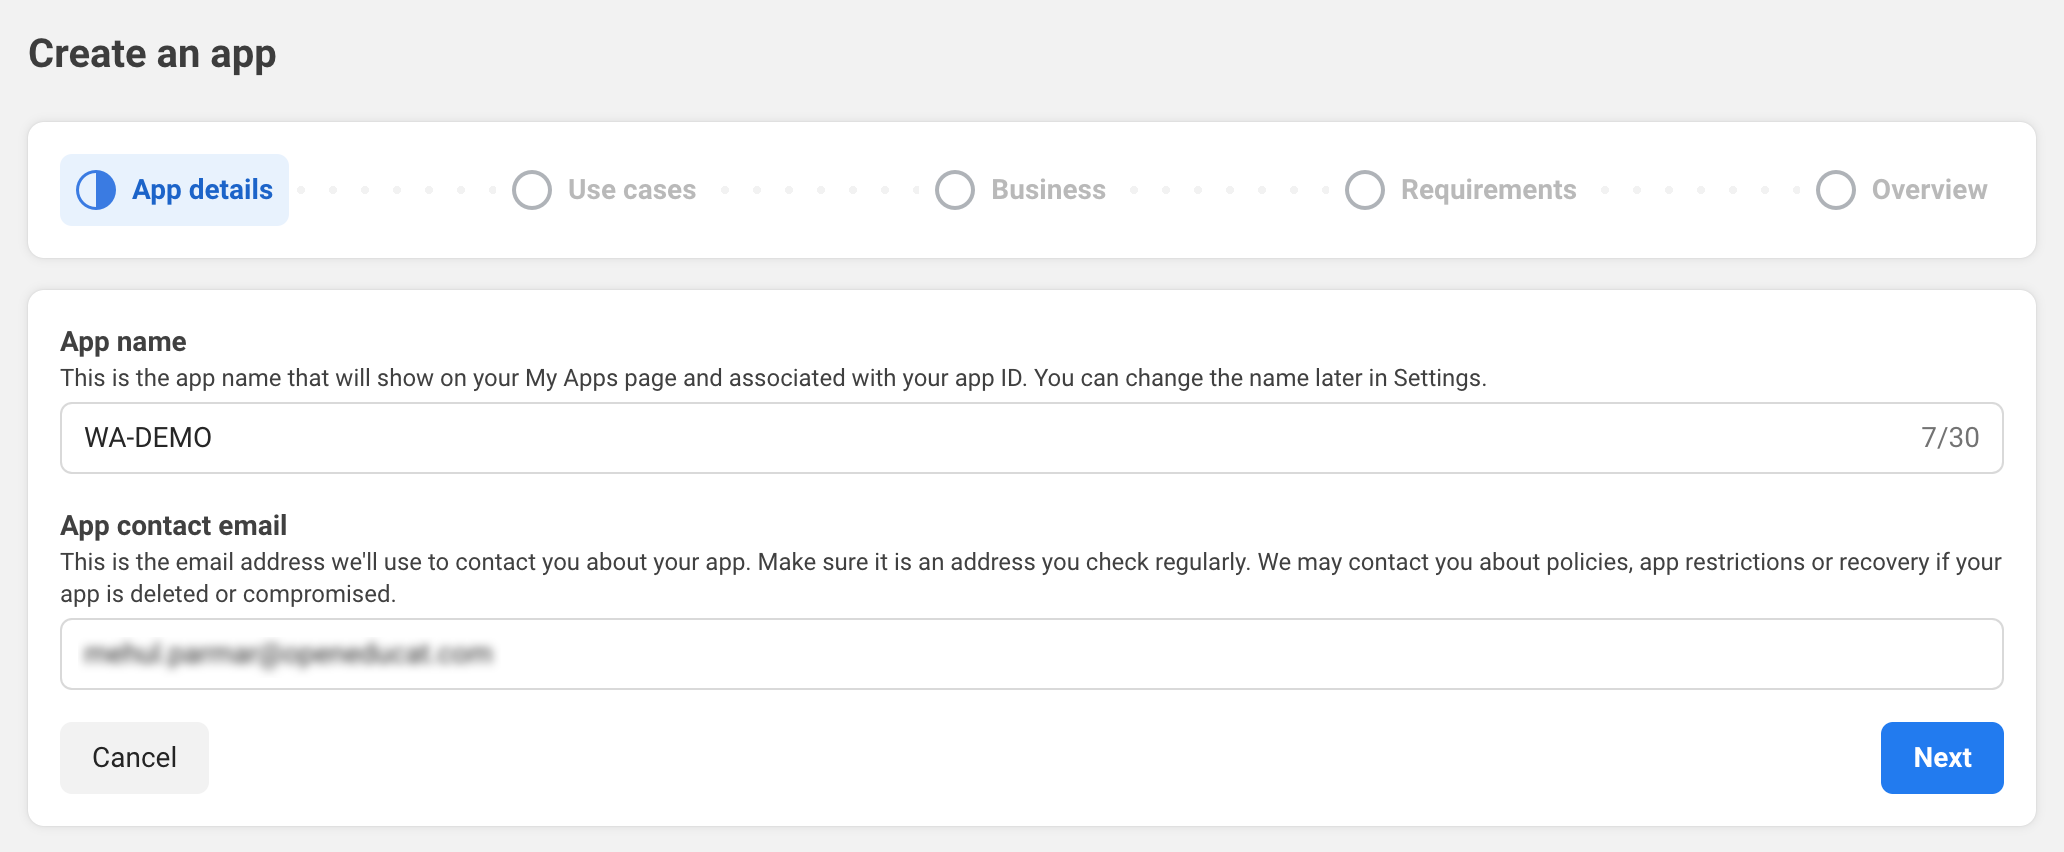
Step 2: Enter your App Name and Contact Email.
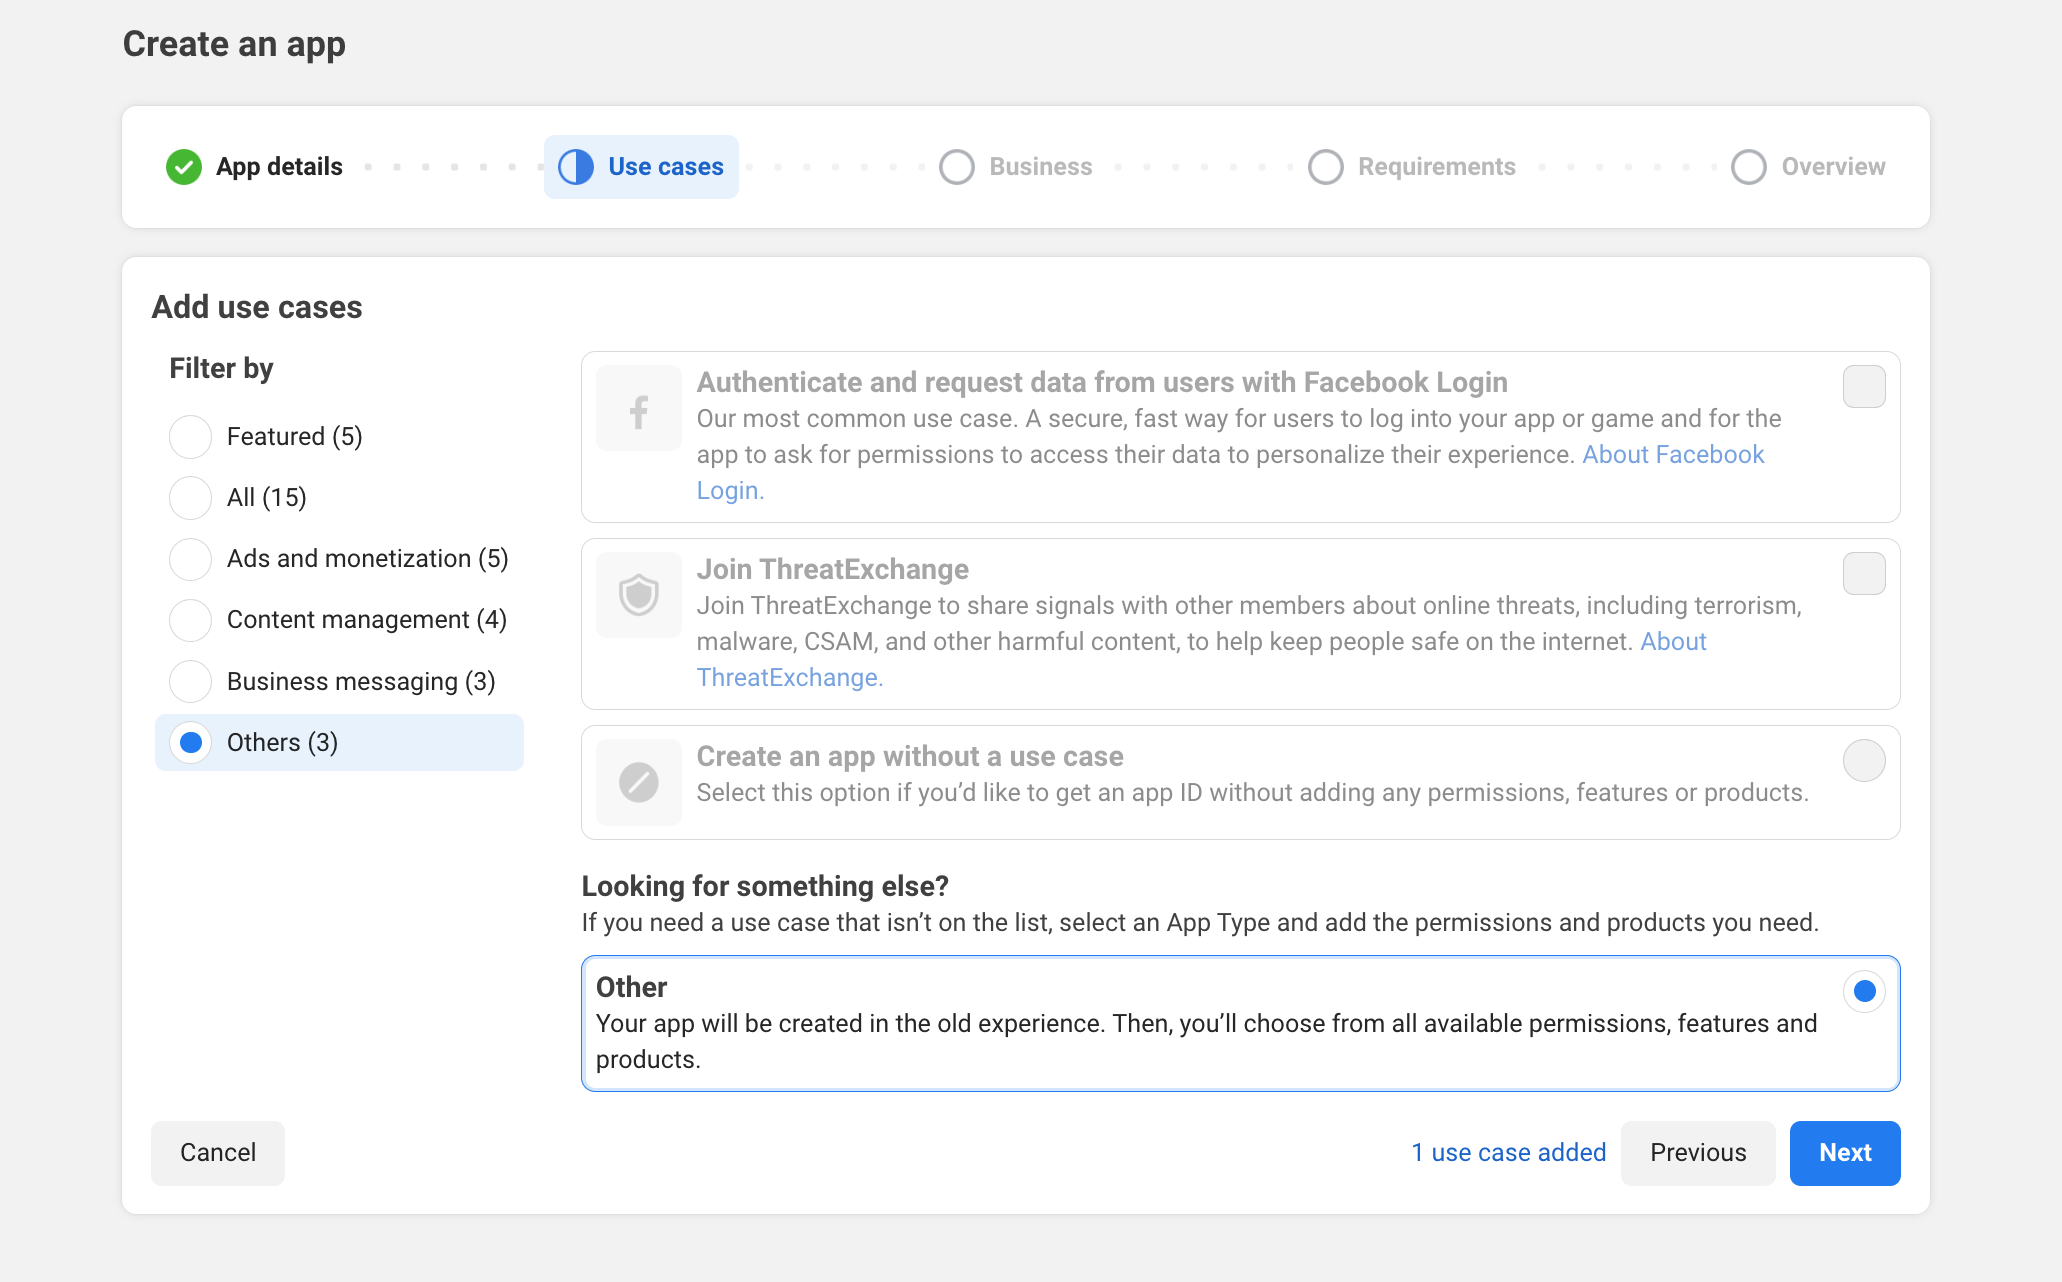
Step 3: Choose your Use Case according to your requirements.
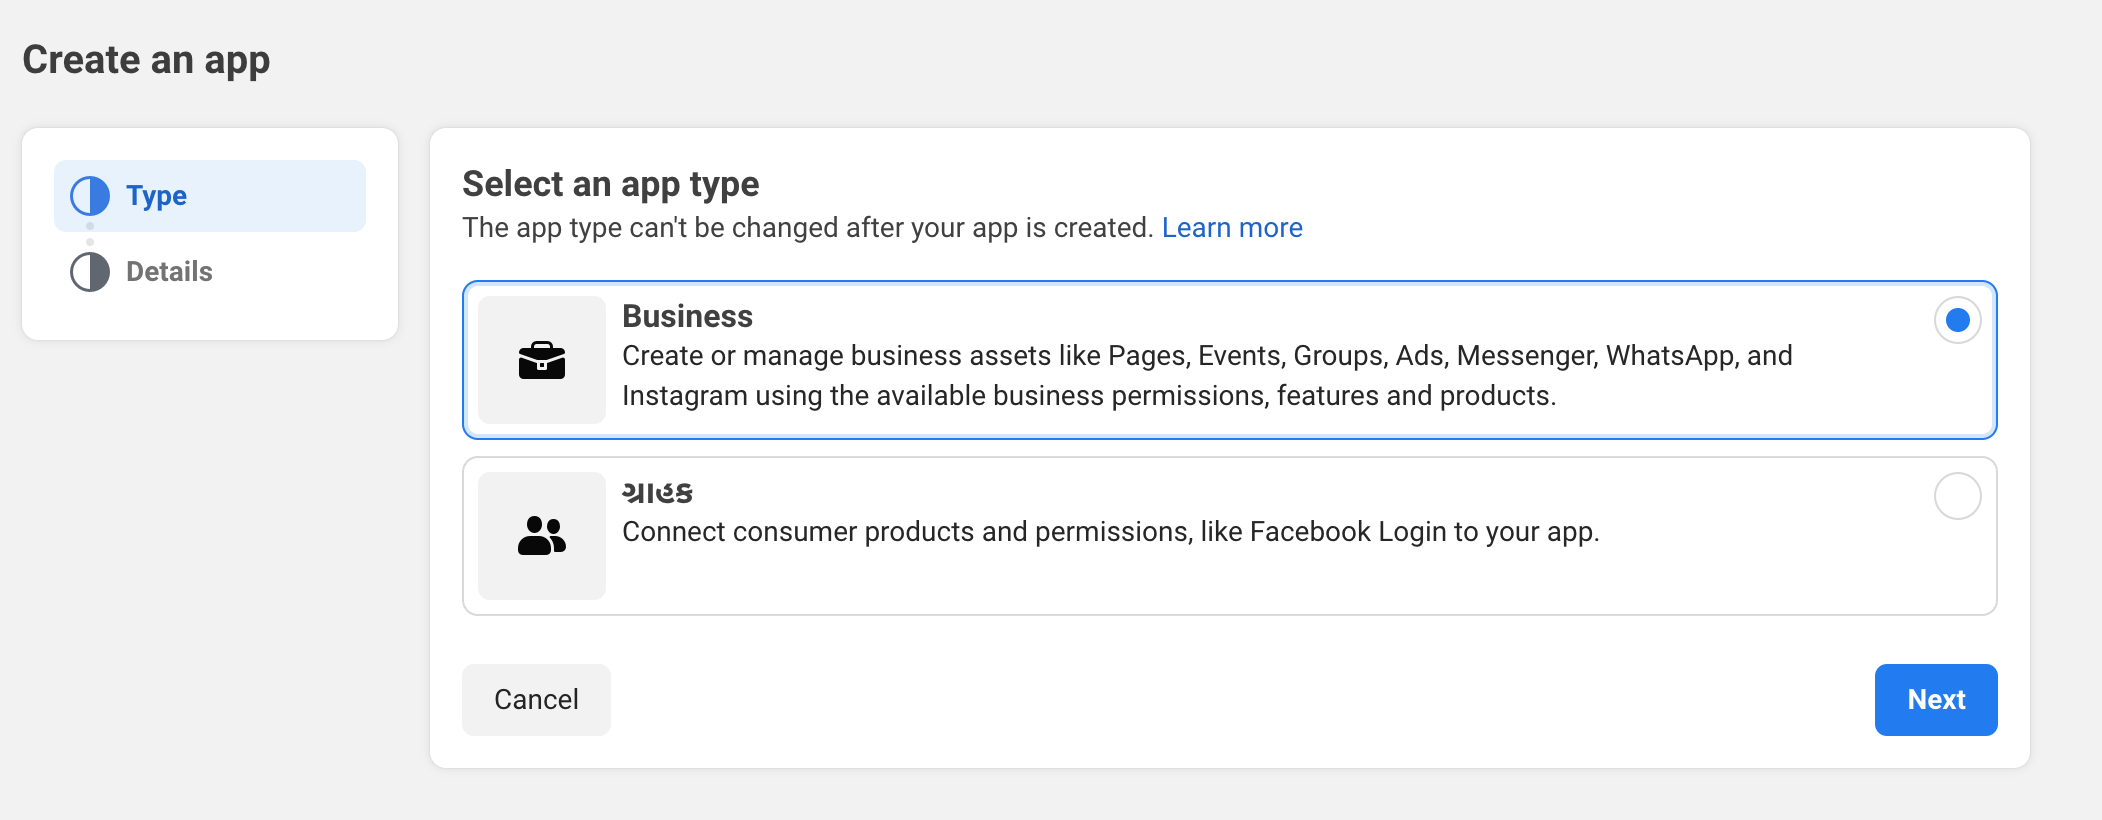
Step 4: Under App Type, select
Business, then clickNext.
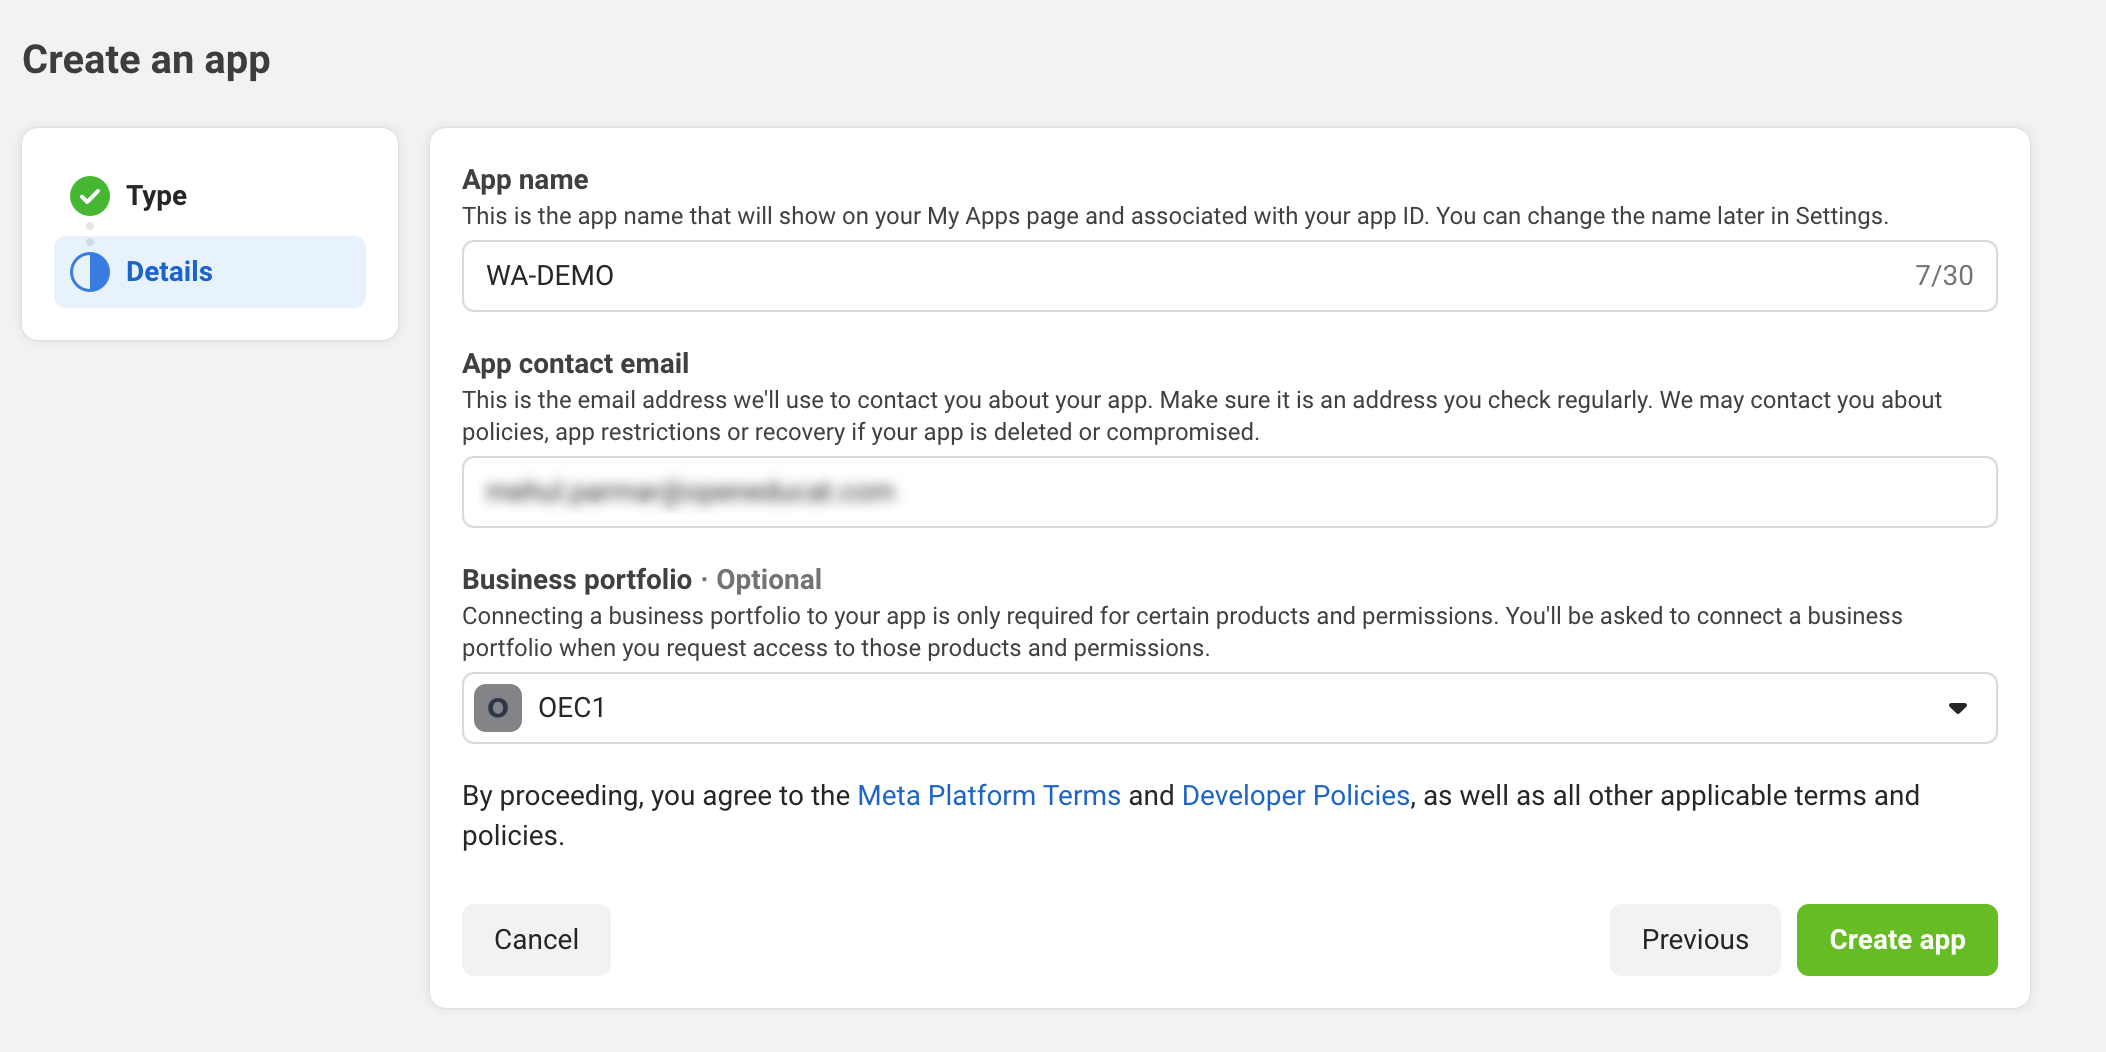
Step 5:Confirm the App Name and Contact Email, and select your Business Account to associate the app with your business.Click
Create Appto proceed.
Comment enregistrer votre entreprise en méta (voir point 1)
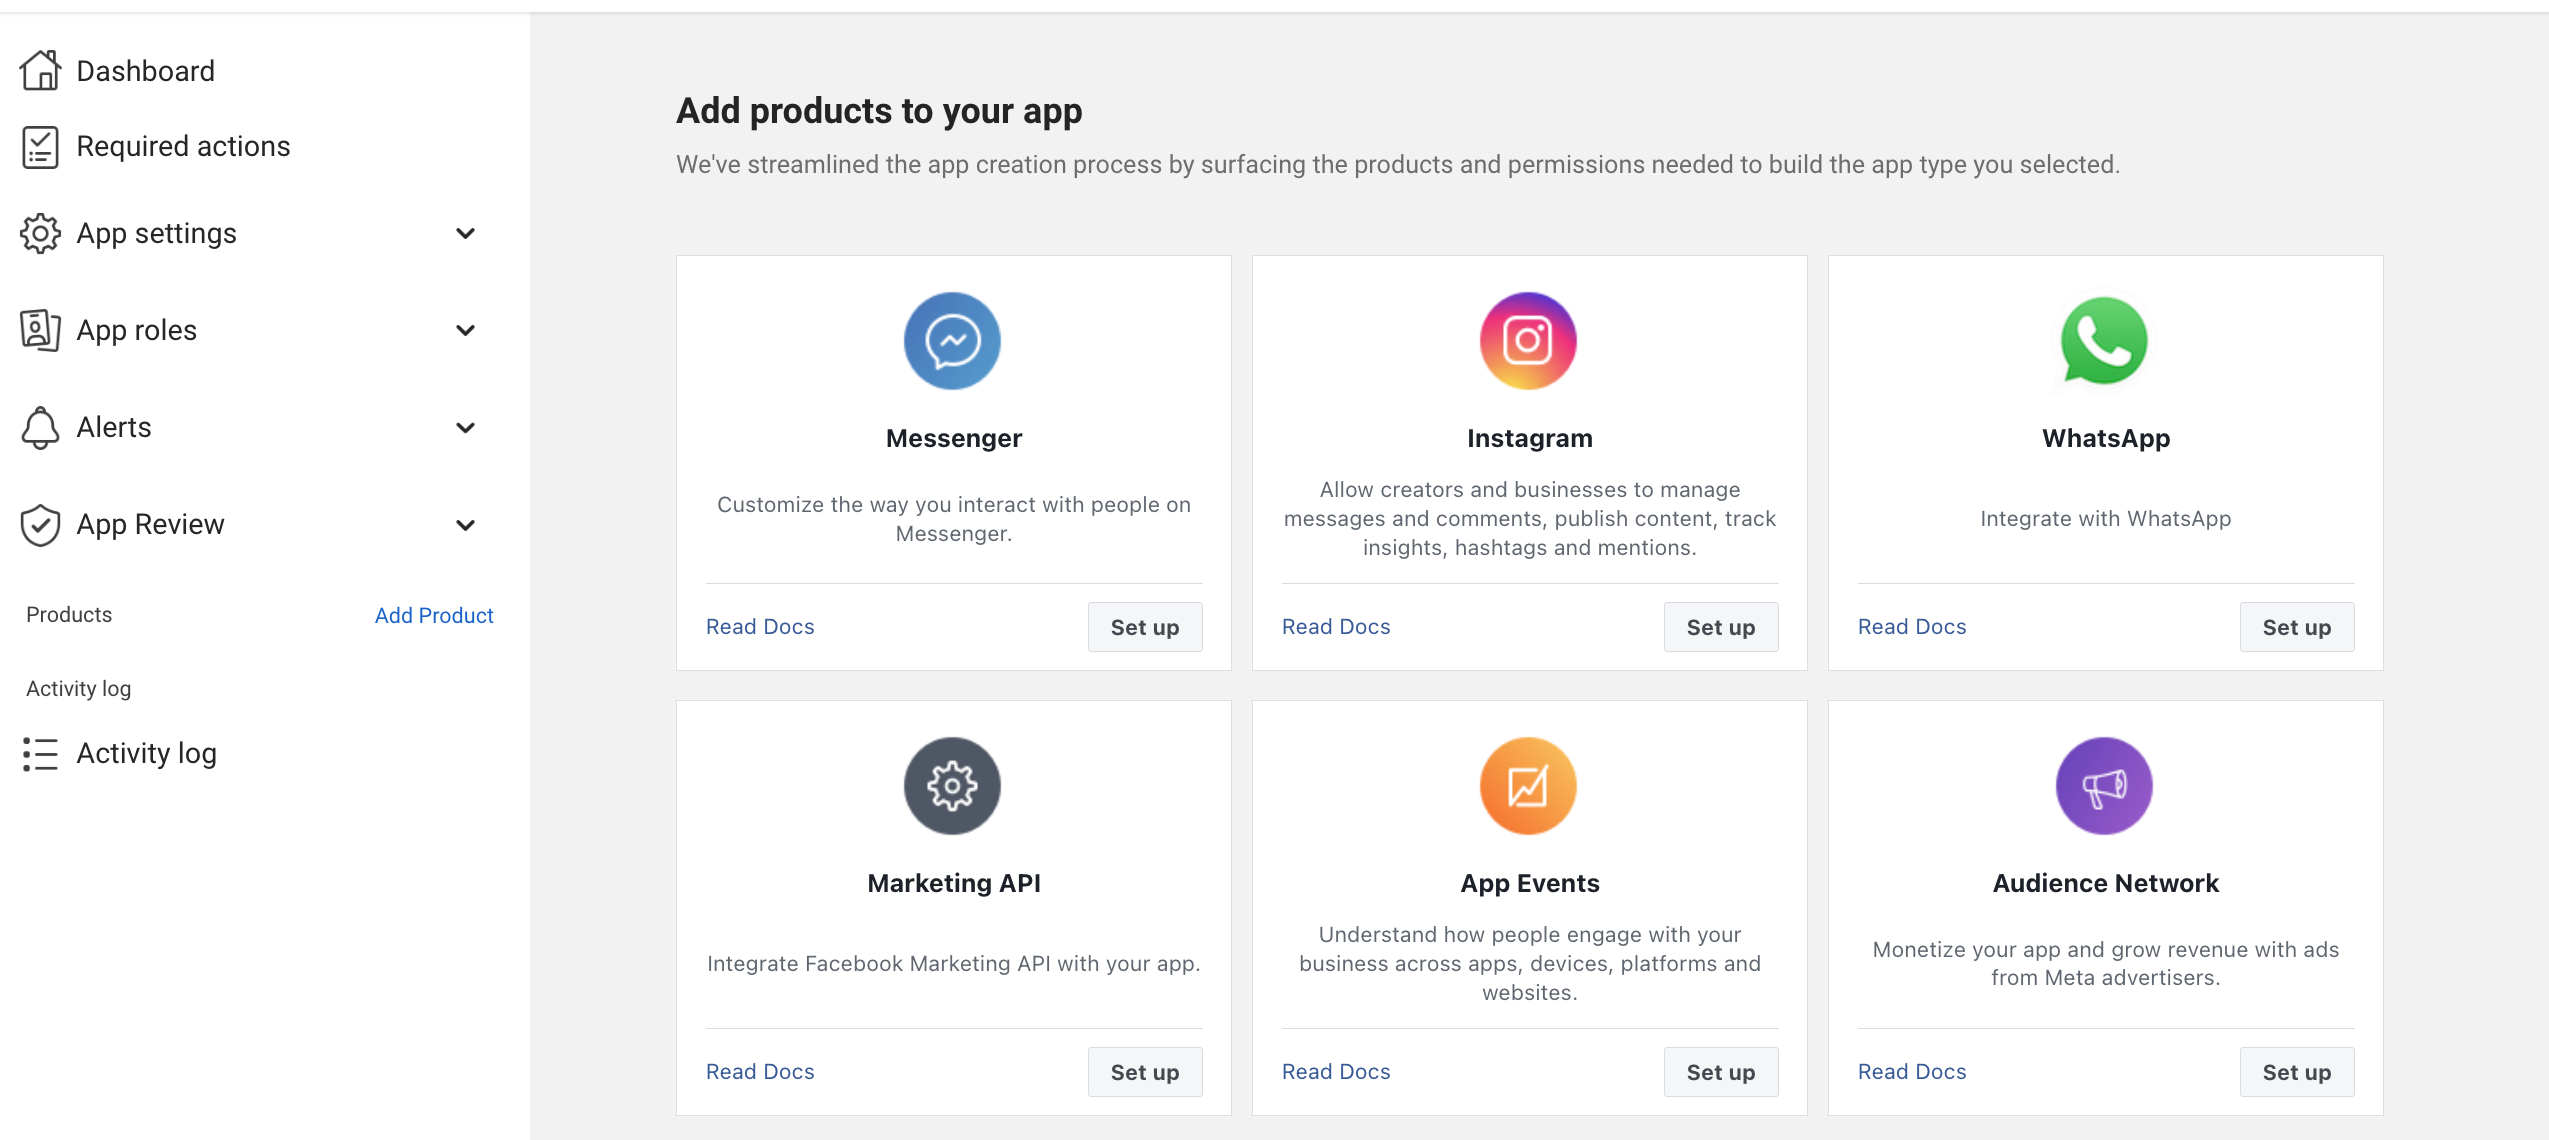
Step 6: Once you have completed the app creation flow your app will be loaded in the App Dashboard. Then, Click on Add Product to add products in the App.
Step 7: You can also refer to this link https://developers.facebook.com/docs/development/create-an-app.
How to link your Facebook page with business
Une fois votre compte Business Manager créé, vous devrez y ajouter votre page entreprise.
Comment enregistrer votre entreprise auprès de Meta (voir le point 1.)
You can now connect your page with the Business Manager Account. Follow the below steps:
Step 1: On the left-hand side navigation pane, go to the Accounts → Pages tab.
Étape 2 : Cliquez sur le bouton Ajouter puis cliquez sur Ajouter une page.
Étape 3 : La fenêtre contextuelle apparaîtra.
Step 4: Click on the Add Page button. If you’re the admin of that page, it will be automatically added.
Add a WhatsApp product to the app
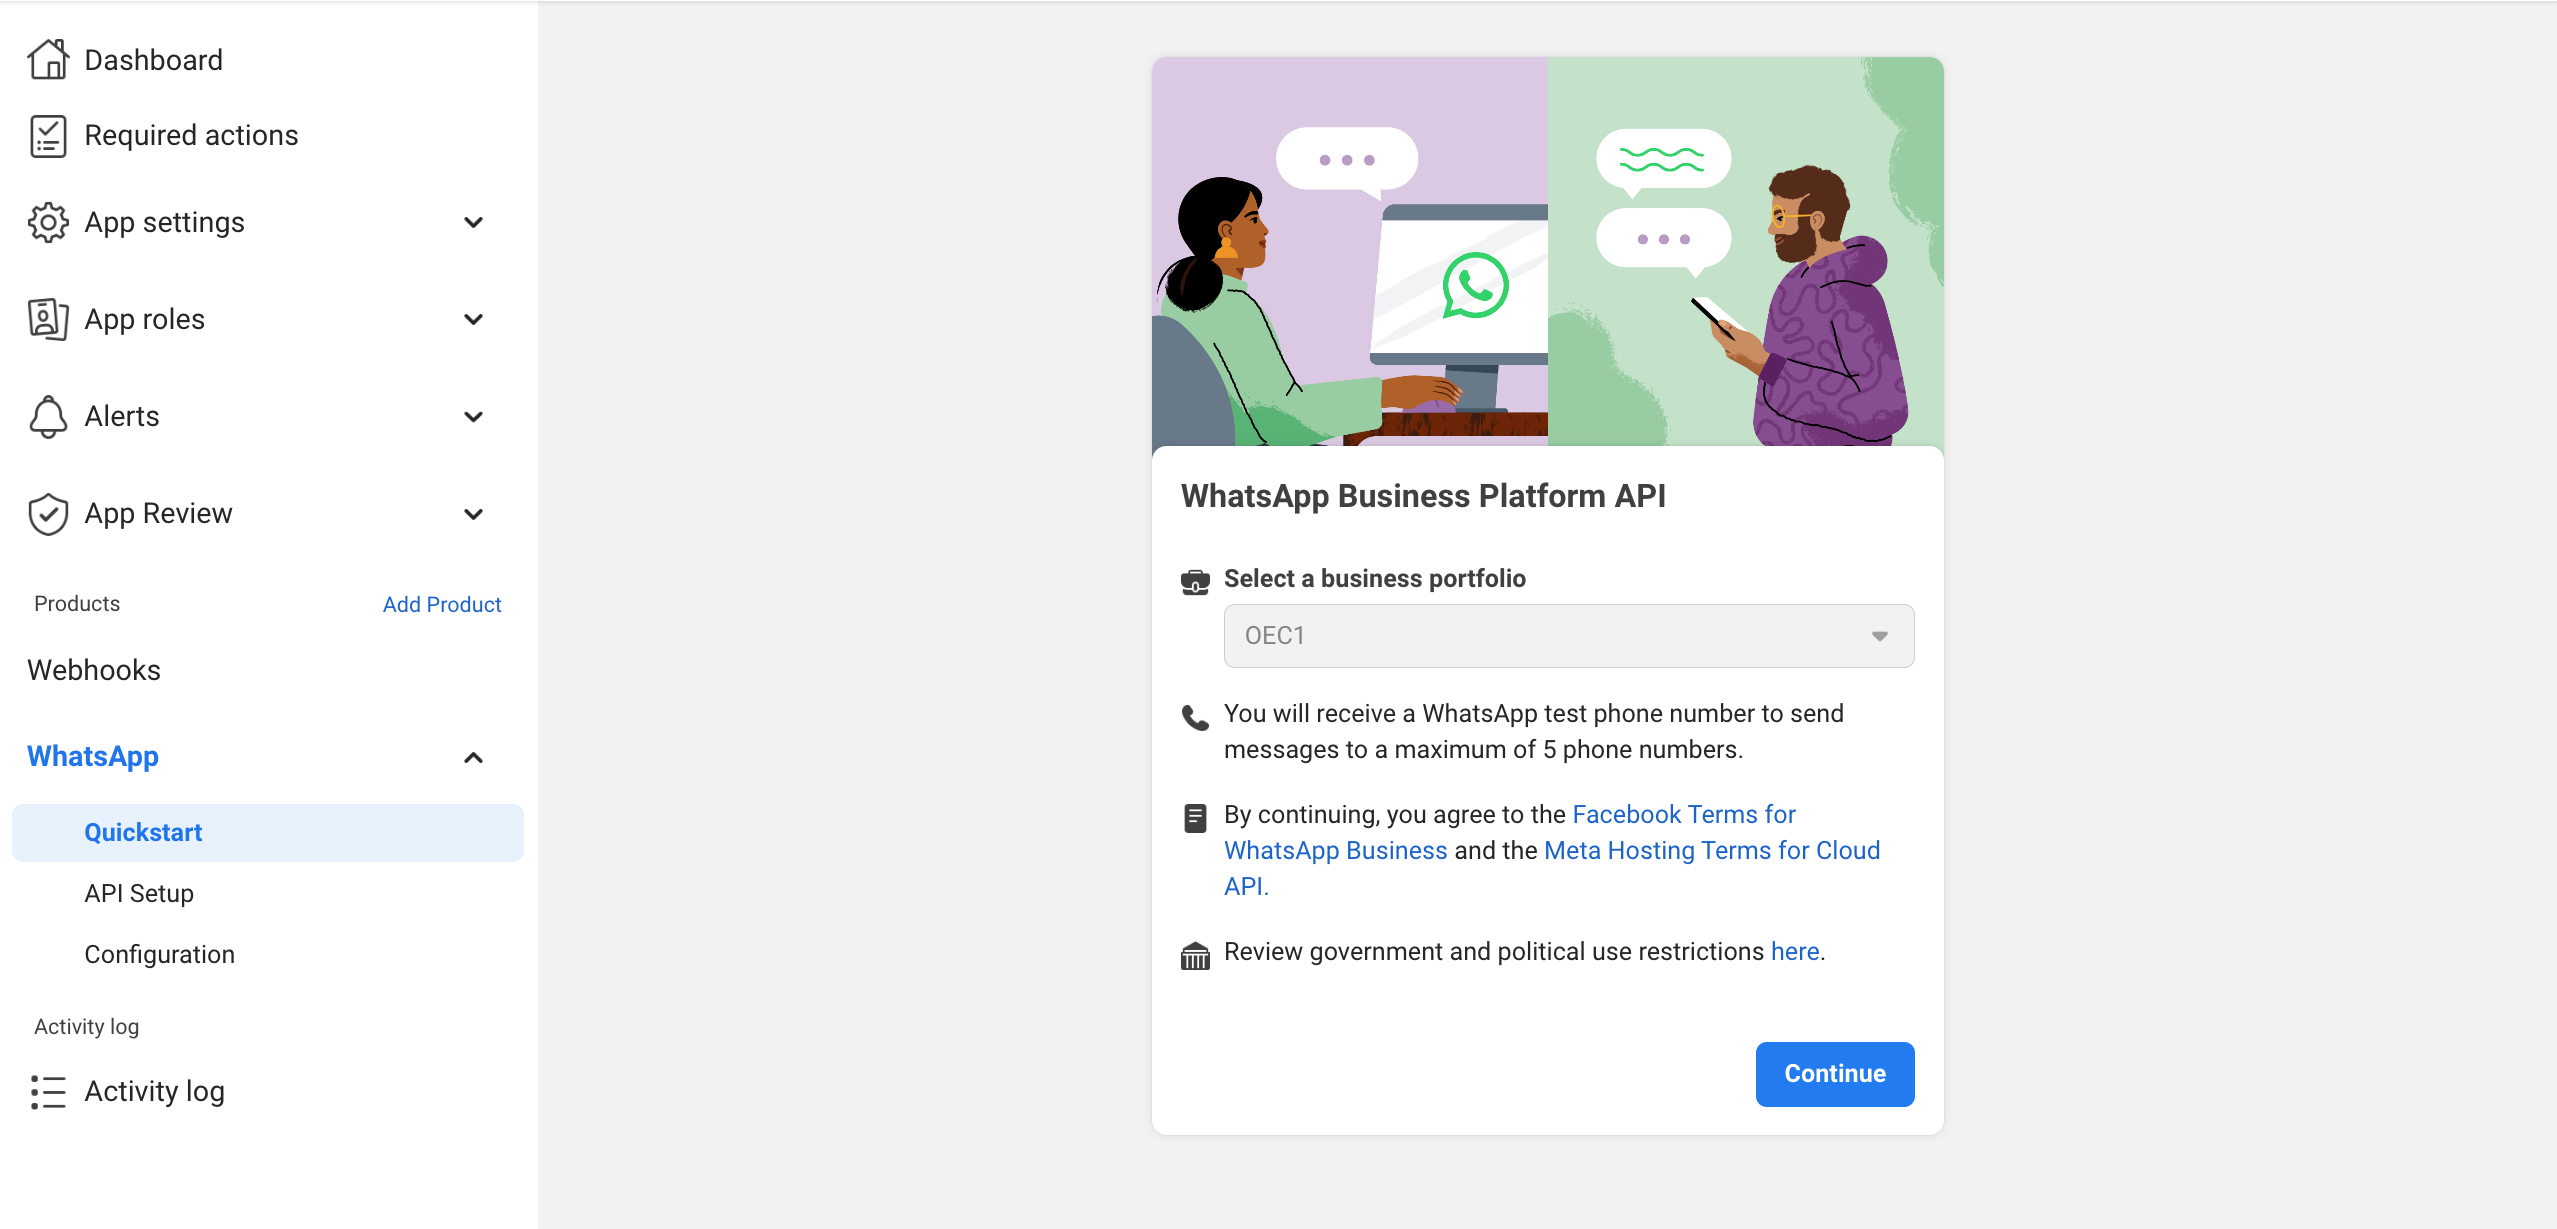
After finishing the previous WhatsApp product wizard, and clicking Continue, the browser should have directed to the WhatsApp Quickstart page; this Quickstart page is where to begin configuring the WhatsApp API by adding a phone number and then sending an initial test message. Go to https://developers.facebook.com/ then Click on your new created app and then click on add product:
Ajouter WhatsApp dans l’application
Cliquez sur WhatsApp pour ajouter un produit dans l’application.
ID d’application et clé secrète d’application
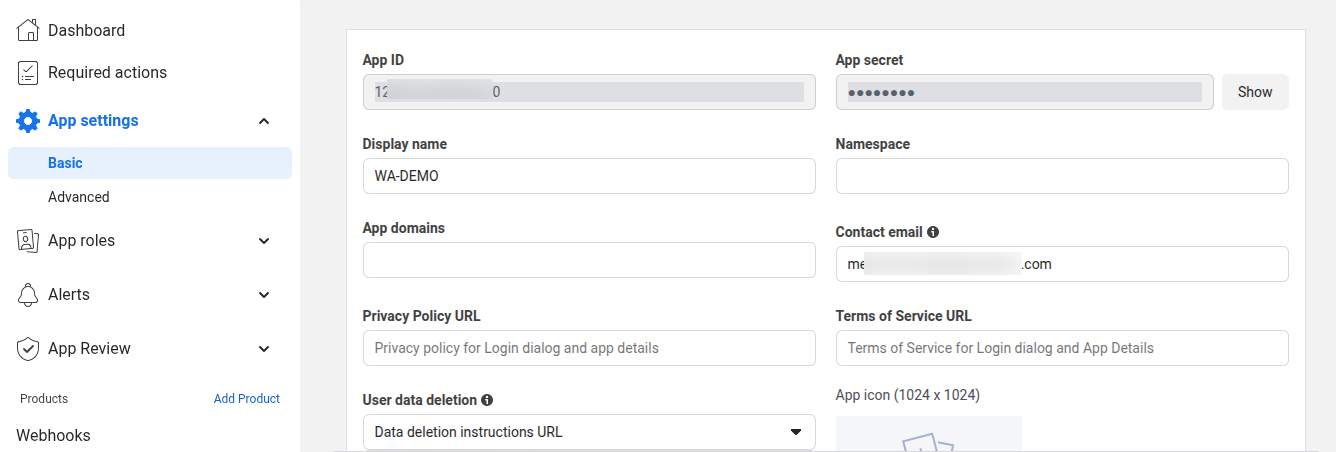
Go to Settings ‣ Basic Click on Show to see your App secret key & App ID. This Secret key and App ID will be used to create a Whatsapp Business Account.
Jeton d’accès, identifiant de téléphone, identifiant d’entreprise Whatsapp
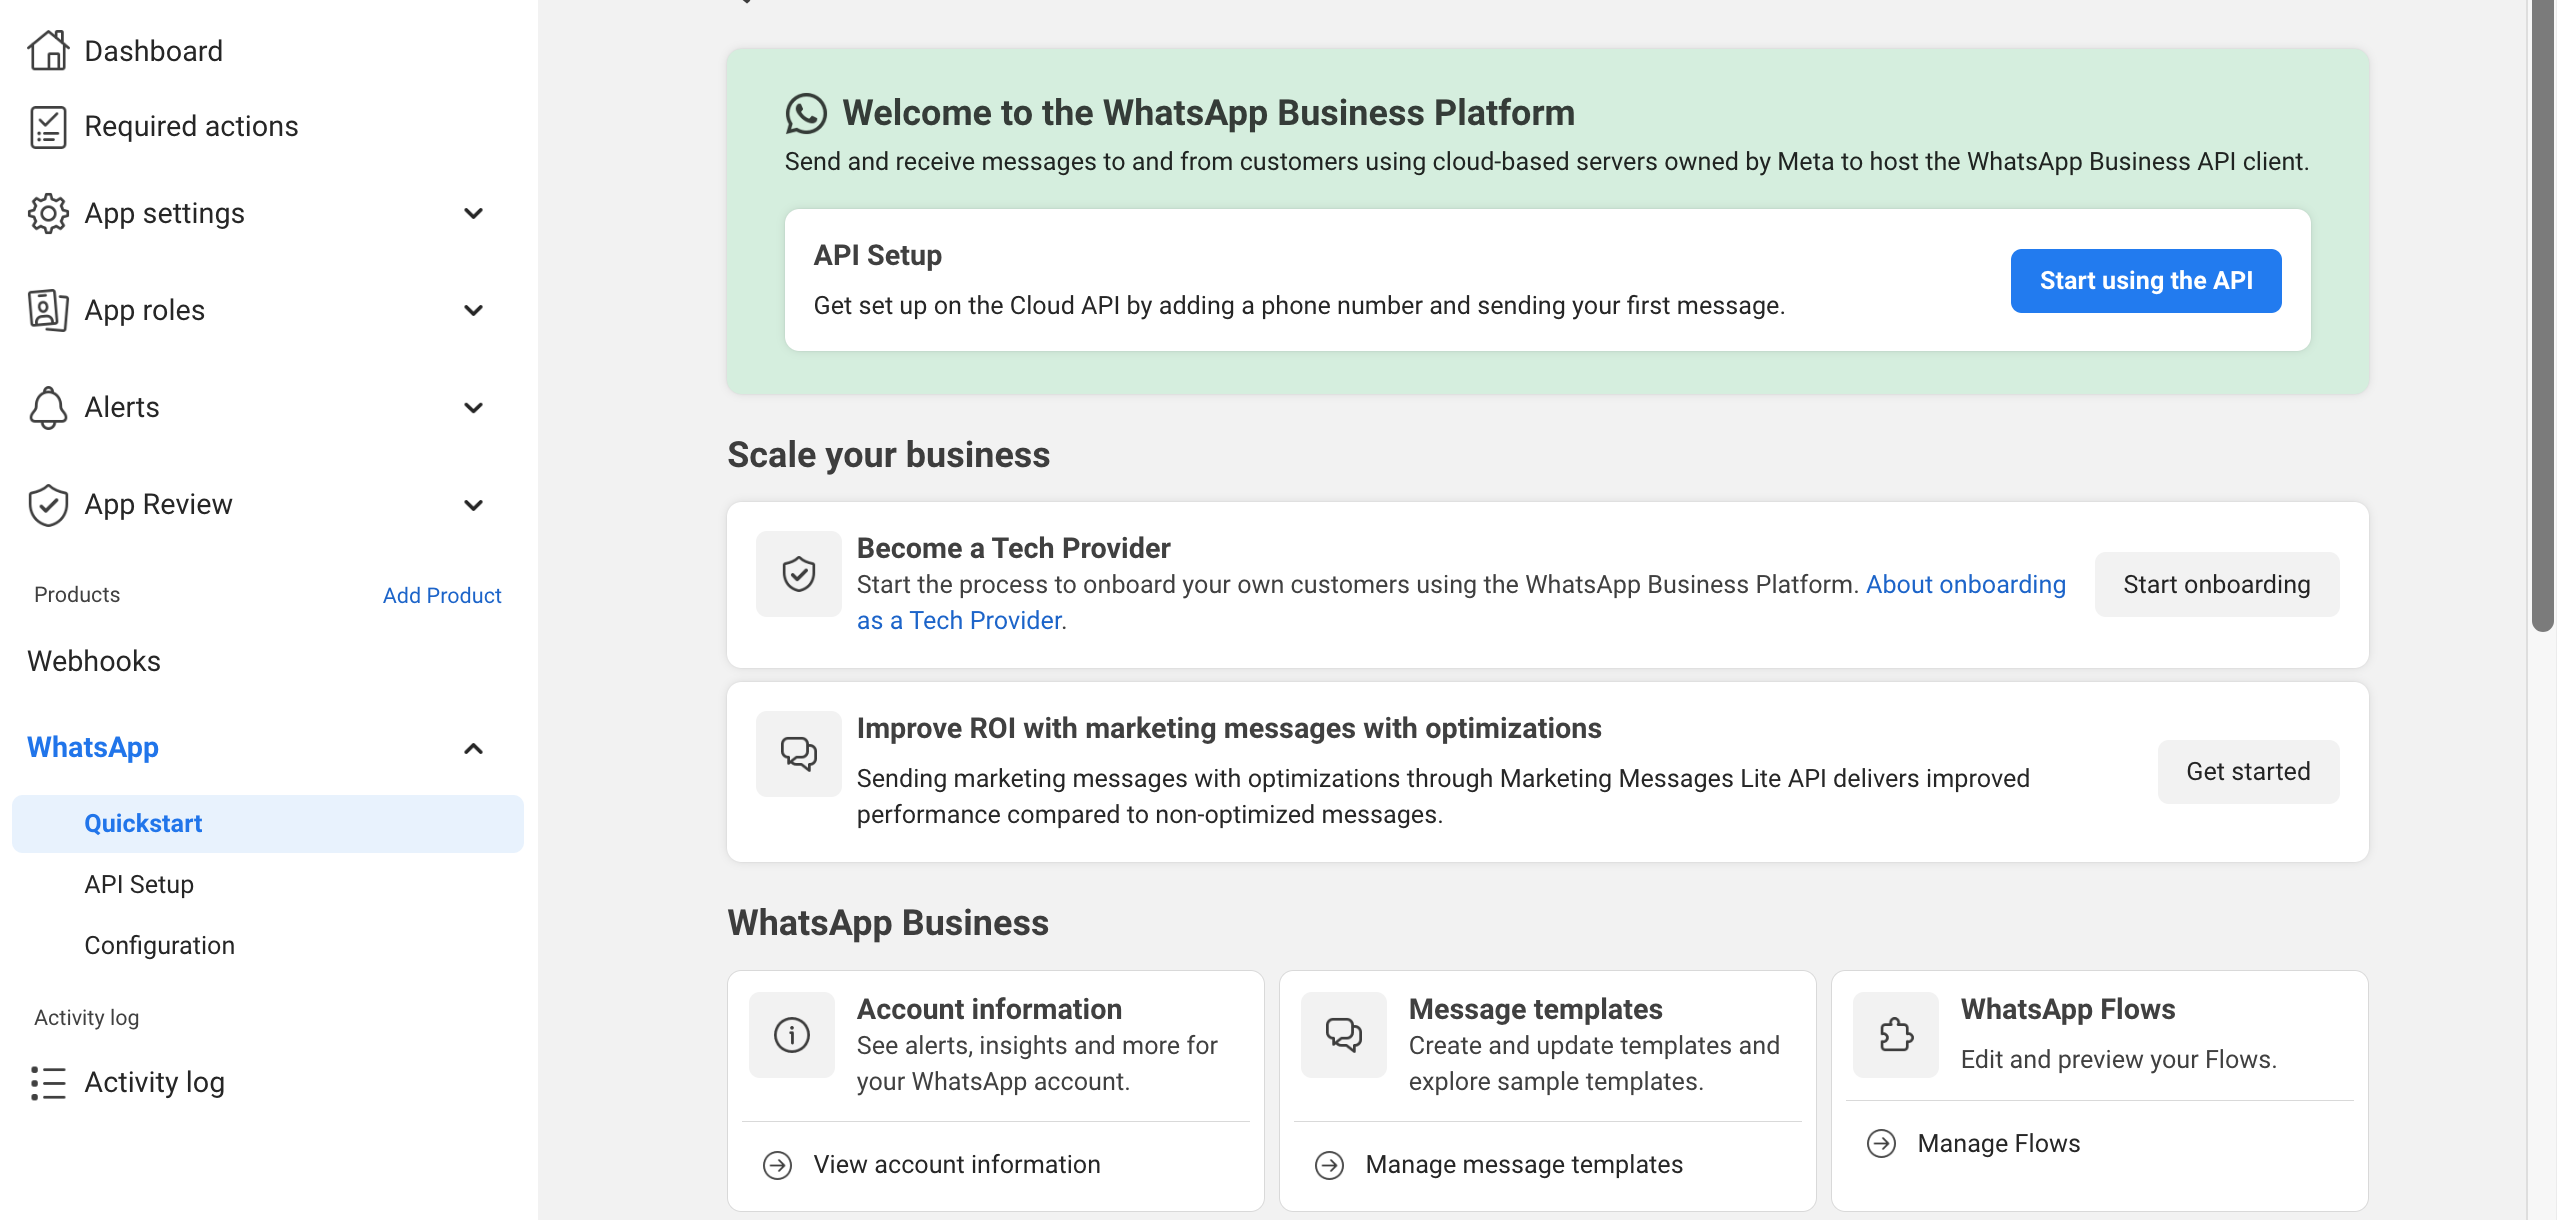
Go to After clicking Start using the API, you’ll be taken to the API Setup page.
To test if WhatsApp is working, scroll down to the Send and receive messages section.
Step1: Select phone numbers, click the drop-down next to To.
Step2: Click Manage phone number list.
Step3: Add up to 5 phone numbers you want to send test messages to.
Step4: Enter the country code and phone number, then click Next.
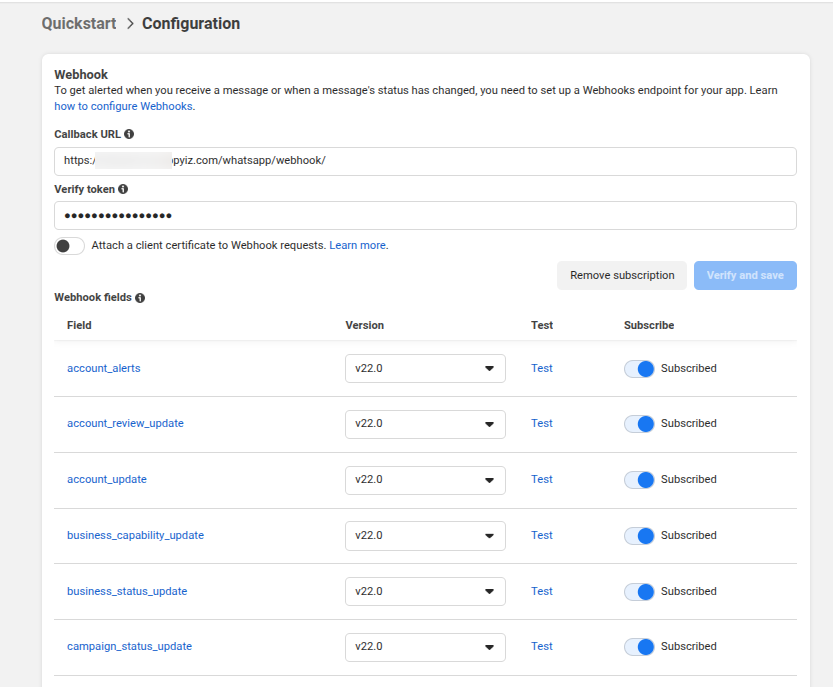
Configuring webhooks
When you receive a message or when a message’s status has changed, you need to set up a Webhooks endpoint for your app to receive the message.
Step 1: Go to https://developers.facebook.com/ then open your created app.
Step 2: In your App Dashboard, find the WhatsApp product and click Configuration. Then, find the webhooks section and click Configure a webhook or Edit . After the click, a dialog appears on your screen and asks you for two items:
Callback URL: This is the URL Meta will be sending the events to. So you have to add your URL here. ( Example: https://www.abcdef.com/whatsapp/webhook/)
Verify Token: This string is set up by you, when you create your Whatsapp business account .( Example: abc12345 ) How to Create business account in Whatsapp.
Step 3: After adding the information, click Verify and Save.
Step 4: Click on Manage to add webhook fields access to your app.
How to link your WhatsApp Business Profile with your Phone number
Step 1: Go to from the left menu and click « Add phone number » under Step 5.
Step 2: Enter a Display Name, select your Timezone, choose a Business Category, and add a short Description.
Step 3: Click Next, select your Country Code, enter your Phone Number, and choose how you’d like to receive the Verification Code (Text or Call).
Step 4: Enter the received code, click Next, and your number will be added.
Step 5: You can now select the number from the « From » dropdown in the Send and receive messages section to start messaging.
Step 6: You can also refer to this link https://developers.facebook.com/docs/whatsapp/cloud-api/get-started/add-a-phone-number for configuring phone number in your whatsapp business account.
Configuration de WhatsApp Business
Create Whatsapp Business
Go to Click on Create to create a new Business. Details of Business
Nom de la boutique : - Ajoutez le nom de la boutique/de l’entreprise.
Photo de profil d’entreprise : - Téléchargez votre photo de profil d’entreprise.
Business Account Id :- Add the Business Account Id you obtained from your Meta App
App Id :- Add the App Id you obtained from your Meta App
Phone Number ID :- Add the Phone Number ID you obtained from your Meta App.
Attribuer le chat par défaut à : - Ajoutez l’attribution du chat par défaut à.
App Secret Key :- Add the App Secret Key you obtained from your Meta App.
Jeton de vérification Webhook : - Ajoutez le jeton de vérification Webhook.
Numéro de mobile : - Ajoutez le numéro de mobile.
Pays : - Ajoutez le pays.
Jeton d’accès : - Ajoutez le jeton d’accès.
Configurer la vue du site Web de WhatsApp Chat
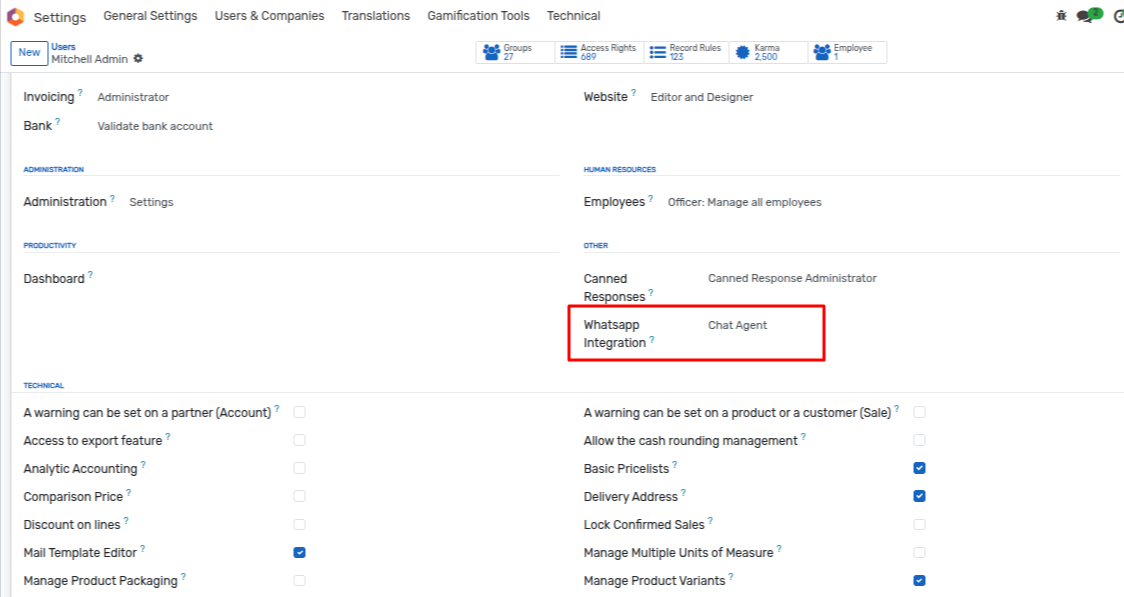
First, ensure the Admin user has the required access rights to manage WhatsApp settings. Go to open the user (e.g., Admin), and assign one of the following under the Access Rights tab:
Manage: Full access to configure WhatsApp Business settings, chat templates, and connect numbers.
Chat Agent: Can only respond to customer chats on the website; no configuration access.
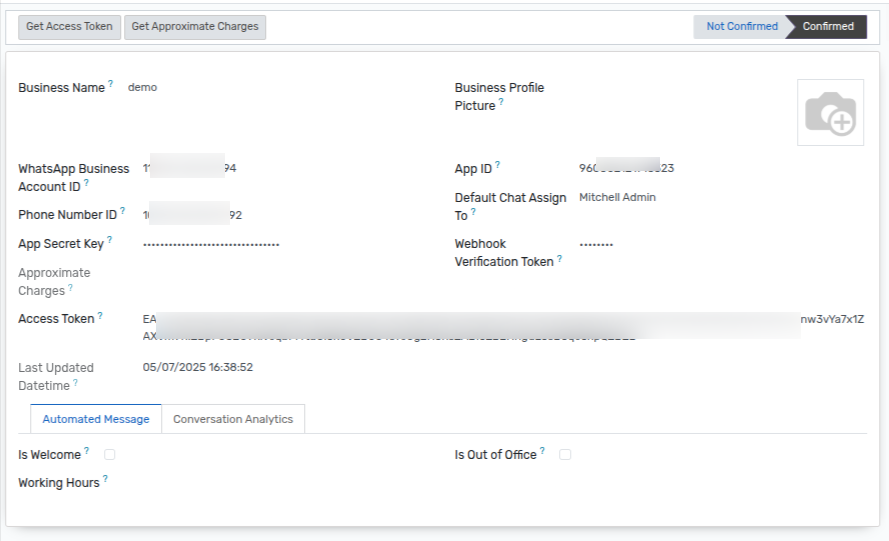
Once you’ve created the app on the Meta Developer Portal, you’ll receive details like:
App ID
Access Token
Phone Number ID
WhatsApp Business Account ID
App Secret Key
Webhook Verification Token
👉 Fill these values in the form in OpenEduCat, as shown in the image.
After entering all the required fields, click Save to confirm the configuration. Your WhatsApp Business setup is now connected with OpenEduCat.