
Admission Registers
Before the Enrollment of a student an Admission Register is created for each course. All the admissions for that course falls in respective Admission Register.
You can go to the . Click on
Newbutton to create a new Admission Register.
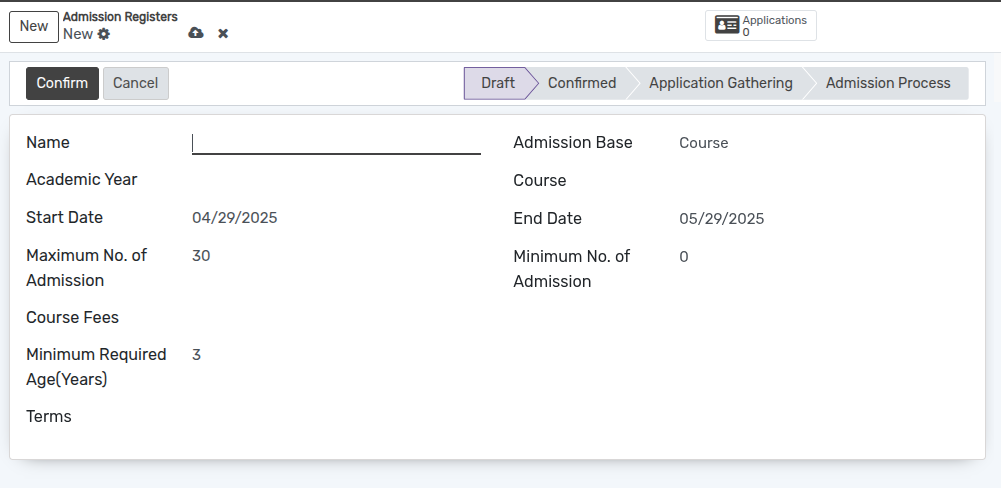
Details of Admission Registers Form
Name :- Provide appropriate title for the admission Register.
Admission Base :- Selection field to determine whether the admission is based on a program or a course.
Course :- Select the course from the list of courses.
Academic Year :- Select the academic year for which the register collects applications. This field is mandatory, so an Admission Register cannot be saved until an Academic Year is selected.
Start Date :- By default today’s date appears here.
End Date :- By default one month later date appears here.
Course Fees :- Select Course fees. Its like a service product.
Minimum No. of Admission :- Min no. of admissions for particular course can be specified.
Maximum No. of Admission :- Max no. of admissions for particular course can be specified. By default it displays 30.
Minimum Required Age(Years) :- Specifies the minimum age, in years, that an applicant must be to qualify for admission.
Terms :- Select the term from the list.
Applications Button :- It provides a quick way to view all the applications linked to a specific Admission Register. It displays the total number of applicants and allows users to navigate directly to the list of applications.

Note
The Maximum No. of Admission is also enforced at the time of enrollment. Once the number of enrolled (Done) applications reaches this limit, OpenEduCat blocks any further enrollment in that register and displays a validation message.
Admission Register Dashboard & Onboarding
The Admission Registers menu opens in a Kanban dashboard, featuring an Onboarding Banner at the top that guides administrators through initial setup steps, such as configuring admission registers and defining intake parameters.

Each Kanban card provides the following real-time details:
Favourite Star :- Click the star icon next to the register name to mark it as a favourite for quick filtering.
Ribbon Indicators :- Visual state ribbons display current status:
Draft(cyan),Confirmed(blue),Published(purple),Admission(orange),Done(green), orCancelled(red).Draft Applications Button :- Displays the count of draft applications. Click to filter and view draft records.
Confirm Applications Button :- Displays the count of confirmed applications. Click to view confirmed records.
Enroll Applications Button :- Displays the count of enrolled (Done) applications. Click to view completed enrollments.
Start Date / End Date :- Indicates the application submission window defined for the register.
Applications Action Button :- Primary button displaying total linked applications. Click to navigate directly to the complete application list.
Course Search Panel :- A dedicated search panel on the left sidebar allows filtering admission registers by course or selecting All to reset filters.
Tip
Use the view switcher at the top right to switch between Kanban dashboard, list view, and form view.
Admission Base on Program Configuration
Select Program in the Admission Base field.
Configure fees for the program in the Admission Fees Configuration section
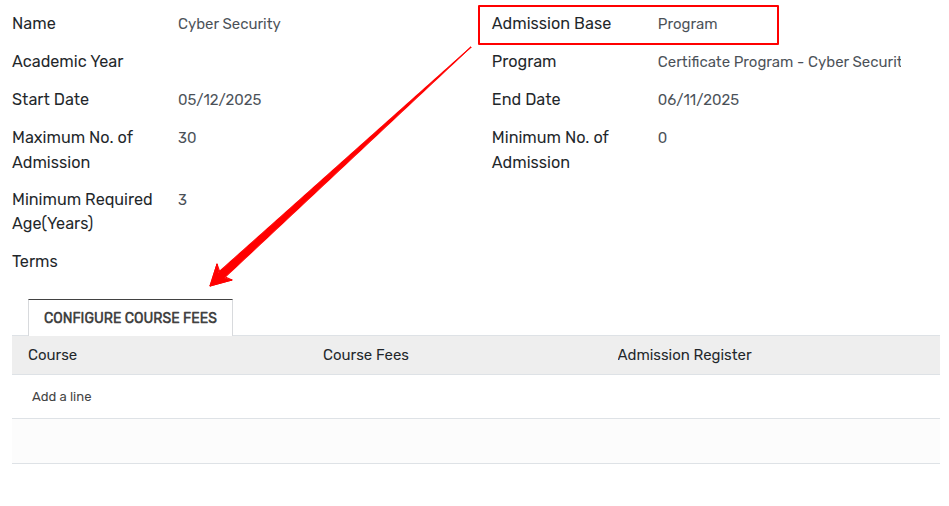
Click on the
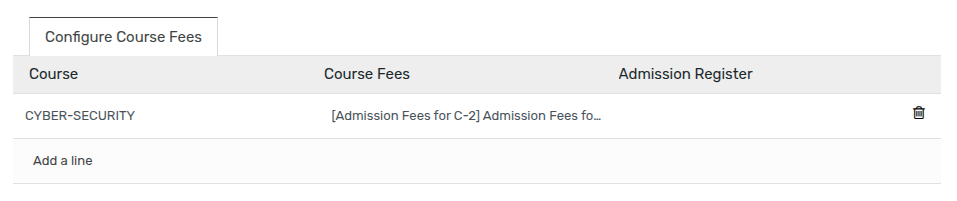
Add a linebutton to configure course fees.Select the course from the list of courses and fees.
Admission Register workflow
Initially Admission register flow start with draft state.
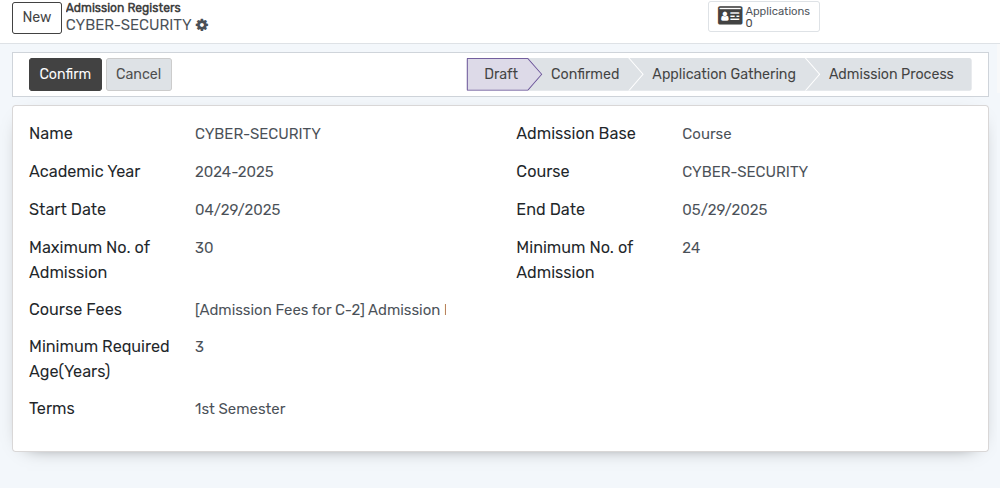
Click on the
Confirmbutton to confirm the Admission Register.If you want to cancel the admission register click on the
Cancelbutton.

Click on the
Start Applicationbutton to start receiving the application from students.

Now the Admissions can be created/selected under particular Admission Register.
Afterward click on
Start Addmissionbutton to start admission process of student.

After the Enrollment of students is finished click on
Donebutton.State Changed to done state.
