
Workflow of Registration
Stages of an Application
Every application carries a Stage, which is displayed as a status bar at the top right of the application form. The status bar shows the stages that are marked as visible on the form (by default Draft, Confirmed and Done), together with the time the application has already spent in its current stage.
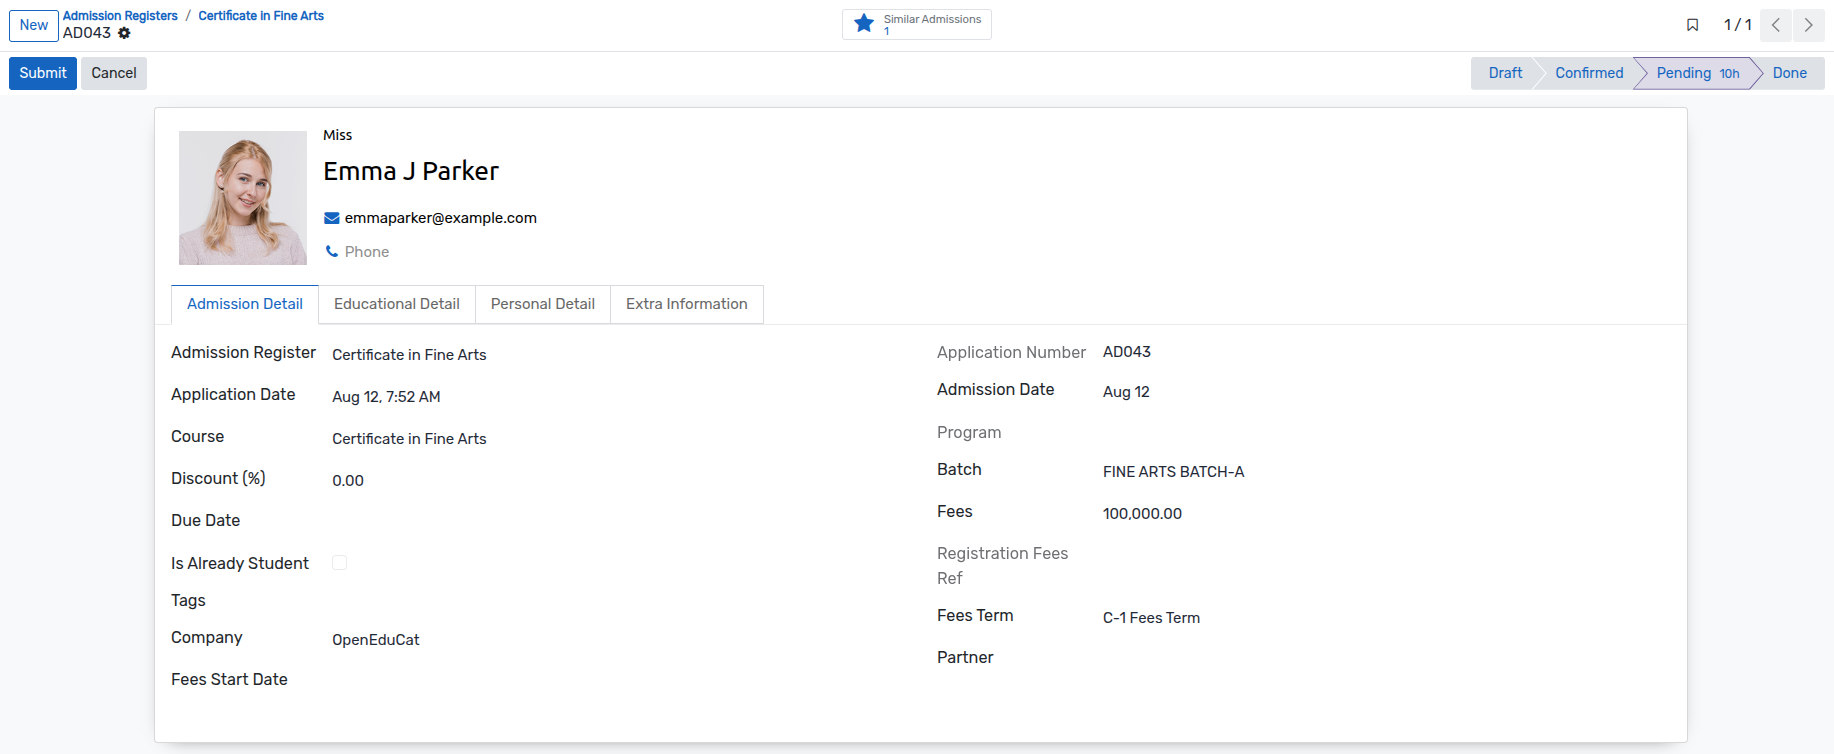
The stage and the status of an application are always kept in sync. Moving the application with the workflow buttons (
Submit,Confirm,Admission Confirm,Enroll…) updates the stage, and changing the stage updates the status accordingly.You can also move the application forward by clicking directly on a stage in the status bar.
The stages themselves are configurable, see Admission Stages.
Application Pipeline
Go to . The list of applications opens in a Kanban pipeline where each column is an admission stage.
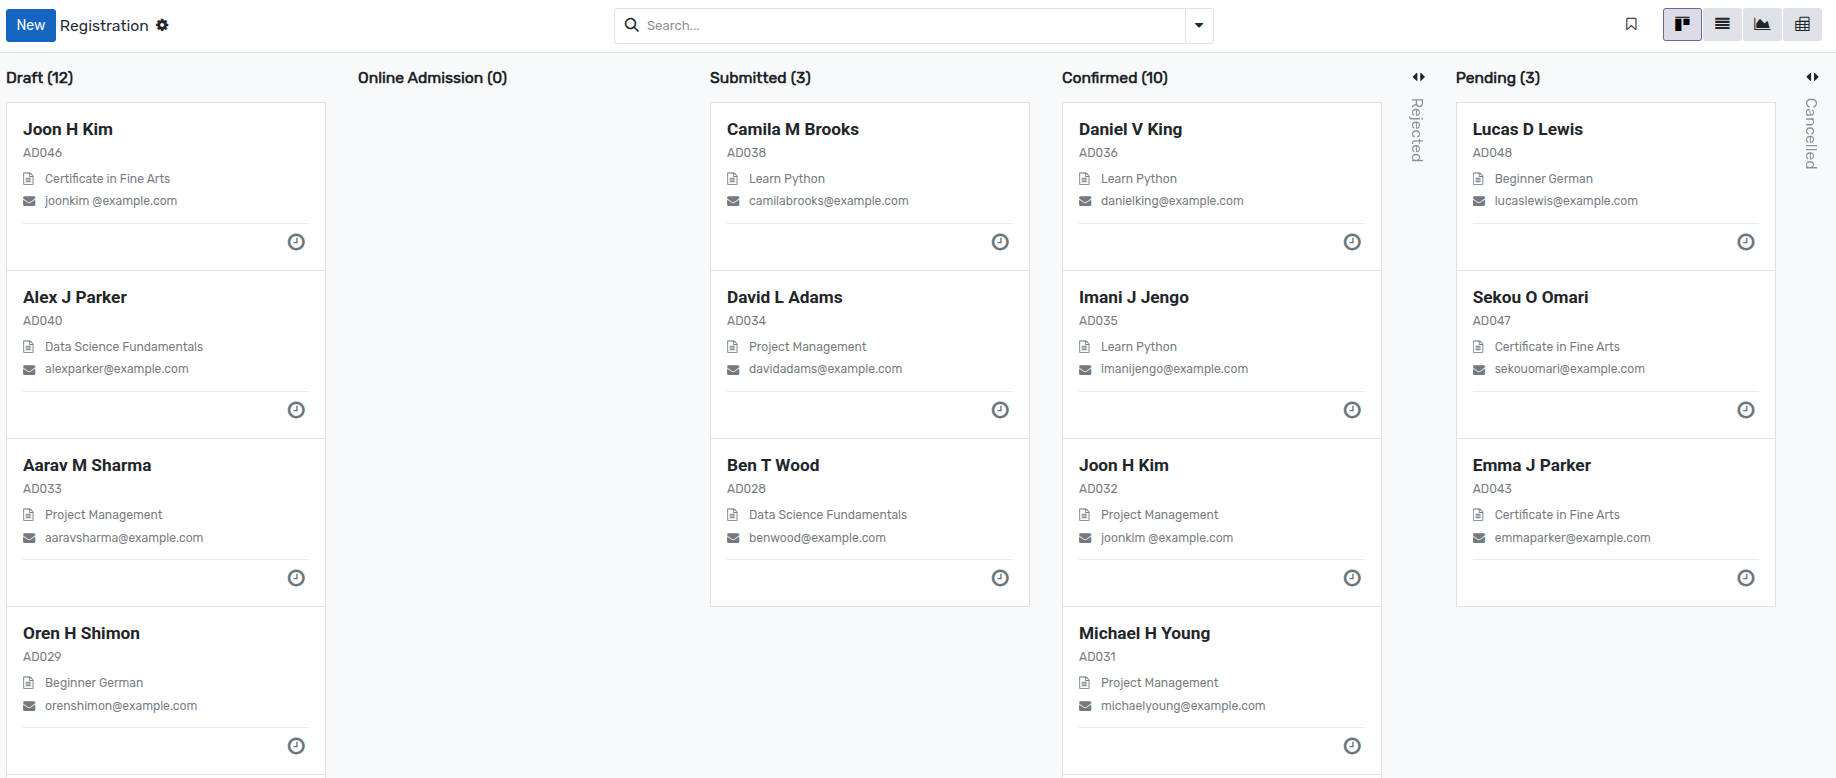
Every card displays the applicant name, the application number, the course and the tags of the application, along with the activity scheduling icon.
Drag and drop a card from one column to another to move the application to that stage. The status of the application follows the stage automatically.
Use the
⋮menu of a card to set a colour on the card or to open the application.Stages that are marked as Folded In Kanban (
RejectedandCancelledby default) are shown as collapsed columns, so the pipeline stays focused on the applications that are still being processed.
Warning
Dropping a card in the
Donecolumn enrolls the applicant immediately, exactly like theEnrollbutton. The student record, the subject registration and the fees details are created at that moment, so use it only for applications that are really ready to be enrolled.
Draft
Once the details are filled up in the enrollment registration form and it is saved, the state is Draft. Workflow of this form is started from here.

Submit
Click on Submit button to confirm the application. This changes the state of record from
DrafttoSubmitted.

Confirm
Click on Confirm button to confirm the application. This changes the state of record from
SubmittedtoConfirmed.In order or cancel the application, click on
Cancelbutton.

Admission Confirm
Click on Admission Confirm button to confirm the application. This changes the state of record from
ConfirmedtoAdmission Confirm.

Enroll
Click on Enroll button to Enroll student. This changes the state from
Admission ConfirmtoDone.

At that moment OpenEduCat performs the whole enrollment :-
The student record is created with the course, the batch, the academic year and the academic term of the Admission Register, together with the Academic Plan and the Intake Year of the application when they are used.
If a student already exists for that applicant (same contact, or same login as the email address of the application), that student is reused and the new course is simply added to their course details, so no duplicate student is created.
When the Create Student User option is enabled in , a portal user is created for the student, using the email address of the application as login, or the application number when no email address is filled in. If a user already exists with that login, it is reused and flagged as a student user.
The fees details of the student are generated according to the fees term, for the terms that are based on fixed days or on a fixed date, with the discount of the application.
A subject registration is created for the student in draft, pre-filled with the subjects of the course and its minimum and maximum unit loads.
Note
The enrollment is refused when the Maximum No. of Admission of the Admission Register is already reached.
Open Student Profile
Clicking on Open Student Profile , You can see student profile detail.