Academic Plan Management
Go to Setting ‣ Openeducat ‣ SIS.
When the Academic Plan is enabled, the system operates according to the structure and rules defined within the plan.
Assessment Type
Go to SIS ‣ Configuration ‣ Assessment Type.
Click on New to create a new Assessment Type.

Details of Assessment Form
Name:- Specify the name of the assessment type.
Code:- Provide a unique code for the assessment type.
Parent:- Specify the parent assessment type, if applicable.
Index:- This will be auto-generated based on the creation of the assessment type.
Academic Plan
Go to SIS ‣ General ‣ Academic Plan.
Click on New to create a new Academic Plan.
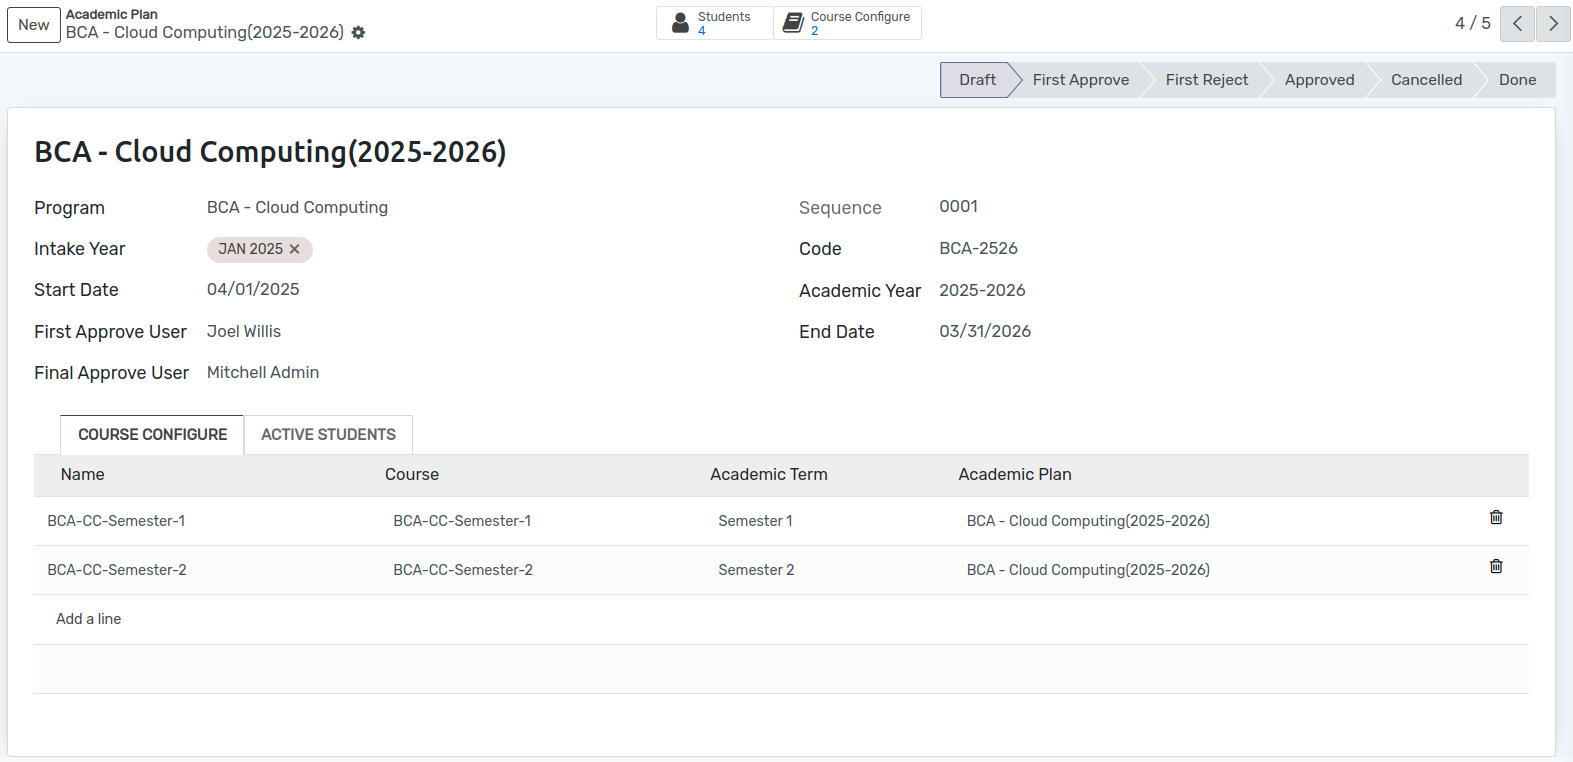
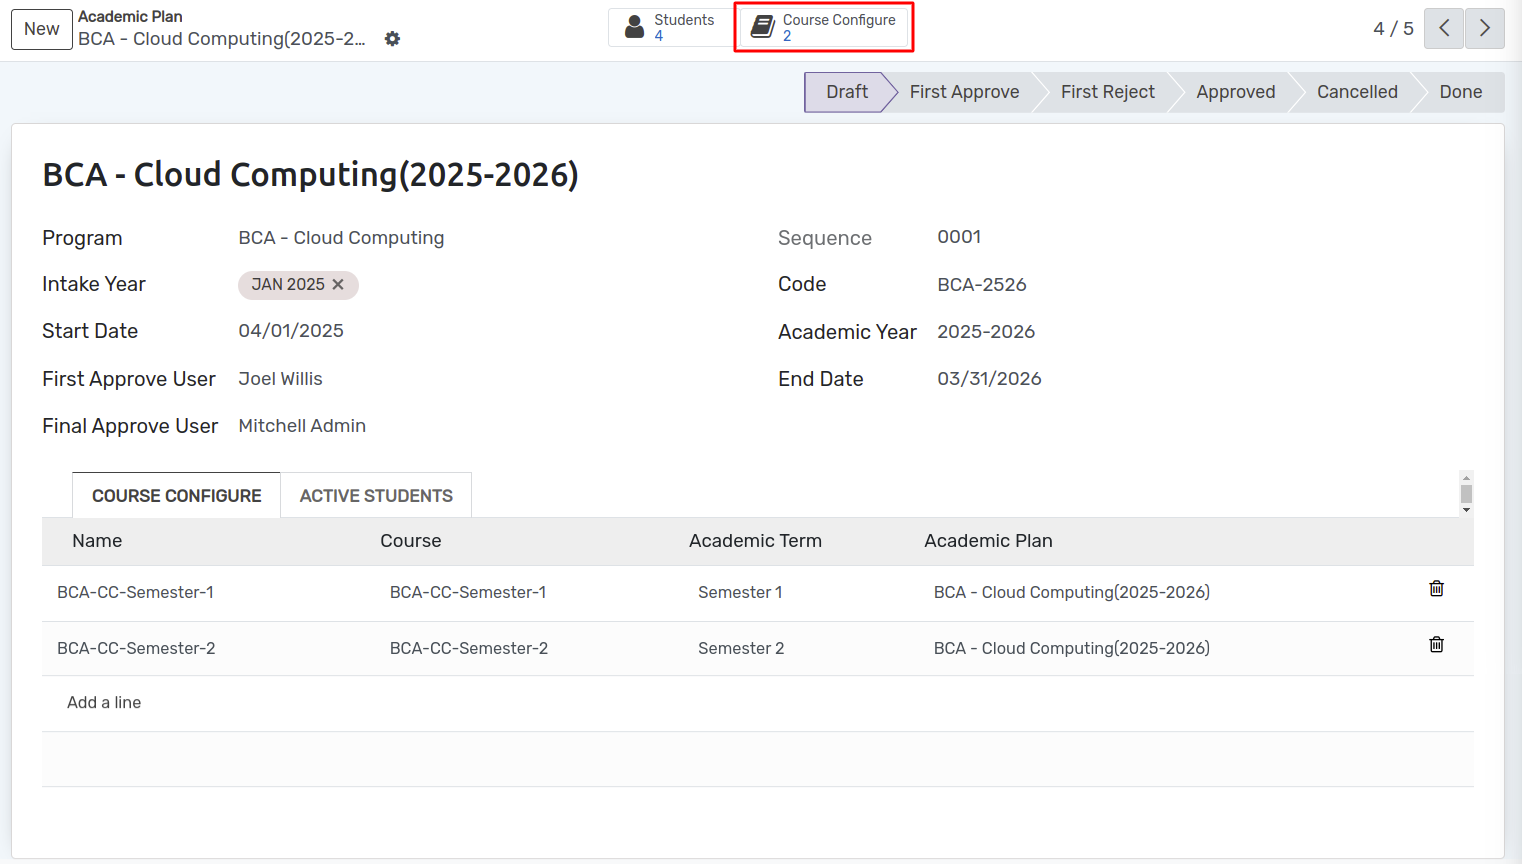
Details of Academic Plan
Programme:- Select the appropriate programme from the available list.
Intake Year:- Specify the corresponding intake year.
Code:- Enter a unique identifier code for the assessment type.
Start Date:- This will be based on the start date defined in the academic Year.
End Date:- This will be based on the end date defined in the academic Year.
Academic Year - Select the applicable academic year from the provided list.
First Approve User:- Select the user responsible for the initial approval of the plan.
Final Approve User:- Select the user responsible for the final approval of the plan.
Students(Smart Button) :- Located at the top of the form, this button displays the list of students currently enrolled in the course.
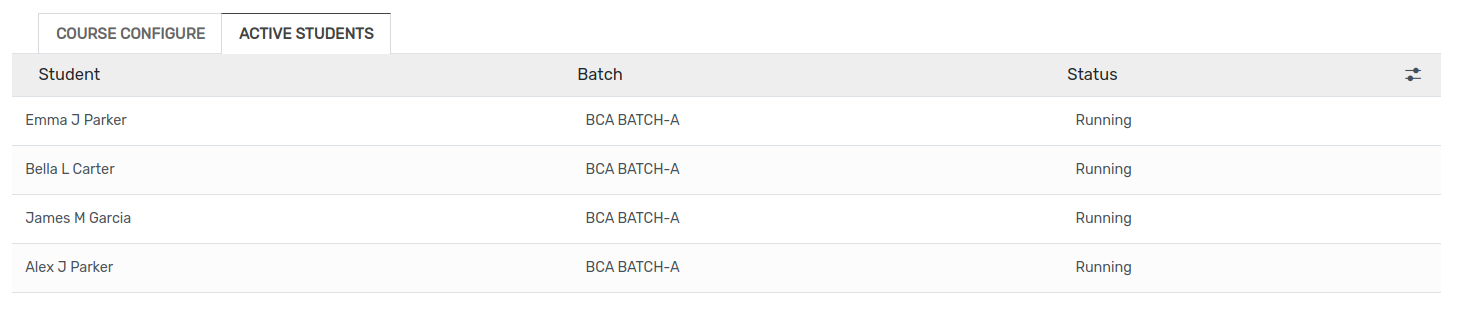
Active Students
This page displays all students currently enrolled in the course.
Course Configuration
To configure a course, click on the Course Configure smart button located at the top of the screen.
Click on New to create a new Course Configuration.

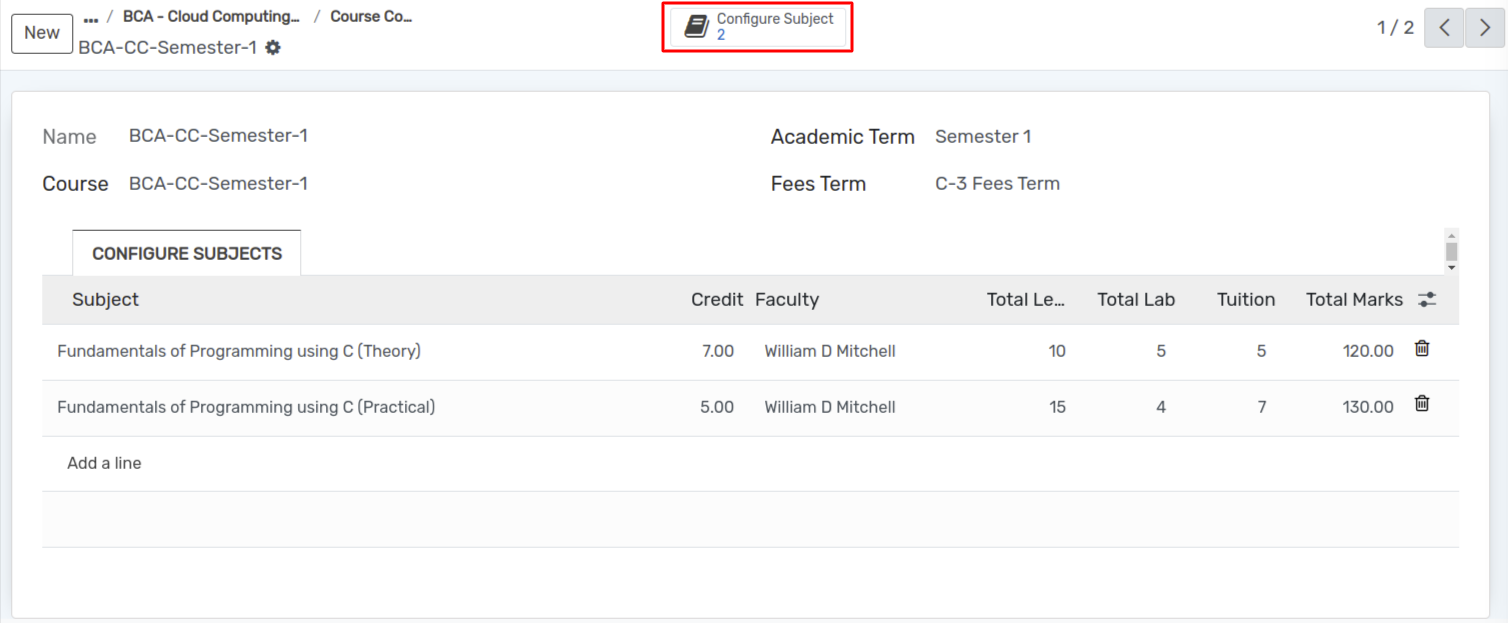
Course Configuration form
Name:- Enter the name for the course configuration.
Course:- Select the appropriate course from the provided list.
Academic Term:- Choose the relevant academic term from the available options.
Fees Term:- Select the applicable fees term from the list.
Subject Configuration
To configure subjects, click the Configure Subject smart button located at the top of the page.
Click on New to create a new Subject Configuration.
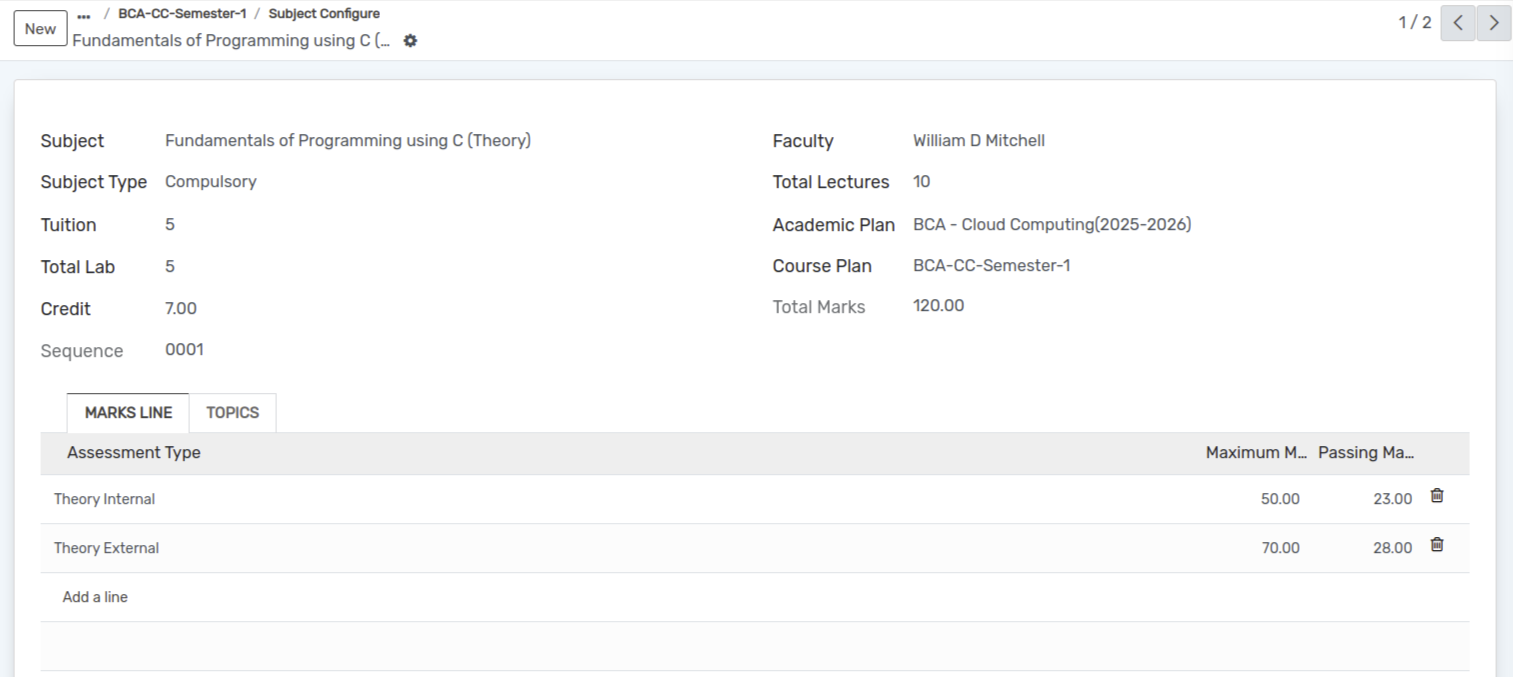
Subject Configuration form
Subject :- Select the appropriate subject from the provided list.
Faculty :- Choose the faculty member from the available list.
Subject Type :- Select the relevant subject type (Compulsory, Elective).
Total Lectures :- Enter the total number of scheduled lectures for the subject.
Tuition :- Specify the tuition component, if applicable.
Academic Plan :- Select the corresponding academic plan from the list.
Total Lab :- Enter the total number of lab sessions associated with the subject.
Course Plan :- This field is automatically populated based on the selected course configuration.
Total Marks :- Automatically calculated as the sum of all exam components.
Credit :- Specify the credit value awarded upon completion of the subject.
Marks Line
Click on Add a Line to include examination details and marks associated with the subject.

Topics
Click on Add a Line to add topics related to the subject.

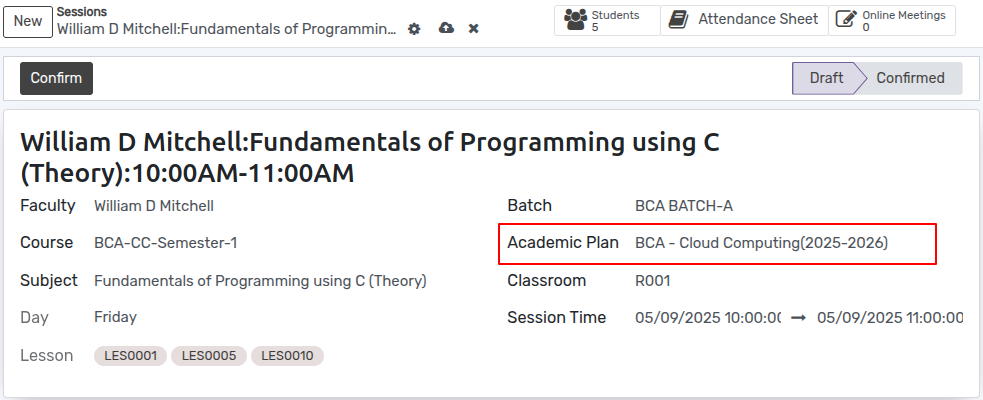
Academic Plan Based Session
If the academic plan is enabled, it will be visible in the system interface.
Go to Timetable ‣ Session.
Click on New to create a new Session.
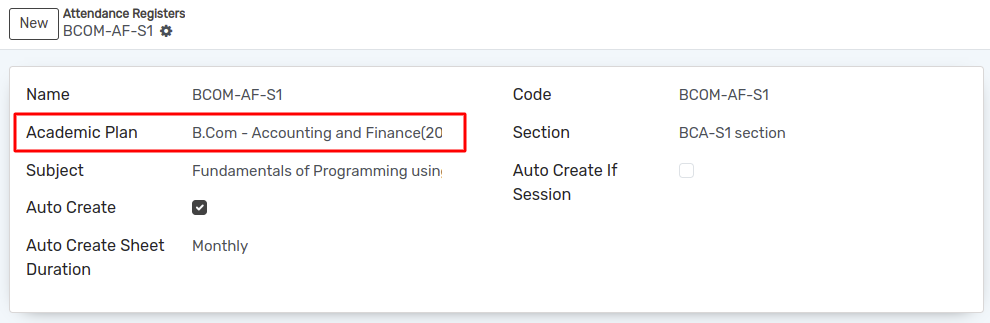
Academic Plan Based Attendance Register
Go to Class Attendance ‣ Attendance ‣ Register.
Click on New to create a new Register.
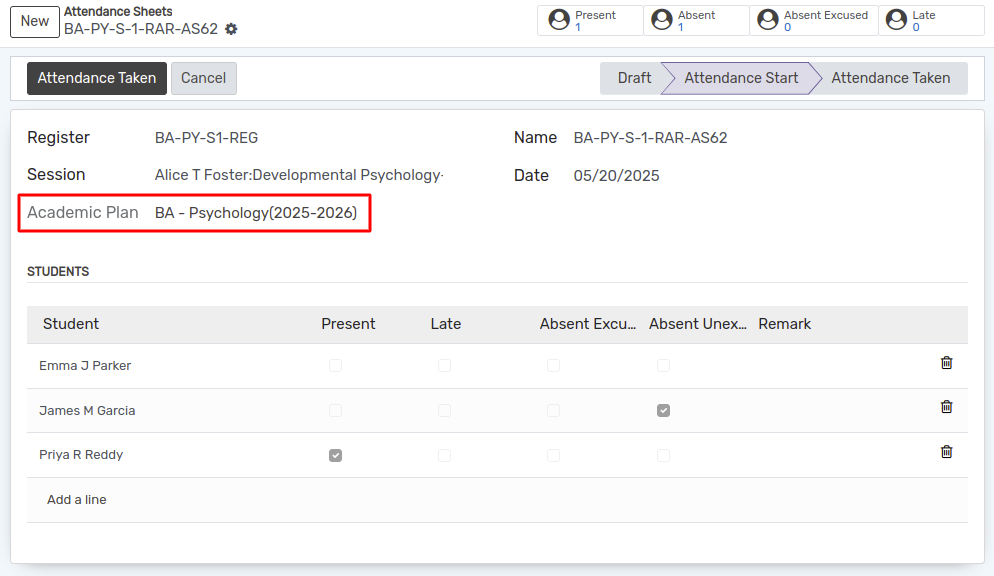
Academic Plan Based Attendance Sheet
Go to Class Attendance ‣ Attendance ‣ Sheet.
Click on New to create a new Sheet.
Academic Plan base Admission
Go to Admission ‣ Application.
Click on New to create a new Application.
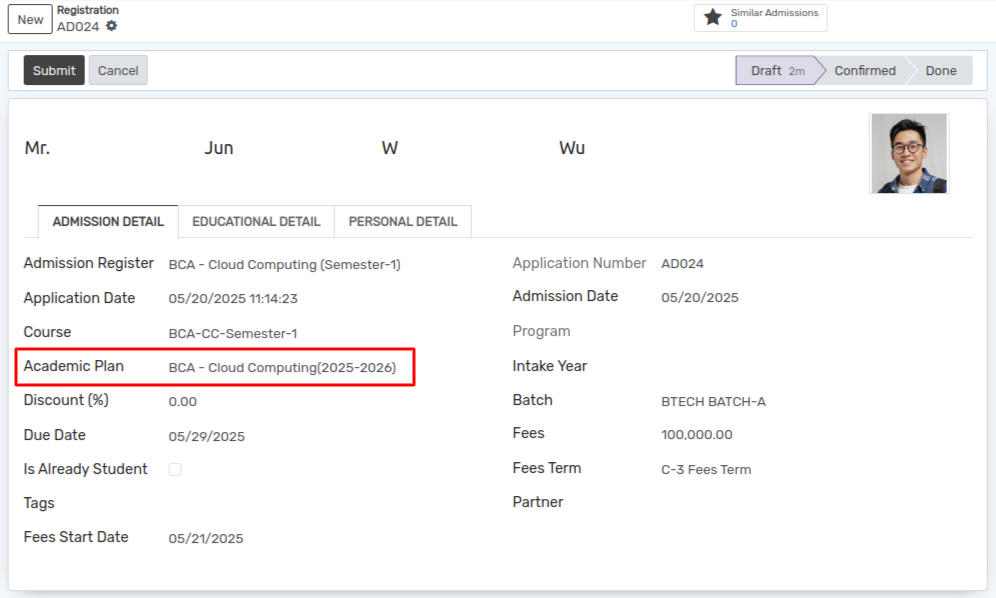
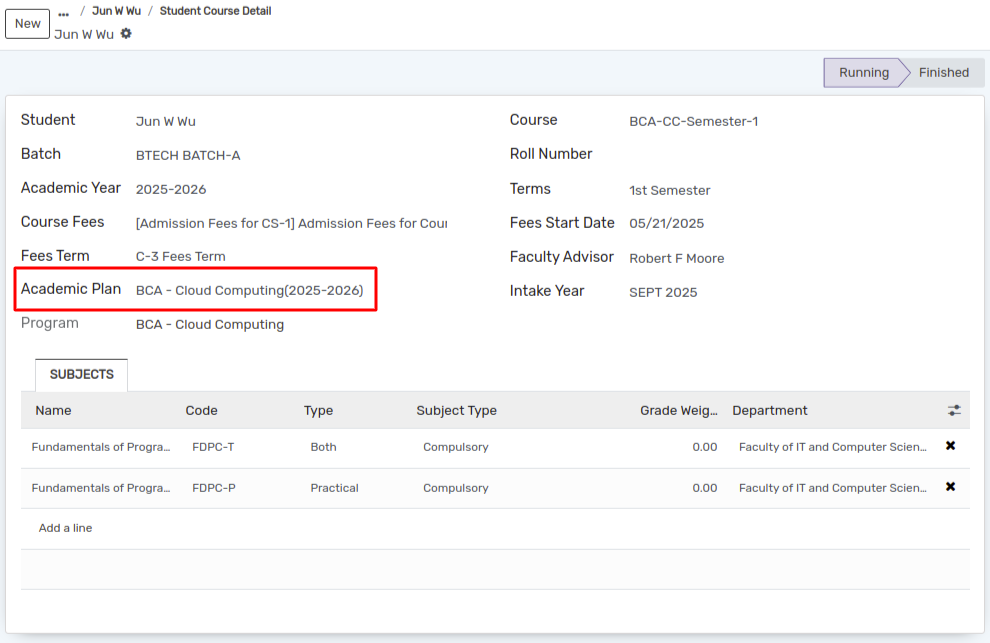
Once a student’s admission is confirmed, the student is enrolled in the academic plan based in the system, which is then displayed at the bottom of the screen as shown in the images below.
Go to Student ‣ Admission (Smart Button).
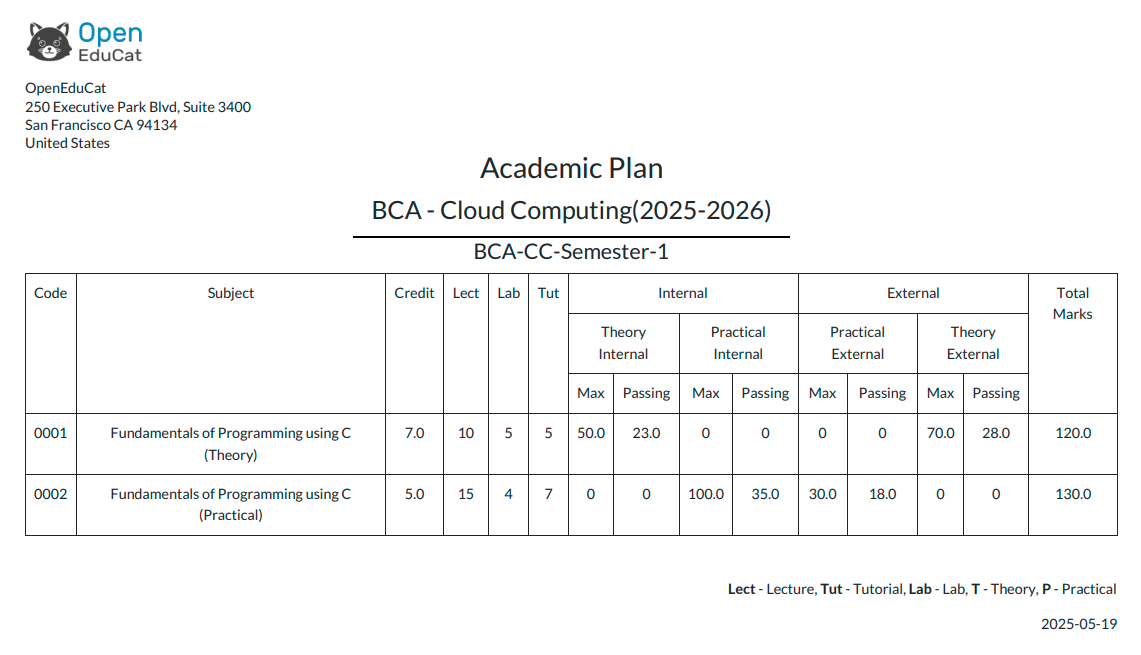
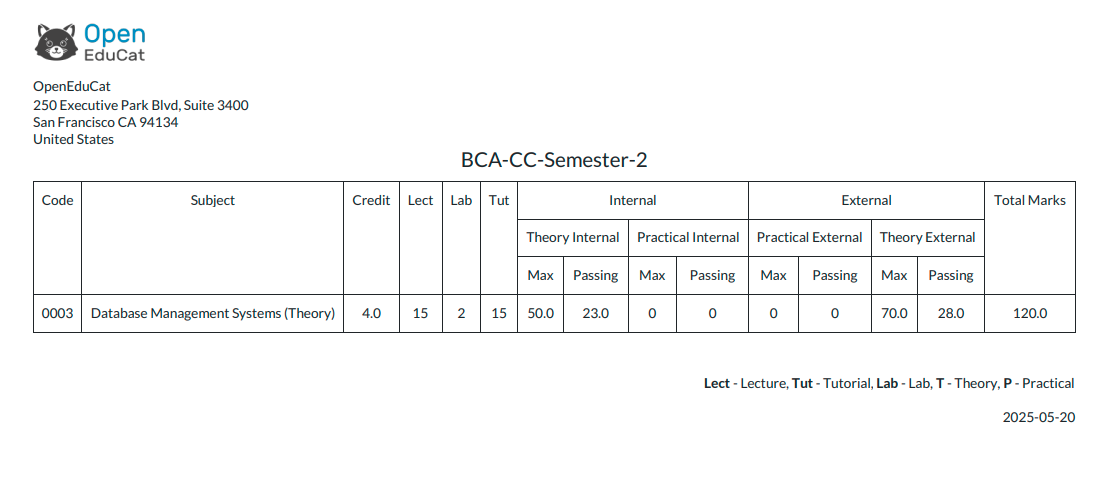
Academic Plan Report
Go to SIS ‣ General ‣ Academic Plan.
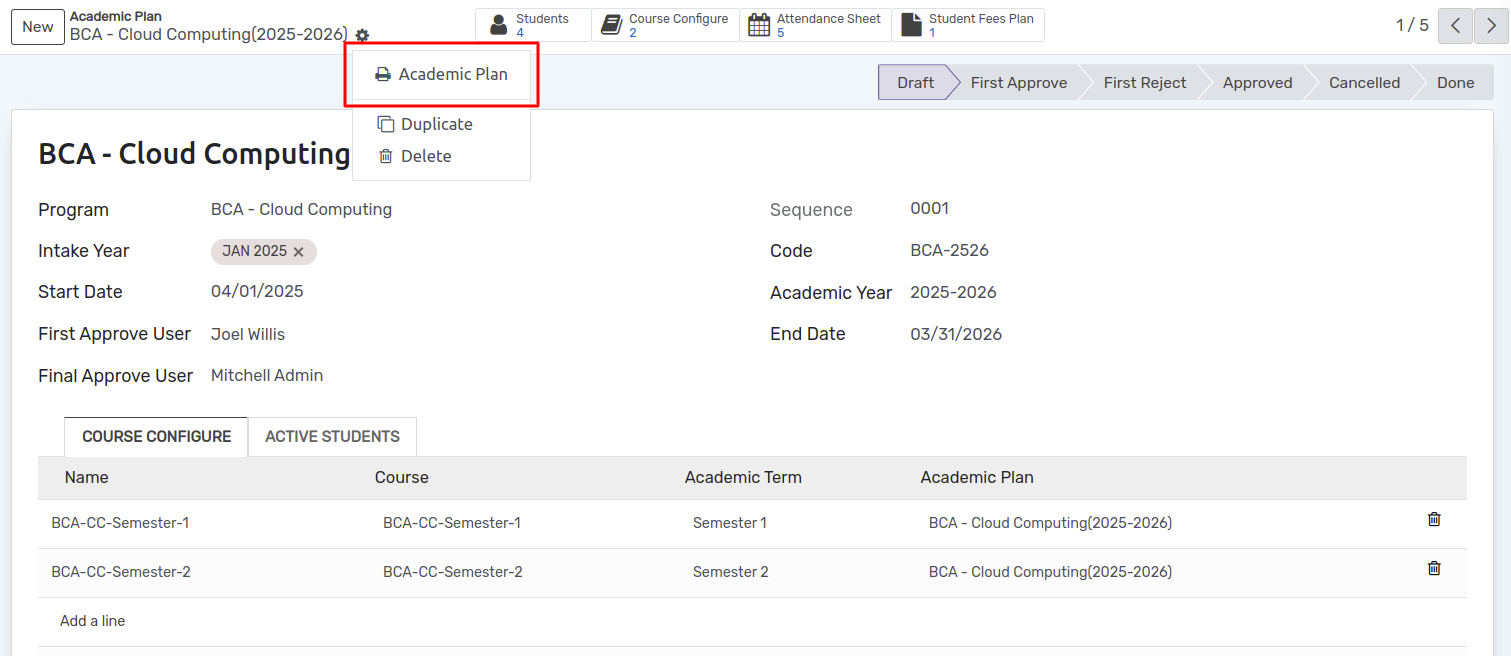
By clicking Academic Plan the academic plan report can be viewed, as shown in the image below.