Job
OpenEduCat Job feature provides placement for the graduates.
Configure Job Type
Configuration of Job Type in Placement Management will let the user to create the job type options e.g. full time, part time, freelancing jobs. To configure the job type, follow the below steps :-
Go to .
Click on New to create a new job type.

Details of Job Type Form
Employment Type :- Set the name of the Employment Type.
Code :- Set the code of the Employment Type.
Configure Skills Category
Configuration of Skills category in Placement Management provides details of the Job Skill Category. To configure the skill category, follow the below steps :-
Go to .
Click on New to create a new skill category.
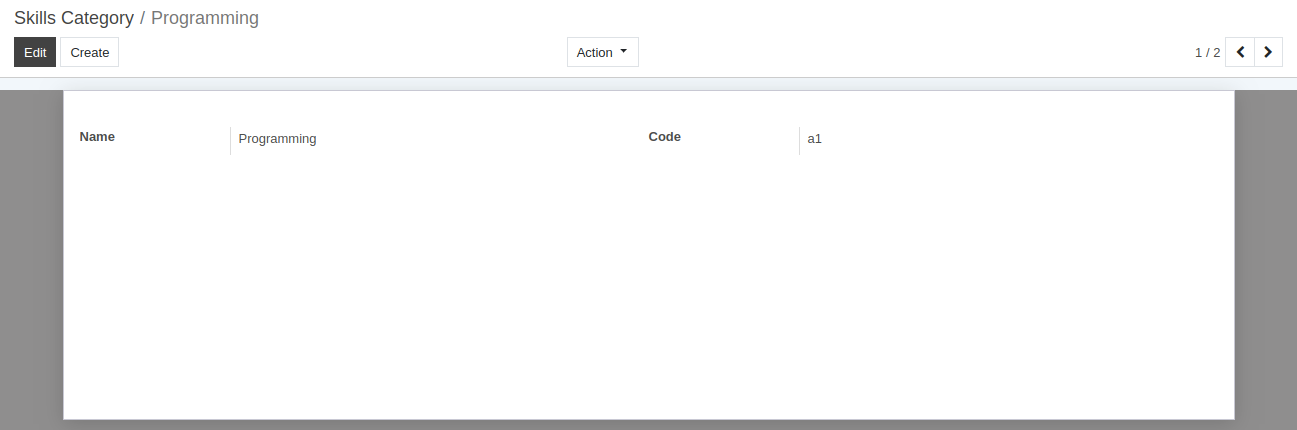
Details of Skill Category Form
Name :- Set the name of the Skill Category. It will be displayed in whole system.
Code :- Set the code of the skill category. Unique code for skill category.
Configure Skills
Configuration of Skills in Placement Management helps us to provide the details of the skills and abilities for the job post.
Go to . Click on New to create a new skill.
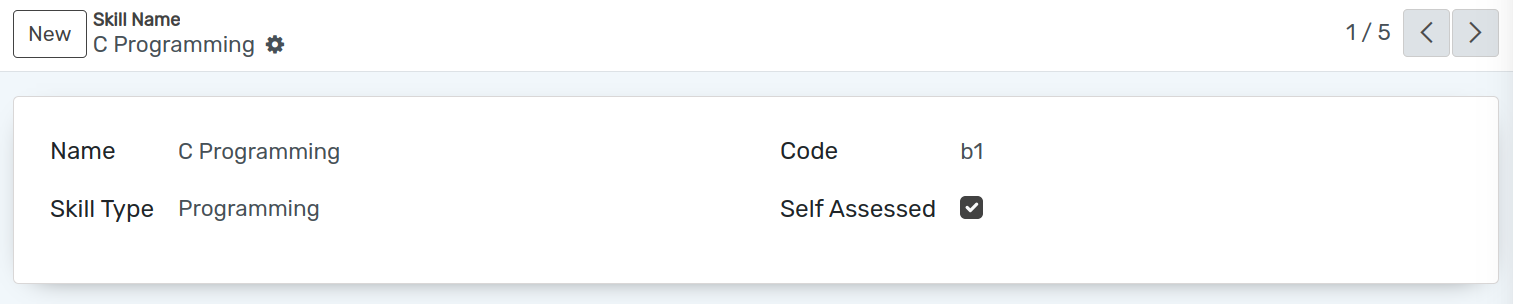
Details of Skills Form
Name :- Set the name of the Skill. It will be displayed in whole system.
Code :- Set the code of the skill. Unique code for skill.
Skill Type :- Select the skill category for whom the skill is created.
Job Post
OpenEduCat provides feature to post the job for placement.
Go to .
Click on New to create a new job post.
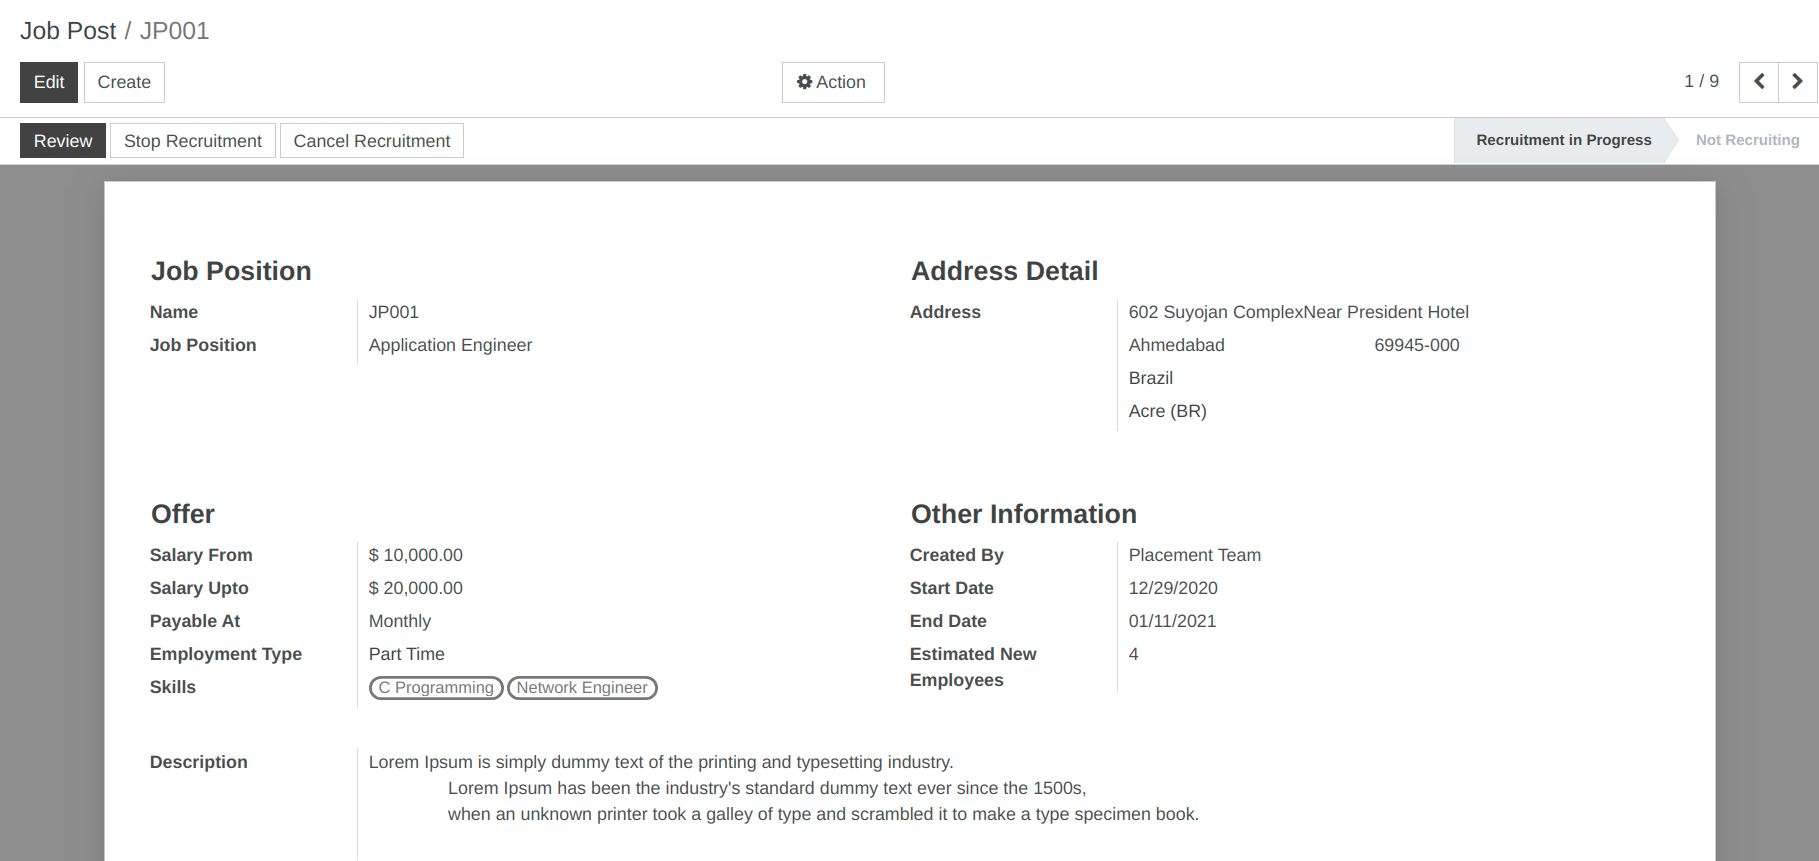
Details of Job Post Form
Name :- Name is the unique Job Post name.
Job Position :- Set the name for the job position.
Address :- You can add details like street, city, state, nation, zip code and country in the provided fields.
Salary From :- Set the starting salary for the job.
Created By :- Select the option who created the job.
Salary Upto :- Set the ending salary for the job.
Payable At :- Set the salary pay structure either weekly, monthly or yearly.
Start Date :- Set the start date for the job post from which the applicant can apply.
End Date :- Set the end date for the job post till which the applicant can apply.
Estimated New Employees :- Set the number of the estimated new employees for the created job post.
Employment Type :- Select the employment type i.e. Full time, Part Time, Freelancing.
Skills :- Select the skills required for this job post.
Description :- Set the description for the job post.
Workflow of Job Post
Once the details are filled up in the job post form and it is saved, the state is
Draft. Workflow of this form is started from here.Click on Start Recruitment button to start the recruitment for the created job post. This changes the state of record from
DrafttoRecruitment in Progress. Once we click on Start Recruitment button, this created job post can be displayed inActivity Announcementin Placement module.Click on Stop Recruitment button if the recruitment for the created job post is completed. It changes the state from
Recruitment in ProgresstoNot Recruiting. When we click on Stop Recruitment button, this job post will be deleted from theActivity Announcementin Placement module.
Job Applicant
These created job posts are displayed under Campus Job menu on the website. Any student can apply for the job by logging into their account.
First student will login into their account and go the Campus Job menu.
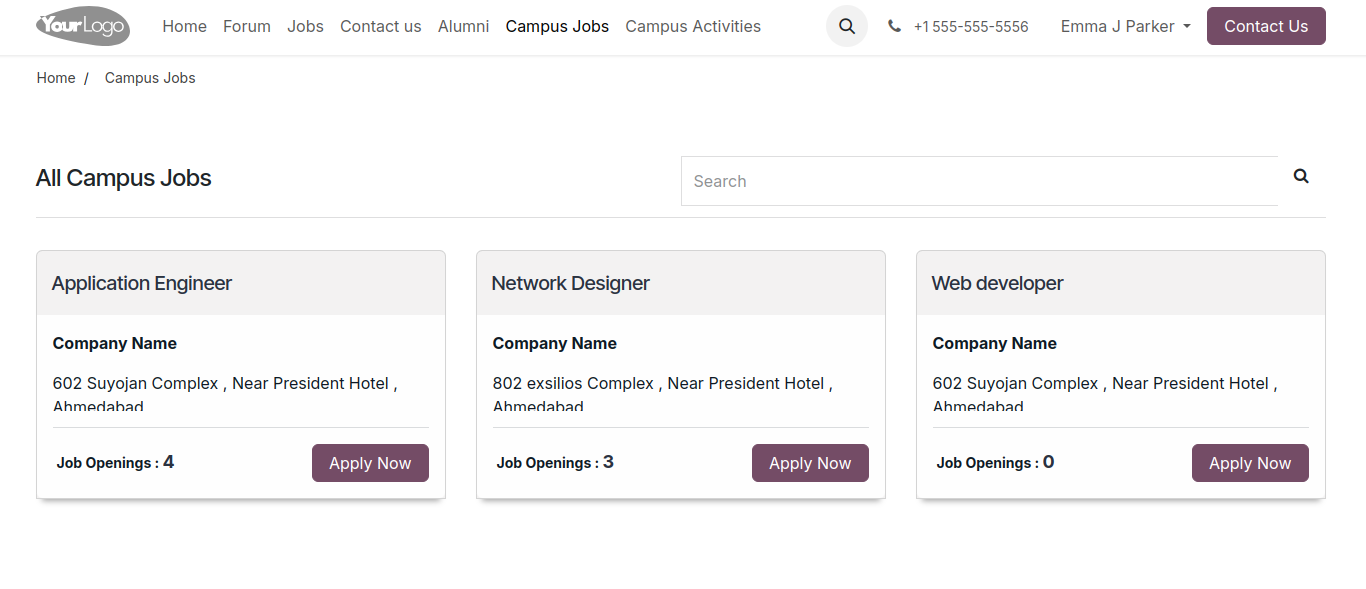
Then the student can apply for the job according to their skills and click on
Apply!button.
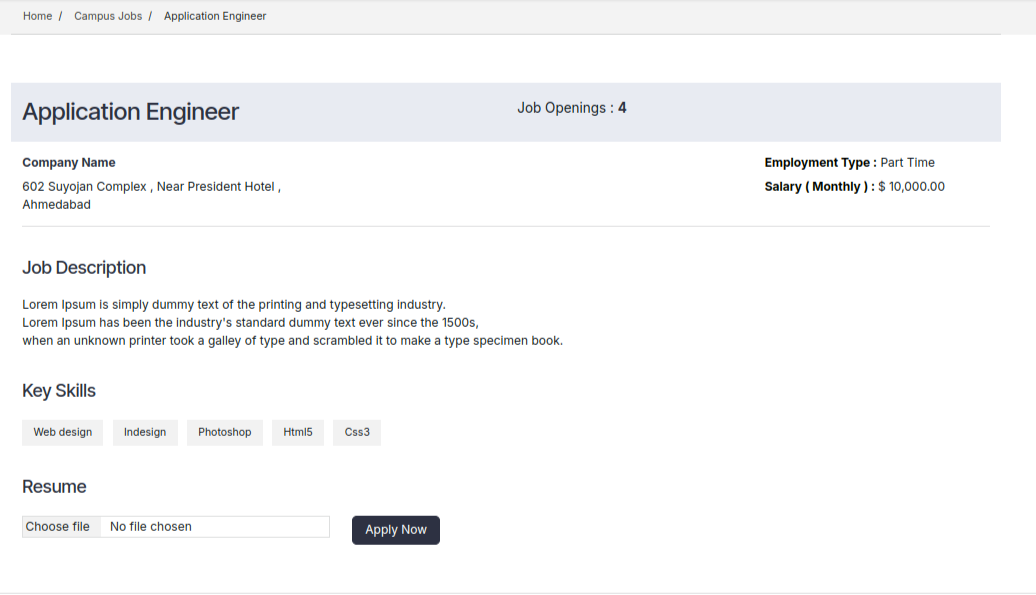
Then student can upload their documents to apply for the job and click on the
Apply Nowbutton.
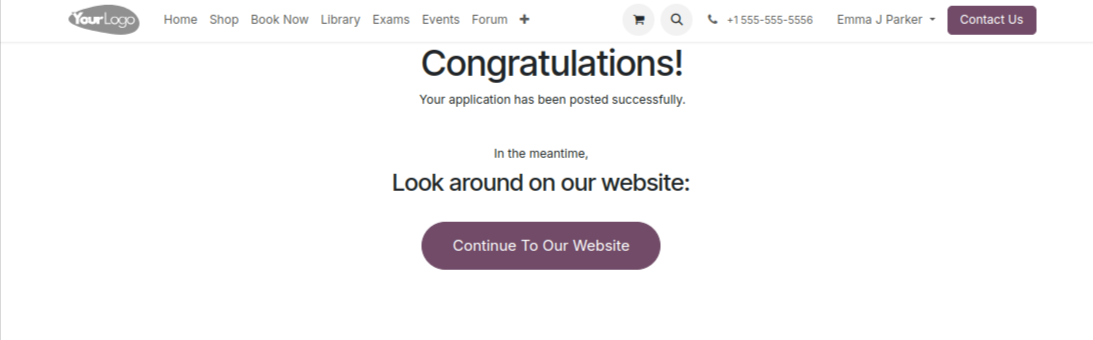
Then the confirmation message will be displayed.
Admin can see the applicant under Applicant menu in the Job module.
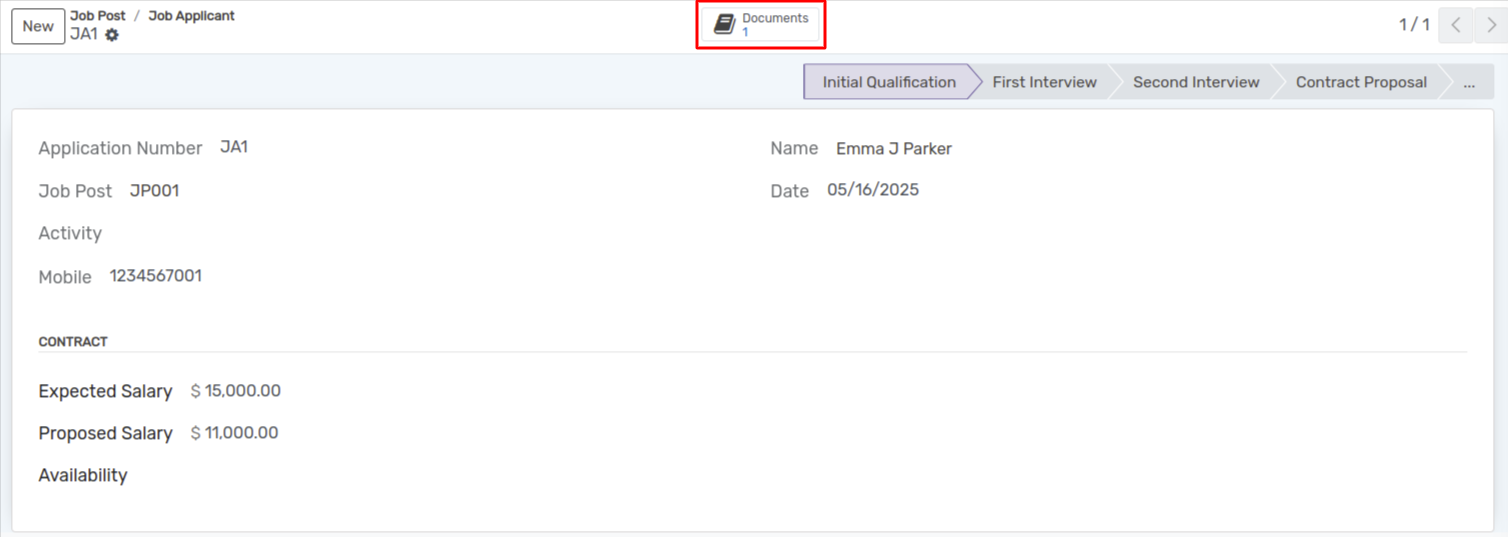
Click the Documents Smart button at the top to access the uploaded documents.
