Fees Management
Configure Fees
Configuration of fees helps you to provide the start up data of fees according to the courses of an institute.You can also configure fees elements of the particular Fees Terms. To configure the fees, follow the below steps :-
Go to SIS ‣ Configuration ‣ Fees Term.
Click on New to create a new fees term.
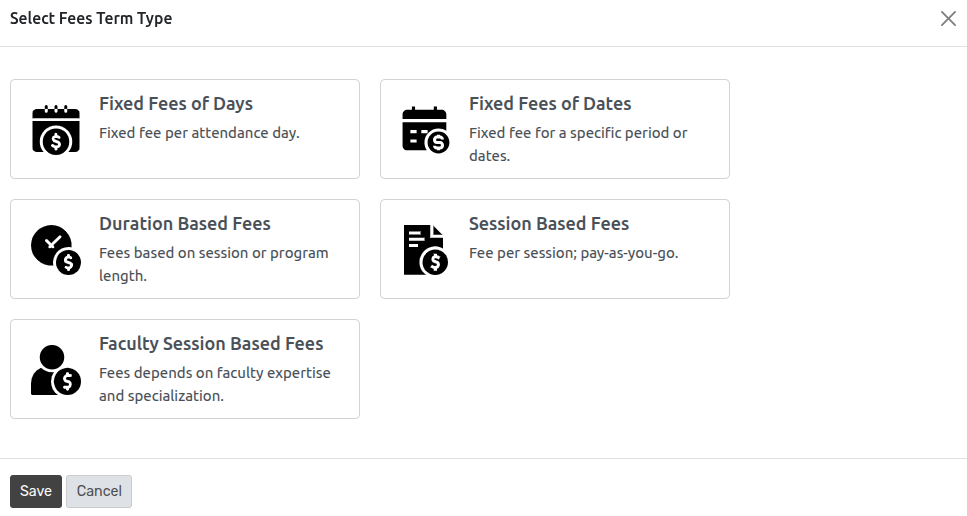
Select any Fees Term Type and click on
savebutton.
Details of Fees Form
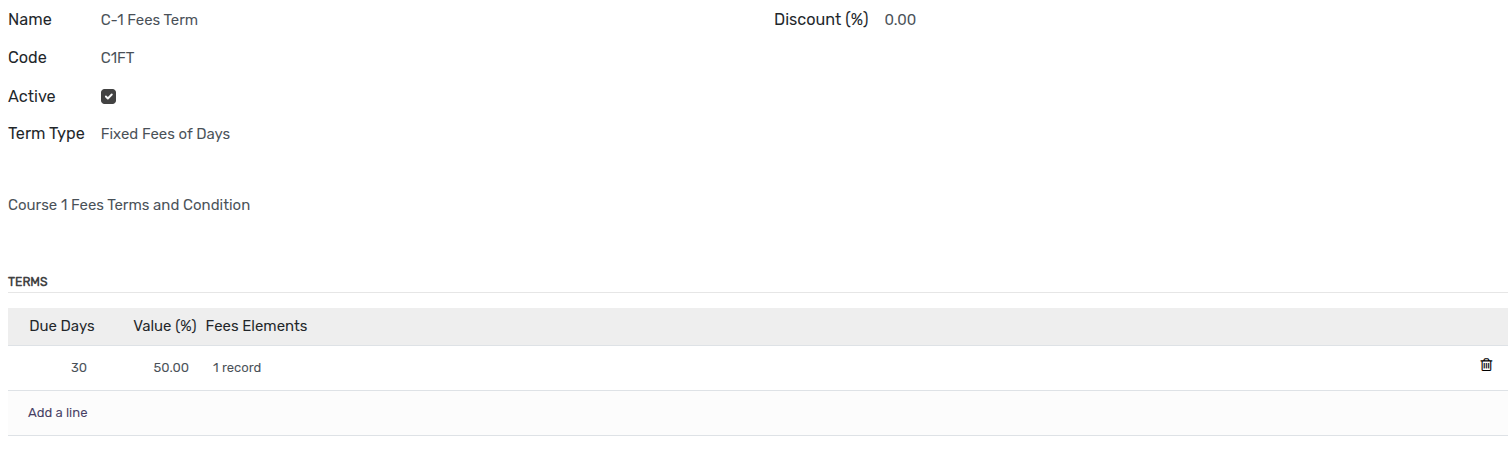
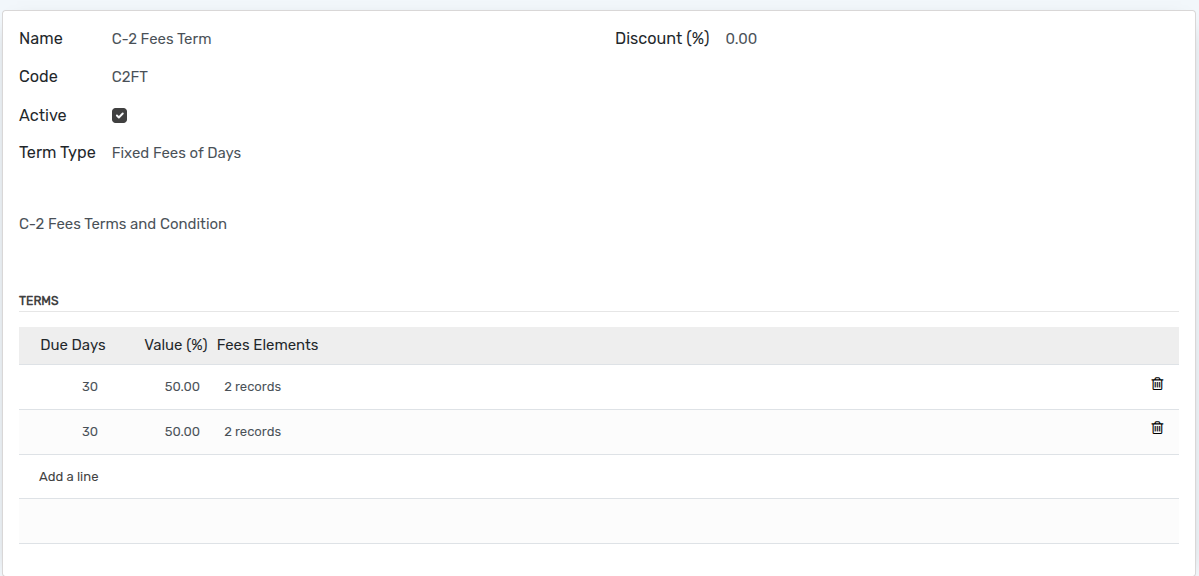
Name :- Set name of the new fees term.
Code :- give unique code.
Active :- Set true or false whether fees term is currently active or not.
Discount :- Set Discount for particular fees term.
Term Type :- Select the term type which is Fixed Fees Of Days or Fixed Fees Of Dates.
Description :- Set description of new fees term.
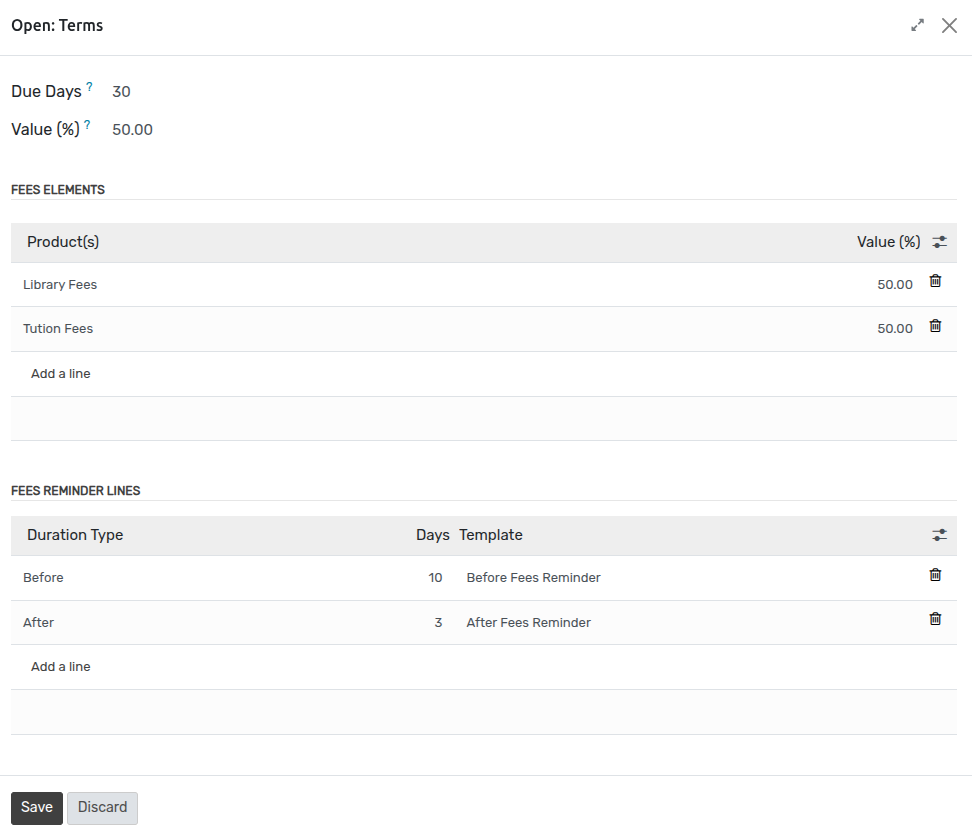
Terms :- Set due days , percent of fees for next due date , reminder of fees before or after due date.
Fees Elements :- You can divide the fees terms by setting the elements of the fees.
To configure the fees elements of the Fees Terms, follow the below steps :-
Go to SIS ‣ Configuration ‣ Fees Term ‣ Edit ‣ Fees Elements.
Click on Fees Elements, Wizard will open to create fees elements.
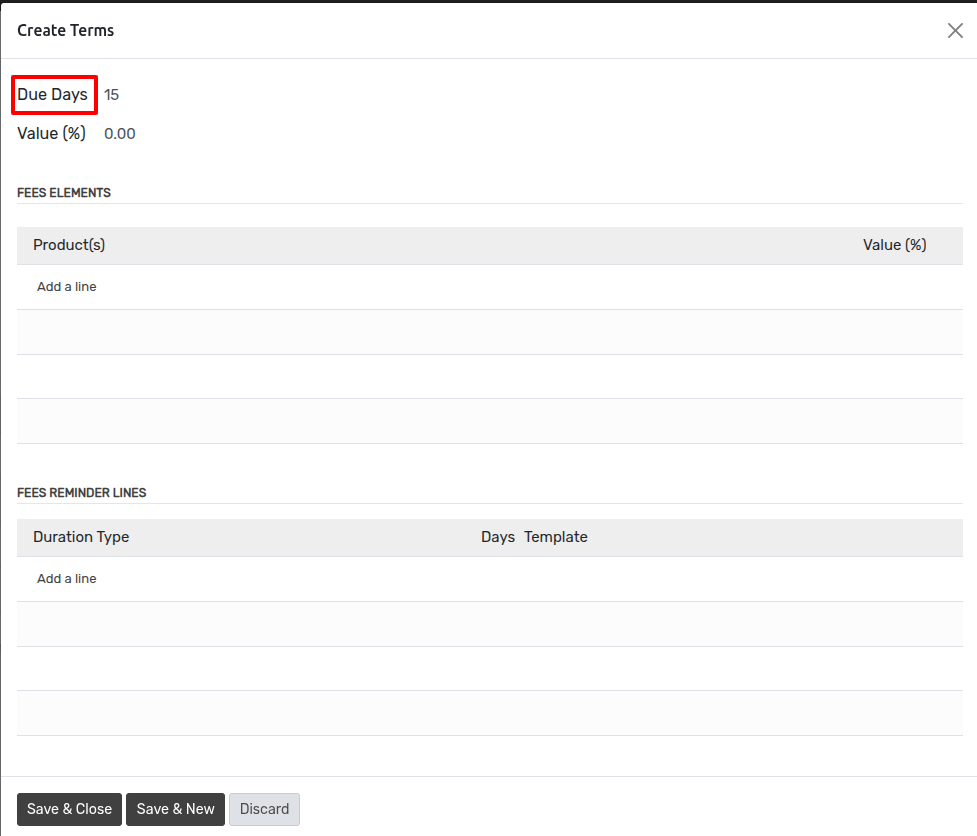
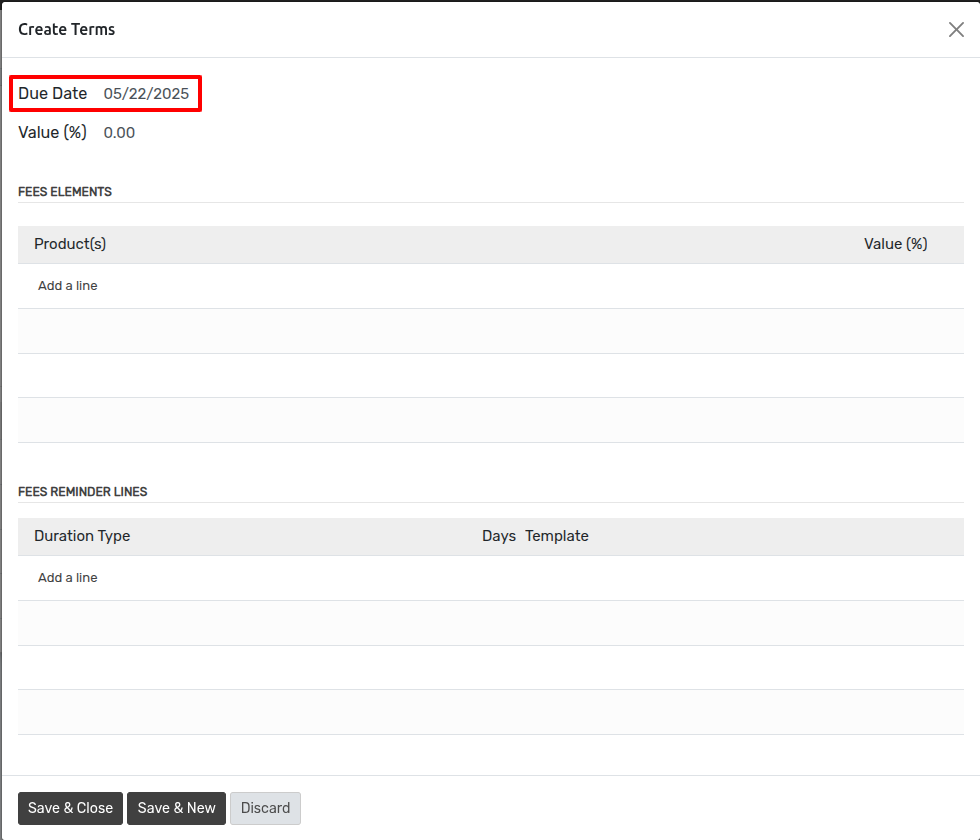
If you have selected Fixed Fees Of Dates by Term Type then select Duet Date.
Click on Fees Elements and you can create fees elements according to
your requirements.
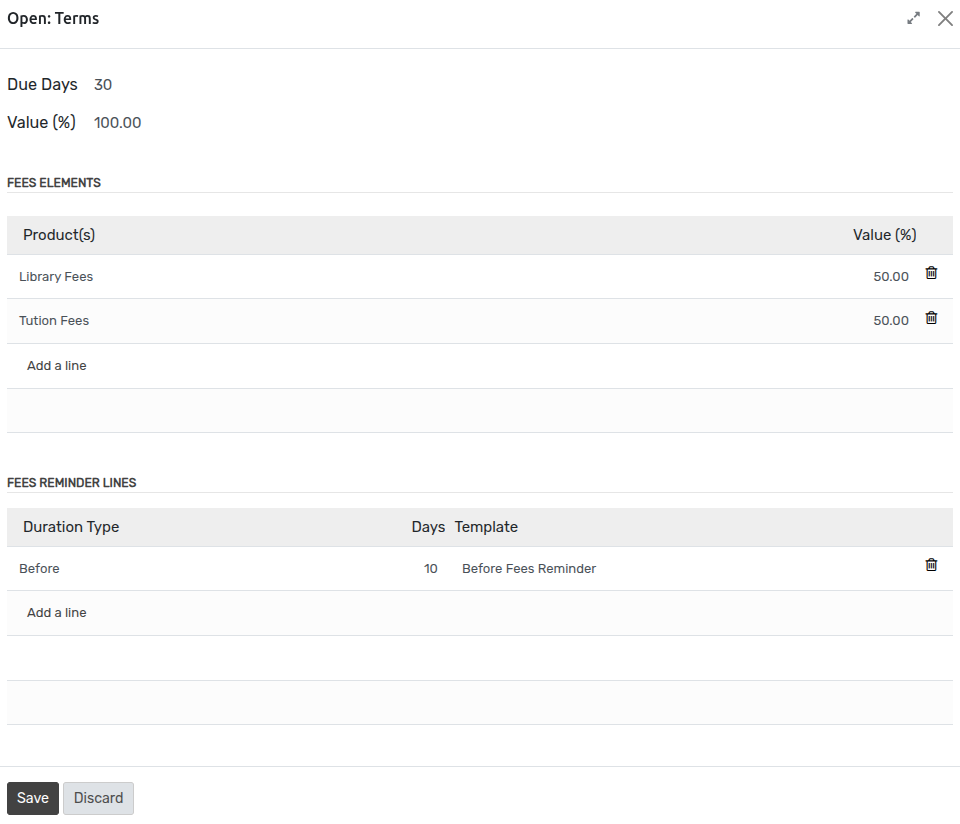
You can create the other fees elements also.
Here Two fees elements are created in Fees Terms
If you have selected Duration Based Fees by Term Type then select Duration like days, week, month, years etc..
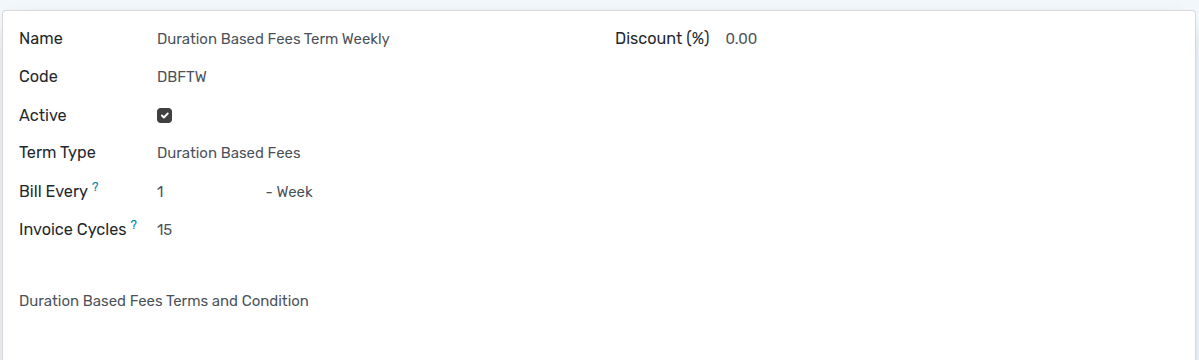
Term Type :- Select the Duration Based Fees term type from the dropdown menu.
Bill Every :- Select option in bill every field when you want to create a invoice from Bill Every Day, Every Week, Every Month or Every Year.
Invoice Cycles :- Set the number of expire after number of invoicing.
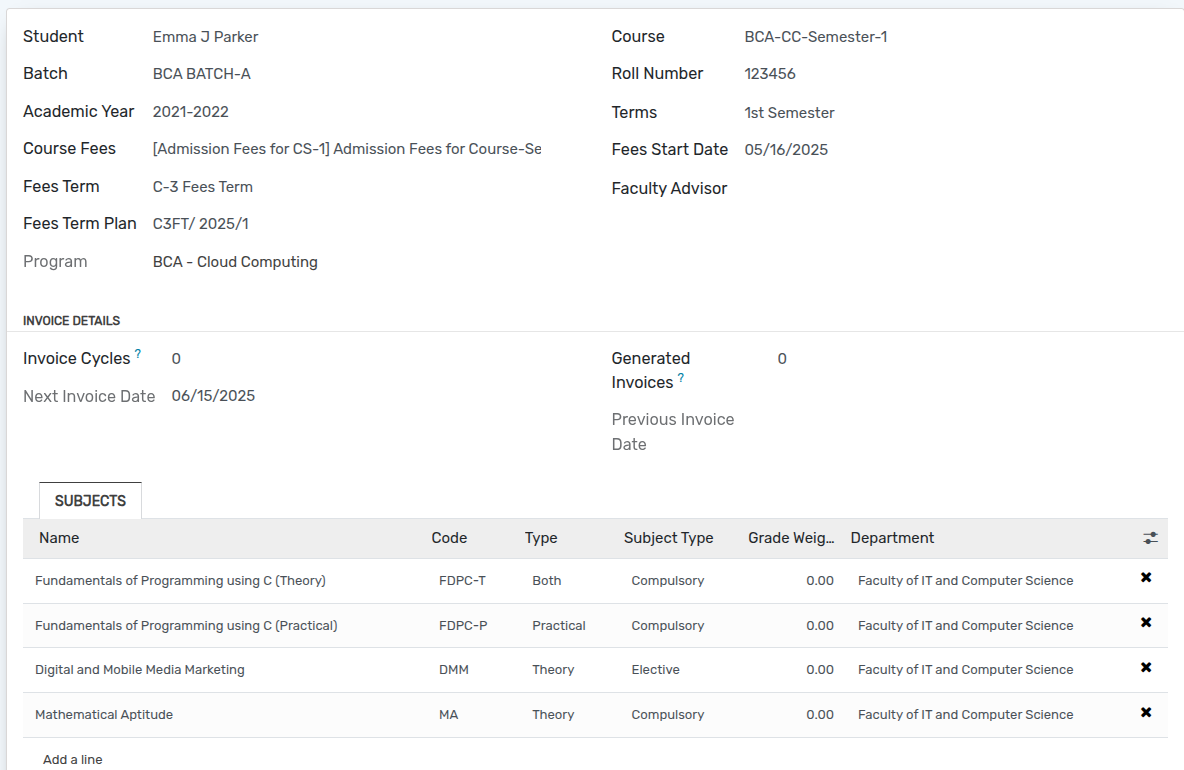
Go to Students ‣ General ‣ Student Course Detail and select the particular student.
Here you can see invoice cycles, generated invoice, next invoice date and previous invoice date.
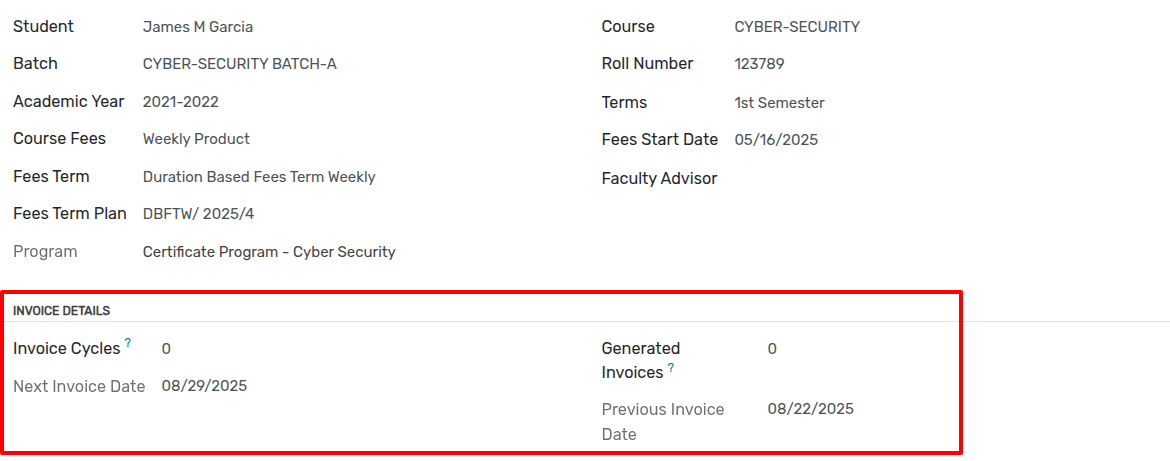
Fees Start Date :- Select Fee Start Data. If not, this default will be taken Current Date.
Invoice Cycles :- It will display the total invoice cycles.
Generated Invoices :- It will display total number of generated invoices.
Next Invoice Date :- It will display next invoice date.
Previous Invoice Date :- It will display previous invoice date.
If you have Session Based Fees by Term Type like how many sessions you have to attend.
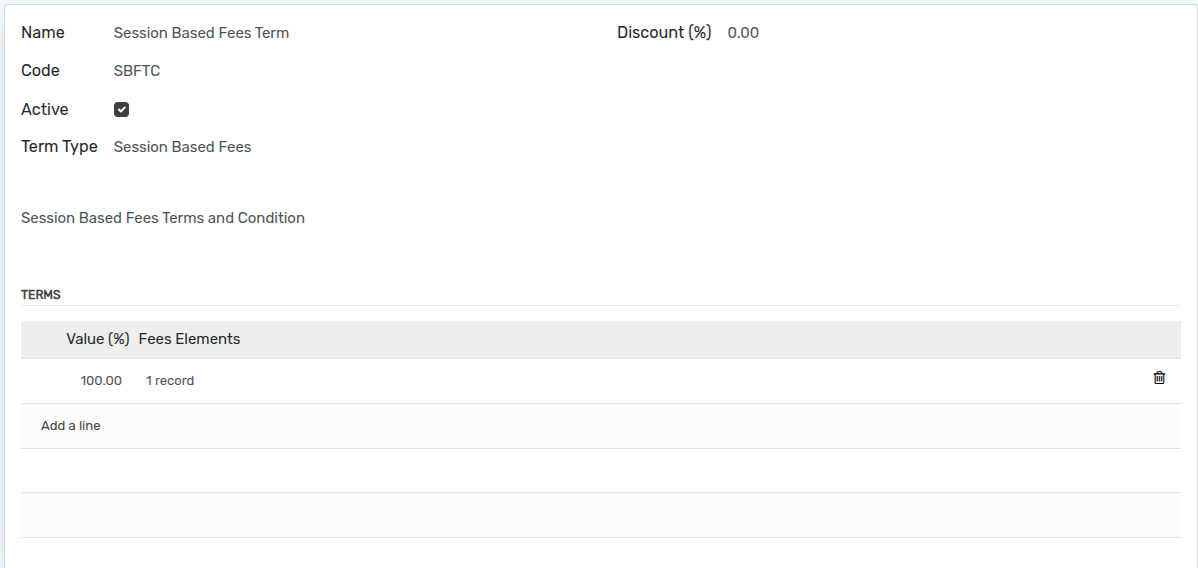
Term Type :- Select the Session Based Fees term type from the dropdown menu.
Go to Students. Click on New to create a new
student.
Once a student is created and admitted to a course, a fee plan is generated automatically. The student can also be admitted dynamically from the portal side.
You can also create student admissions from the backend. To do this, follow the steps below:-
Go to Admission page and click on New in Admission.

Go to Attendances ‣ Attendances ‣ Sheets.
Click on New to create a attendances sheet.
After select the Register and Session click on Attendances Start
button.
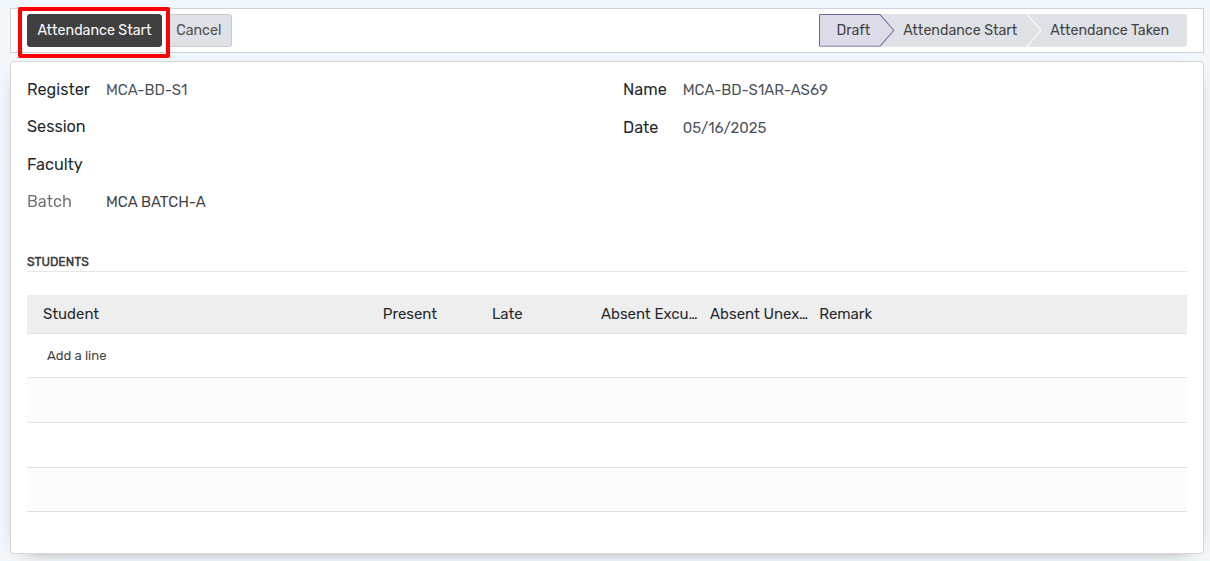
After the click of that button user can see list of students based on register and session.
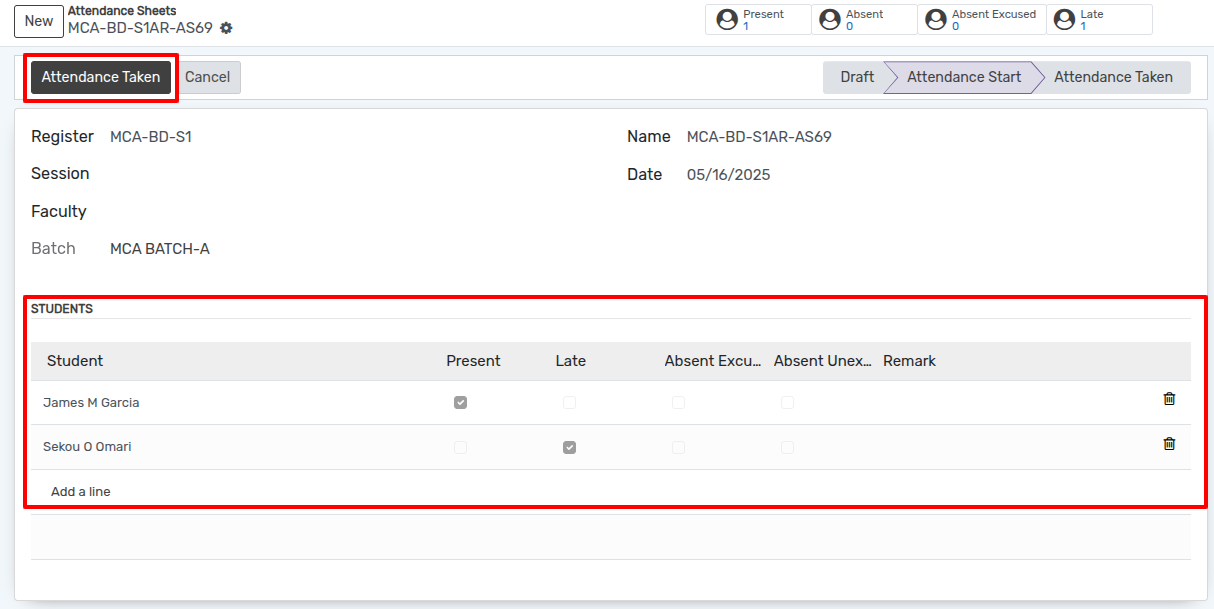
Click on Attendances Taken button.
Invoice will be generated only when the attendance taken.
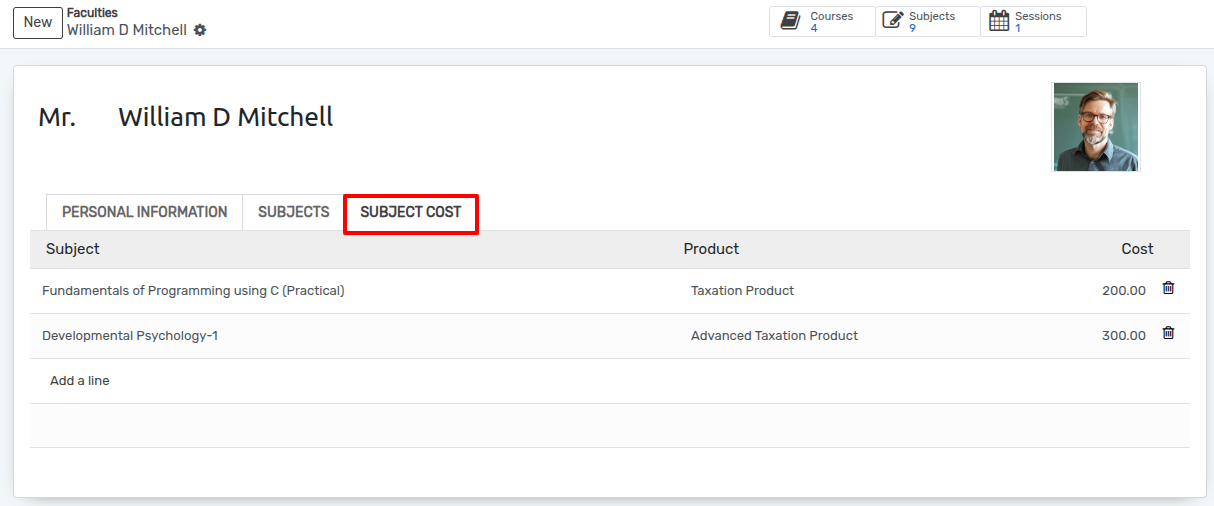
If you have Faculty Session Based Fees by Term Type its like which faculty takes how many lectures.
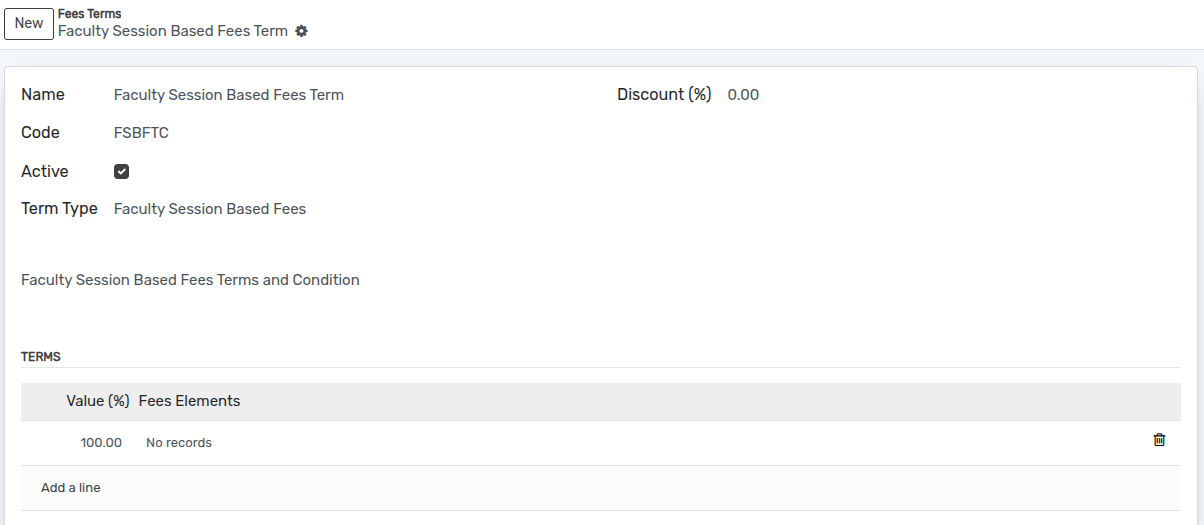
Term Type :- Select the Faculty Session Based Fees term type from the dropdown menu.
Go to Faculties and select the particular faculty.
Go to page subject cost and click on Add a Line.
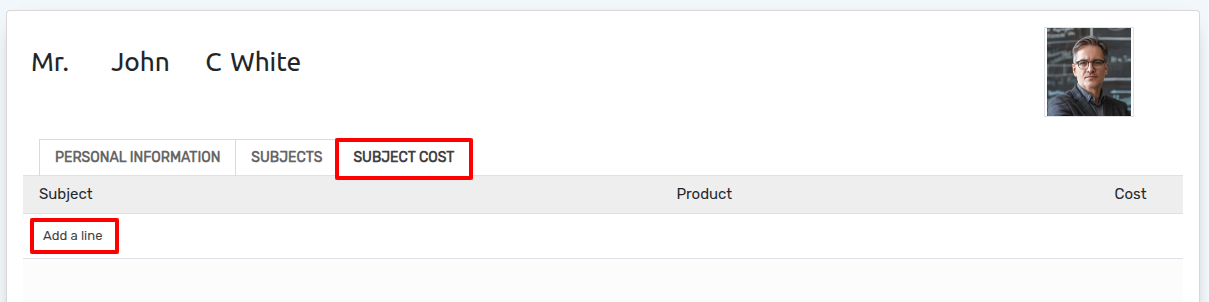
Subject :- Select the subject from the list.
Product :- Select the product from the list.
Cost :- It will automatically set based on select product.
Invoice will be generated only when the attendance taken.
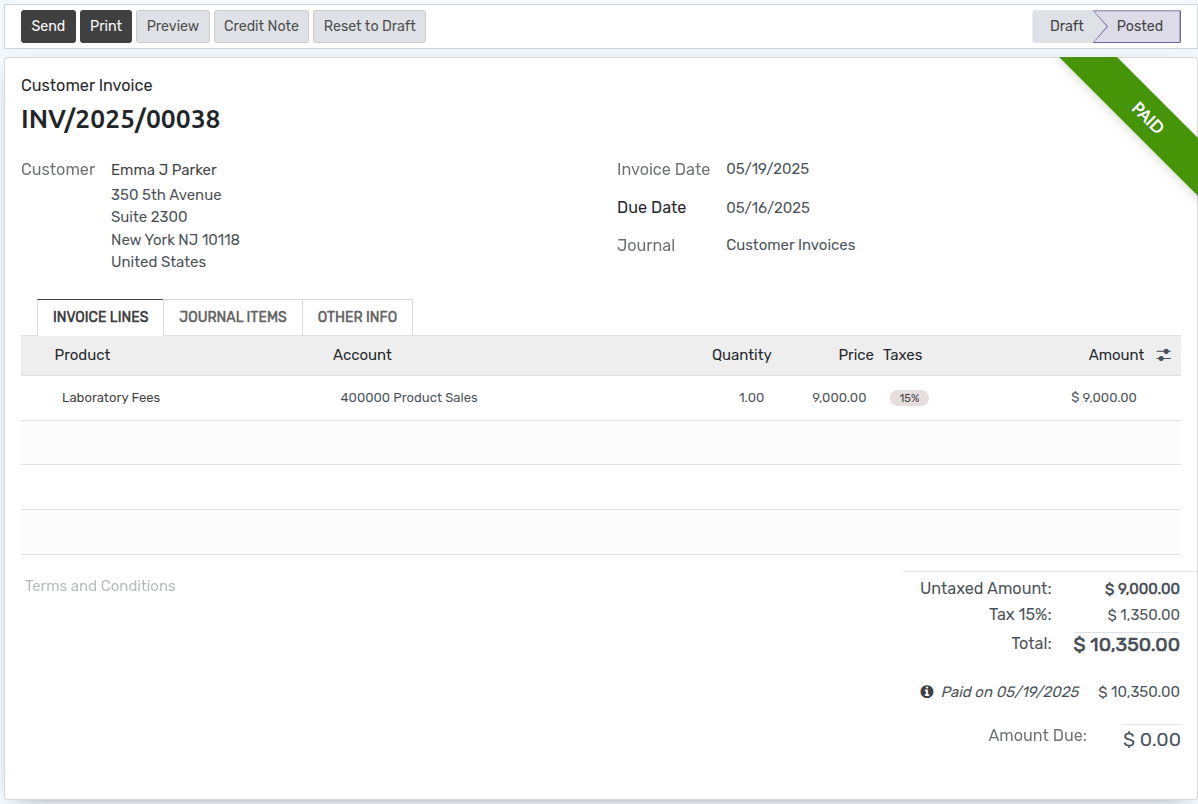
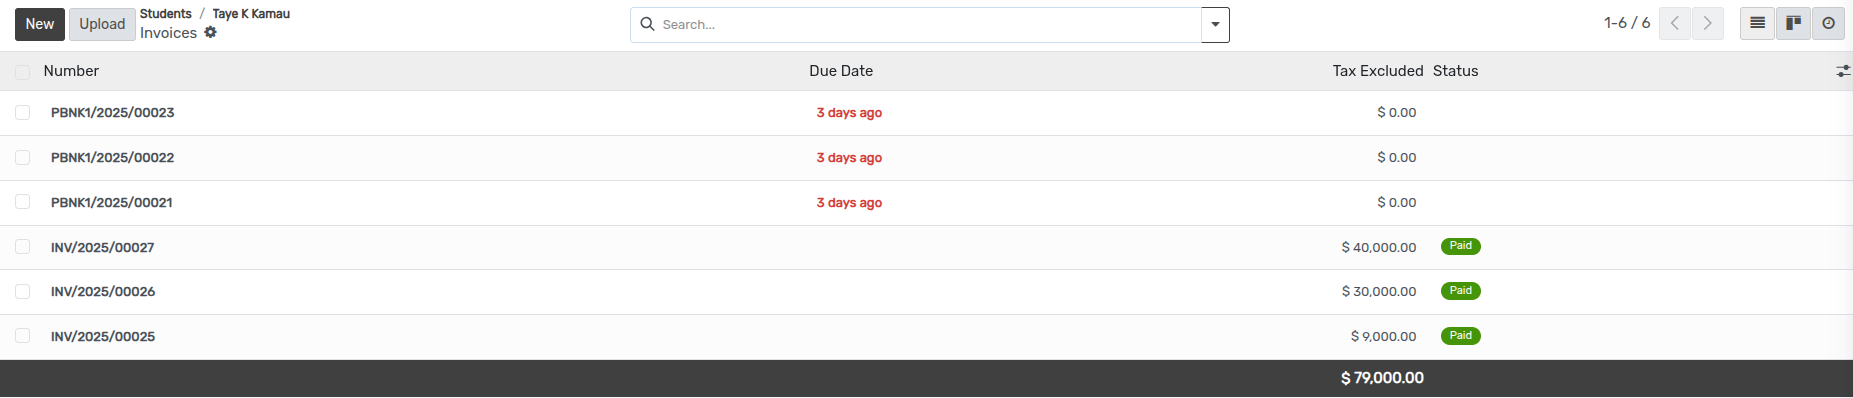
Invoice Creation
To create the invoice of the fees collection of the student, follow the
below steps :- Go to Students.
To create invoice,click on invoiced button.

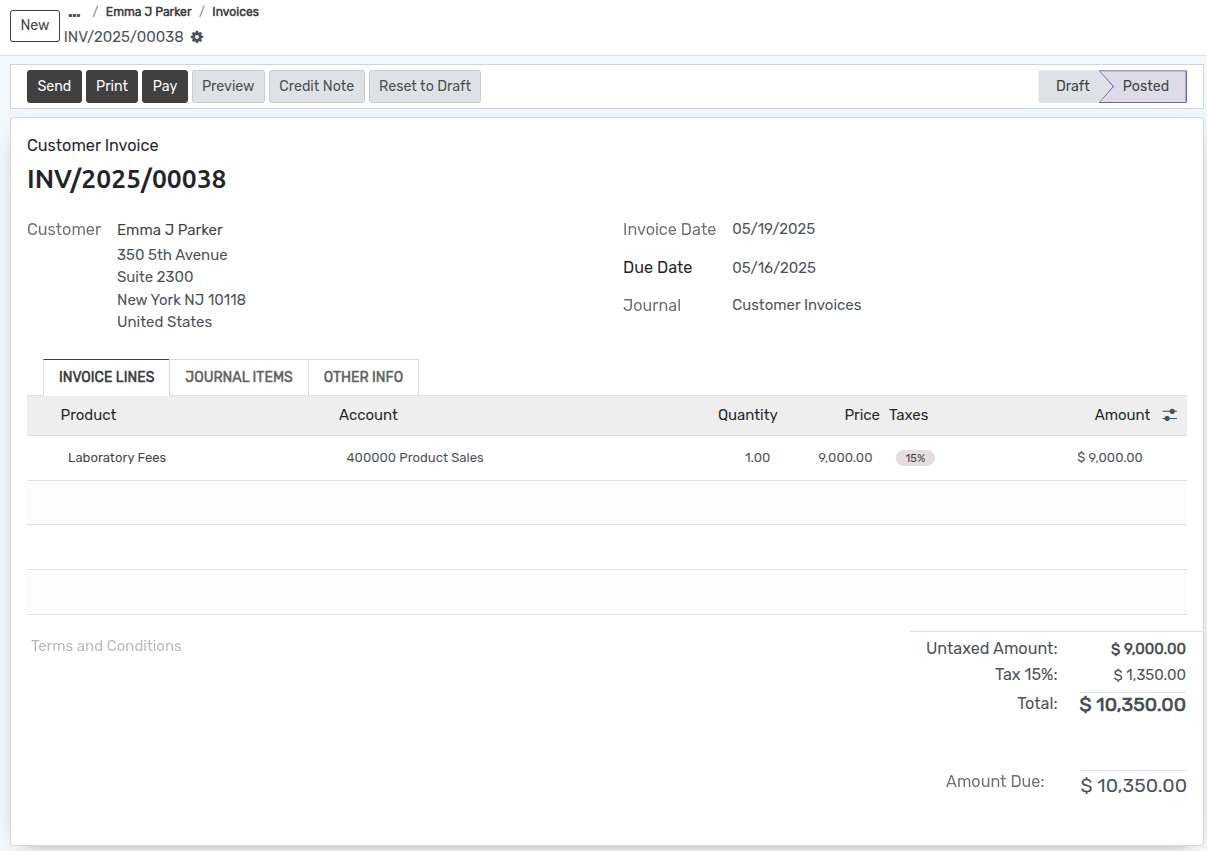
Click on pay button and wizard will open to pay fees.
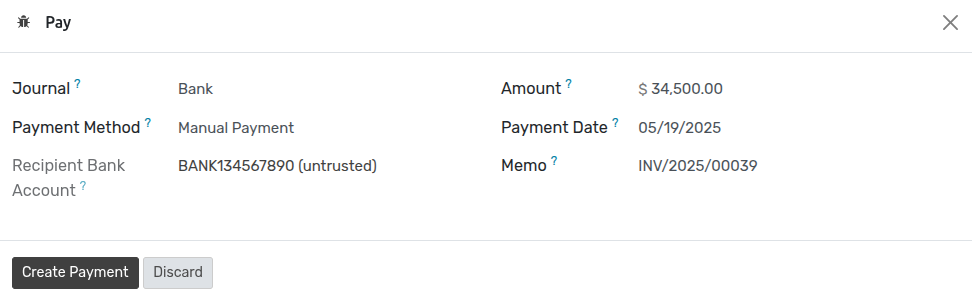
Click on Create Payment.Invoice detail is shown as below image.