How To Configure
1. How to create student profile in OpenEduCat.
Student Profile in OpenEduCat.
To create student profile in OpenEduCat, first we have to create the admission register and enroll the student in that admission register and the student profile is created in OpenEduCat.
1.) Admission Registers
Before the Enrollment of a student, an Admission Register is created for each course. All the admissions for that course falls in respective Admission Register.
You can go to the . Click on
Createbutton to create a new Admission Register.
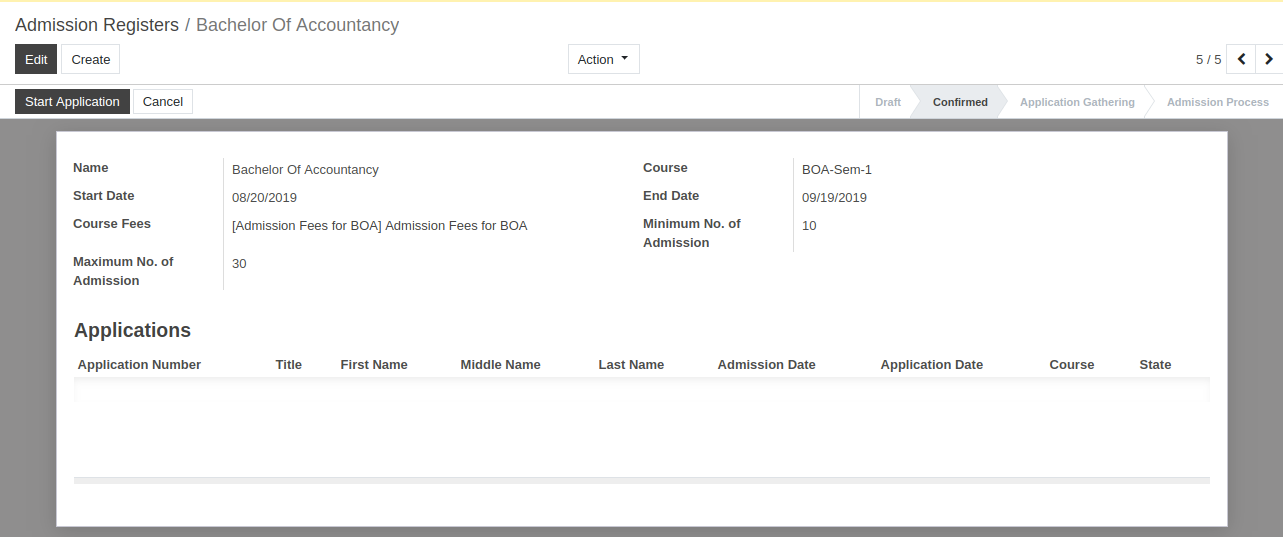
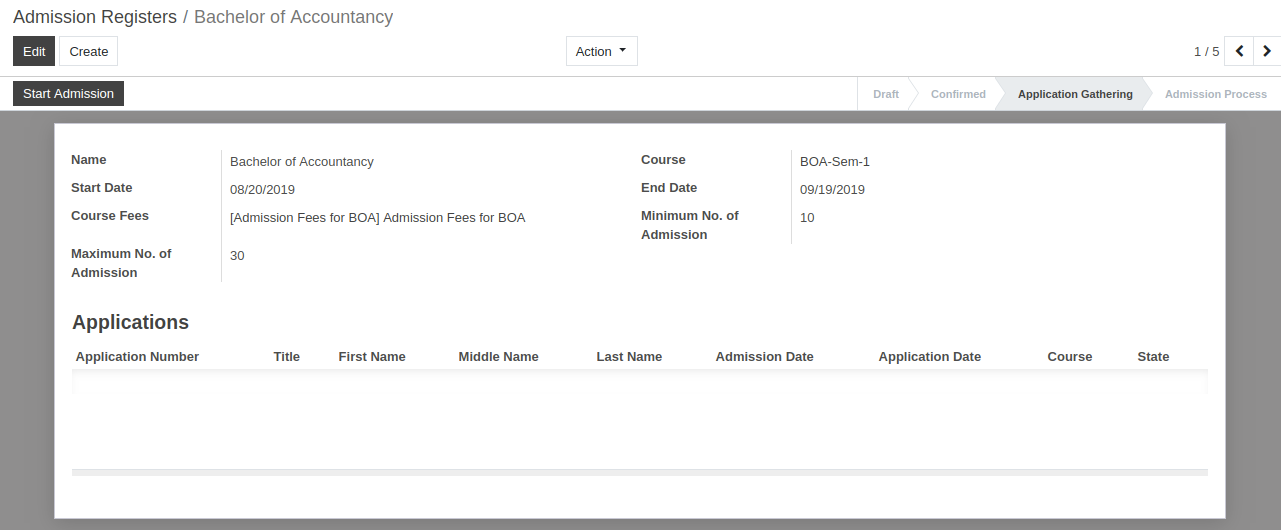
Details of Admission Registers Form:
Name :- Provide appropriate title for the admission Register.
Course :- Select the course from the list of courses.
Start Date :- By default today’s date appears here.
End Date :- By default one month later date appears here.
Course Fees :- Select the course fees of the particular admission register created.
Minimum No. of Admission :- Min no. of admissions for particular course can be specified.
Maximum No. of Admission :- Max no. of admissions for particular course can be specified. By default it displays 30.
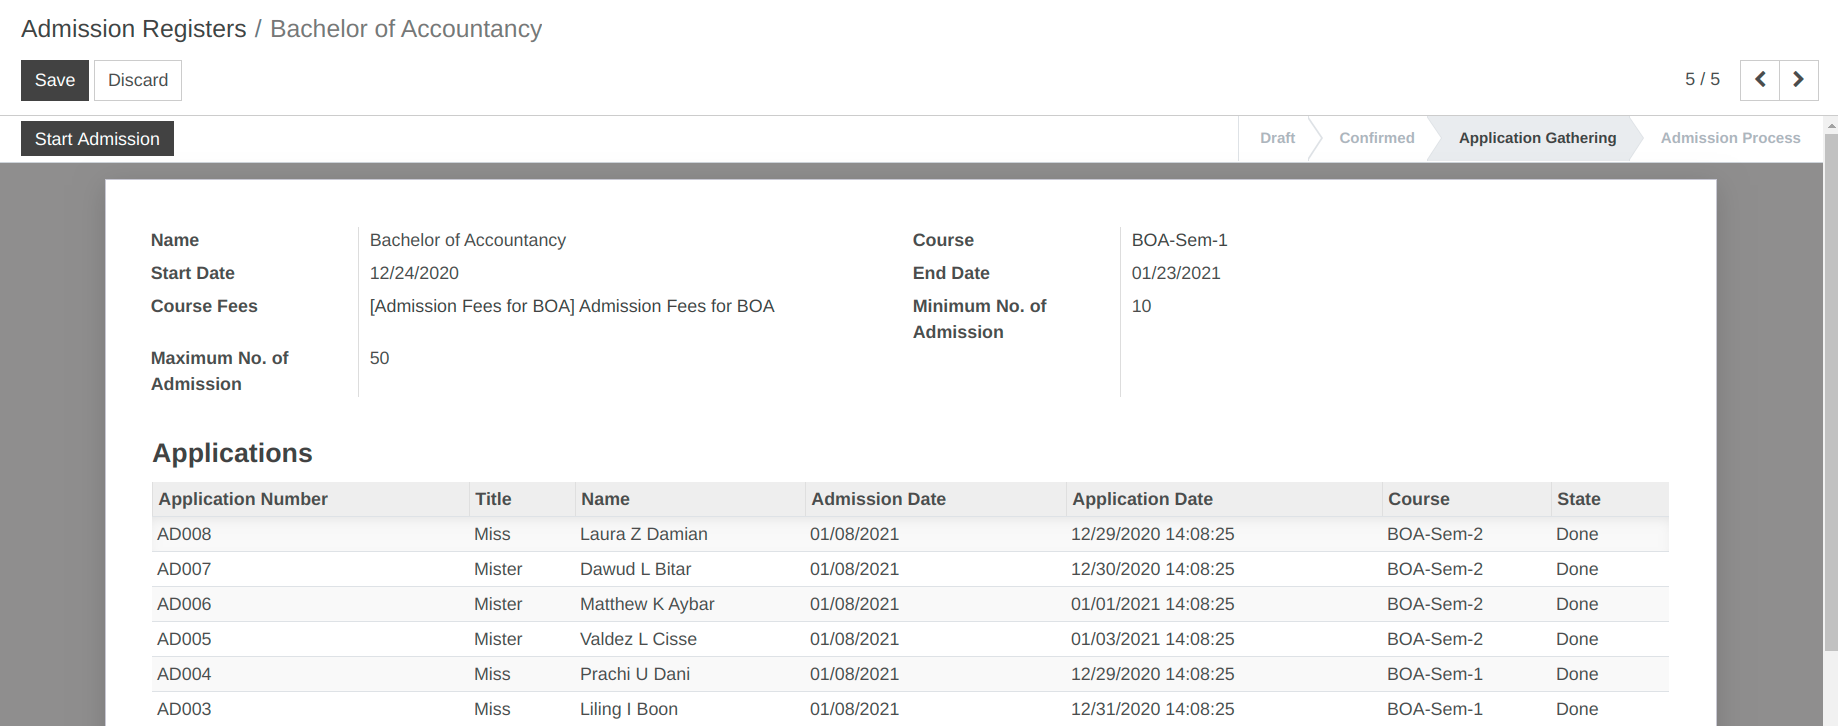
Applications :- Select no of students for admission register process.
Admission Register workflow:
Initially Admission register flow start with draft state.
Click on the
Confirmbutton to confirm the Admission Register.If you want to cancel the admission register click on the
Cancelbutton.
Click on the
Start Applicationbutton to start receiving the application from students.

2.) Applications
Flow is started from admission of the student in institute. To begin with this, OpenEduCat provides functionality of an Enrollment.
You can go to the . Click on
Createbutton to give admission to particular student.
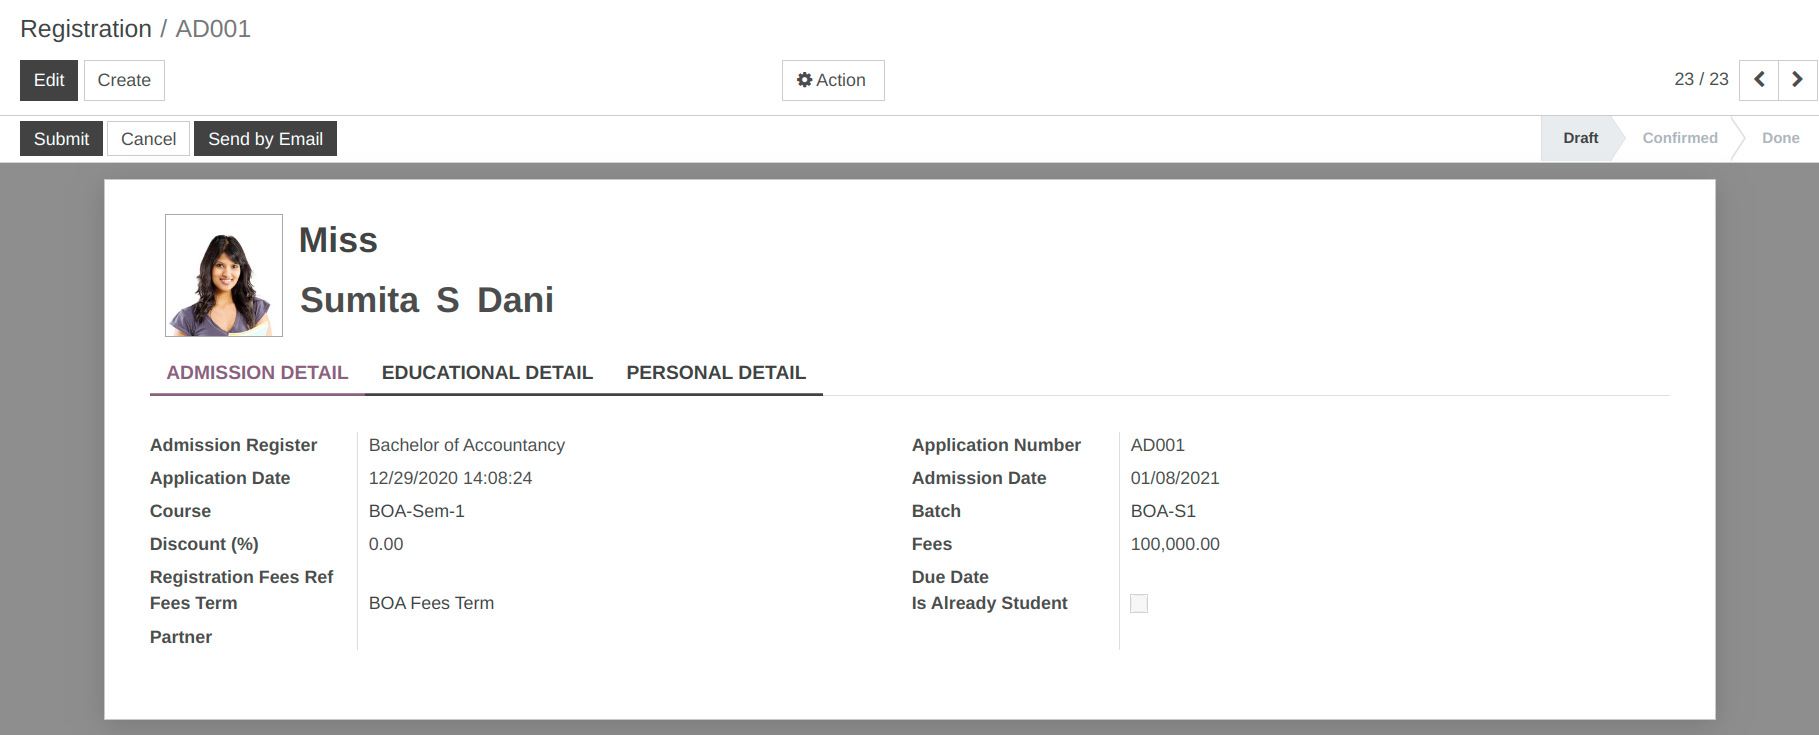
Details of Registration Form:
Photo :- Upload a passport size photo of the student from the image widget on the top left corner.
Title :- Provide appropriate title for the student from the list provided in Title field.
Name :- You can provide the name of the student in terms of First name, Middle name and Last name in the name fields.
Pages in the Registration Form:
1. Admission Detail
Admission Register :- Each admission falls in a Admission Register which basically consist of the Course(Course for which the admission is created).
Application Number :- Application Number is a unique number generated by OpenEduCat to uniquely identify the admission record. It is generated by default by OpenEduCat.
Application Date :- Application Date is the date on which this application is created. Date and time is fetched by default from the system by OpenEduCat.
Admission Date :- Admission Date is on which date the admission of the student is confirmed. It is set by OpenEduCat automatically as per the system date. You can change it later on.
Course :- Specify the name of the course in which the student has taken the admission from the list provided in Course field. You can create a new course from here too.
Batch :- Batch is the year span (For example, batch from 2012-2015) in the student is enrolling for particular course.
Discount :- Set Discount for particular course.
Fees :- Fees field fetches the price from product field in admission register or you can specify different price here.
Due Date :- Due date is the last date of the fees to be paid up for confirming the enrollment.
Fees Term :- Select Fees term for registration.
Note
Batch provides the list of only those batches which are mentioned under the Course, selected in the Course field.
2. Educational Detail
The information about the previous course, institute and score obtained in that course can be mentioned under this page.
Previous Institute :- Previous Institute can be selected from the list of names of organization from where student has pursued his last educational degree.
Previous Course :- Previous Course can be selected from the list of available course that student has completed successfully.
Previous Result :- You can provide the result of student’s latest degree in terms of percentage in Previous Result field.

3. Personal Detail
To specify the personal details of the student, open this tab.
Gender :- Specify the Gender of Student.
Birth Date :- Specify the Date of Birth of Student.
Email :- Specify the Email of Student.
Address :- Specify the contact details of the applicant in here with details like street, city, state, zip code, country, phone number, mobile number and email.
Family Business :- You can specify family business in this field.
Family Income :- You can specify family income in this field.

Workflow of Registration:
1. Draft
Once the details are filled up in the enrollment registration form and it is saved, the state is Draft. Workflow of this form is started from here.
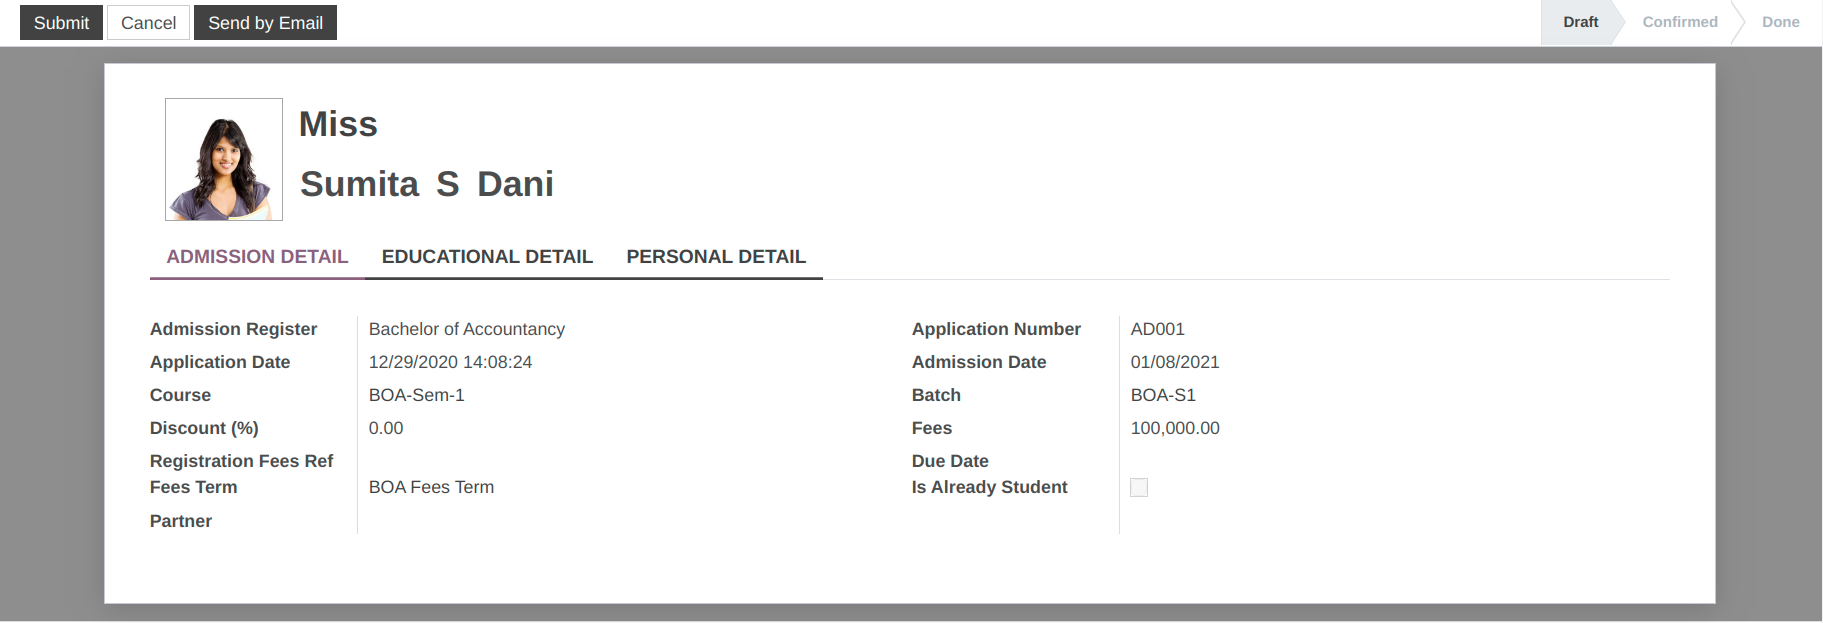
2. Submit
Click on Submit button to confirm the application. This changes the state of record from
DrafttoSubmitted.
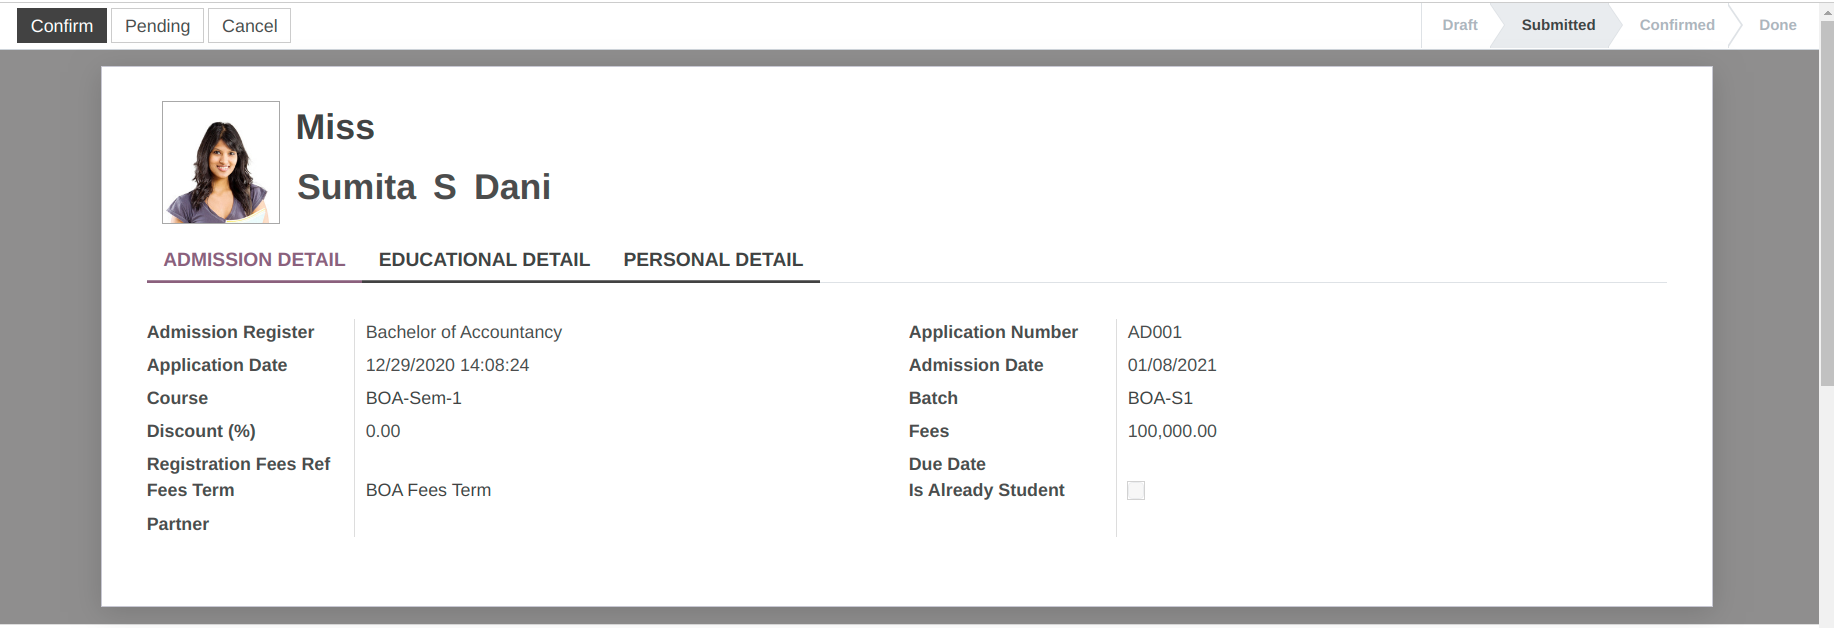
3. Confirm
Click on Confirm button to confirm the application. This changes the state of record from
SubmittedtoConfirmed.In order or cancel the application, click on
Cancelbutton.
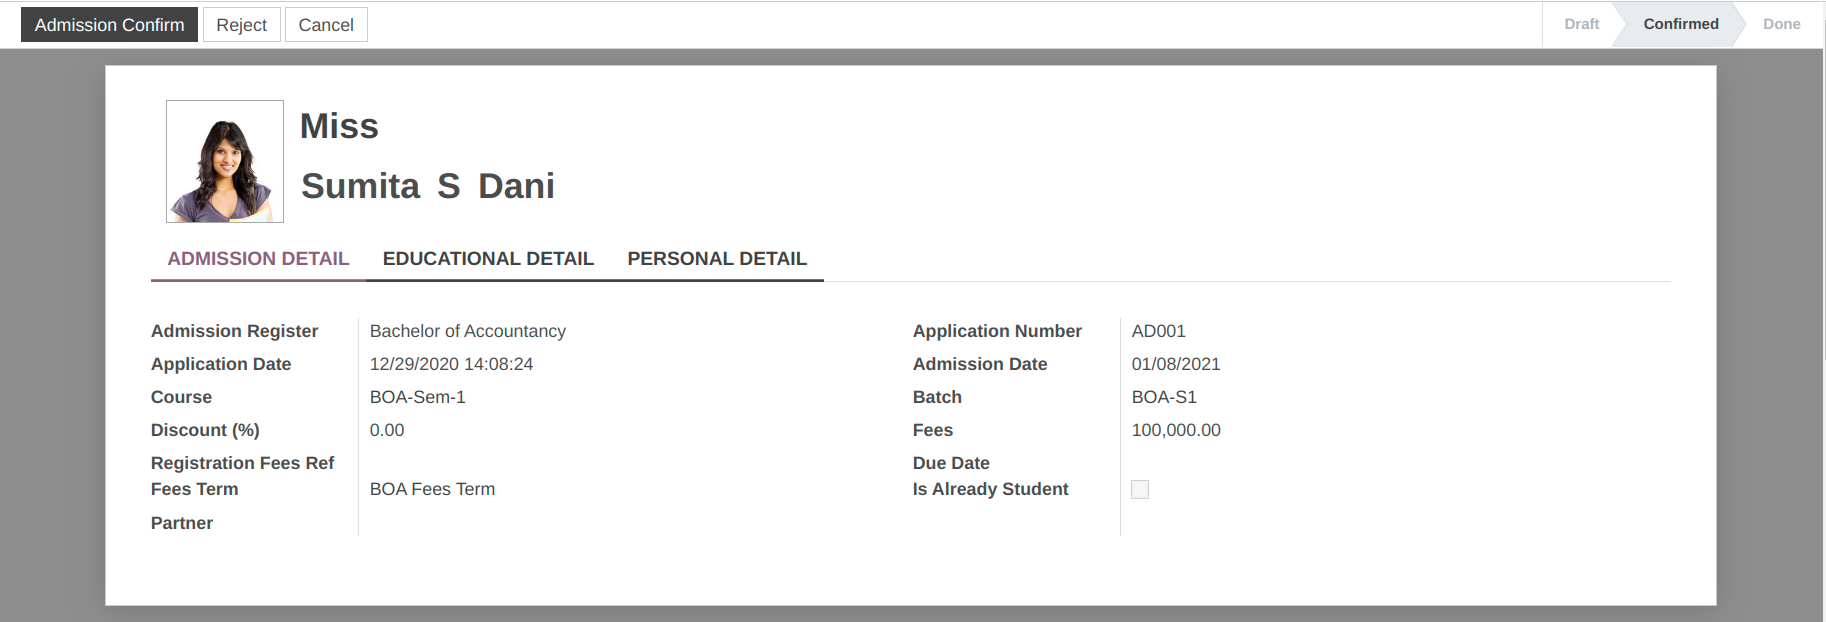
4. Admission Confirm
Click on Admission Confirm button to confirm the application. This changes the state of record from
ConfirmedtoAdmission Confirm.
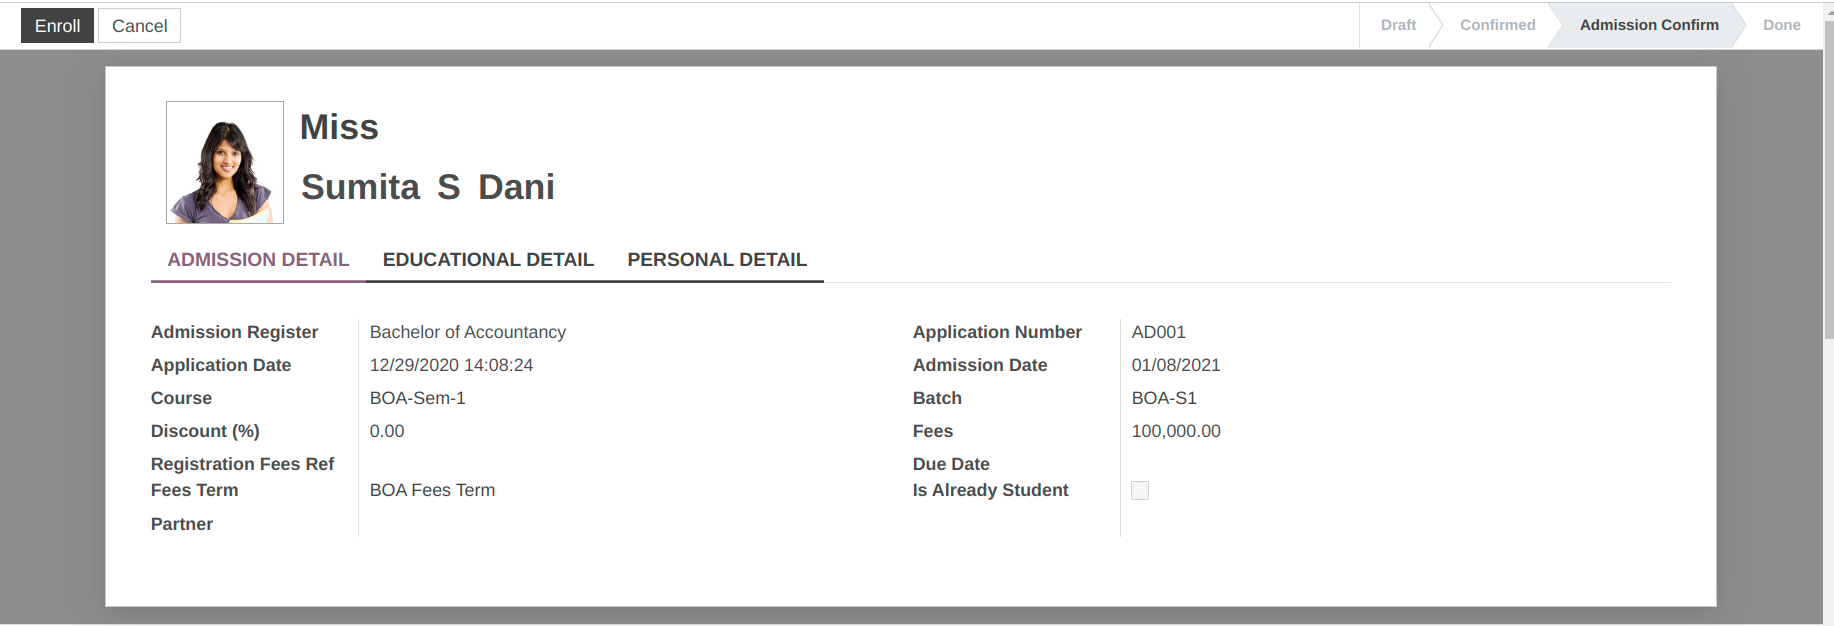
5. Enroll
Click on Enroll button to Enroll student. This changes the state from
Admission ConfirmtoDone.

You can see the enrolled student in that particular register.

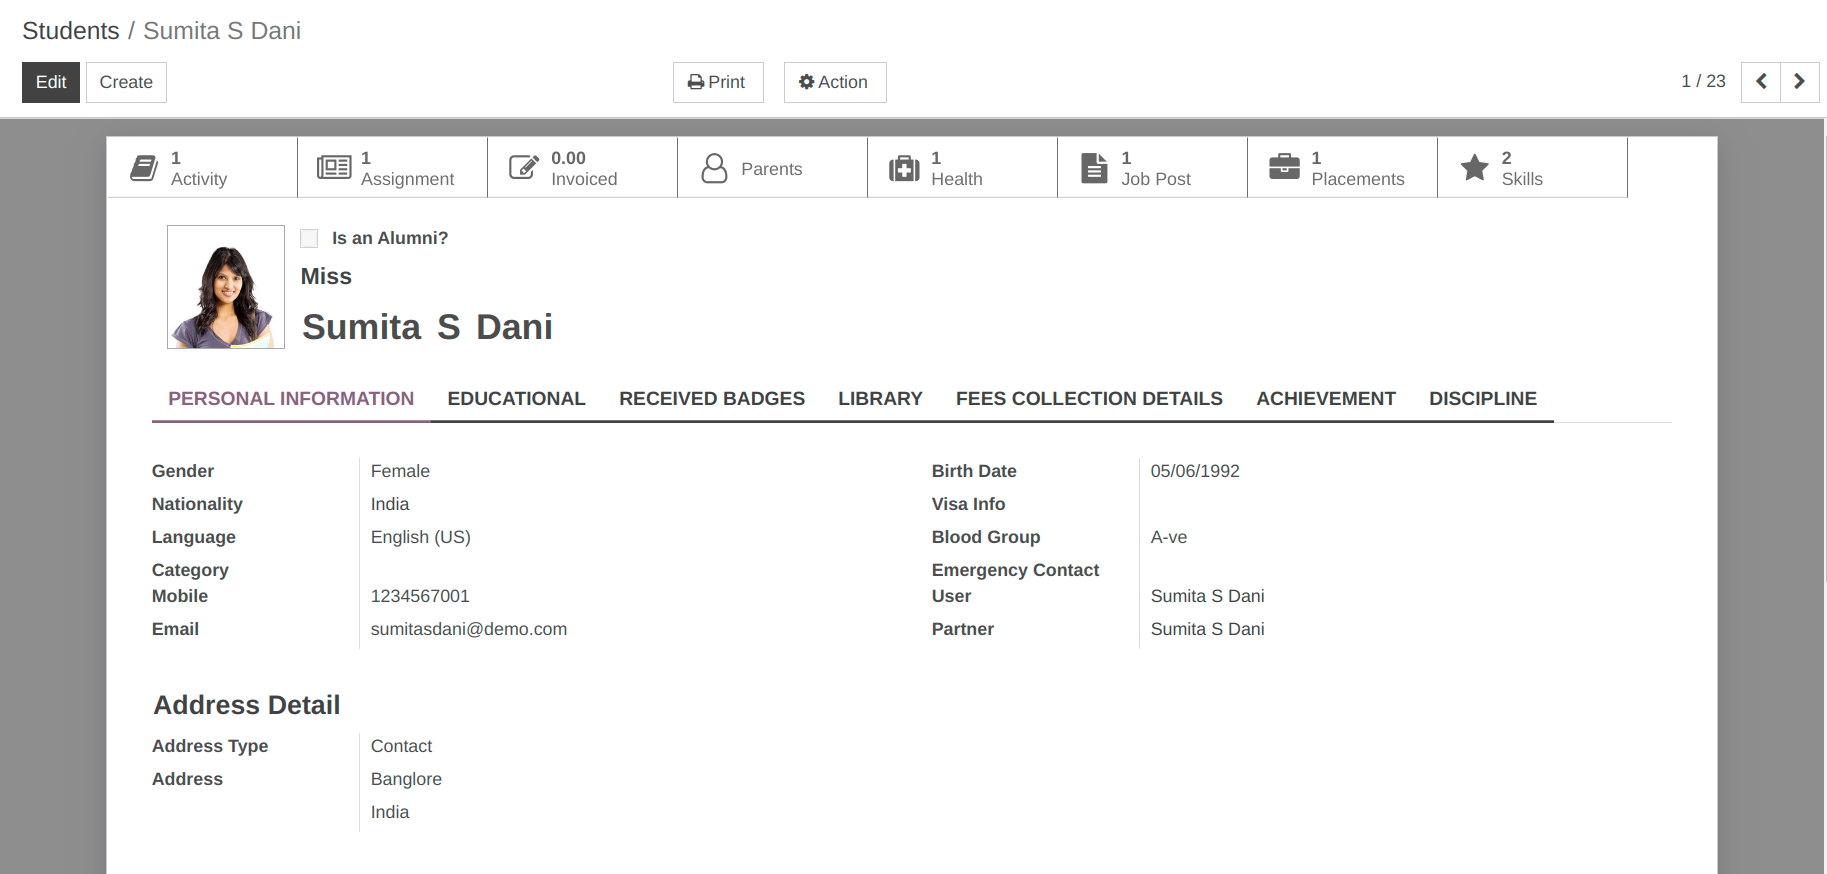
Open Student Profile
Clicking on Open Student Profile , You can see student profile detail.
The alternative way to create student profile is as below:
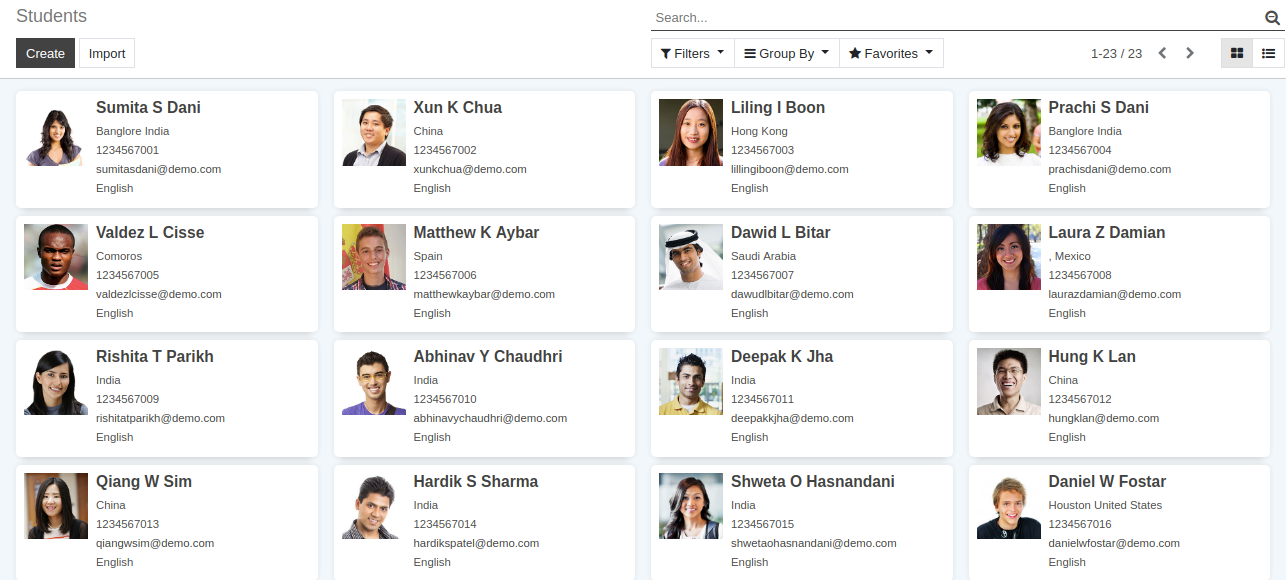
Student:
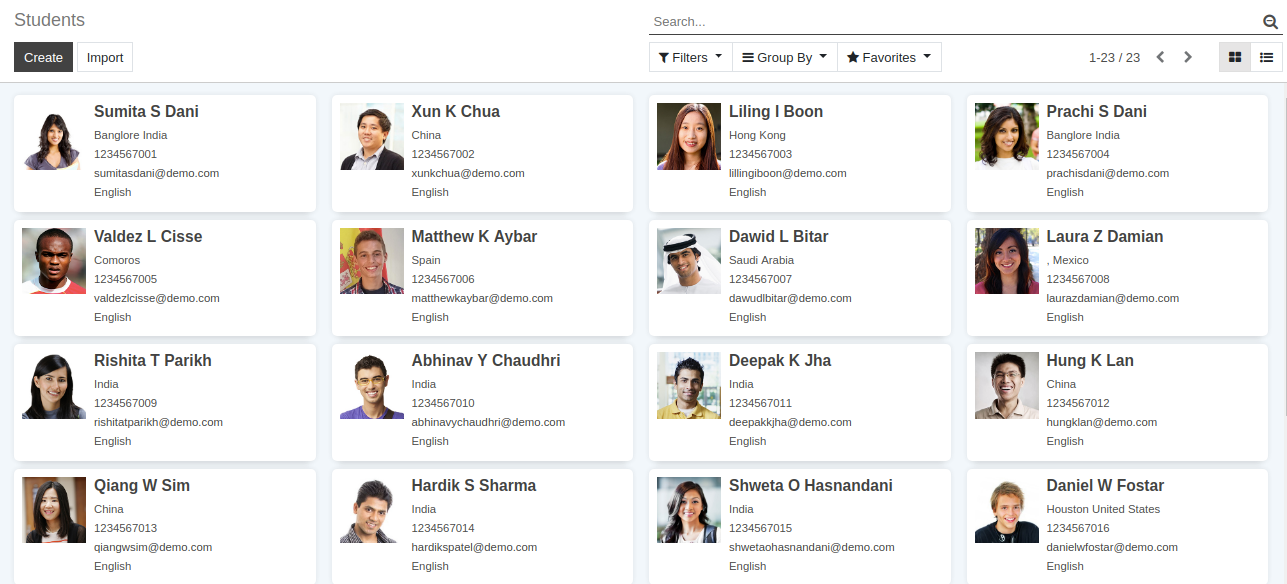
OpenEduCat provides the fully developed module especially manage the details of the Student. You can manage student profile starting from creating a record for a student to manage his/her profile till the end of his academic session.
You can go to the .
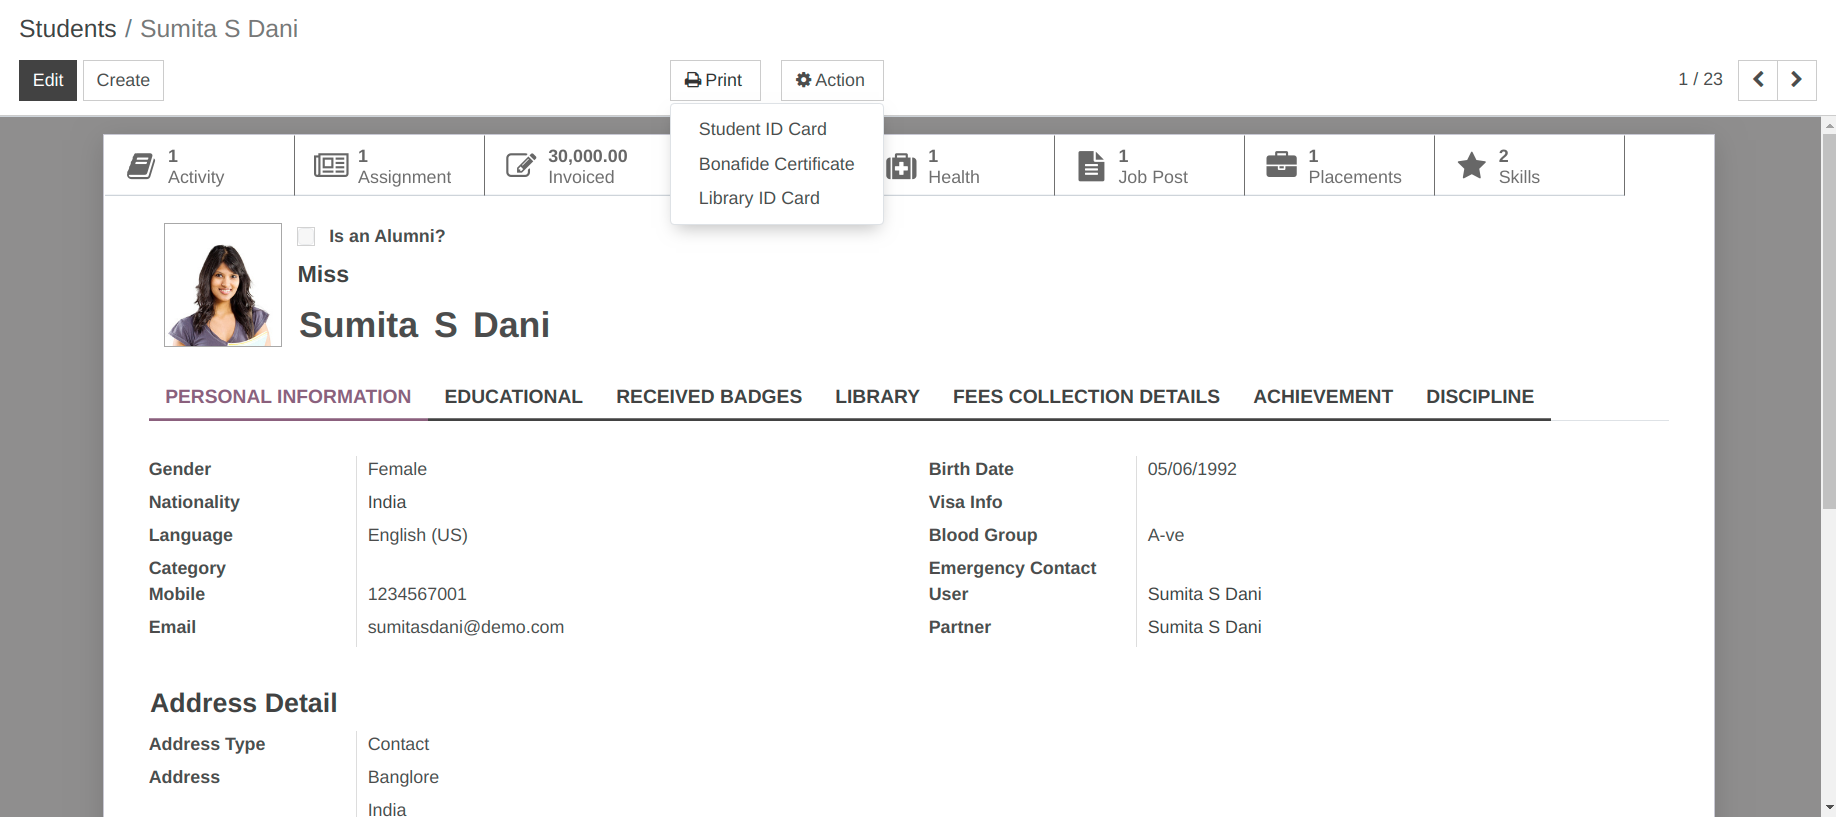
The below image shows the student profile which is created by OpenEduCat.

Details of Students:
Is an Alumni :- If student is an alumni student of your institute click on Alumni Student check box.
Photo :- You can upload a photograph of student from the image widget on the top-left corner.
Title :- Provide appropriate title for the student from the list provided in Title field.
Name :- You can provide the name of the student in terms of First name, Middle name and Last name in the name fields.
Pages in Students Form:
1. Personal Information
Under the Personal Detail, you can specify the personal details of the student.
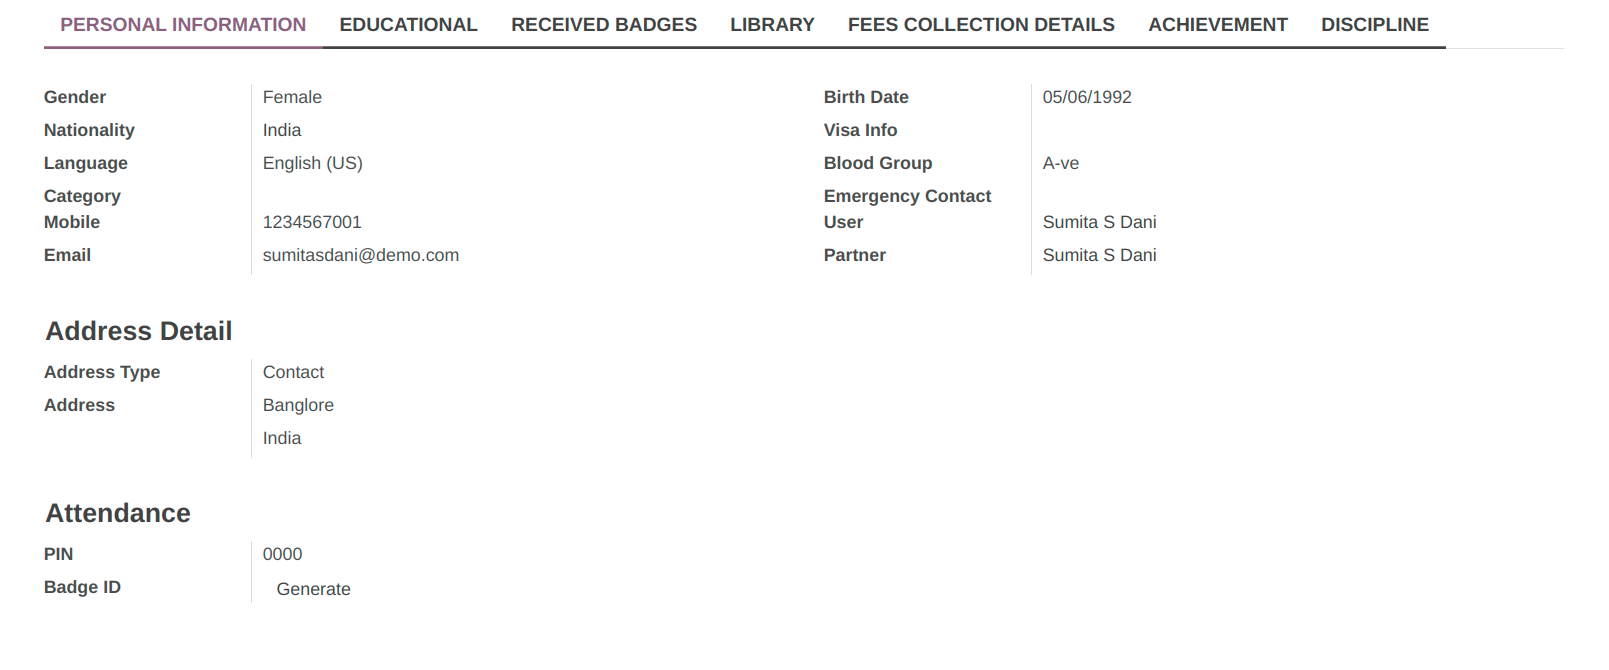
Gender and Birth date :- You can specify the Gender and the Birth date of the student.
Nationality :- Specify the nationality of the student in Nationality field.
Visa Info :- Specify the Visa info in Visa Info field.
Language :- Set the primary language of student in Language field.
Blood Group :- Select the blood group of the student in Blood group of student from list provided.
Category :- Specify category of student.
Emergency Contact :- Emergency Contact is list of people. You can select one of them. This contact person will be contacted in emergency for this student.
User :- User is OpenEduCat user for this student.
Address Type :- Address details has Address Type to specify the type of the address. It can be Default, Invoice, Shipping, Contact or Other.
Address :- You can add details like street, city, state, nation, zip code and country in the provided fields.
2. Educational
You can provide the educational details of the student under this tab.
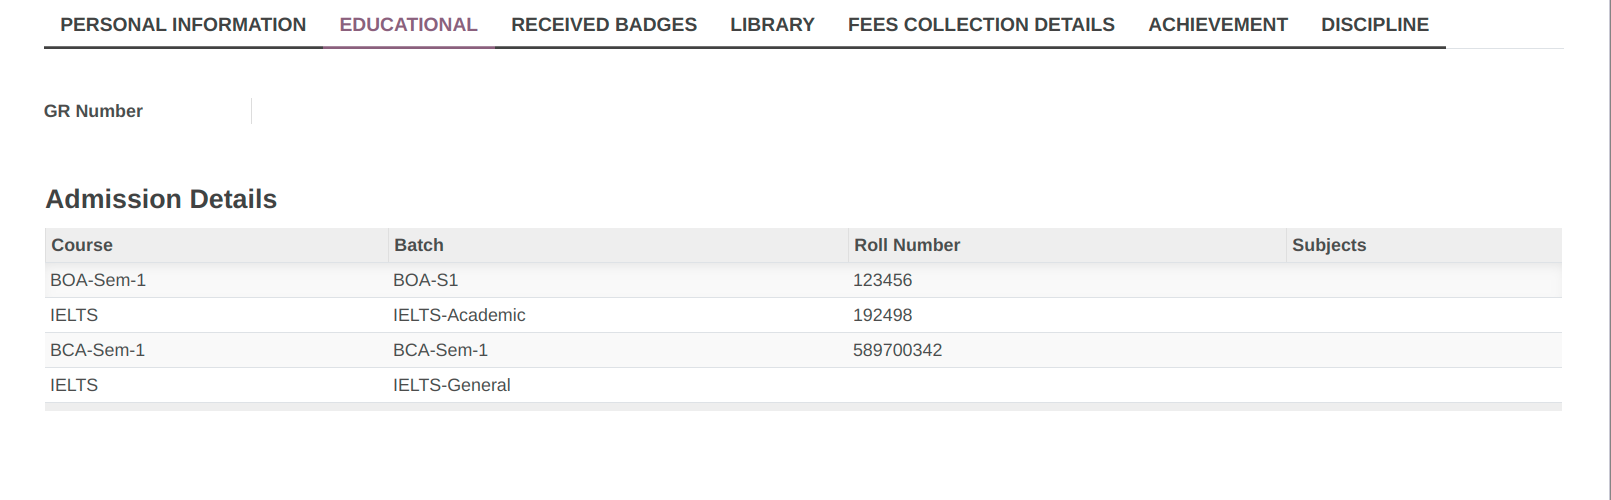
GR Number :- GR Number is the current General Register number of the student.
Course :- Course is the current course of the student, he is studying in.
Batch :- Batch is the current batch, the student is studying in.
Roll Number :- Assigns Roll Numbers are the roll no. given to the student based on course chosen.
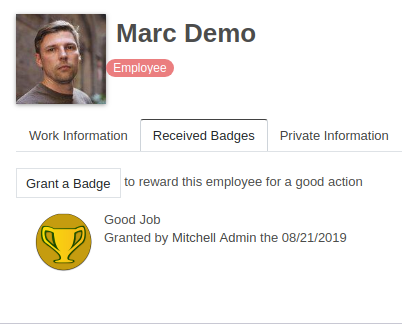
3. Received Badges
Received Badged given to Student.

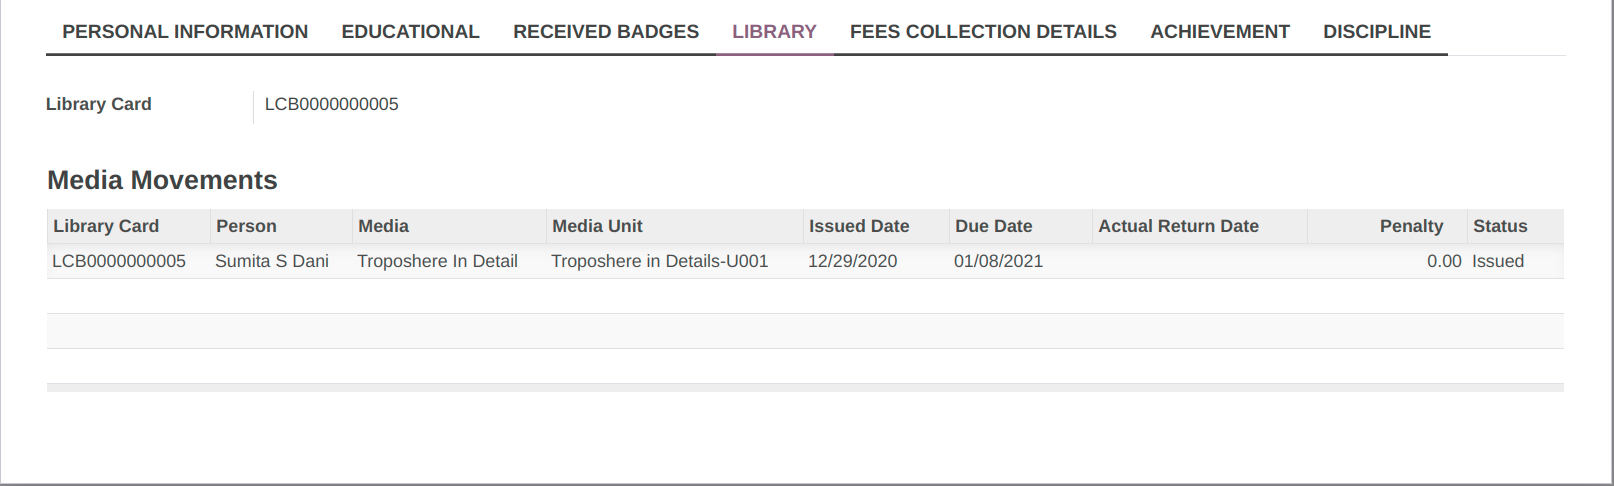
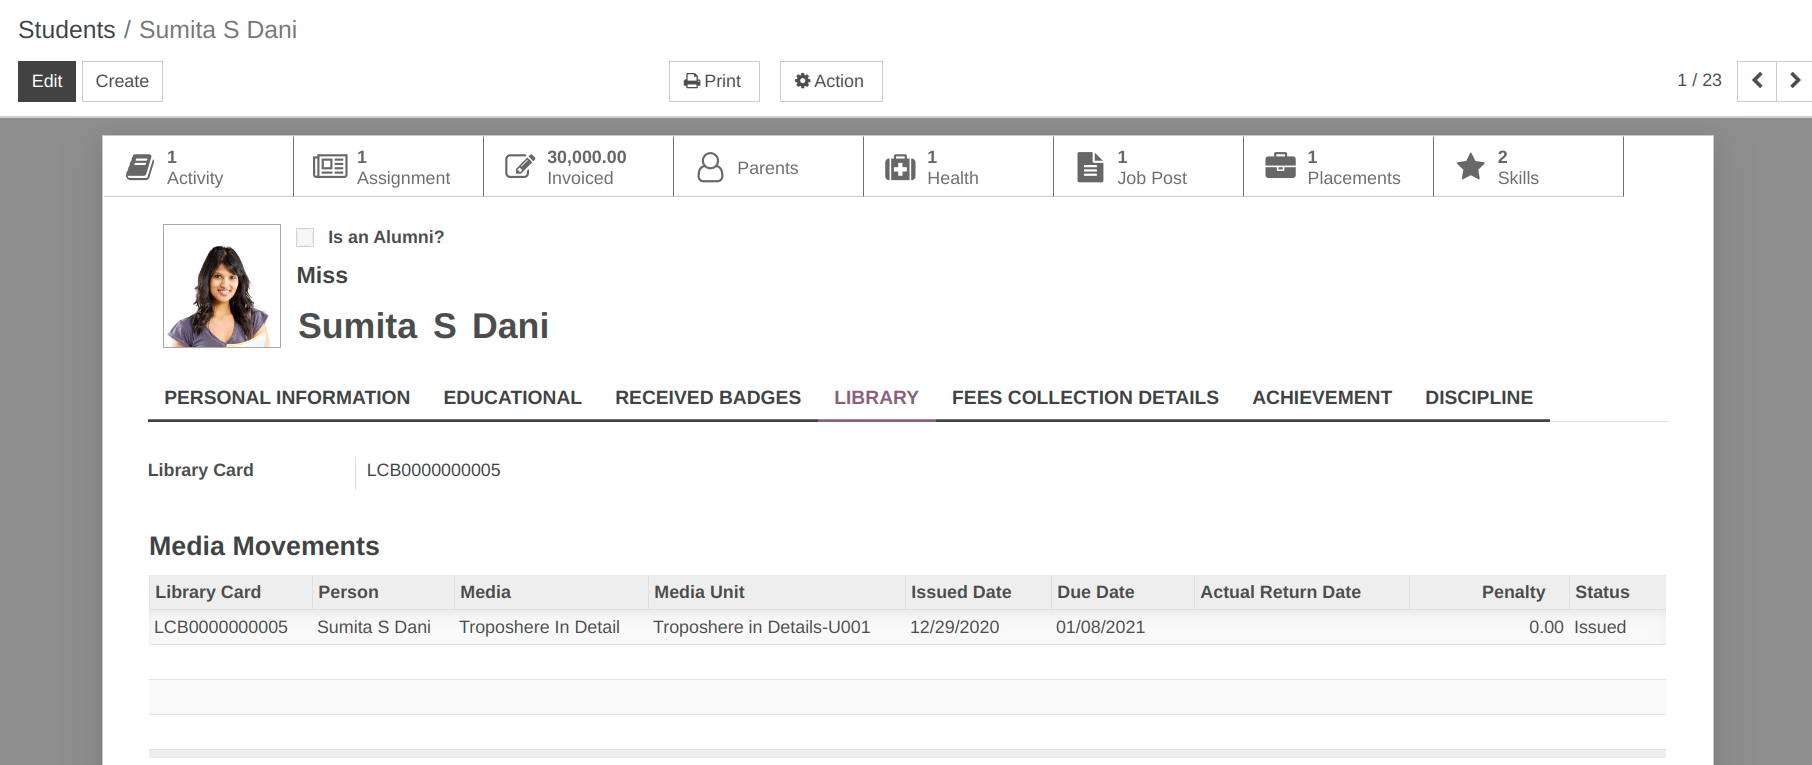
4. Library
Library Card :- The library Card held by student is mentioned in Library Card field.
Media Movements :- Media Movements shows the books requested, issued, returened to and by the student. It shows the media movements with respect to student.
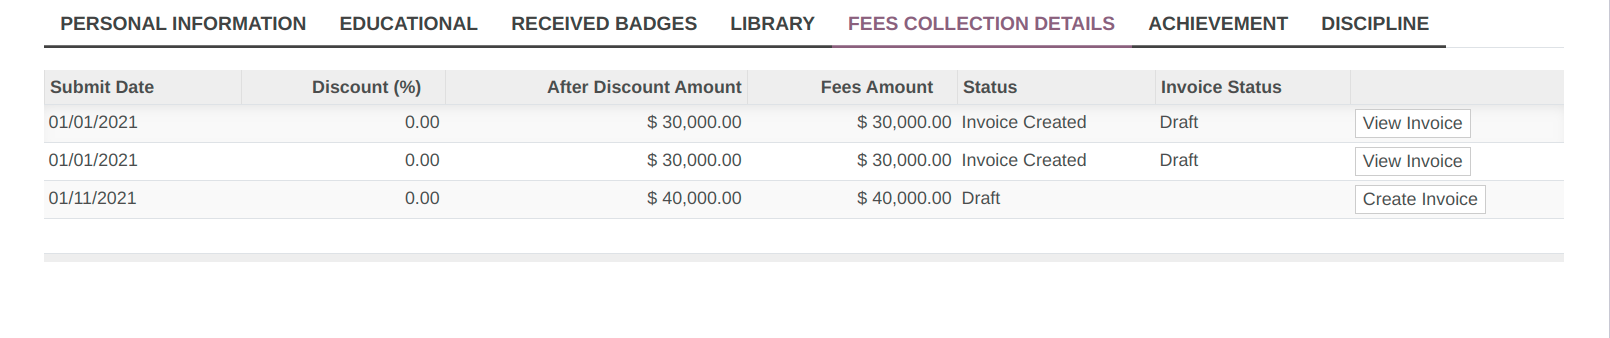
5. Fees Collection Detail
You can find details of Fees Detail of student under this tab.
6. Achievements
Participating in the activity leads to achievements of the students. You can maintain details of all the achievements here.
Information like which student achieved which achievement on which date can be stored here.
Go to .
Click on Create to create a new achievement.
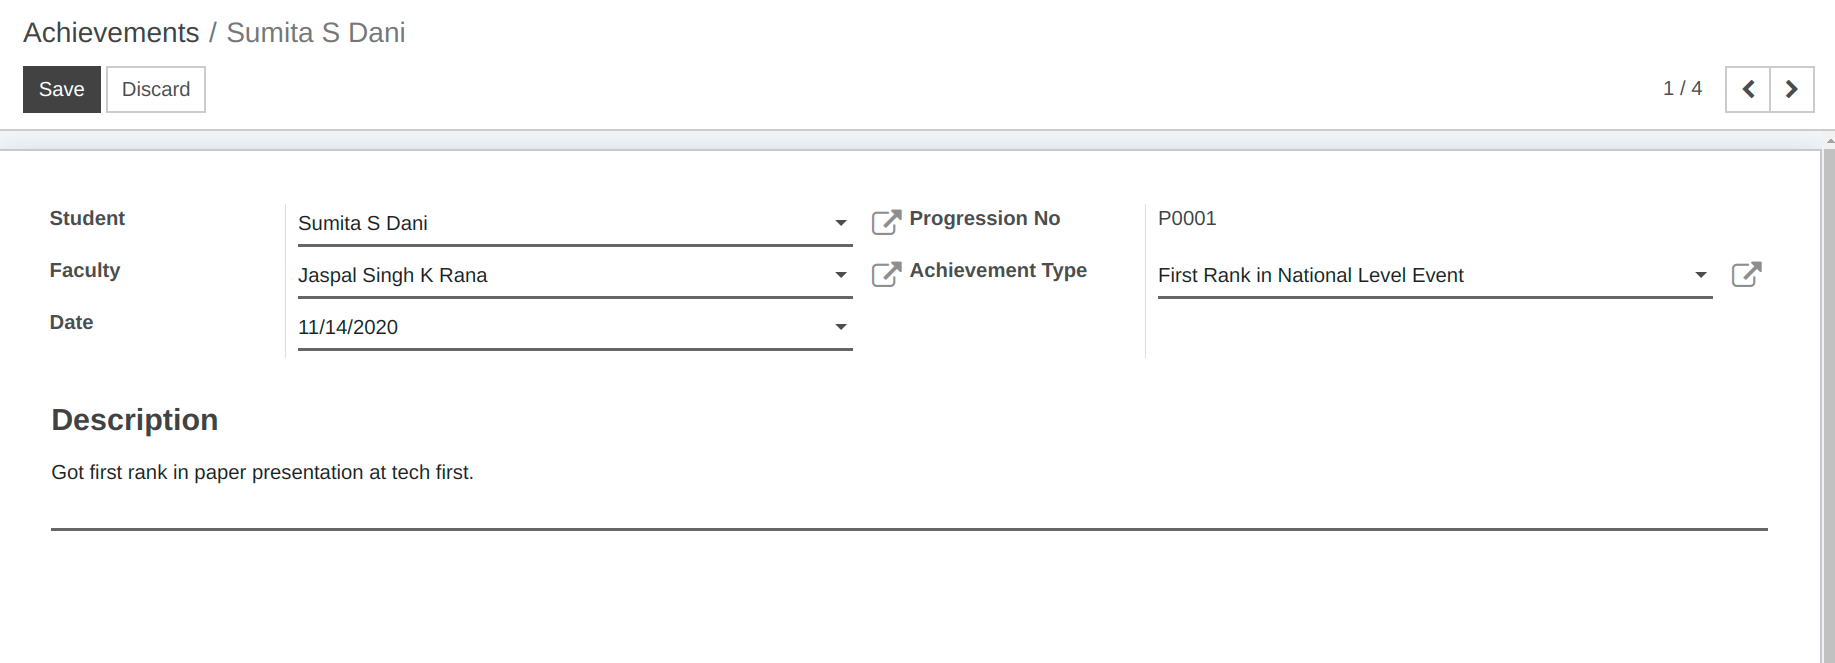
Details of Achievements
Student :- Provide the name of the student who has achieved something from the list here.
Progression No :- It will show a Progression number of Particular student.
Faculty :- Provide the name of the faculty from the list here.
Achievement Type :- Select the type of achievement from the list here.
Date :- By default today’s date appears in this fileds, you can change the date as per requirement.
Description :- You can provide description of achievement here.
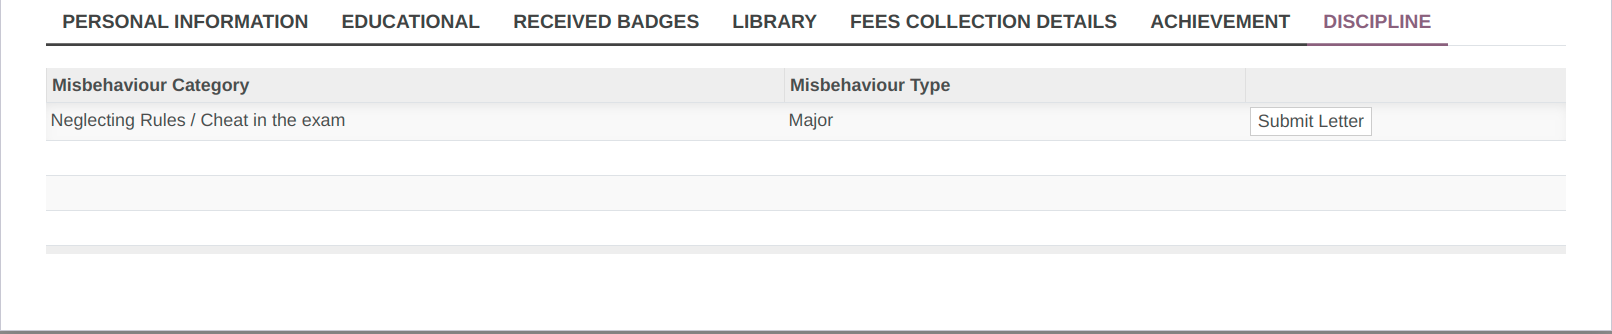
7. Discipline
You can find the details of student discipline
Activity Log
You can find details of extra curricular activities in which student has participated on this button.

Assignments
The list of assignments which were specified to a particular student is displayed on this button.


Parents
You can find details of Parent of student on this button.


Health
You can set health related details for a student on this button.


Job Post
If student has applied for any job, it will be displayed on this button.


Placements
You can find out the list of placement offers for a student on this button.


Skills
Student can create their own skills and rate them.


Alumni
If student is an alumni student of your institute, click on Alumni Student check box to allow to show the Alumni Details of student.

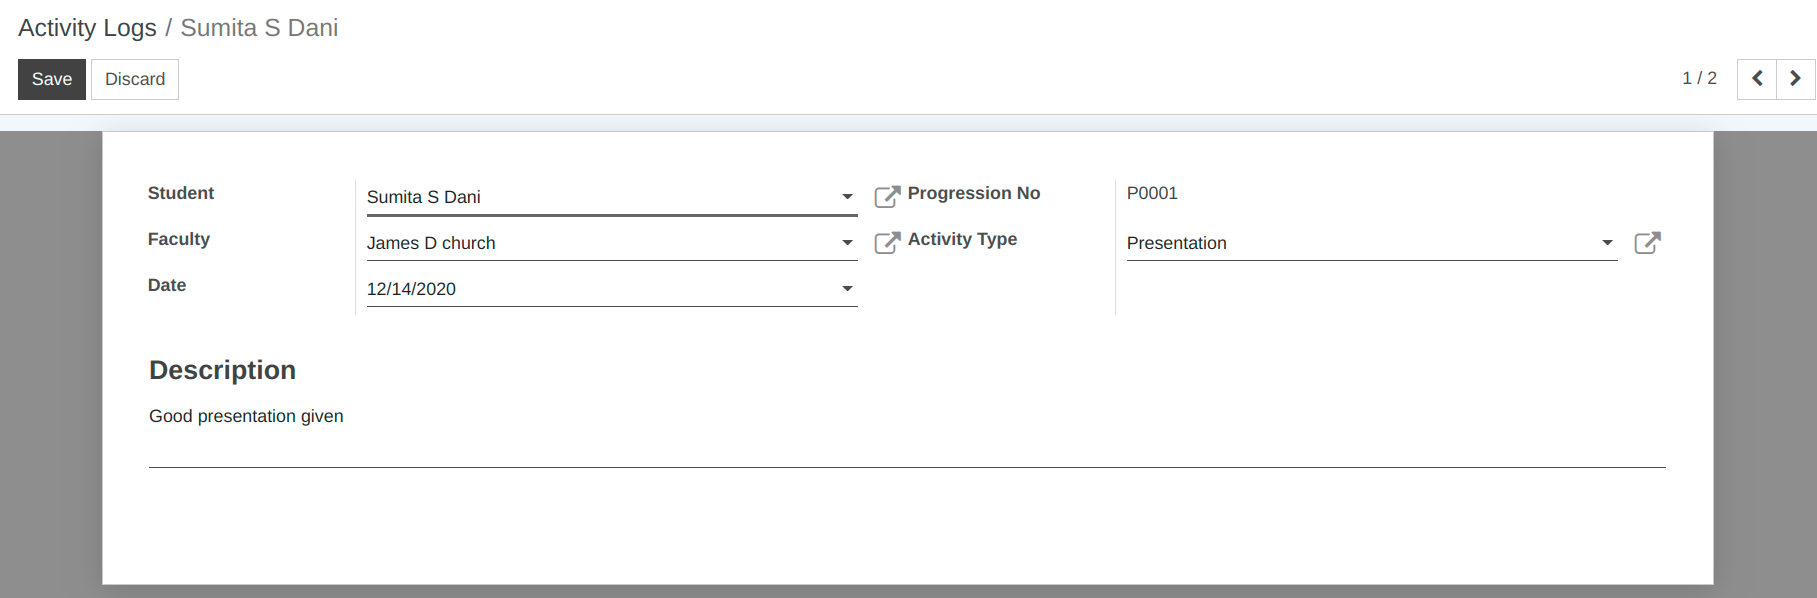
Activity Logs
Various activities takes place in the institute. You can maintain details of all the activites here.
Information like which student participated in which activity on which date can be stored here.
Go to .
Click on Create to create a new activity log.
Details of Activity Logs
Student :- Provide the name of the student who has participated in the activity from the list here.
Progression No :- It will show a Progression number of Particular student.
Faculty :- Provide the name of the faculty who has participated in the activity from the list here.
Activity Type :- Select the type of activity from the list here.
Date :- By default today’s date appears in this filed, you can change the date as per requirement.
Description :- Provide the description about the Activity.
2. Manage Faculty Profile in OpenEduCat
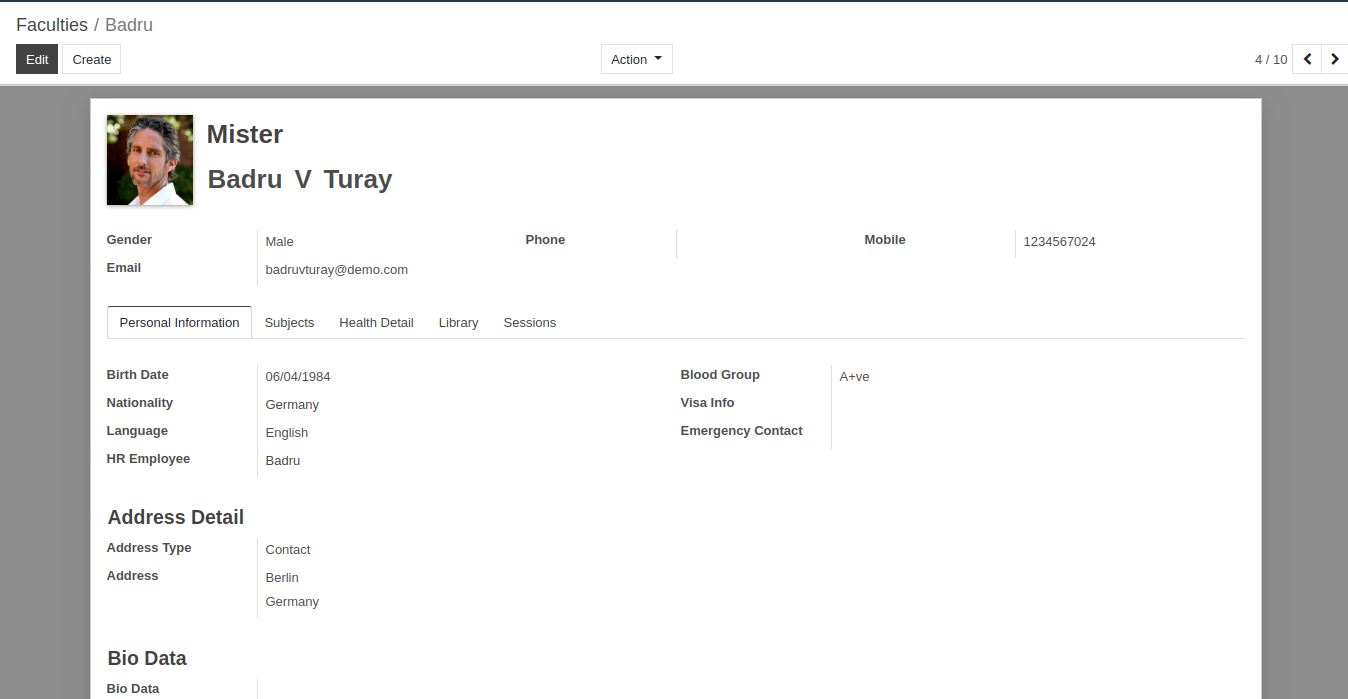
Faculty:
OpenEduCat is fully integrated application which provides a facility to manage the faculty information.
Go to menu .
Click on Create to create a new faculty profile.
Details of Faculty Form:
Photo :- You can upload the photograph of a faculty using image widget at the top-left corner.
Title :- Provide the appropriate title for the faculty from the list of titles.
Name :- Assign values in First Name, Middle Name and Last Name to specify the name of the faculty.
Basic Information :- Under Basic Information, provide details like Gender, Phone, Mobile number and Email of the faculty.
Pages in Faculty Form:
1. Personal Information

You can specify the personal details of the faculty under this page.
Birth Date :- Specify the birth date of the faculty.
Blood Group :- Specify the blood group of the faculty.
Nationality :- Specify the nationality of the faculty.
Visa Info :- Add visa related textual description in Visa Info field.
Language :- You can specify the primary language of the faculty.
Emergency Contact :- It is the list of the users in the system. You can specify one from the list who can be contacted in emergency.
HR Employee :- When an employee for the faculty is created, name of the created employee is set in Employee field.
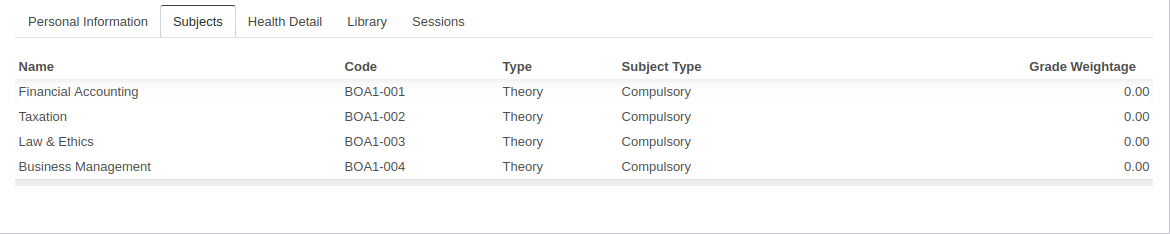
2. Subjects Detail
You can specify the list of subjects that the faculty teaches under this tab.
3. Health Detail
Health related details for the faculty should be mentioned over here.

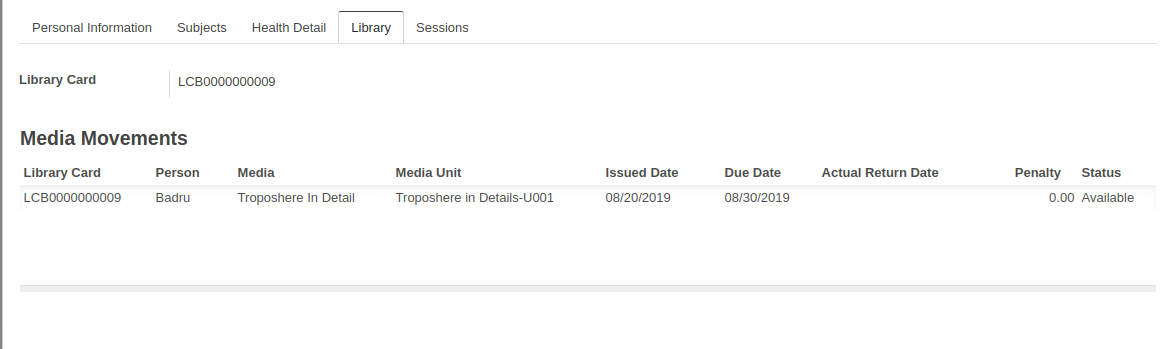
4. Library Detail
Faculty may have a record in Library management system as they also need to use the library functionality.
5. Sessions
Whenever a session is created for this faculty, record is added under this tab. So you can have quick reference to all the session related details of the faculty.

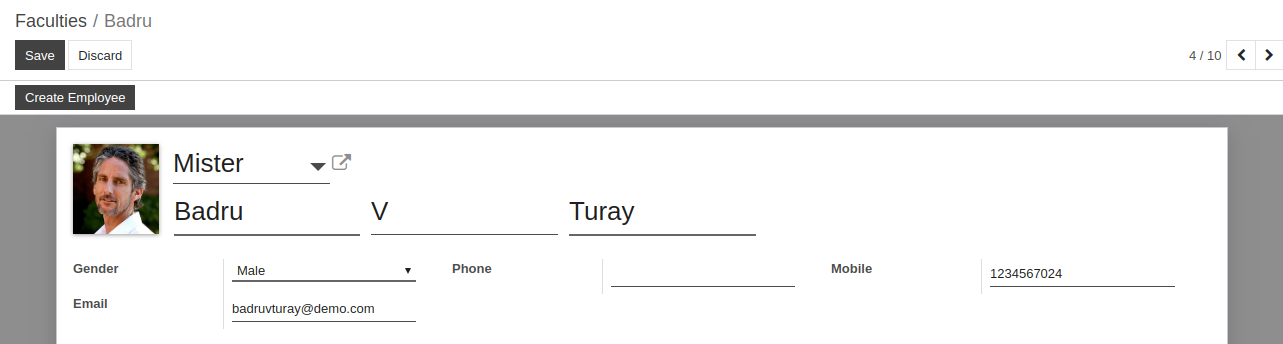
Create Employee:
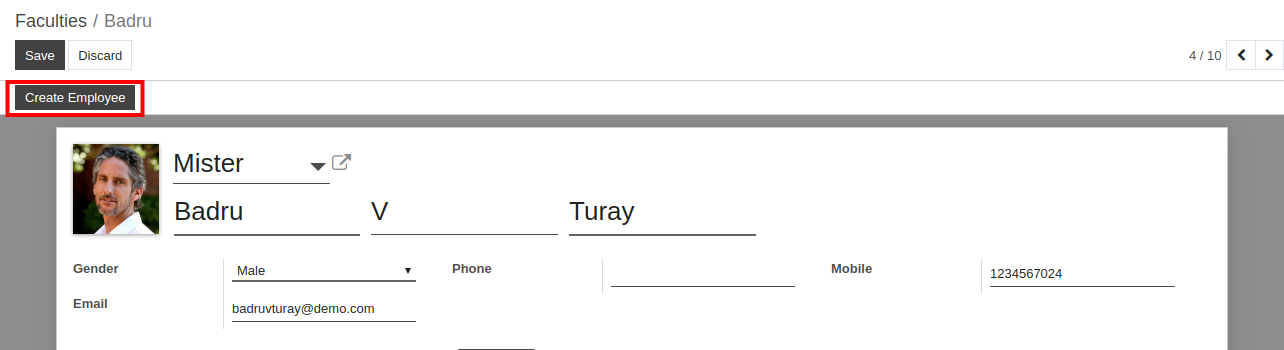
Clicking on
Create Employeebutton,wizard will be displayed.
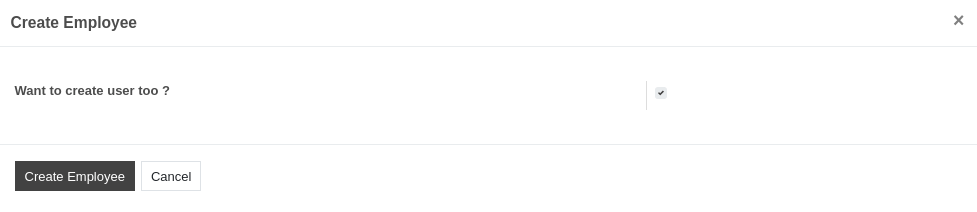
When you click on button
Create Employeein wizard, value of HR Employee field is set automatically as shown in image.
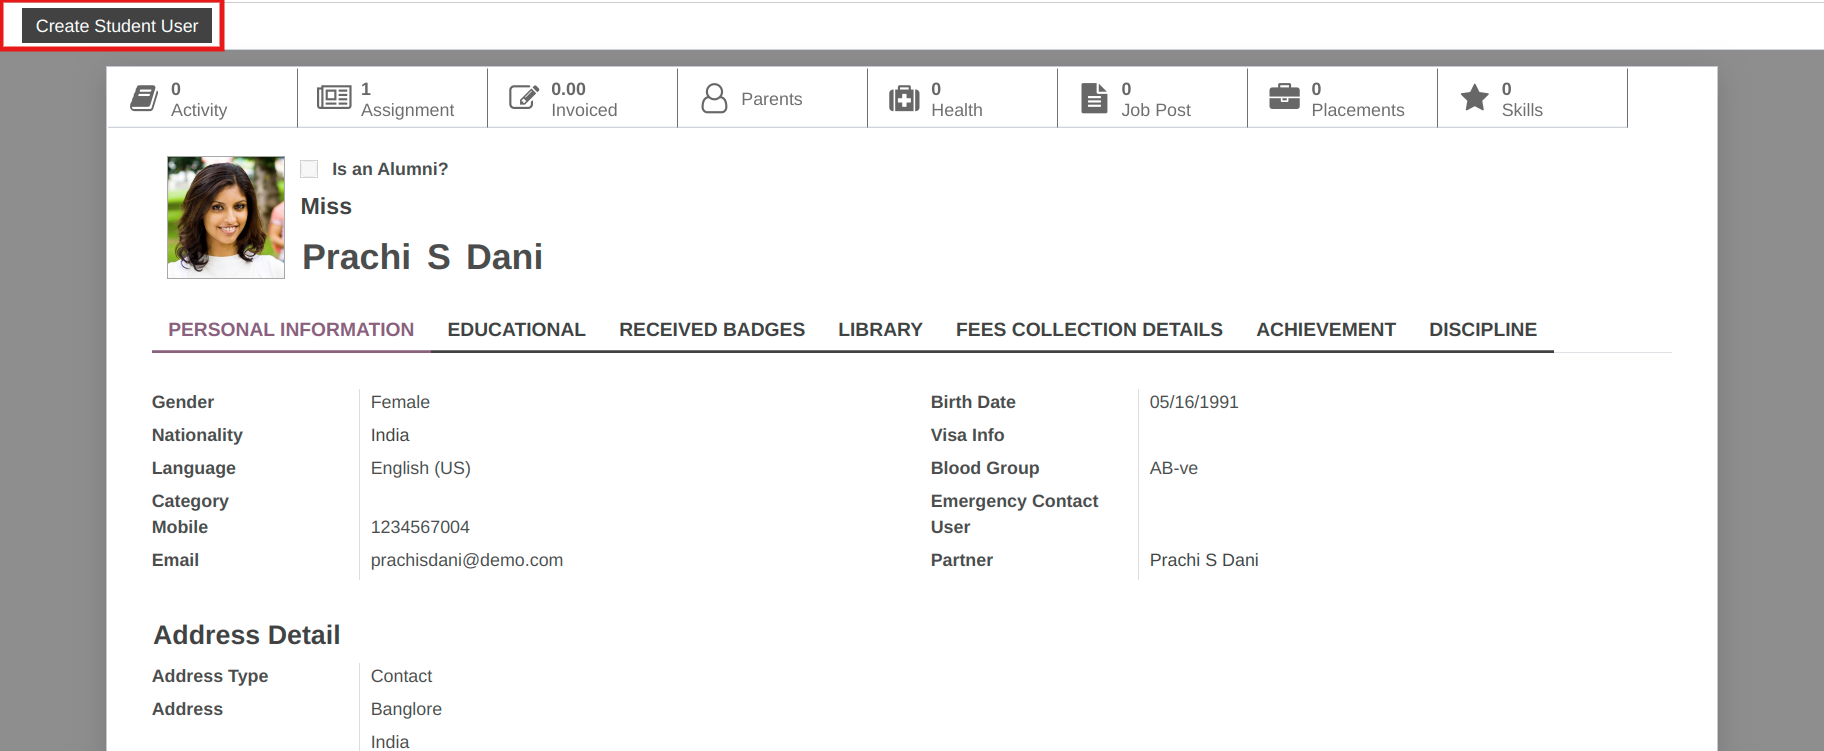
3. How to create Odoo users for students in OpenEduCat
1. Create Single Student User At a time:
To create Odoo users for students, follow the below steps:
Go to
Select the student profile of which you want to create Odoo user.
Click on Create Student User to create Odoo user for student in Openeducat.
2. Create Multiple Student Users At a time:
To create multiple odoo users for students at a time, follow the below steps:
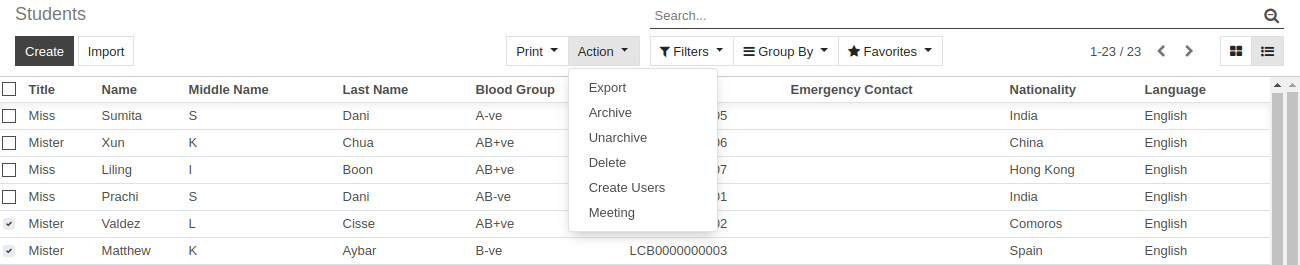
Go to, student’s list view, select the students of whom you want to create Odoo user.
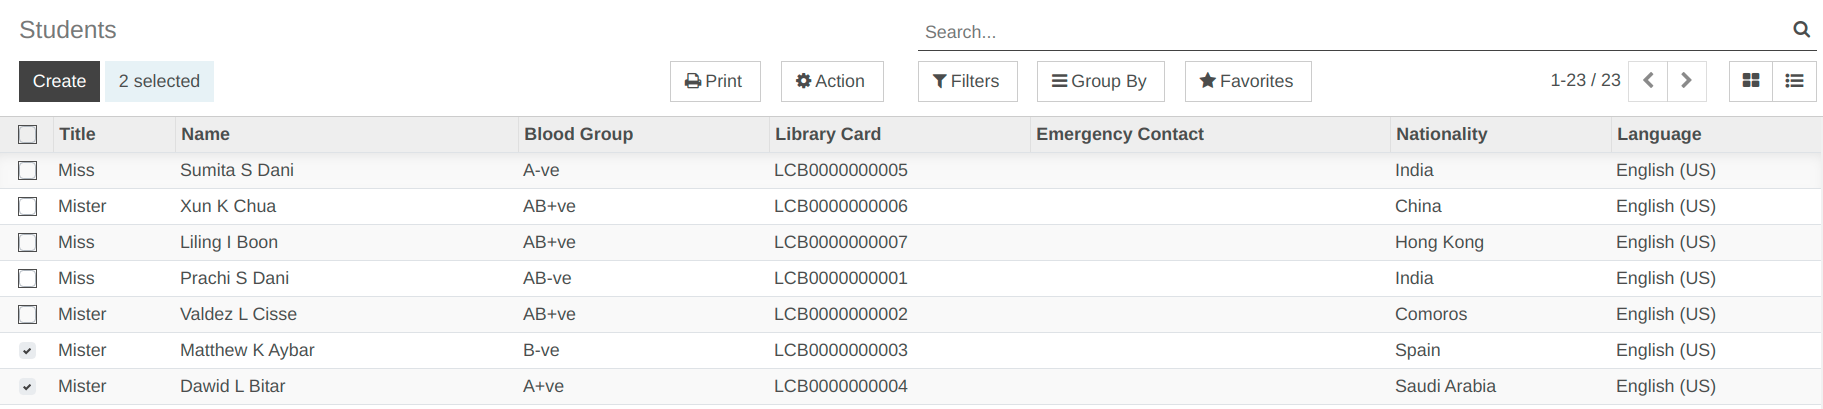
Click on
Action.
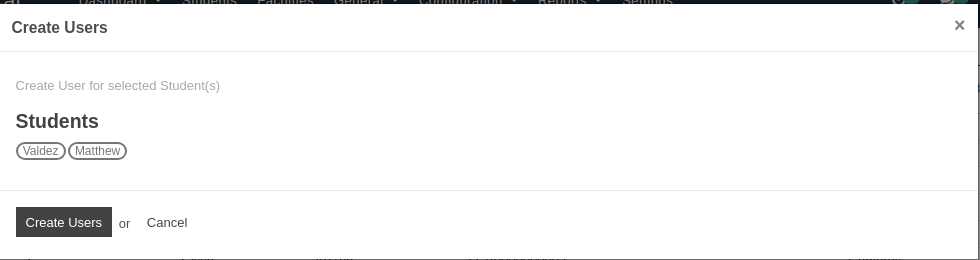
Select Create Users, then the wizard will open.
Click on
Create Usersand the student odoo user will be created.
To view the created Odoo users for students, follow the below steps:
Go to
4. How to manage fees invoice for students in OpenEduCat.
Invoice Creation:
To create the invoice of the fees collection of the student, follow the below steps :-
Go to .
To create invoice,click on Fees Collection Details.
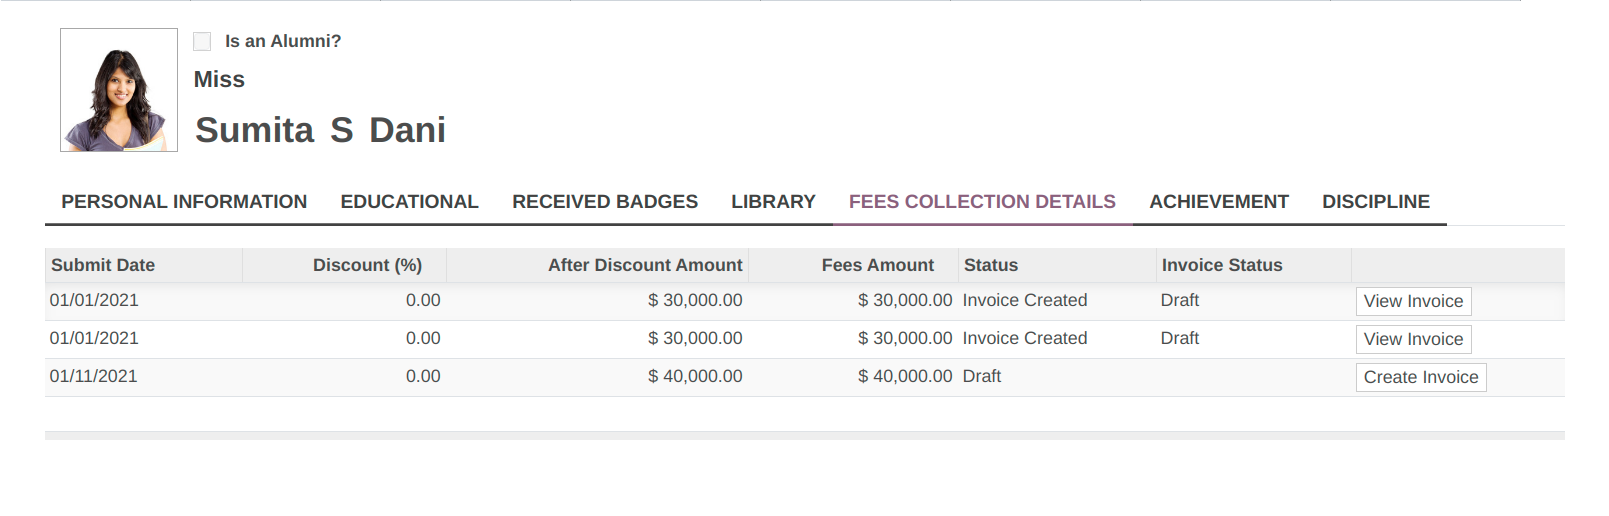
Click on
Create Invoiceto create invoice.
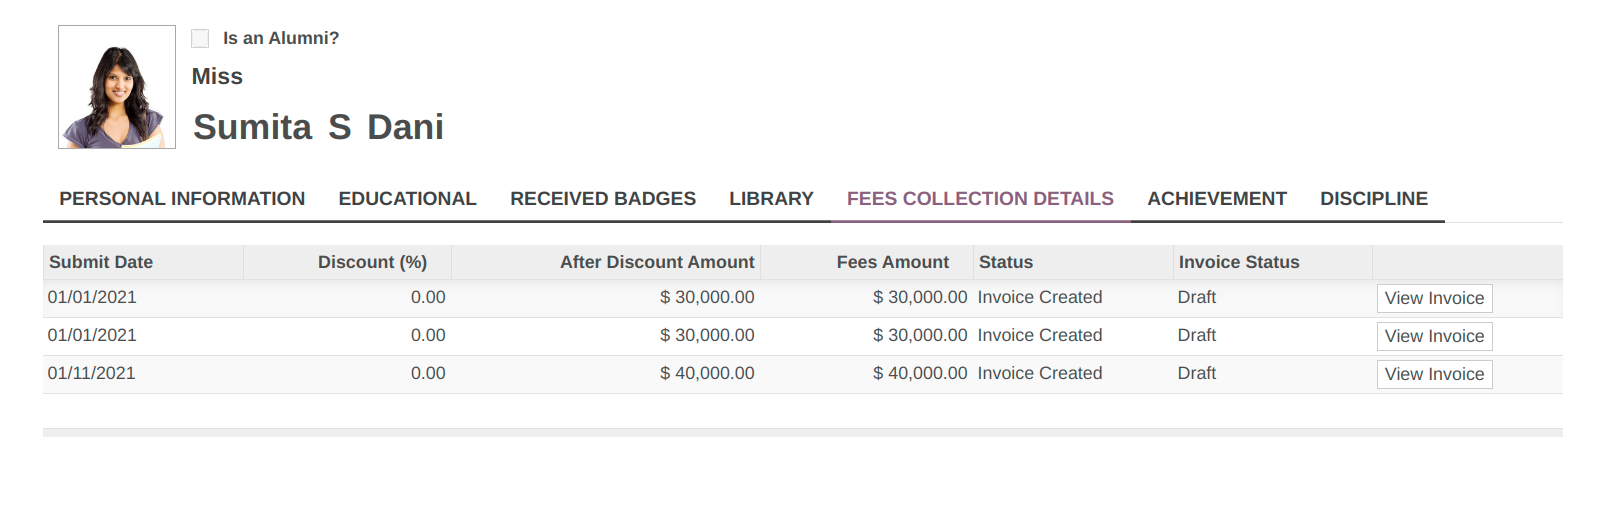
After that click on View invoice, wizard will open.
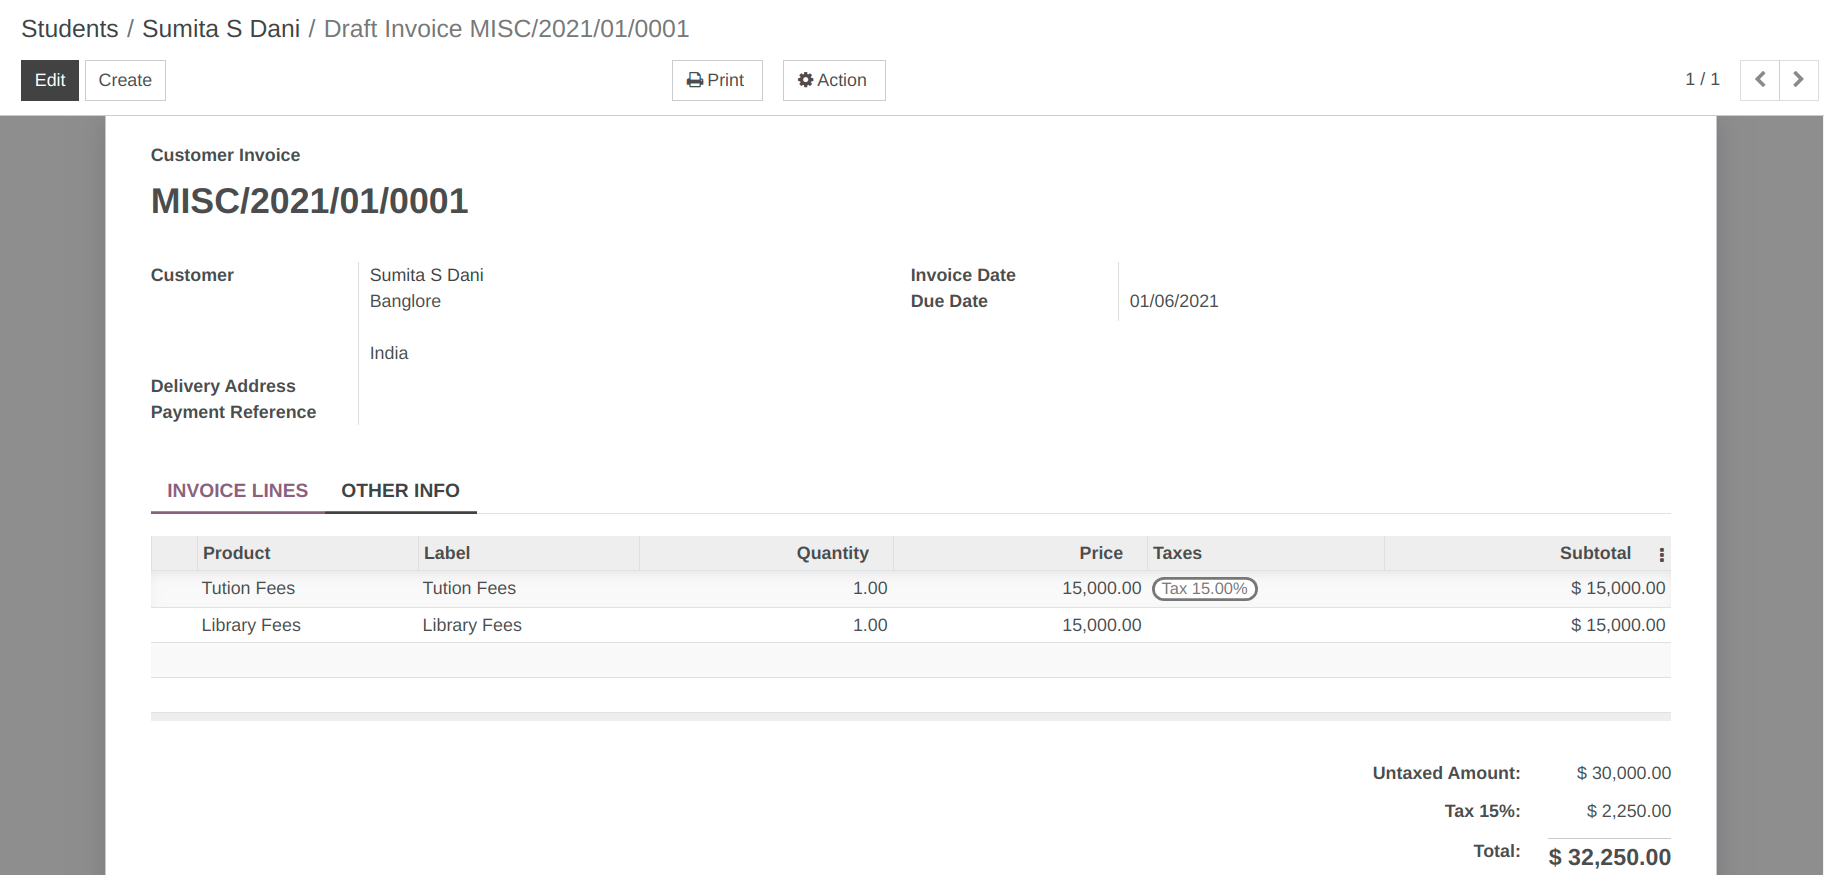
Click on validate.
Below image shows the invoice detail.
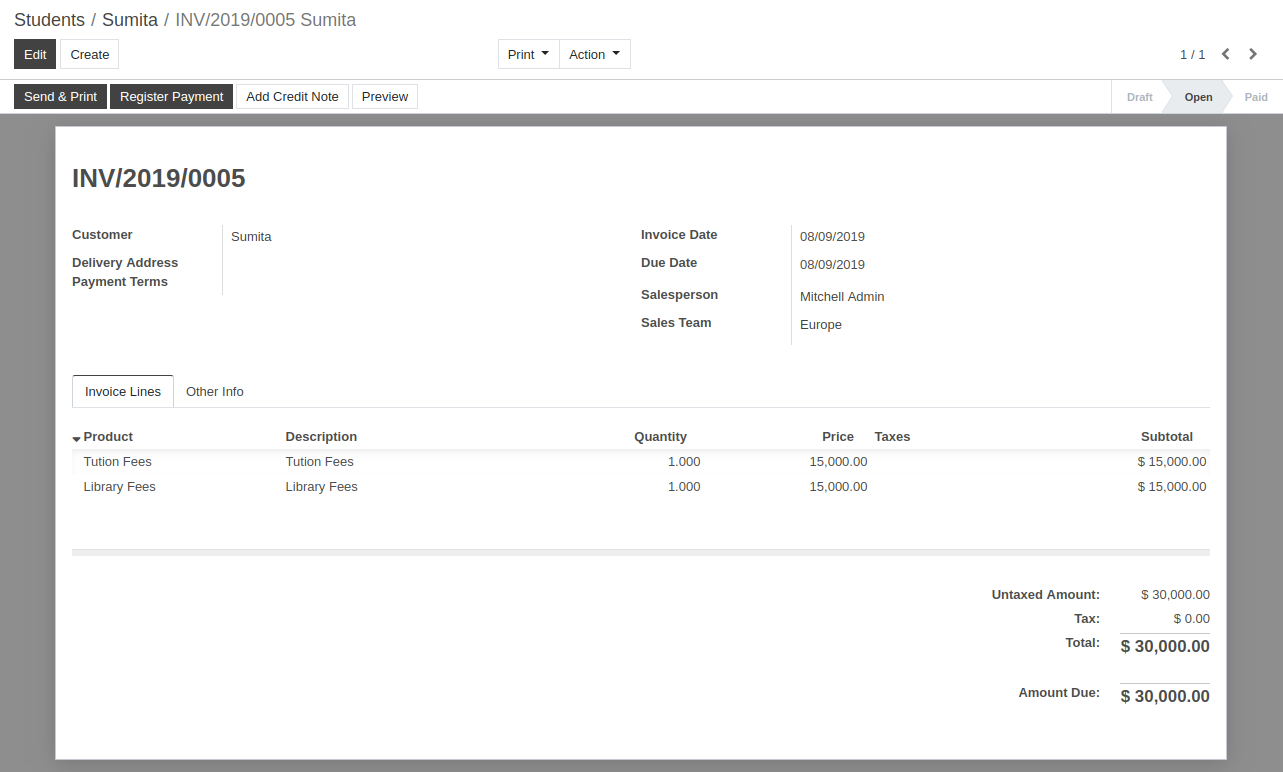
Click on Register Payment.After click on Register Payment wizard will open.
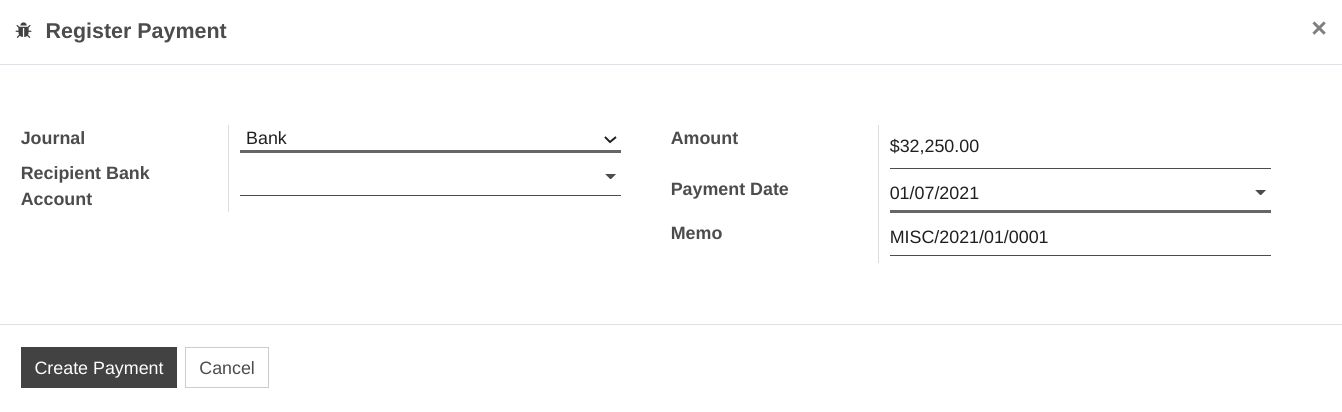
Click on Validate.Invoice detail is shown as below image.
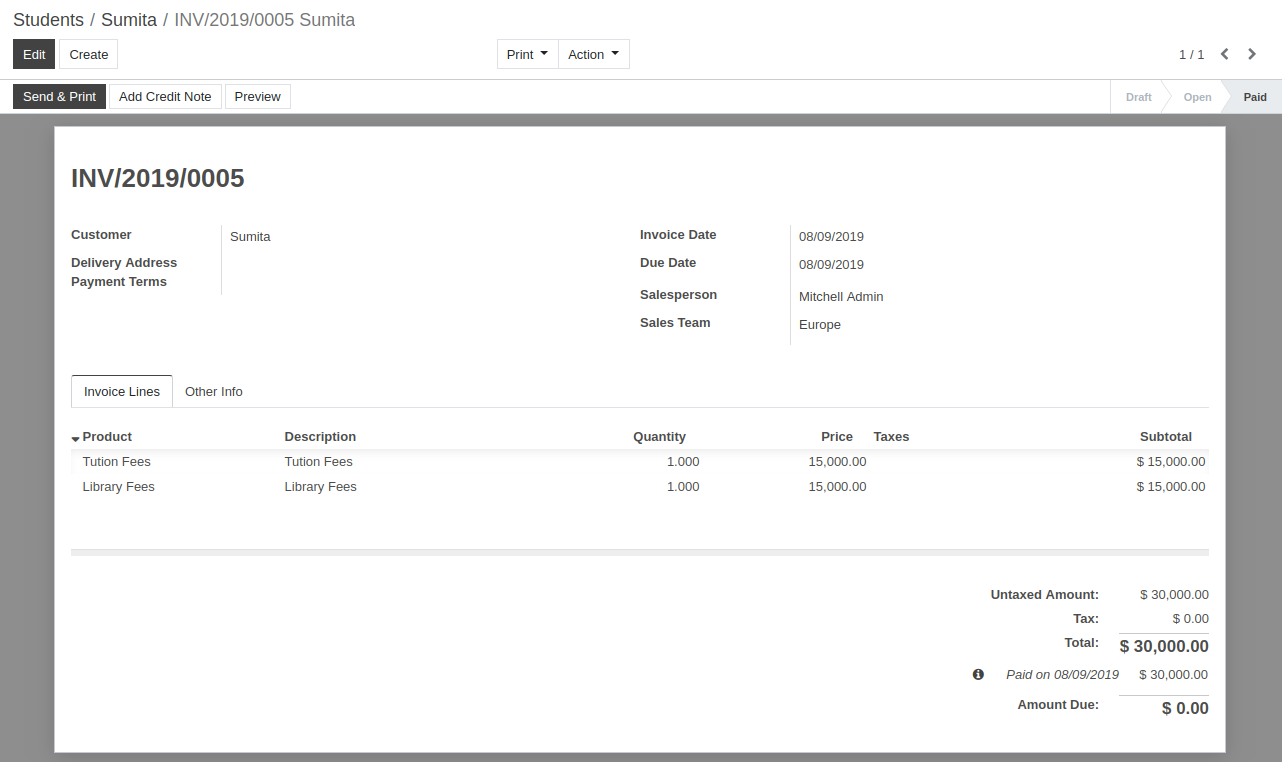
Click on Send & Print to send the invoice to student and print it.
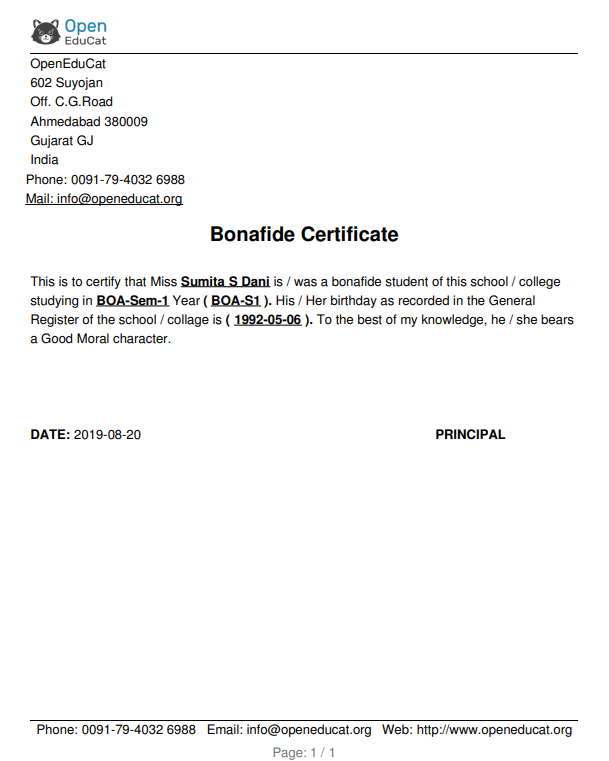
5. How to print bonafide certificate in OpenEduCat.
To print bonafide certificate in OpenEduCat, follow the below steps:
Go to .
Click on individual student profile of whom you want to print the bonafide certificate.
Click on
Print.
Select
Bonafide Certificateto print it.Save file or download it to print.
6. How to configure course and it’s batches.
Course Management:
Course management includes configuration of course and batch.
Configure Course
Configure Batch
1.) Configure Course
To configure the course, follow the below steps :-
Go to .
Click on Create to create a new Course.
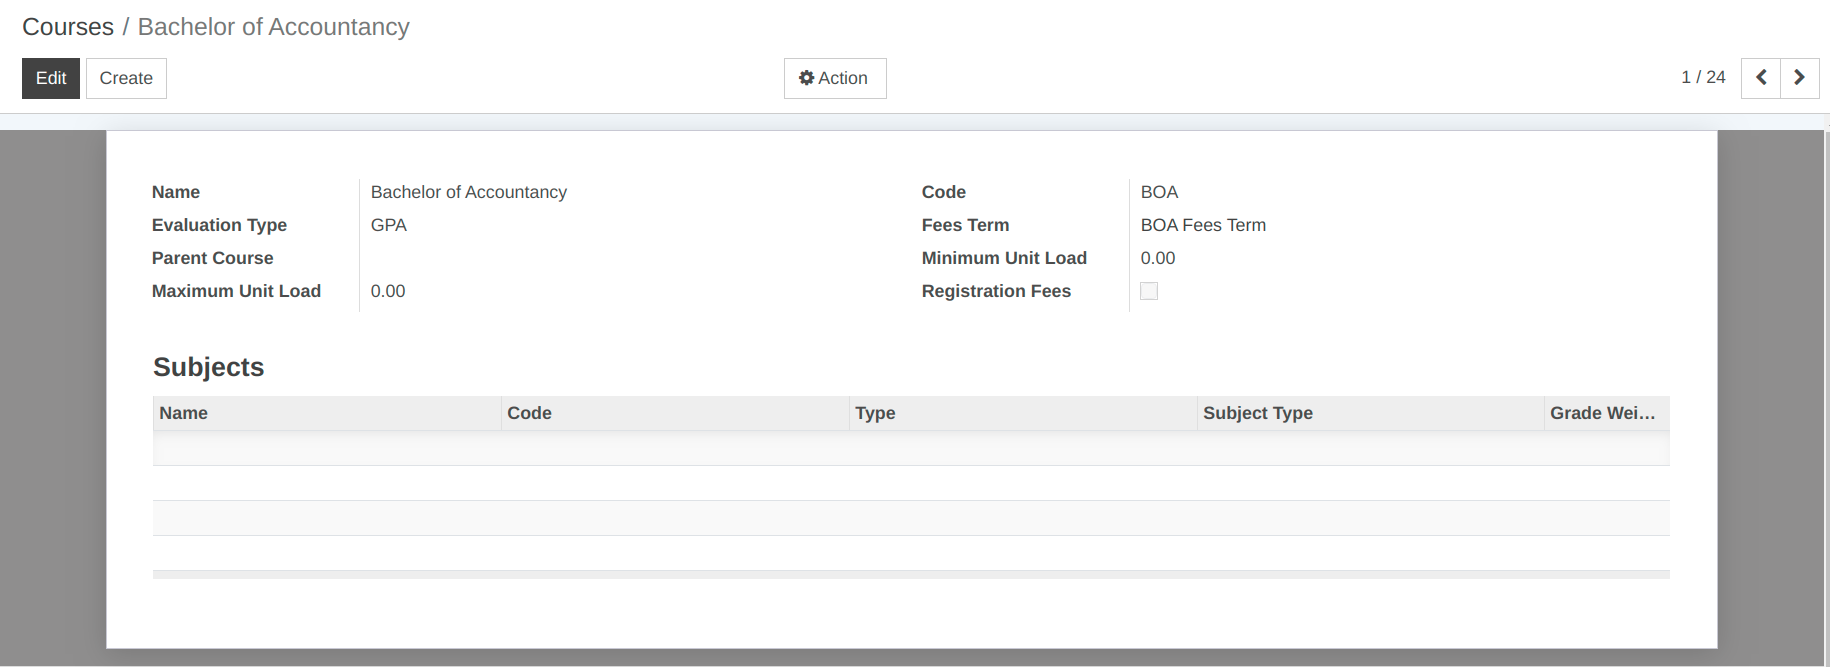
Details of Course Form:
Name :- Name of the course. It will be displayed in whole system.
Code :- Code of the course. Unique code for course.
Evaluation Type :- Select evaluation type of the course from the list.
Fees Term :- Select or create a new fees term for the course from the list.
Parent Course :- Select or create a new parent course for the course from the list.
Maximum Unit Load :- Set Maximum unit load for whole course.
Minimum Unit Load :- Set Minimum unit load for whole course.
Subjects :- Select subject(s) those are included under the course.
2.) Configure Batch
Configuration of batch helps you to provide the start up data of batch that will be running in an institute. To configure the batch, follow the below steps :-
Go to .
Click on Create to create a new batch.
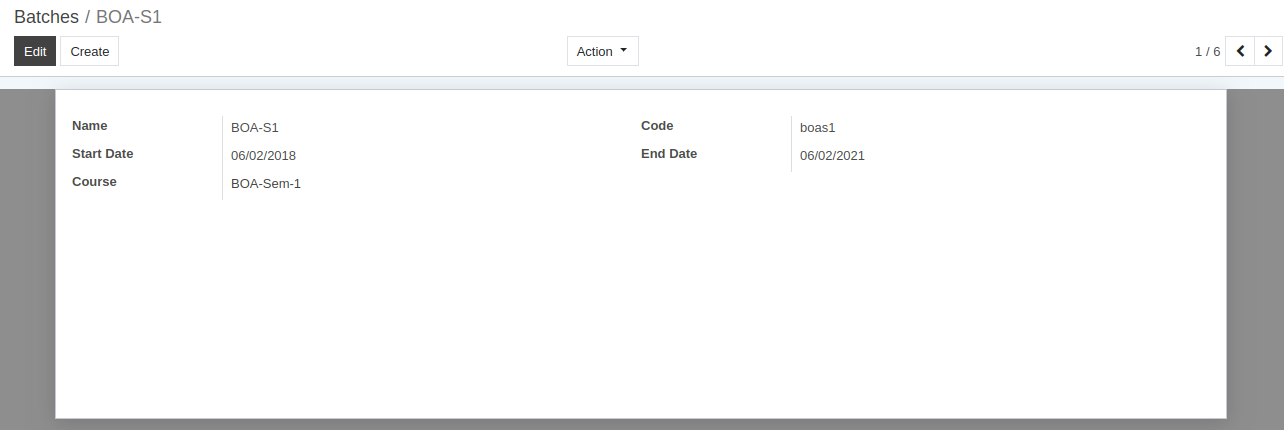
Details of Batch Form:
Name :- Name of the batch. It will be displayed in whole system. The maximum size of the name is 32 characters.
Code :- Code of the batch. Unique code for batch. The size of the code should not be more than 8 characters in length.
Start Date :- Provide start date of the batch here.
End Date :- Provide end date of the batch here.
Course :- One course can be taught in more than one batches. For example BOA-Sem-1 is being taught in two batches, morning batch and noon batch. Select the course from the list here for which the batch is created.
7. How to configure subjects in OpenEduCat
Subject Management:
Configuration of subject helps you to provide the start up data of subjects those will be taught in an institute. To configure the subject, follow the below steps :-
Go to .
Click on Create to create a new subject.

Details of Subject Form:
Name :- Name of the subject. It will be displayed in whole system.
Code :- Code of the subject. Unique code for subject.
Course :- Select the course to which you want to assign this subject.
Type :- Subject can be only theory , practical , both or other. Choose one proper type for a subject from the list here.
Subject type :- Select subject type whether it is compulsory or elective.
Grade Weightage :- Set grade weightage for particular subject.
8. How to manage activities in OpenEduCat.
Activity Management:
OpenEduCat provides facility to manage activities. Configuration of activities include two things as below:
Activity Types :- Specify different activities which is held in an institute.
Achievement Types :- You can also configure the achievement type details.
1.) Configure Activity Types
Go to .
Details of Activity Types:
Name :- Name of the activity type.It will be displayed in whole system.
2.) Configure Achievement Types
Go to .
Details of Achievement Types:
Name :- Give name to the achievement types. The maximum length of the name should not be greater than 64 characters.
Code :- Give Code to the achievement types.
3.) Activity Log
You can create the details of extra curricular activities in which student has participated from this tab.
Go to .
Click on Create to create a new Activity Log.
Details of Activity Log Form:
Student :- Select the Name of student who has participated in the particular activity.
Progression No :- It will show a Progression number of Particular student.
Faculty :- Select the faculty here.
Activity Type :- Select the activity type in which the student has participated.
Date :- Select the date on which the student has participated in the activity.
Description :- Specify the details of activity in description field.
4.) Achievements
Participating in the activity leads to achievements of the students. You can maintain details of all the achievements here.
Information like which student achieved which achievement on which date can be stored here.
Go to .
Click on Create to create a new Achievement.
Details of Achievements Form:
Student :- Select the Name of student who has achieved the particular achievement.
Progression No :- It will show a Progression number of Particular student.
Faculty :- Select the faculty here.
Achievement Type :- Select the achievement type in which the student has achieved.
Date :- Select the date on which the student has achieved the achievement.
Description :- Specify the details of achievement in description field.
When a Student has participated in new Activity and Achievement, it can be allocated to student in their profile.
You can go to the .
Achievements
Activity Log

9. Manage Student Migration in OpenEduCat.
Student Migration:
This general category provides details for student migration from one course to another course along with their batch specification.
Go to .
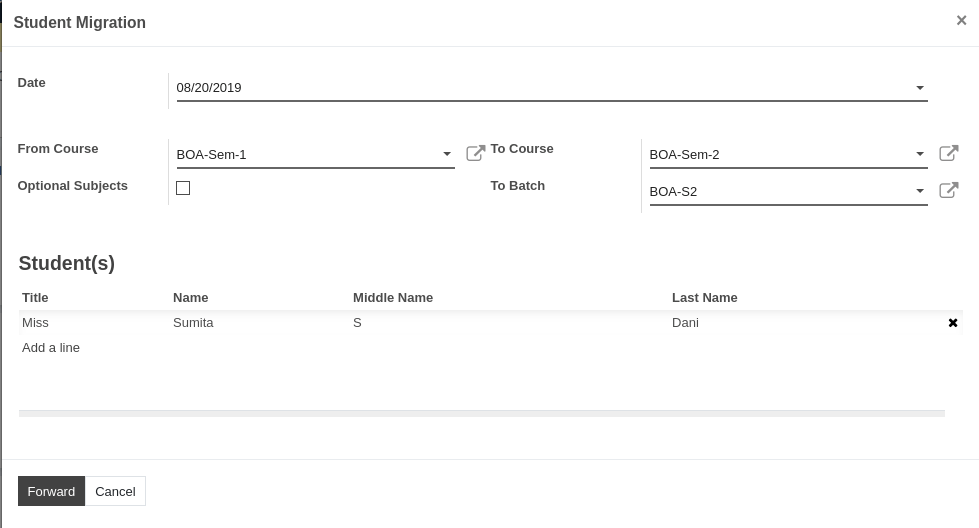
Details of Student Migration Wizard :
Date :- Select the migration date.
From Course :- Select the course from which the student is migrating.
To Course :- Select the course to which the student is migrating.
Optional Subjects :- Student’s Optional Subjects
To Batch :- Select the batch of the respective course to which the student is migrating
Student(s) :- Select no of students who are going to migrate from one course to another.
Click on Forward to migrate the student.
10. How to manage classroom details in OpenEduCat.
Configure Class Room:
Configuration of class room helps you to provide the start up data of class rooms of an institute. To configure the class room, follow the below steps :-
Go to .
Click on Create to create a new class room.

Details of Class Room Form:
Name :- Name of the class room. It will be displayed in whole system. The length of class room name should not be greater than 16 characters.
Code :- Code of the class room. Unique code for class room. The code length should be 4 or less.
Course :- Select the course from the list whose students will be seating in this class room.
Batch :- Select the batch of the particular selected course.
No. of Person :- Provide the maximum number of students that can seat in this class room.
Pages in Class Room Form:
1. Facilities
Below image shows different facilities which are available in classroom.You can also create facility from here.

2. Asset Management
Select the asset which are available in the class room from the list. You can also create an asset from here.

11. How to enrol an applicant in OpenEduCat.
Admission Management:
1.) Before the Enrollment of a student an Admission Register is created for each course.
Before the Enrollment of a student, an Admission Register is created for each course. All the admissions for that course falls in respective Admission Register.
You can go to the . Click on
Createbutton to create a new Admission Register.
Details of Admission Registers Form:
Name :- Provide appropriate title for the admission Register.
Course :- Select the course from the list of courses.
Start Date :- By default today’s date appears here.
End Date :- By default one month later date appears here.
Course Fees :- Select the course fees of the particular admission register created.
Minimum No. of Admission :- Min no. of admissions for particular course can be specified.
Maximum No. of Admission :- Max no. of admissions for particular course can be specified. By default it displays 30.
Applications :- Select no of students for admission register process.
Admission Register workflow:
Initially Admission register flow start with draft state.
Click on the
Confirmbutton to confirm the Admission Register.If you want to cancel the admission register click on the
Cancelbutton.
Click on the
Start Applicationbutton to start receiving the application from students.
2.) Applications
Flow is started from admission of the student in institute. To begin with this, OpenEduCat provides functionality of an Enrollment.
You can go to the . Click on
Createbutton to give admission to particular student.
Details of Registration Form:
Photo :- Upload a passport size photo of the student from the image widget on the top left corner.
Title :- Provide appropriate title for the student from the list provided in Title field.
Name :- You can provide the name of the student in terms of First name, Middle name and Last name in the name fields.
Pages in the Registration Form:
1. Admission Detail
Admission Register :- Each admission falls in a Admission Register which basically consist of the Course(Course for which the admission is created).
Application Number :- Application Number is a unique number generated by OpenEduCat to uniquely identify the admission record. It is generated by default by OpenEduCat.
Application Date :- Application Date is the date on which this application is created. Date and time is fetched by default from the system by OpenEduCat.
Admission Date :- Admission Date is on which date the admission of the student is confirmed. It is set by OpenEduCat automatically as per the system date. You can change it later on.
Course :- Specify the name of the course in which the student has taken the admission from the list provided in Course field. You can create a new course from here too.
Batch :- Batch is the year span (For example, batch from 2012-2015) in the student is enrolling for particular course.
Discount :- Set Discount for particular Admission.
Fees :- Fees field fetches the price from product field in admission register or you can specify different price here.
Due Date :- Due date is the last date of the fees to be paid up for confirming the enrollment.
Fees Term :- Select Fees term for registration.
Note
Batch provides the list of only those batches which are mentioned under the Course, selected in the Course field.
2. Educational Detail
The information about the previous course, institute and score obtained in that course can be mentioned under this page.
Previous Institute :- Previous Institute can be selected from the list of names of organization from where student has pursued his last educational degree.
Previous Course :- Previous Course can be selected from the list of available course that student has completed successfully.
Previous Result :- You can provide the result of student’s latest degree in terms of percentage in Previous Result field.
3. Personal Detail
To specify the personal details of the student, open this tab.
Gender :- Specify the Gender of Student.
Birth Date :- Specify the Date of Birth of Student.
Email :- Specify the Email of Student.
Address :- Specify the contact details of the applicant in here with details like street, city, state, zip code, country, phone number, mobile number and email.
Family Business :- You can specify family business in this field.
Family Income :- You can specify family income in this field.
Workflow of Registration:
1. Draft
Once the details are filled up in the enrollment registration form and it is saved, the state is Draft. Workflow of this form is started from here.
2. Submit
Click on Submit button to confirm the application. This changes the state of record from
DrafttoSubmitted.
3. Confirm
Click on Confirm button to confirm the application. This changes the state of record from
SubmittedtoConfirmed.In order or cancel the application, click on
Cancelbutton.
4. Admission Confirm
Click on Admission Confirm button to confirm the application. This changes the state of record from
ConfirmedtoAdmission Confirm.
5. Enroll
Click on Enroll button to Enroll student. This changes the state from
Admission ConfirmtoDone.
You can see the enrolled student in that particular register.
Open Student Profile
Clicking on Open Student Profile , You can see student profile detail.
12. How To do Online Admission Process.
Online Admission:
1.) First of all to start online admission gathering for the individual course, the admin has to create admission register.
To create Admission Register, follow the below steps:
Go to .
Click on Create to create a new Admission Register.
Details of Admission Register Form:
Name :- Provide appropriate title for the admission Register.
Course :- Select the course from the list of courses.
Start Date :- By default today’s date appears here.
End Date :- By default one month later date appears here.
Product :- Product filed can be defined to for fees. Its like a service product.
Minimum No. of Admission :- Min no. of admissions for particular course can be specified.
Maximum No. of Admission :- Max no. of admissions for particular course can be specified. By default it displays 30.
Applications :- Select no of students for admission register process.
2.) Then the student can able to do the online admission from the website for that particular course.
To do Online Admission, follow the below steps:
Go to , then the online admission registration page will open, and the student can fill in their details to enroll for the particular course.
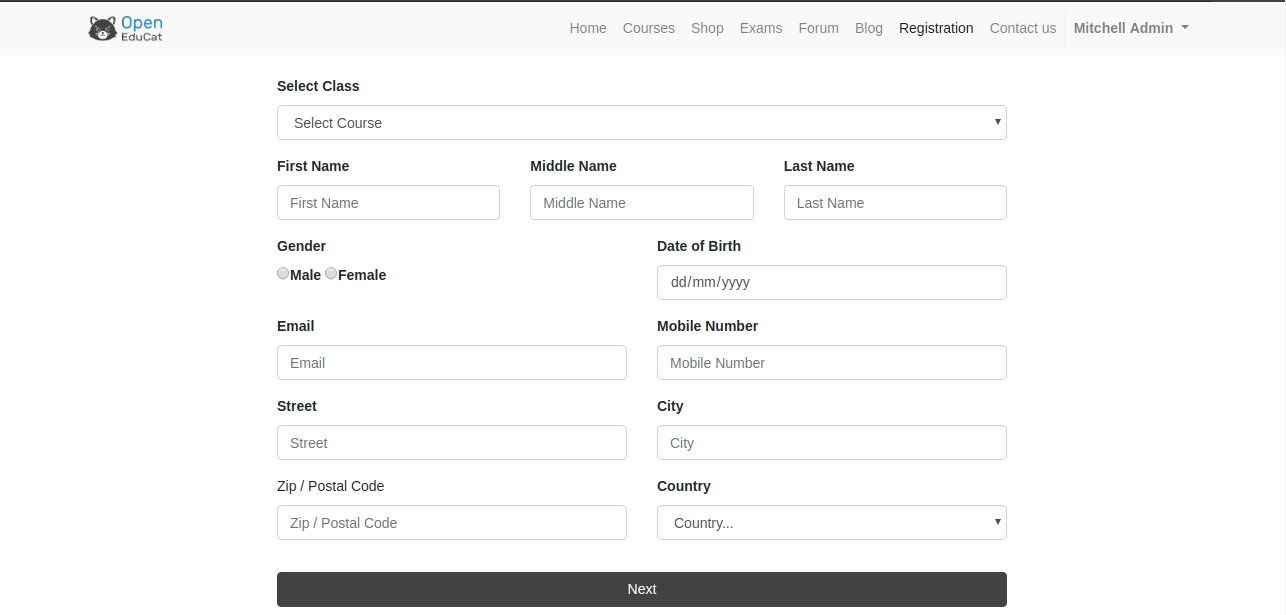
Details of Online Admission Process Page:
Select Course:- Student can select the course for which he/she has to enroll.
Name :- Student can provide their name in terms of First name, Middle name and Last name in the name fields.
Gender and Birth Date :- Student can specify their gender and birth date.
Email and mobile no. :- Student can specify their email and mobile number.
Student has to add details like street, city, state, nation, zip code and country in the provided fields.
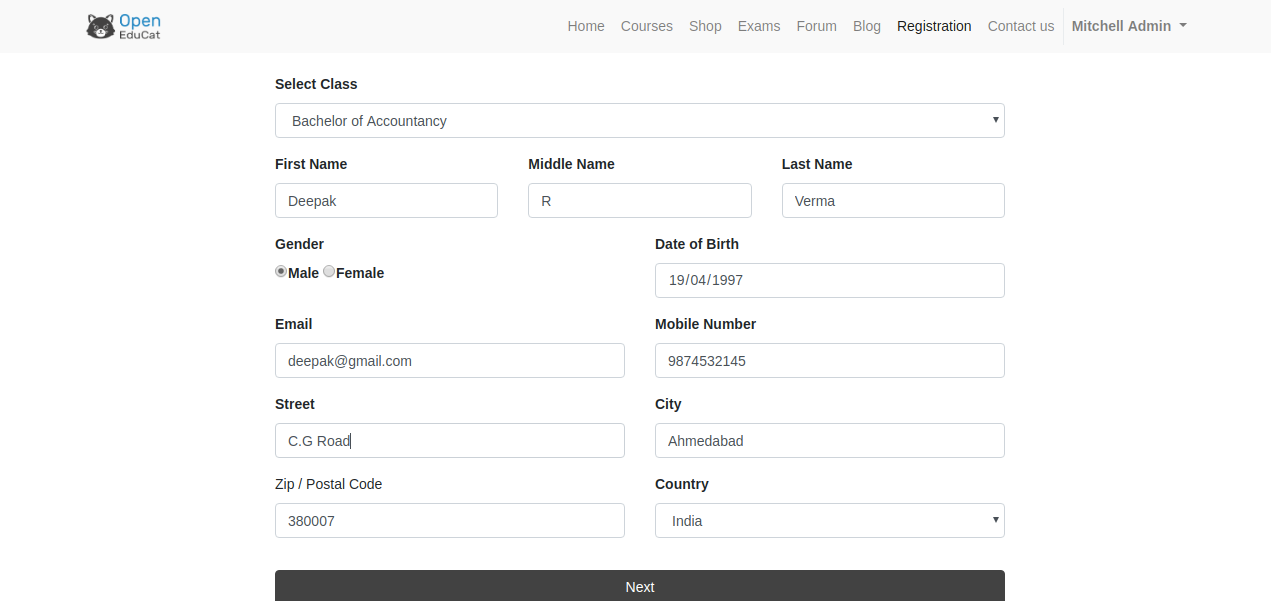
Then click on the Next , and the student has been registered for that particular course.
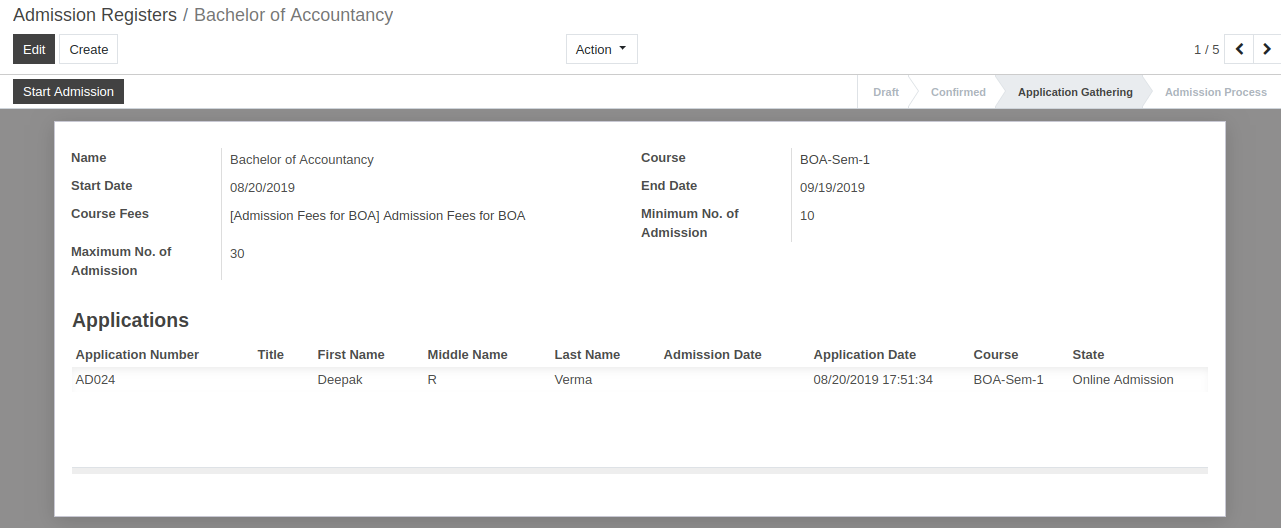
To see the online admission enrolled student, Go to .
13. How to Create Assignment in OpenEduCat.
Assignment:
To create Assignment in OpenEduCat , follow the below steps:
1.) To create assignment, first configure assignment types.
To do that, Go to
Details of Assignment Types:
Name :- Specify the name of the assignment type.
Code :- You can also provide code for assignment type.
2.) OpenEduCat provides the facility to create the assignments.
To do that, Go to .
Click on Create to create a new assignment.
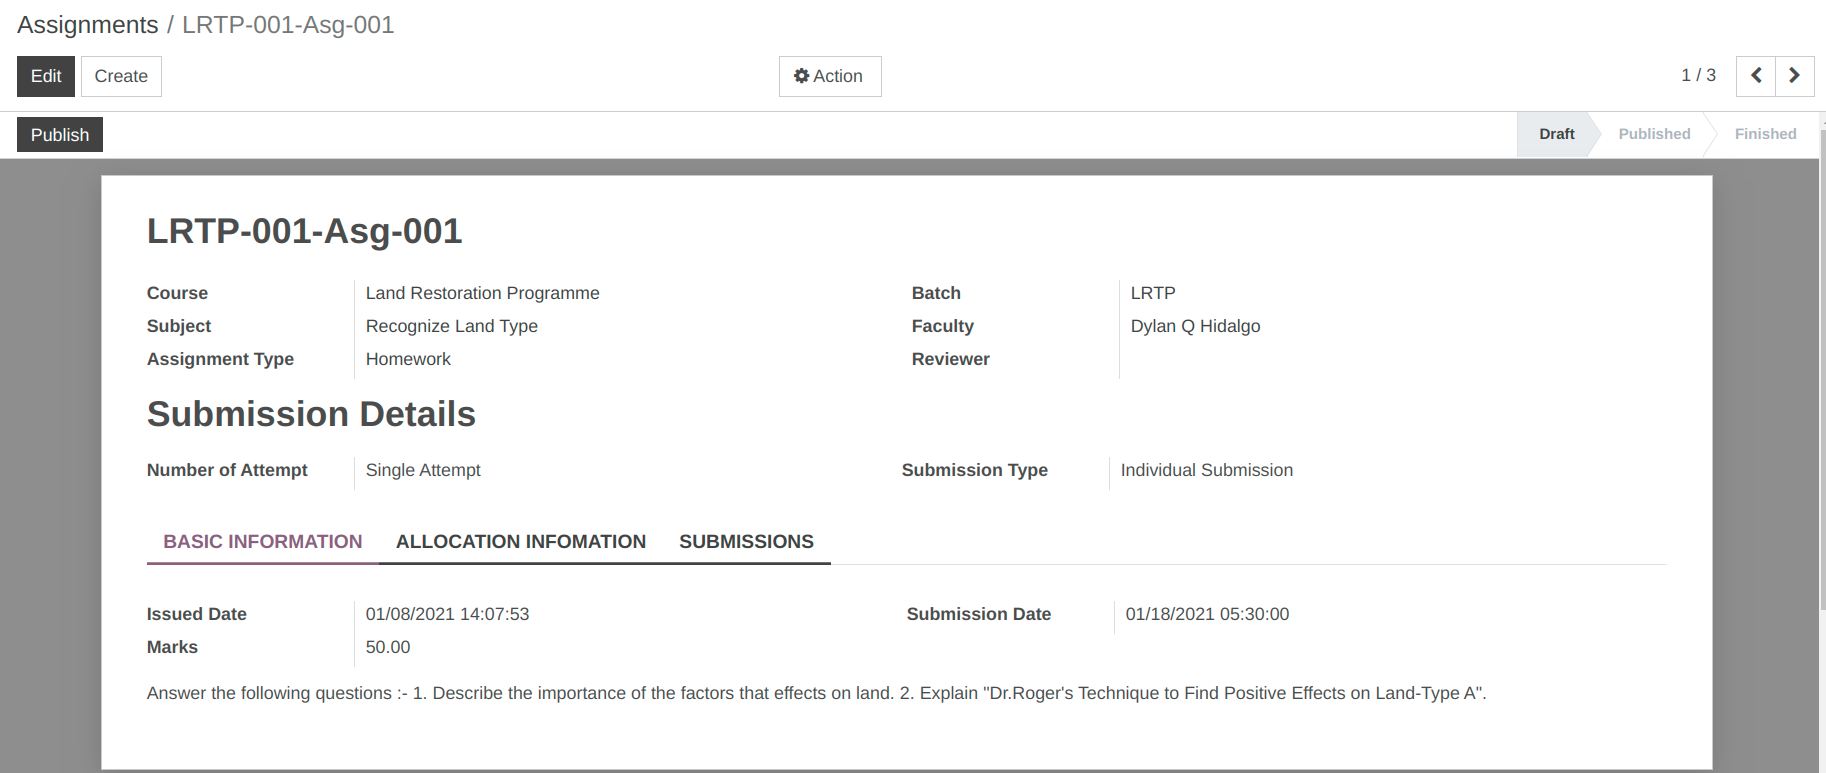
Details of Assignments:
Name :- Specify the name of the assignment.
Course :- Select the course from the list for which assignment is created.
Batch :- Based on the selected course list of batch appears, select appropriate batch from the list.
Subject :- Select the subject from the list whose assignment is created.
Faculty :- Select the faculty who has created the assignment from the Faculty list.
Assignment Type :- Specify the type of assignment being created.
Reviewer :- Specify the name of the person from the Reviewer list who will review the assignment.
Number of Attempt :- Select the number of attempt.
Submission Type :- Select the submission type individual or group submission.
Pages in the assignment form:
1. Basic Information:
Issued Date :- Issued Date is the date on which assignment is issued. By default today’s date and time is set here.
Submission Date :- Submission Date is the date on which assignment is to be submitted.
Marks :- Allocated the marks for the assignment created.
Description :- Specify the details of assignment in description field.
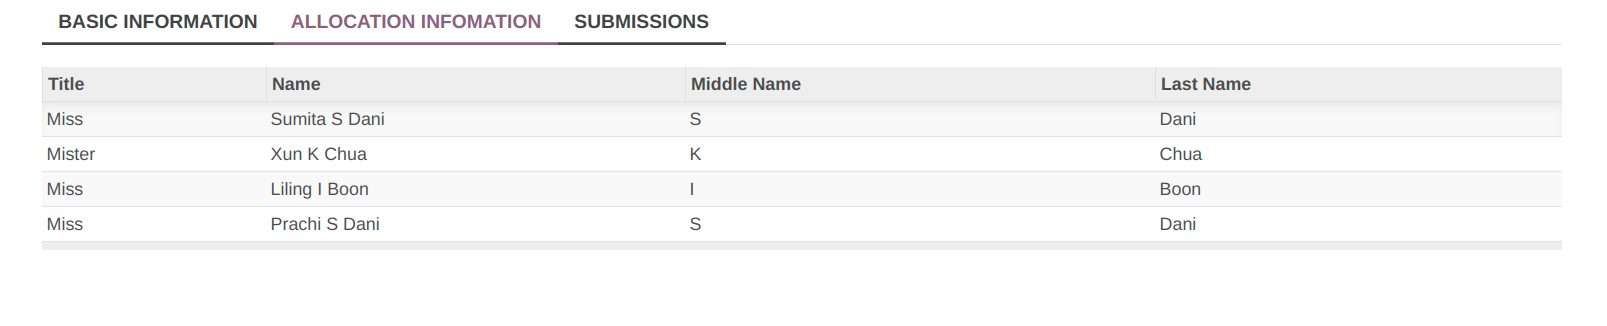
2. Allocation Information:
Specify the list of students to whom the assignment is to allocated, i.e all the students who will perform the assignment.
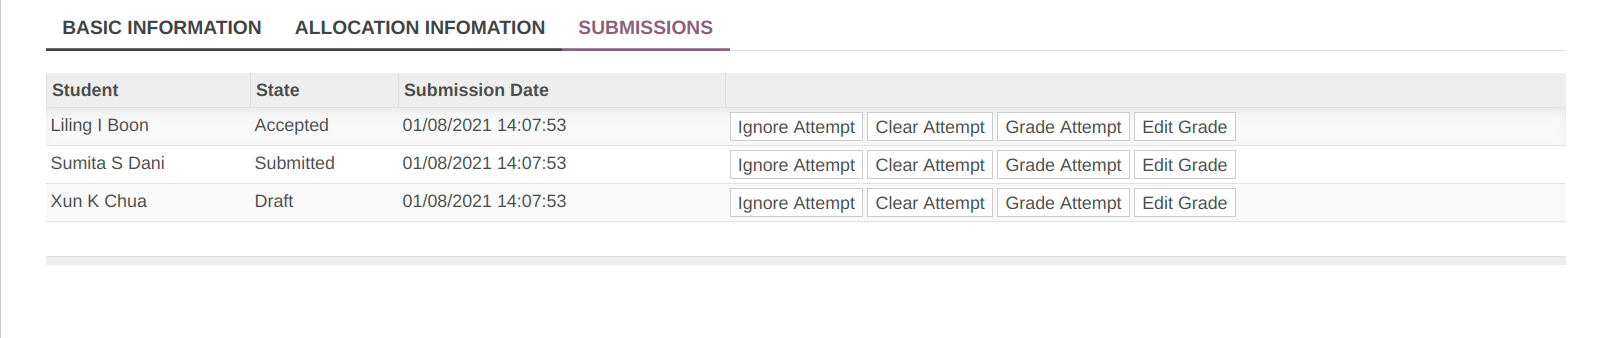
3. Submissions:
List of all the submitted assignments by the students appears here
Workflow of the assignment:
When assignment is created its in
Draftstate.Click on the Publish button to publish the assignment. It changes the state from
DrafttoPublished.Click on Finish button if the assignment is completed. It changes the state from
PublishedtoFinished.
14. How to allocate assignment (faculty prospective).
Assignment Management:
1.) Assignment Types
OpenEduCat provides the facility to configure the assignment type. List of all the assignment type are displayed here.
Go to .
The below image shows the assignment type.
Details of Assignment Types:
Name :- Specify the name of the assignment type.
Code :- You can also provide code of assignment type.
2.) Assignments
OpenEduCat provides the facility to create the assignments. All the assignments are displayed here.
Go to .
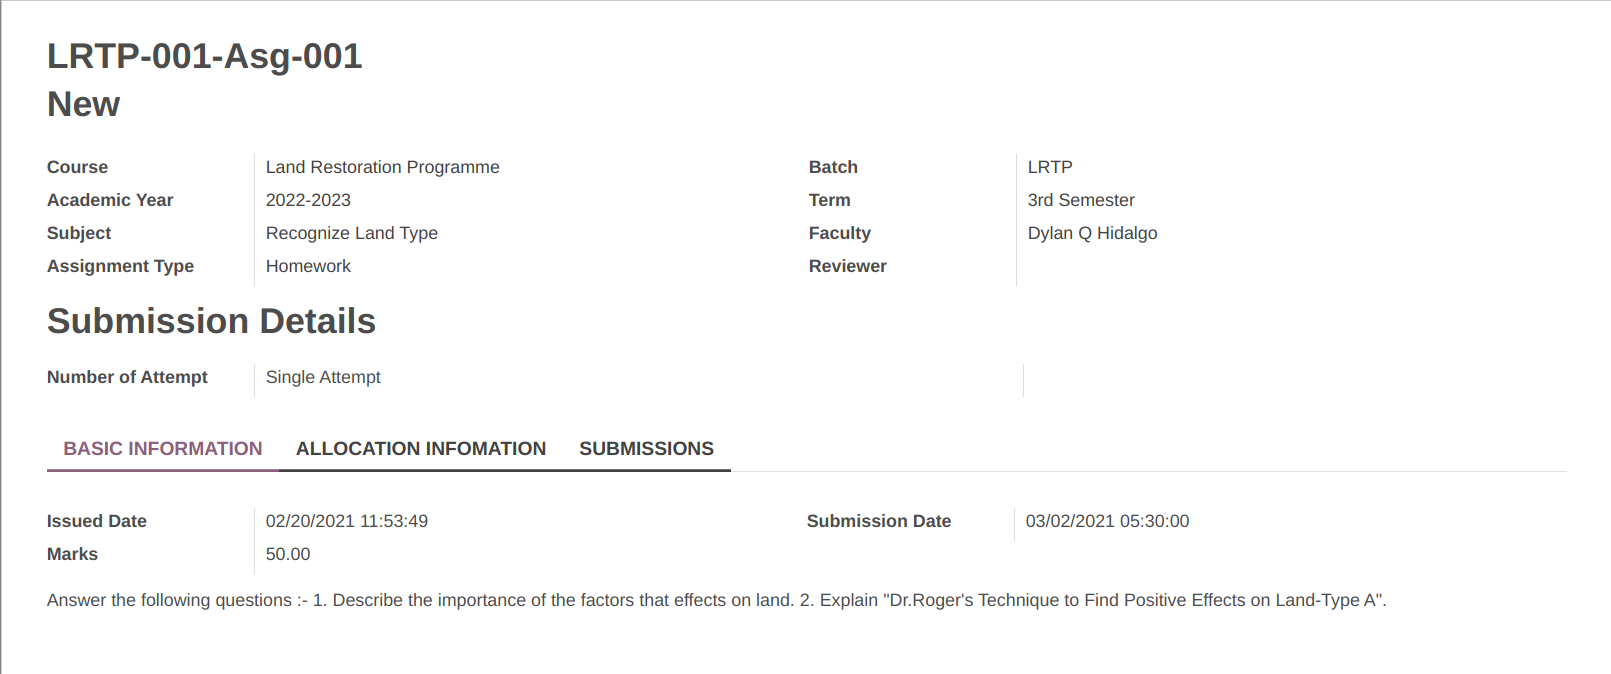
The below image shows the assignment detail
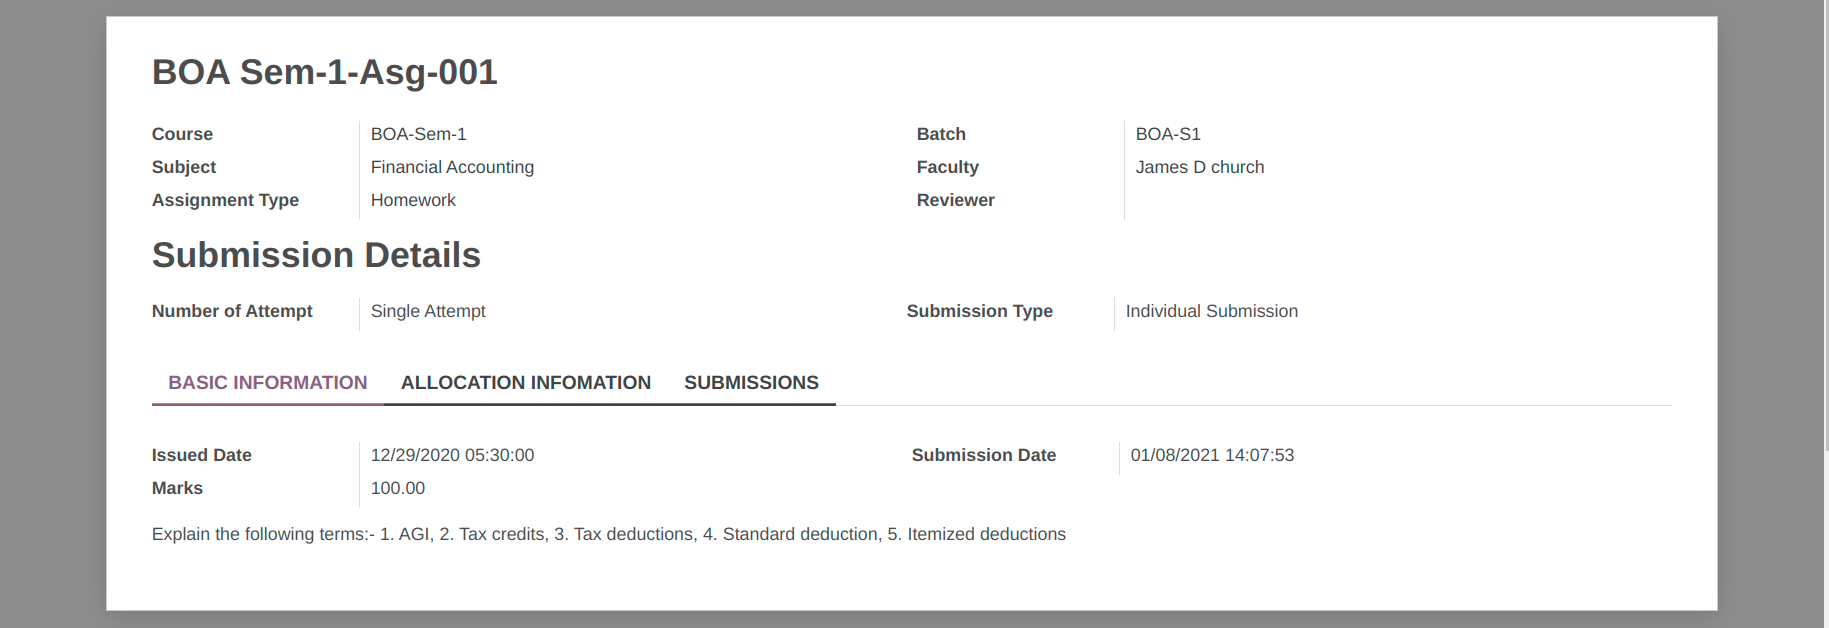
Details of Assignments:
Name :- Specify the name of the assignment.
Course :- Select the course from the list for which assignment is created.
Batch :- Based on the selected course list of batch appears, select appropriate batch from the list.
Subject :- Select the subject from the list whose assignment is created.
Faculty :- Select the faculty who has created the assignment from the Faculty list.
Assignment Type :- Specify the type of assignment being created.
Reviewer :- Specify the name of the person from the Reviewer list who will review the assignment.
Number of Attempt :- Select the number of attempt.
Submission Type :- Select the submission type individual or group submission.
Pages in Assignments Form:
1. Basic Information

Issued Date :- Issued Date is the date on which assignment is issued. By default today’s date and time is set here.
Submission Date :- Submission Date is the date on which assignment is to be submitted.
Marks :- Allocated the marks for the assignment created.
Description :- Specify the details of assignment in description field.
2. Allocation Information
Specify the list of students to whom the assignment is to allocated, i.e all the students who will perform the assignment.
3. Submissions
List of all the submitted assignments by the students appears here.
Workflow of Assignments:
When assignment is created its in
Draftstate.Click on the Publish button to publish the assignment. It changes the state from
DrafttoPublished.Click on Finish button if the assignment is completed. It changes the state from
PublishedtoFinished.
15. How to submit assignment (student prospective).
Assignment Submissions:
OpenEduCat provides the Assignment Submission facility. List of all the assignments submitted by the students are displayed here.
Go to .
The below image shows the submitted assignments.
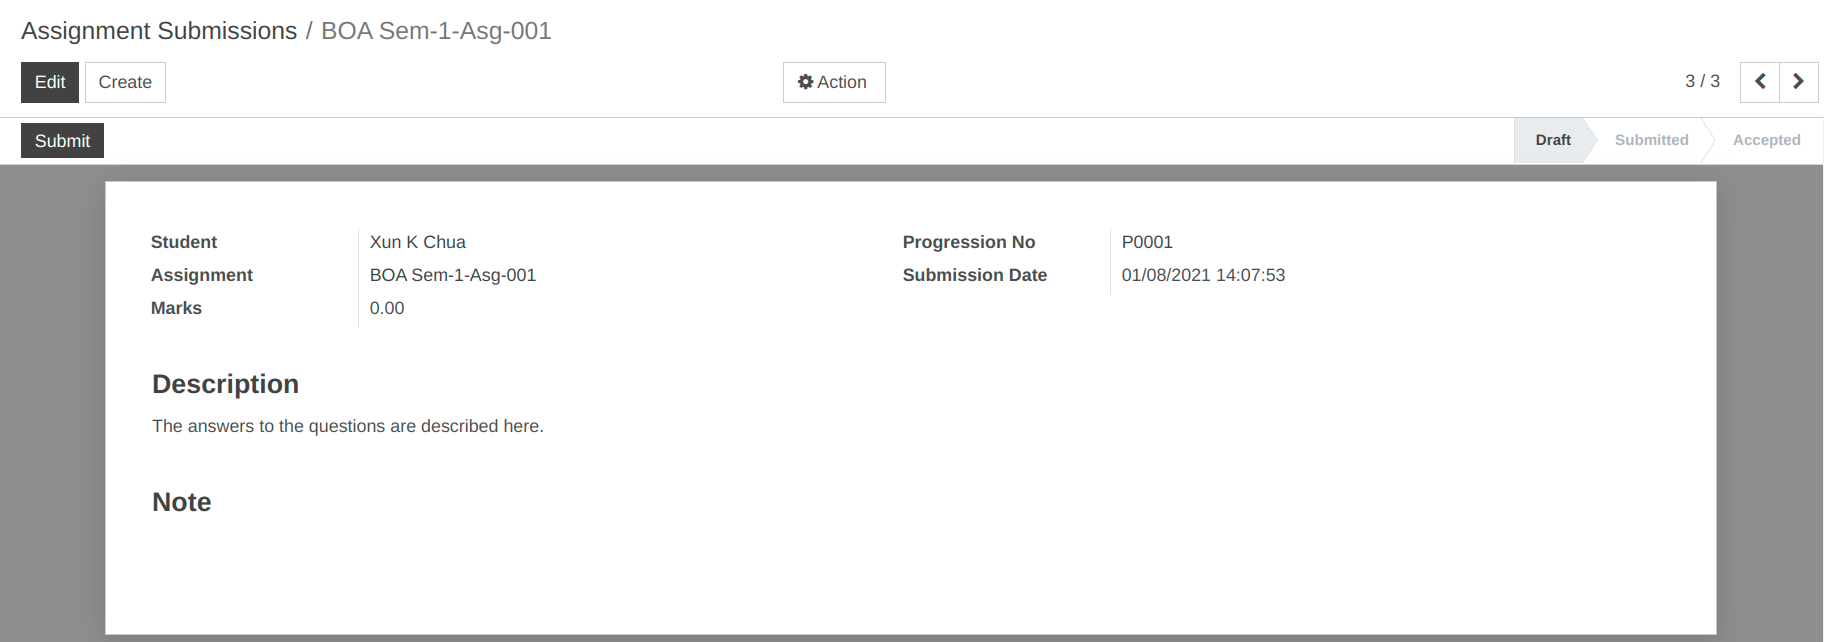
Details of Assignment Submissions:
Student :- Specify the student whose assignment is to be submitted.
Progression No :- It will show a Progression number of Particular student.
Assignment :- Select the name of the assignment from the list of available assignments or create a new assignment.
Submission Date :- By default today’s date and time is set in the Submission Date.
Description and Note :- You can also provide description and note about the assignment.
Workflow of Assignment Submissions:
1. Draft
When assignment is created,it is in
Draftstate.
2. Submitted
Click on the Submit button to submit the assignment. It changes the state from
DrafttoSubmitted.
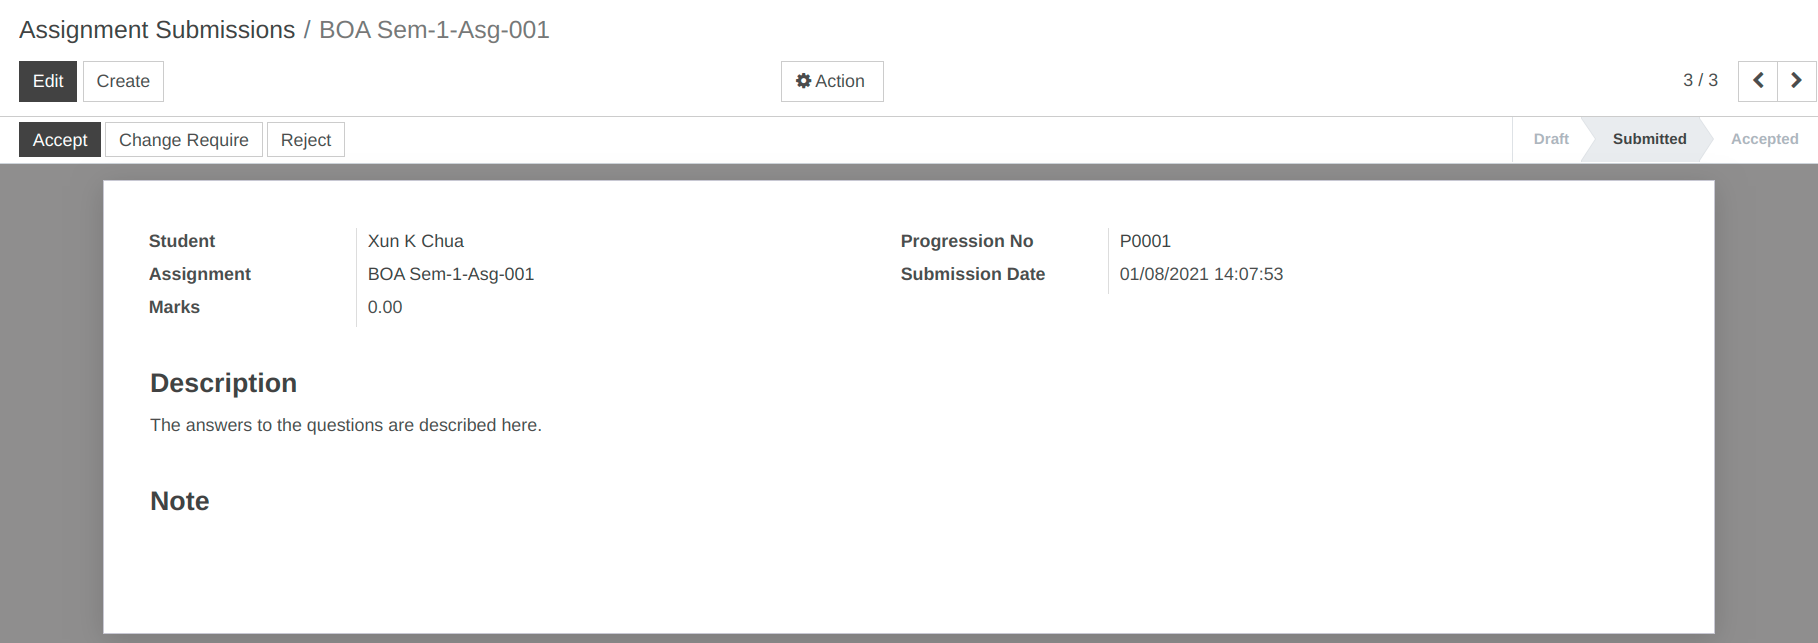
Once the faculty will accept the assignment submitted by student, it changes the state from
SubmittoAccepted.
16. How to create Attendance Register in OpenEduCat.
Attendance Register
OpenEduCat provides the Attendance maintenance facility for an institute.To maintain attendance ,attendance register is created for particular batch and course.
Go to .The below image shows the detail of attendance register.

Details of Attendance Register Form:
Name :- Set name of the attendance register here.
Code :- Set code of the attendance register here.
Course :- Select course for which the attendance register is created.
Batch :- Select batch for which the attendance register is created.
Auto Create :- Auto Create a attendance sheet.
Auto Create If Session :- Auto create a sheet if session is created.
Auto create sheet duration :- Auto create a sheet daily, weekly or monthly.
17. How to create Attendance Sheet in OpenEduCat.
Attendance Sheet
Attendance sheet is created as par particular date and maintain attendance for that day.
To do that,Go to .Click on Create button to create new attendance sheet.
The below image shows the Attendance sheet.
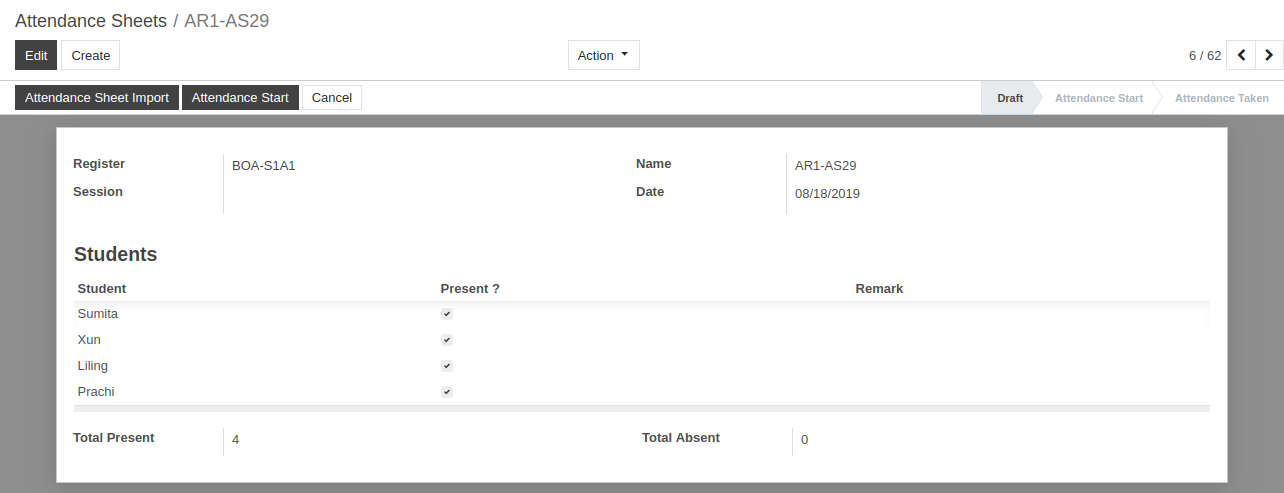
Details of Attendance Sheet Form:
Register:-Create or Select the attendance register from the created attendance registers.
Name:-Set name of the attendance sheet here.
Session:- Create or Select the session from the created sessions.
Date:-Set date of the attendance sheet.
Student(s):-Select the list of absent students from the list here.
Total Present:-It shows the number of present student.
Total Absent:-It shows the number of absent student.
18. How to manage Student Attendance in OpenEduCat.
Attendance Management:
1.) To maintain student attendance ,first of all attendance register is created for particular batch and course.
Go to .
Click on Create to create a new lesson planning Record.
Details of the Attendance Register Form:
Name :- Set name of the attendance register here.
Code :- Set code of the attendance register here.
Course :- Select course for which the attendance register is created.
Batch :- Select batch for which the attendance register is created.
Auto Create :- Auto Create a attendance sheet.
Auto Create If Session :- Auto create a sheet if session is created.
Auto create sheet duration :- Auto create a sheet daily, weekly or monthly.
2.) Attendance sheet is created as per particular date and maintain attendance for that day.
To do that, Go to .
Click on Create to create new attendance sheet.
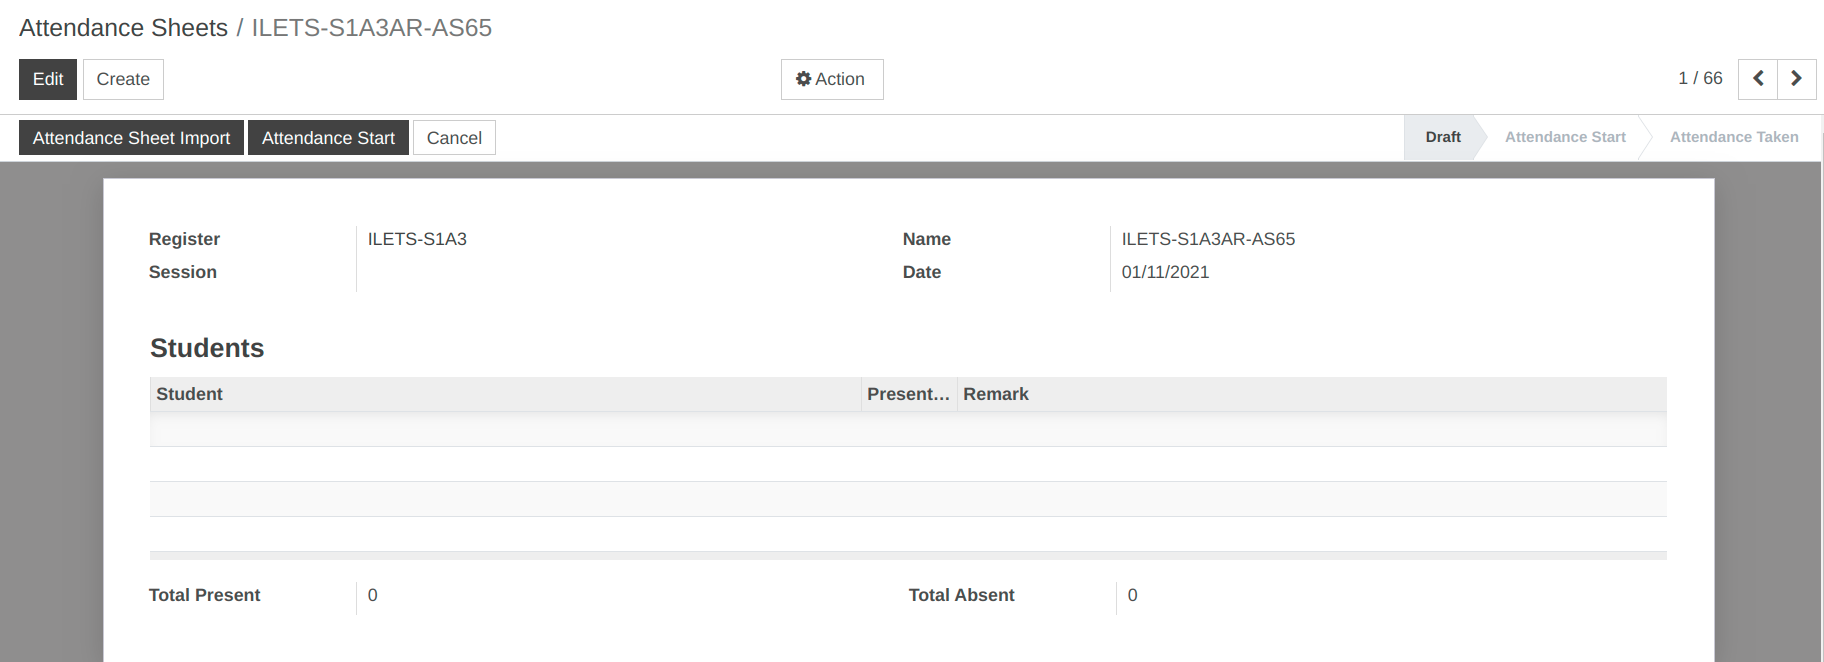
Details of Attendance Sheet Form:
Register :-Create or Select the attendance register from the created attendance registers.
Session :- Select the session from the created sessions.
Name :-Set name of the attendance sheet here.
Date :-Set date of the attendance sheet.
Student(s) :-Select the list of absent students from the list here.
Total Present :-It shows the number of present student.
Total Absent :-It shows the number of absent student
3.) Faculty can take attendance of students in the class room so easily using OpenEduCat.
To do that, Go to .
Click on Attendance Sheet Import.
Details of Attendance sheet import wizard:
Course, Batch, Nationality, Blood Group :- Will be fetch from the data set in attendance sheet.
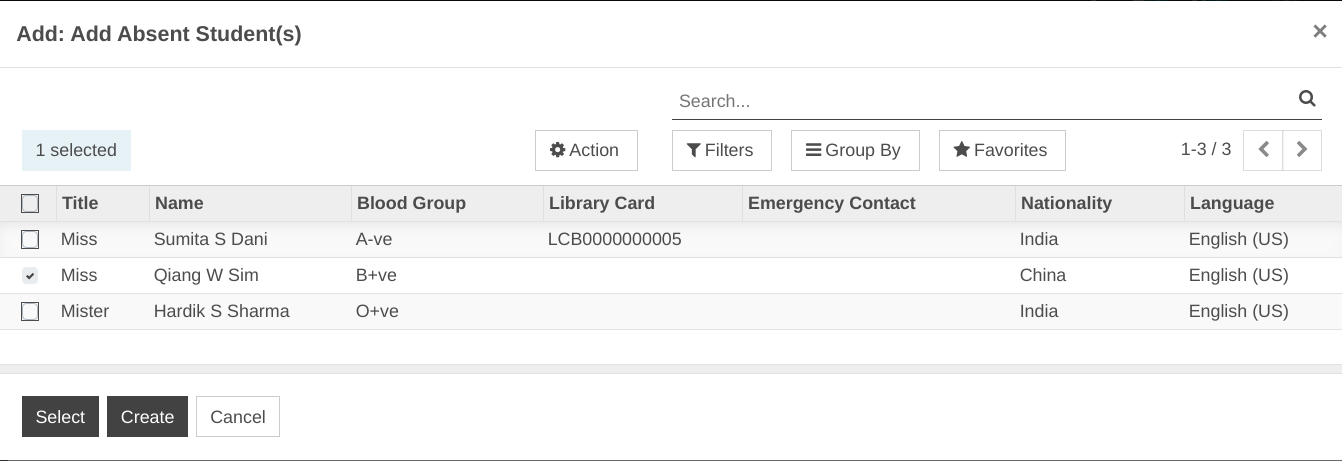
Add Absent Student(s) :- Select the list of absent students from the list here.
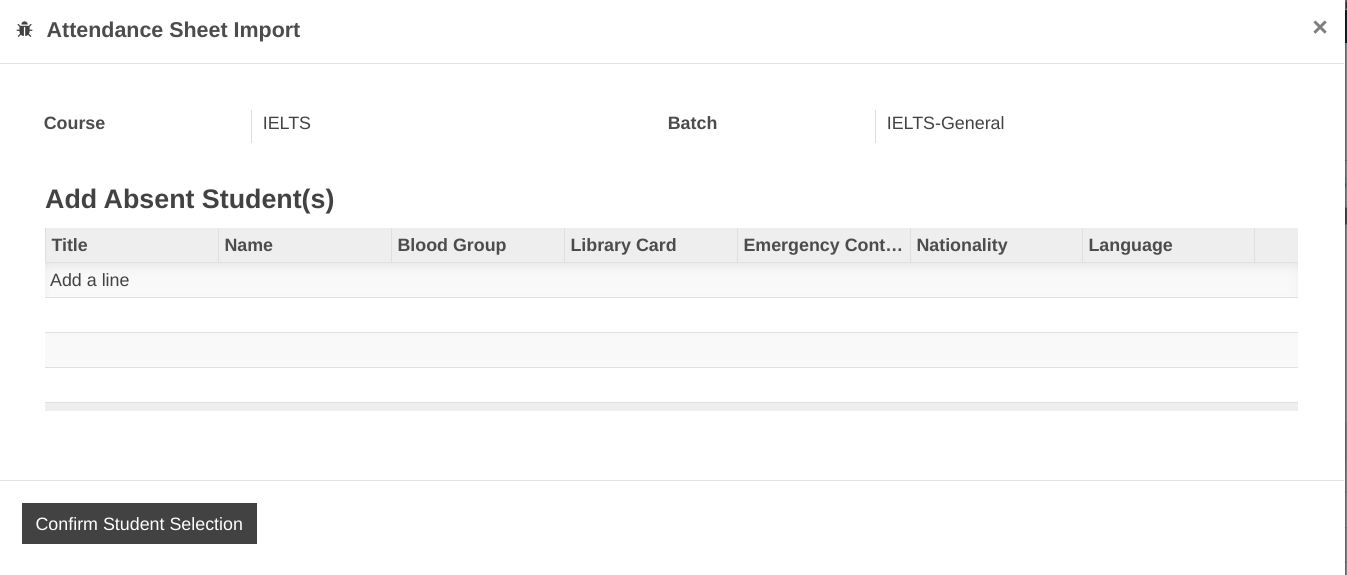
Click on Add a line, Add Absent Student(s) wizard will open to add the add absent students.
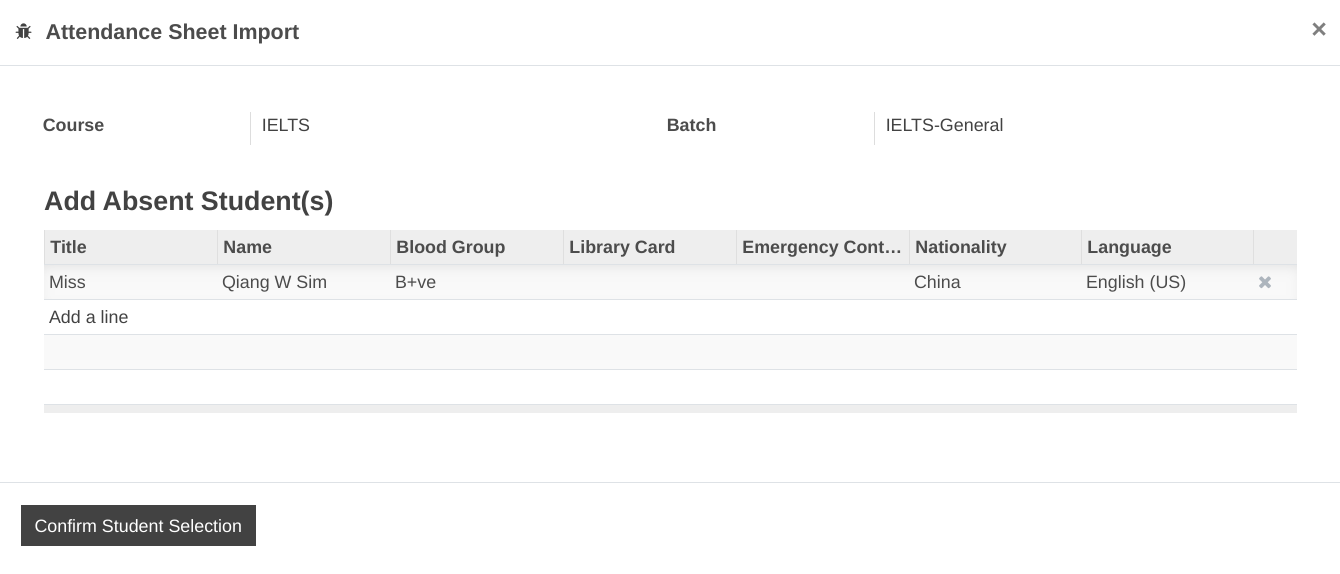
Click on Confirm Student Selection to confirm the list of absent students.
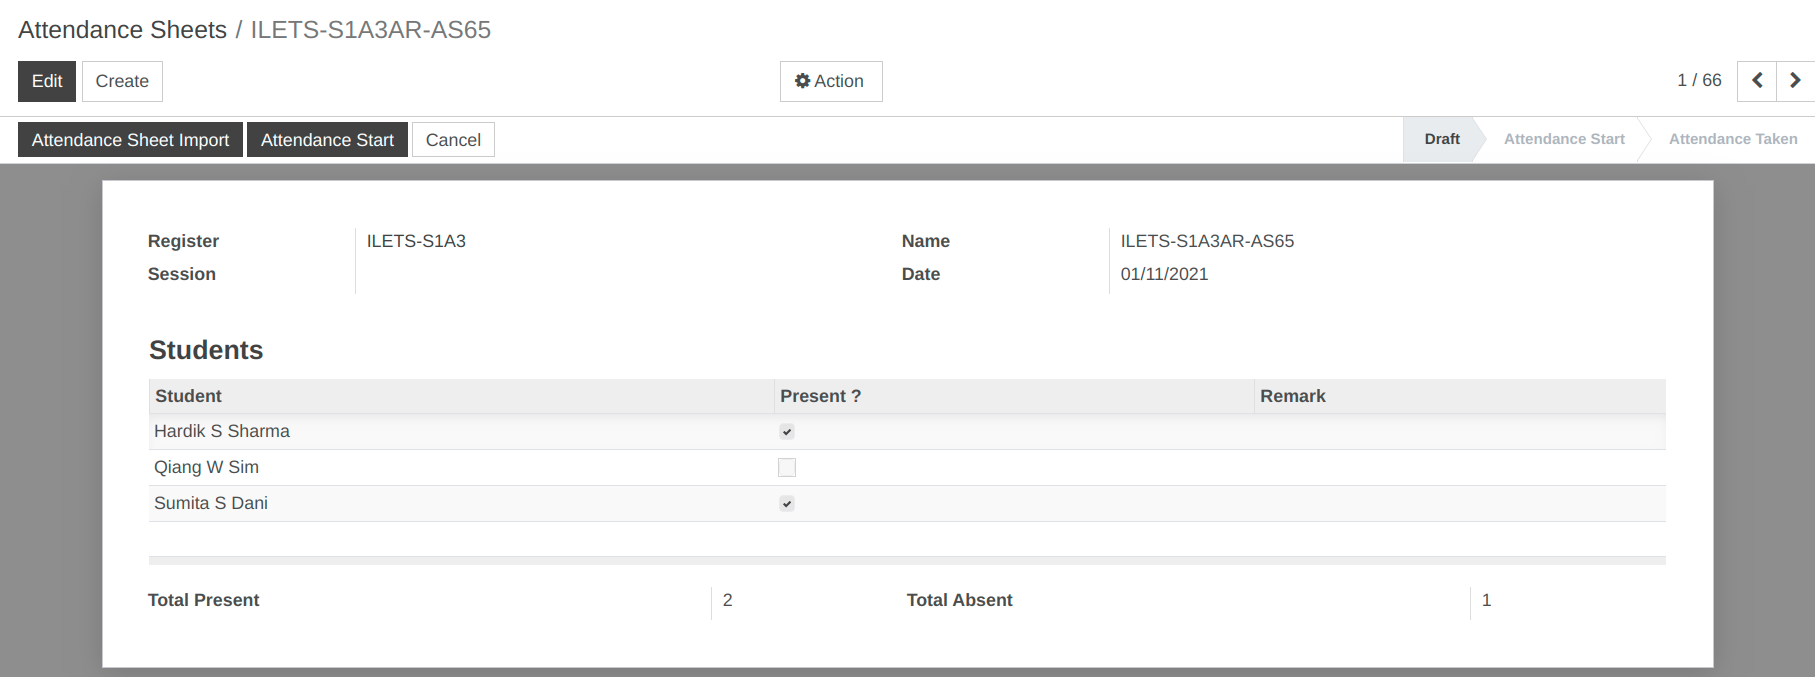
Refer to the attendance sheet for viewing total present and total absent students.
19. How to configure Hostel and allocation room to students.
Campus Management:
Campus helps you to provide the start up data of campus facility in an institute for students.For example campus manage details of different facilities like hostel,auditorium,cricket ground and it’s allocation details.
Configuration of facilities include two things as below:
Configure Facility Type
Configure Facility
1.) Configure Facility Types
Configuration of facility type helps you to provide different campus facility in an institute. To configure the facility types, follow the below steps :-
Go to .
Click on Create to create a new facility type.
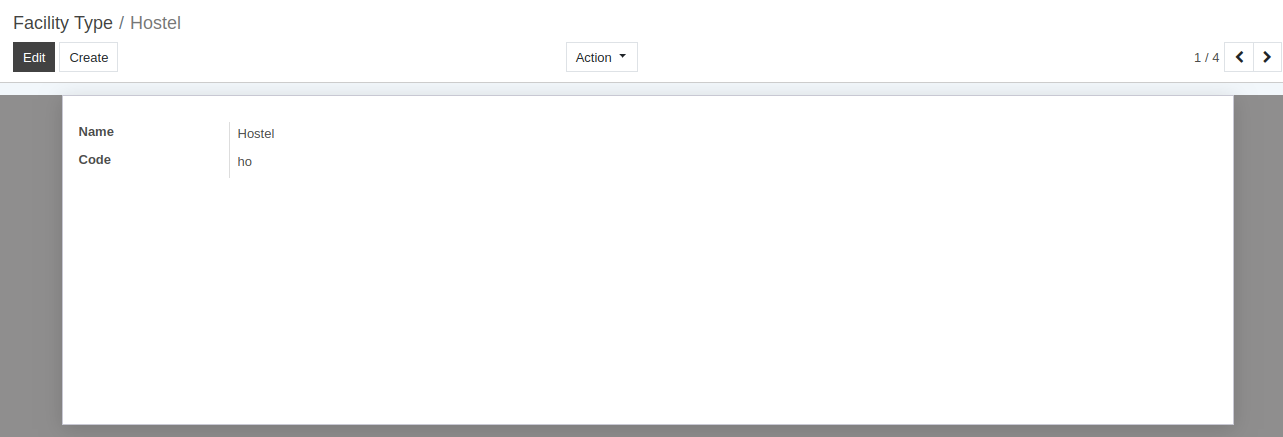
Details of Facility Types:
Name :- Set name for the facility type. It will be displayed in whole system. The maximum size of the name is 32 characters.
Code :- Set Code for the facility type. Unique code for facility type.
2.) Configure Facility
To configure the Facility, follow the below steps :-
Go to .
Click on Create to create a new Facility.
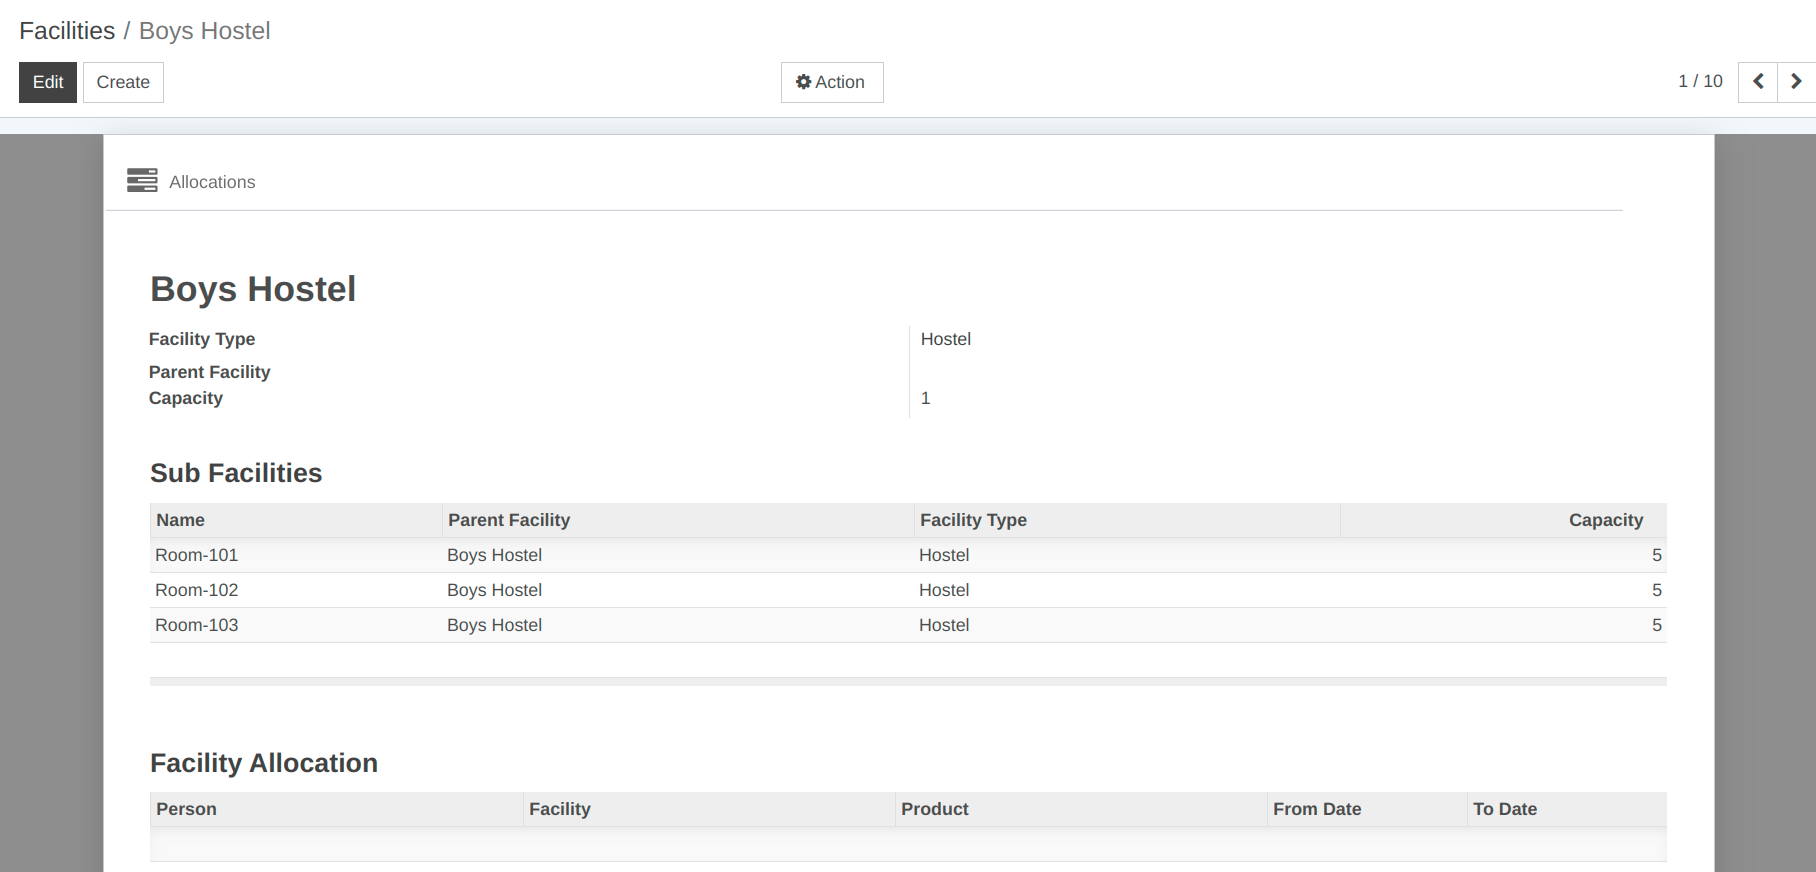
Details of Facility Form:
Facility Name :- Set the name of the facility.
Facility Type :- Select Facility Type for which facility is created.
Parent Facility :- Select parent facility for which facility is created.
Capacity :- Set capacity for the facility.
Sub Facilities :- Set Sub Facility detail for facility type.
Facility Allocation :- Select Student details and which facility is allocated to them.
3.) Facility Allocation To Students
OpenEduCat provides different different facility allocations to students. For example hostel facility,criket groung facility etc.
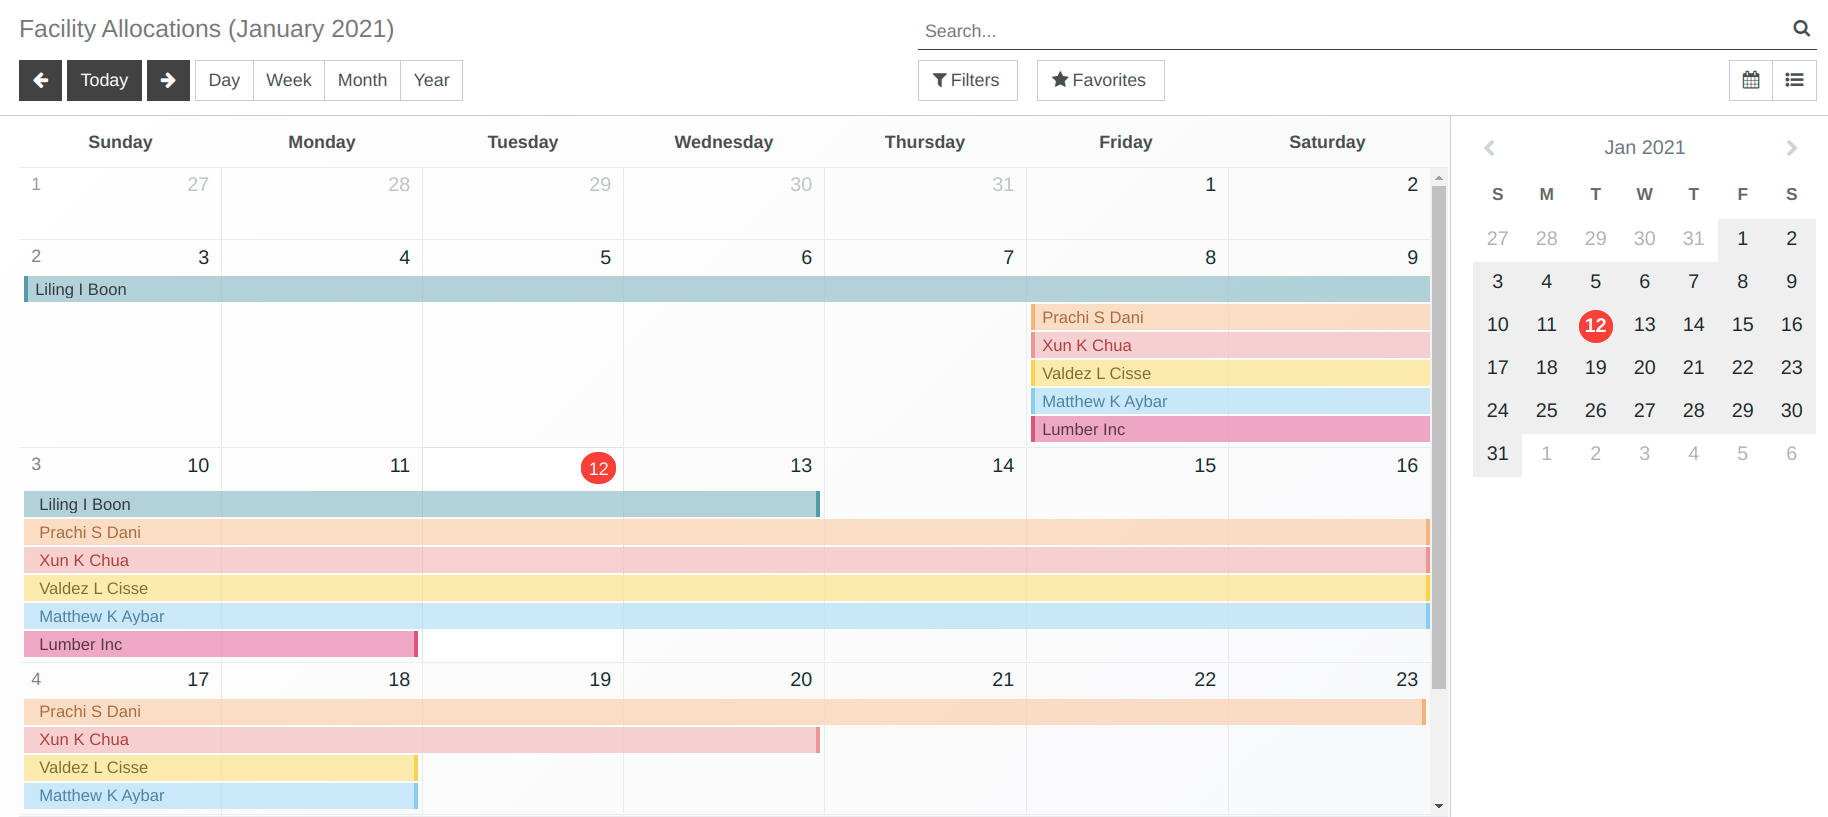
Go to .
The below image shows the facility allocations.Here you can see all facility allocation in particular month.
Here you can select no of days for facility.
Click on
Createto create a new facility allocation.
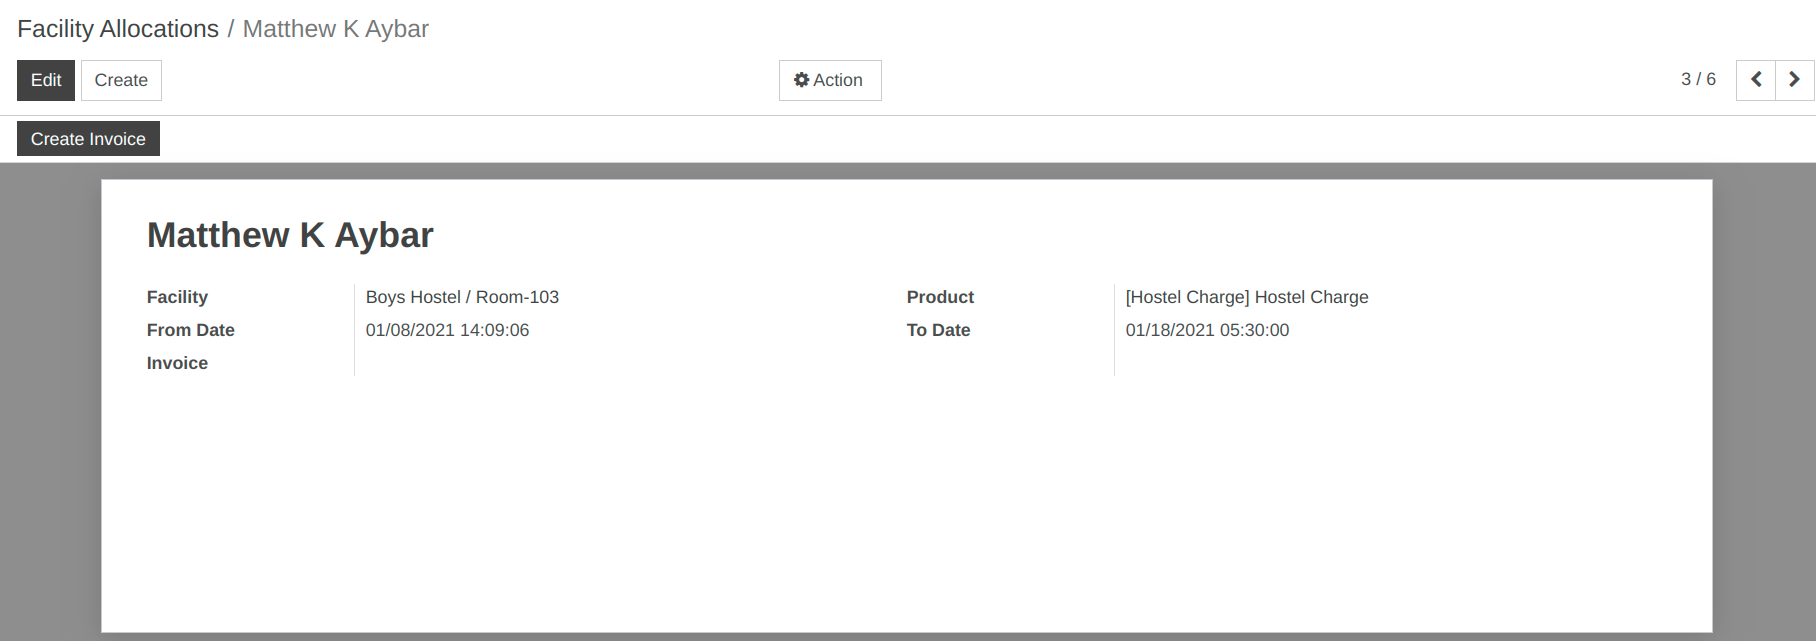
Details of Facility Allocation Form:
Person :-Select the student here to whom the facility is being allocated.
Facility :-Select facility here.
Product:-Select Particular facility fees term.
From Date :- From Date allows to select from which date the facility has been allocated to the student By default todays date appears here.
To Date :- To Date allows to select the last date on which the facility allocation will be completed.
Click on
savebutton. After click on save button facility allocation is created as shown in below image.
20. How to configure Exam Session & It’s exams.
Exam Management:
1.) Configure Exam Sessions
OpenEduCat provides a way to create exam session based on the course and batch.
You can go to the . Click on Create button to create new Exam Session.
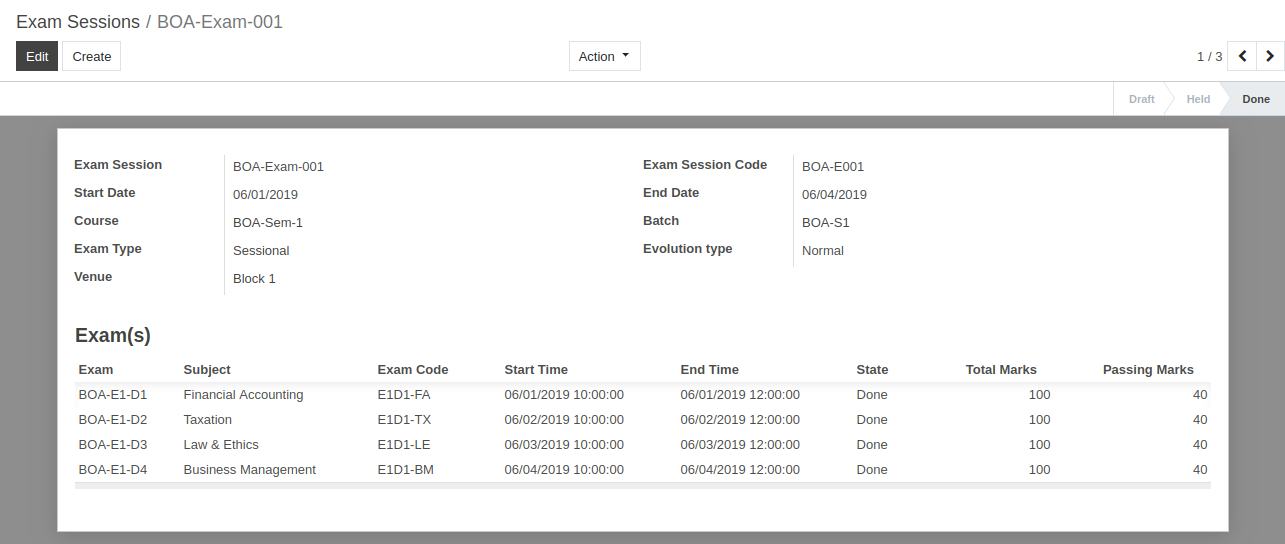
Details of Exam Sessions:
Exam Session :- Provide a name to the exam session. Exam session name should be reasonable according to the exam being held.
Exam Session Code :- Also Provide apppropriate code to the Exam Session. It should not be more than 8 characters long.
Start Date and End Date :- Provide the Start Date and End Date on which the exam will start and end.
Course :- Select the Course for which the exam is to be taken.
Batch :- Based on the selection of course, list of batch appears, select the Batch from the list for which exam is conducted.
Exam Type :- Select exam type whether it is sessional or annual.
Evolution Type :- Select Evolution type whether it is normal or grade.
Venue :- Select the Room from the available list which will used for exam.
Exam(s) :- Exam Session includes number of exams(Subject wise), these exam are shown in exam field.
2.) Configure Exams
Exam Session contains multiple exams. Each individual exam can be created here with respect to each subject.
You can go to the . Click on Create button to create new Exam.

Details of Exams:
Exam Session :- Select the Exam Session under which this exam is contained from the list.
Exam :- Provide a name to the exam. Exam name should be reasonable according to the exam being held.
Subject: -Select the subject for which the exam is being held.
Exam Code :- Also Provide appropriate code to the Exam. It should not be more than 8 characters long.
Start Time and End Time :- Provide the Start Time and End Time of exam.
Total marks and Passing marks :- Provide the Total marks and Passing marks of exam.
Attendees :- Attendees includes all the students who will attend the exam.
Workflow of Exams:
1. Draft
Once the details are filled up in the exam form and it is saved, the state is Draft. Workflow of this form is started from here.
2. Scheduled
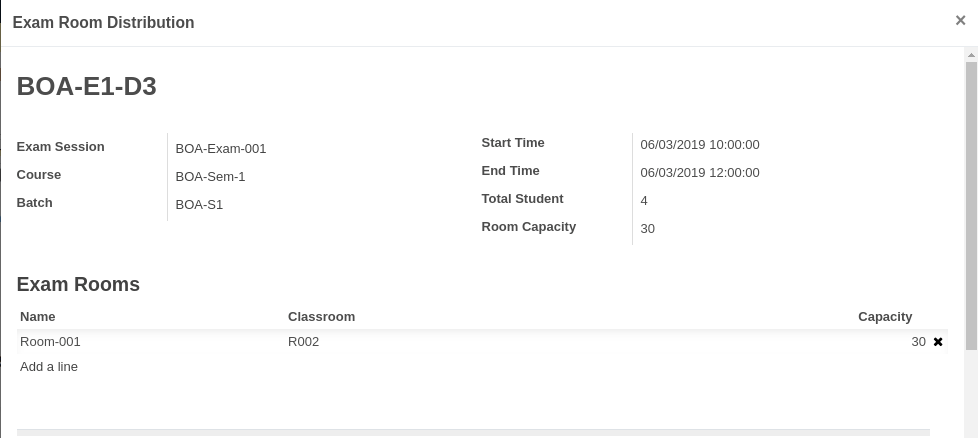
Click on Schedule Exam button , it will open wizard asking detail for exam rooms and attendees.
Click on Exam Rooms to add room for that particular exam. It will open wizard to add exam rooms for that particular exam.
Click on Exam Attendees to add students who are suppose to attain the exam. It will open wizard to add students who are suppose to attain that particular exam.
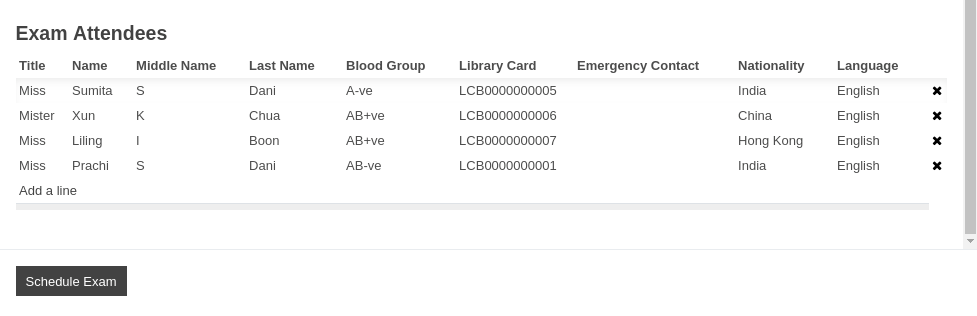
Click on Schedule Exam button to schedule the exam. This changes the state of record from
DrafttoScheduled.
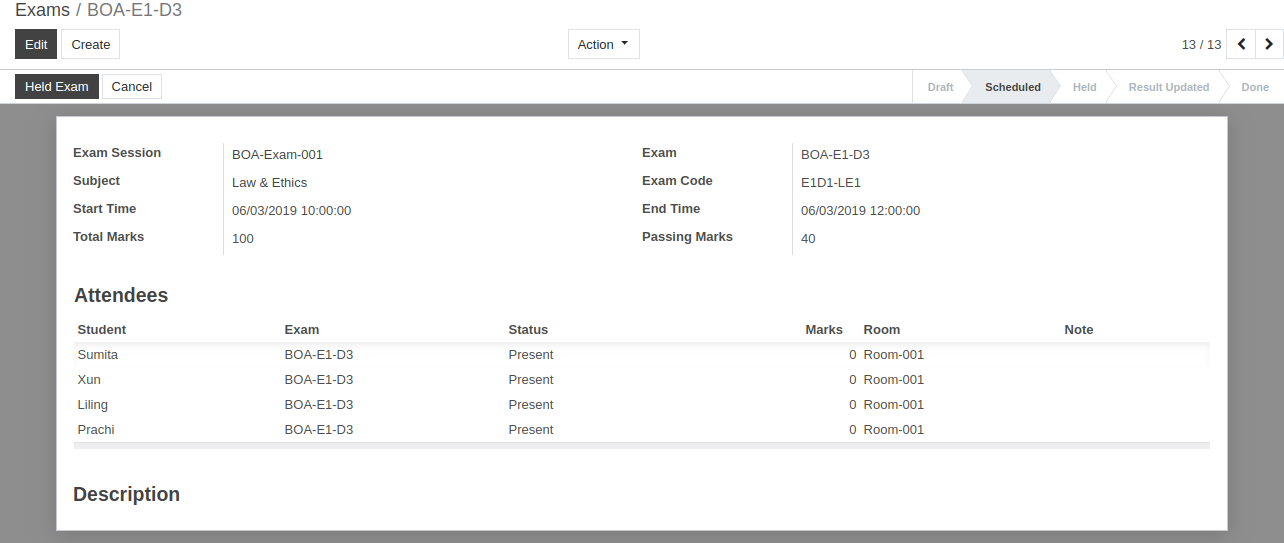
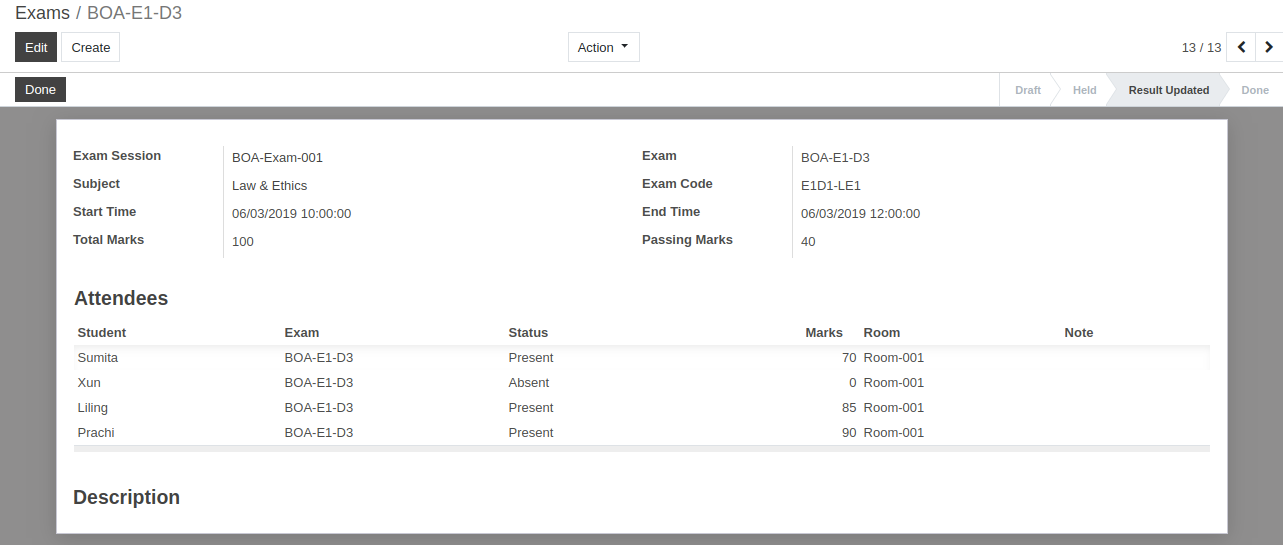
3. Held
Click on Held Exam button to start the exam. It will open wizard asking detail for absent attendees.
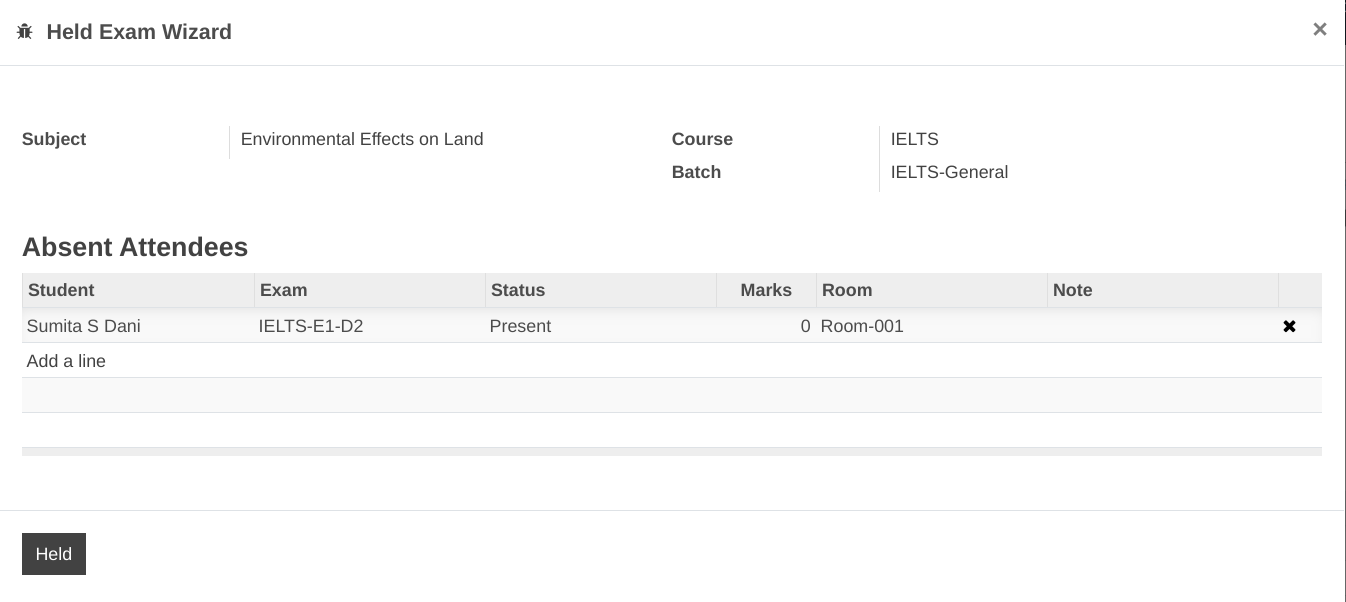
Click on Held button and this changes the state from
ScheduledtoHeld.
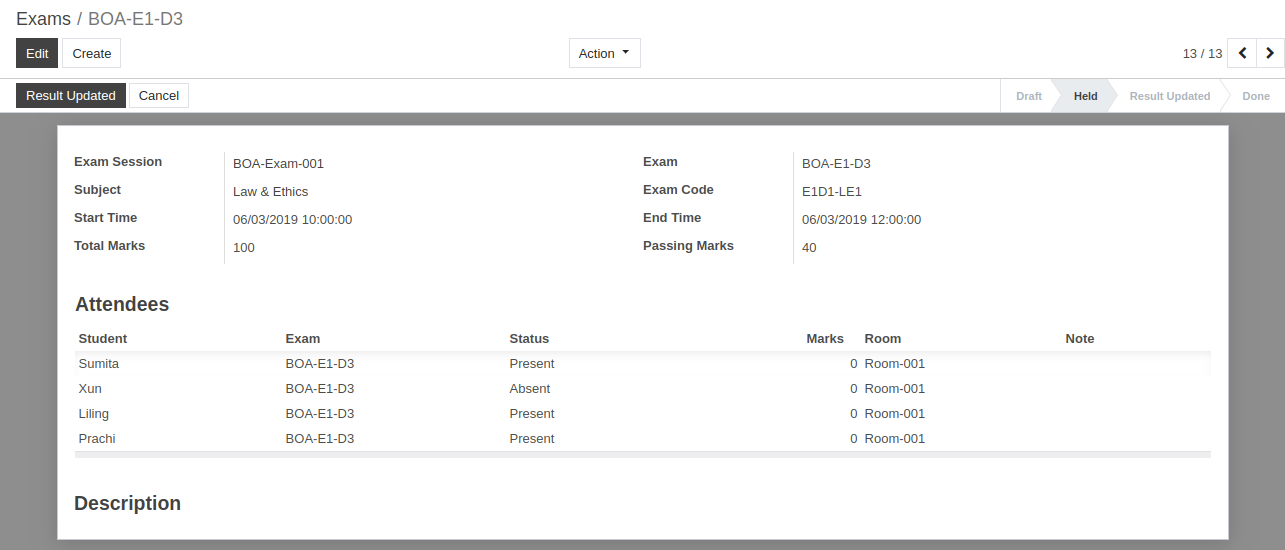
To update result You can go to the and select attendees to update their result.
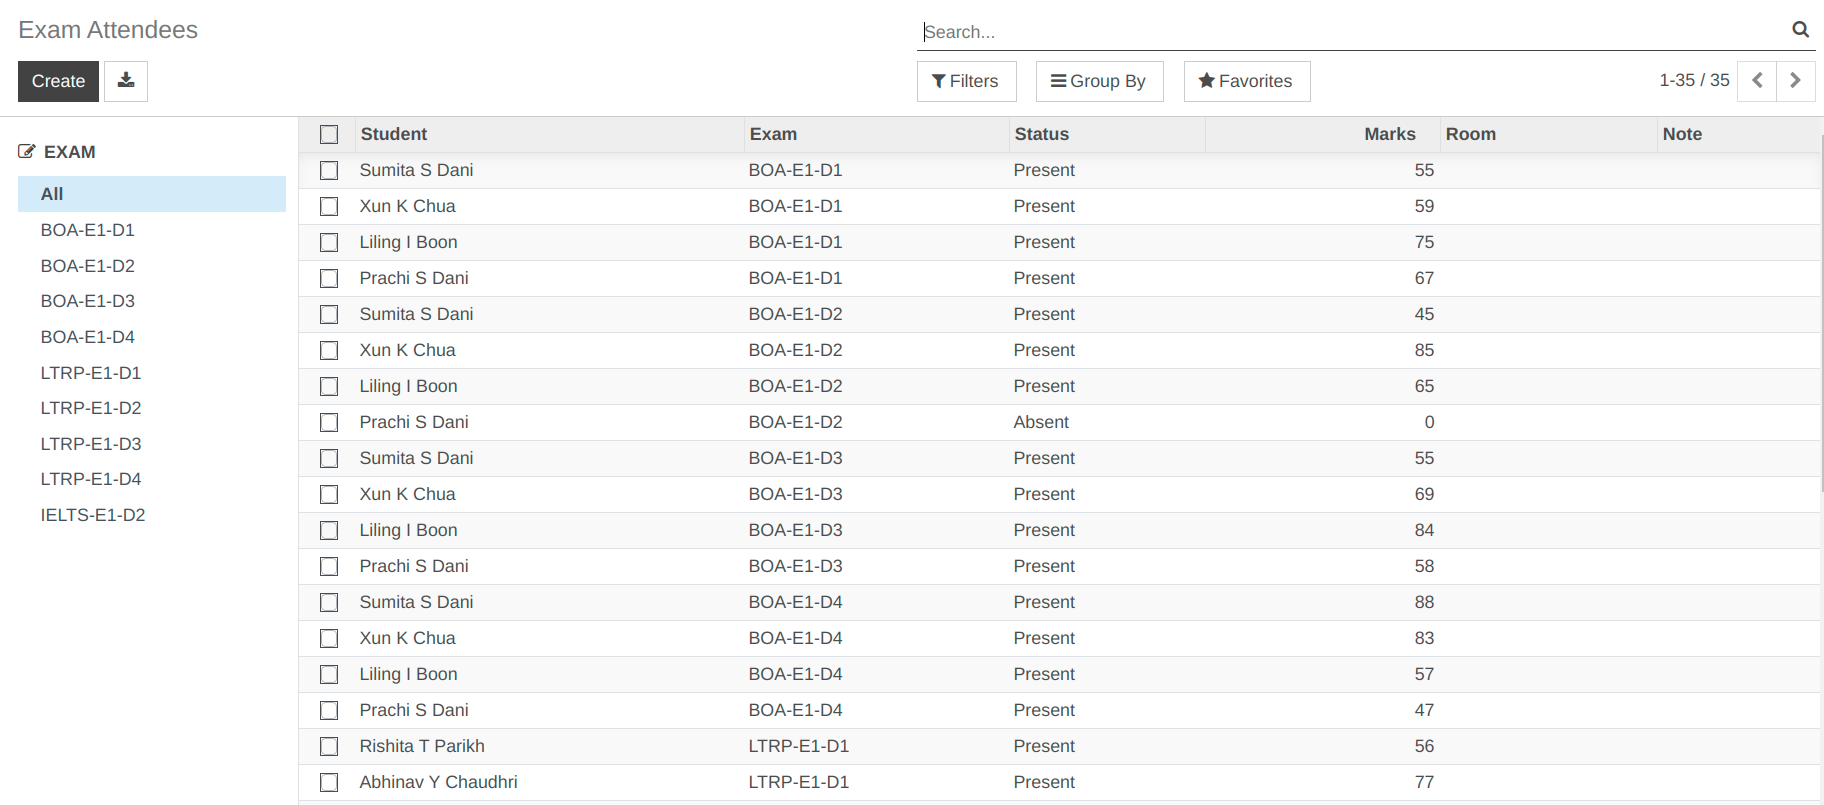
Then go to the exams again and you can see updated result of student.
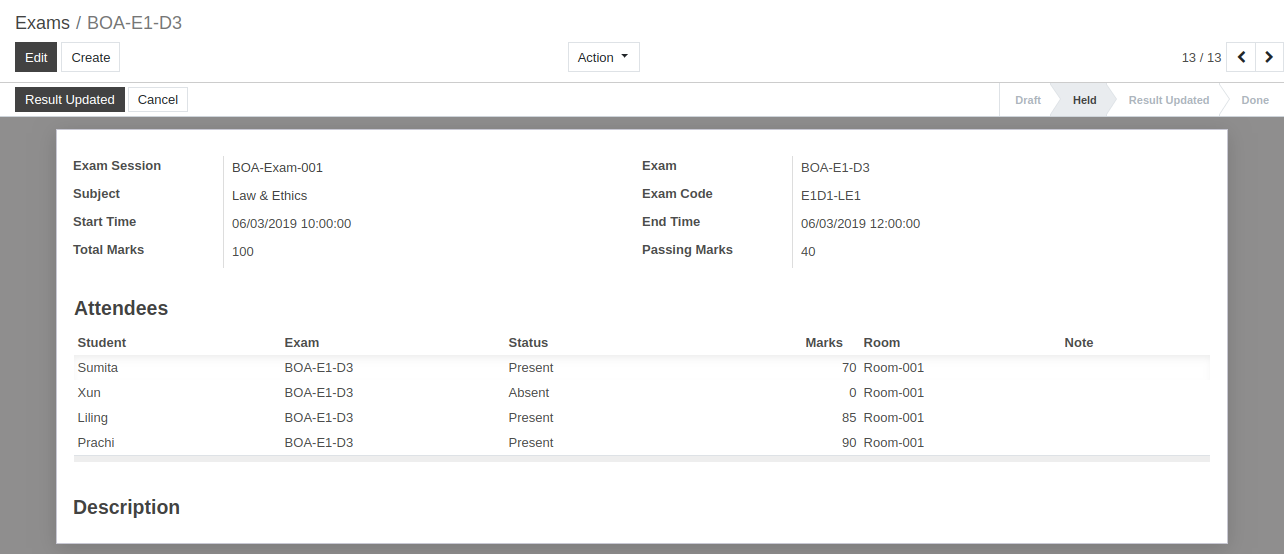
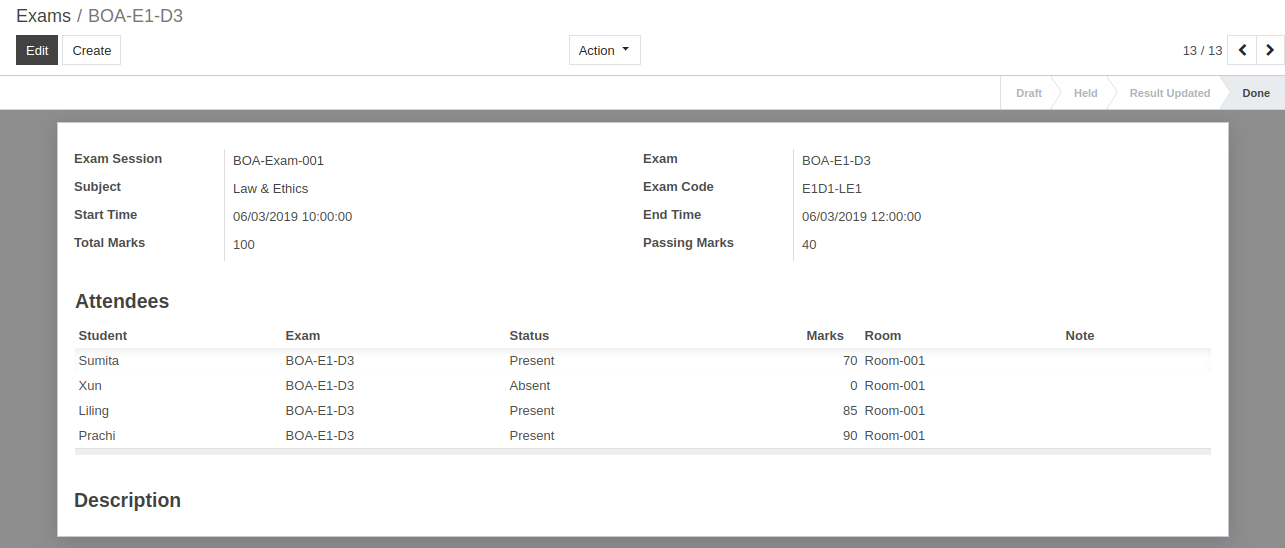
4. Result Update
Click on Result update button. This changes the state to
Result updated.
5. Done
Click on Done button. This changes the state to
Done.
21. How to manage Exam Attendance in OpenEduCat.
Exams:
While creating individual exam for the exam sessions, we can manage the exam attendance of the students for that particular exam.
Exam Session contains multiple exams. Each individual exam can be created here with respect to each subject.
You can go to the . Click on Create button to create new Exam.
Details of Exams:
Exam Session :- Select the Exam Session under which this exam is contained from the list.
Exam :- Provide a name to the exam. Exam name should be reasonable according to the exam being held.
Subject: -Select the subject for which the exam is being held.
Exam Code :- Also Provide apppropriate code to the Exam. It should not be more than 8 characters long.
Start Time and End Time :- Provide the Start Time and End Time of exam.
Total marks and Passing marks :- Provide the Total marks and Passing marks of exam.
Attendees :- Attendees includes all the students who will attend the exam.
Workflow of Exams:
1. Draft
Once the details are filled up in the exam form and it is saved, the state is Draft. Workflow of this form is started from here.
2. Scheduled
Click on Schedule Exam button , it will open wizard asking detail for exam rooms and attendees.
Click on Exam Rooms to add room for that particular exam. It will open wizard to add exam rooms for that particular exam.
Click on Exam Attendees to add students who are suppose to attain the exam. It will open wizard to add students who are suppose to attain that particular exam.
Click on Schedule Exam button to schedule the exam. This changes the state of record from
DrafttoScheduled.
3. Held
Click on Held Exam button to start the exam. It will open wizard asking detail for absent attendees.
Click on Held button and this changes the state from
ScheduledtoHeld.
To update result You can go to the and select attendees to update their result.
Then go to the exams again and you can see updated result of student.
4. Result Update
Click on Result update button. This changes the state to
Result updated.
5. Done
Click on Done button. This changes the state to
Done.
22. Configure library management in OpenEduCat.
Library Management:
OpenEduCat provides the facility to configure library management.
To begin this, you need to configure some data in order to make it working. We refer to this as Configuration. You can configure the data for library like,
Media Type- That is assigned to a book.For example course book , reference book ,magazine.
Publisher- List of publications of which books you have in library.
Authors- List of authors whose books are available in library.
Library Card Type- Specify the type of library card type.For example Bachelor Degree Card , Master Degree Card.
1.) Configure Media Type
The Media Type are used for specifying the sub-category of the media. For example, Course Book , Reference Books , Magazine
Go to .
Click on Create to create a new media type.
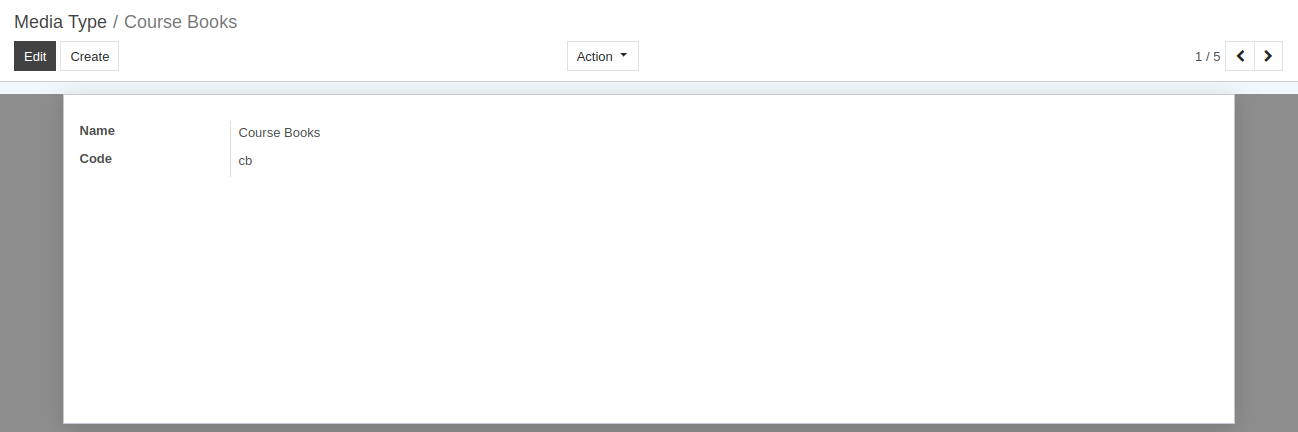
Details of Media Type Form:
Name :- Assign a name to a media type.
Code :- Assign a code to a media type.
2.) Publishers
The media available in library may have different publishers. Sometimes book of particular publisher is preferred by teachers. In such cases you must have publisher related information.
Go to .
Click on Create to create a new publisher.
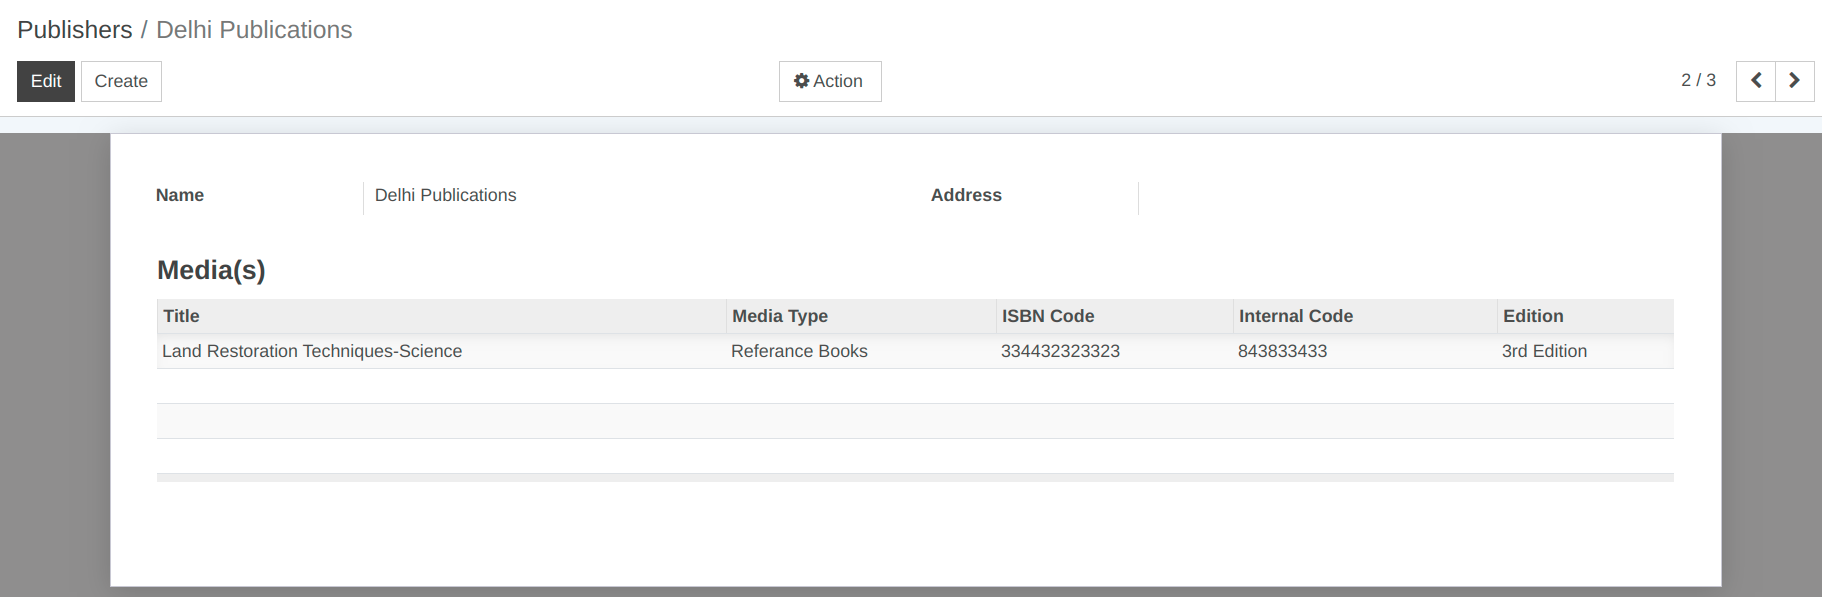
Details of Publishers Form:
Name :- Name is the name of publication house.
Address :- Address is the name of company whose address is considered as address of the publication.
Media(s) :- Media are added in the list automatically when a media is created with particular publisher.
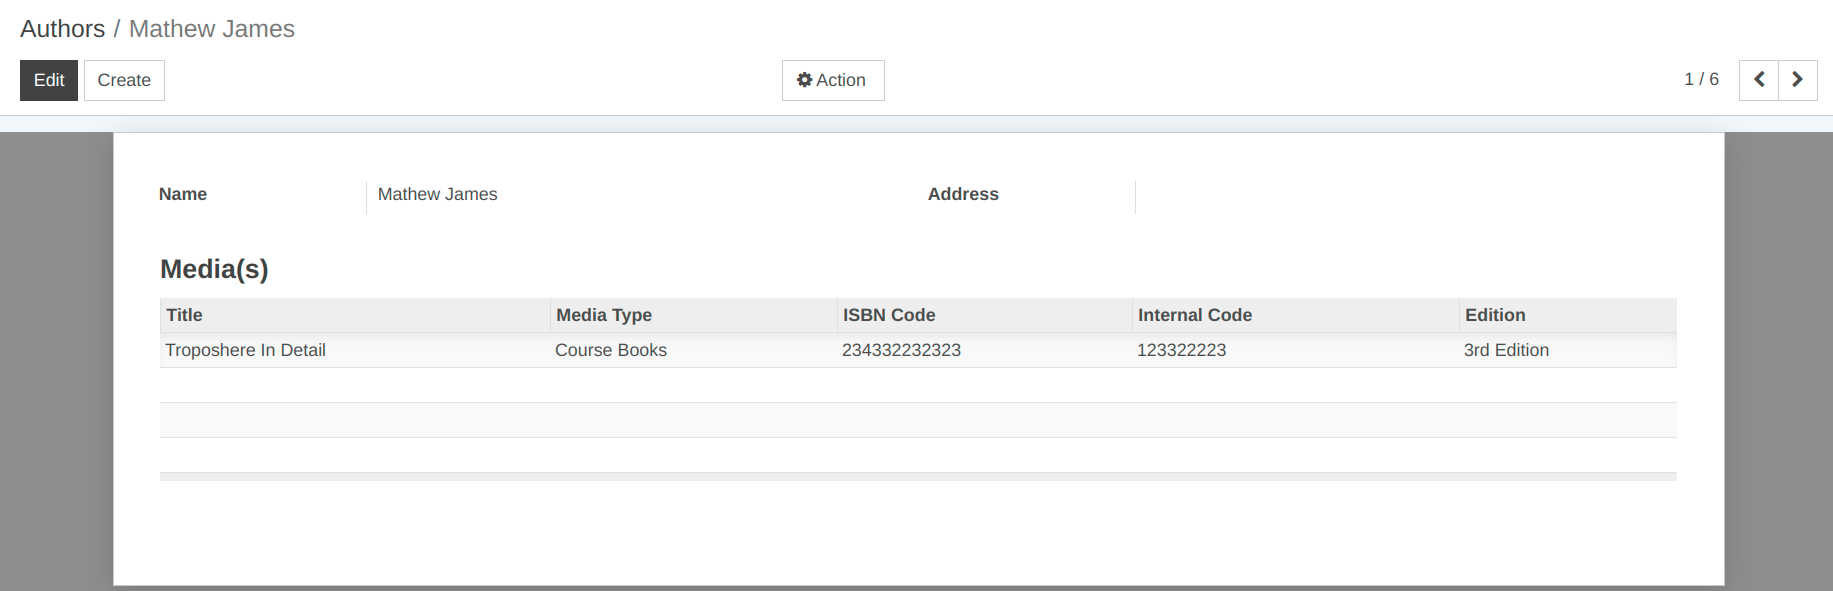
3.) Authors
Media is written by one or more authors. To have the details of authors while creating a media, you can configure the author details.
Go to .
Click on Create to create a new author.
4.) Library Card Types
Library cards can be available in different types as it can be used by students, faculties, alumni etc. Those library cards may have different rules application. So its preferable that you configure this type of library cards.
Go to .
Click on Create to create a new library card type.
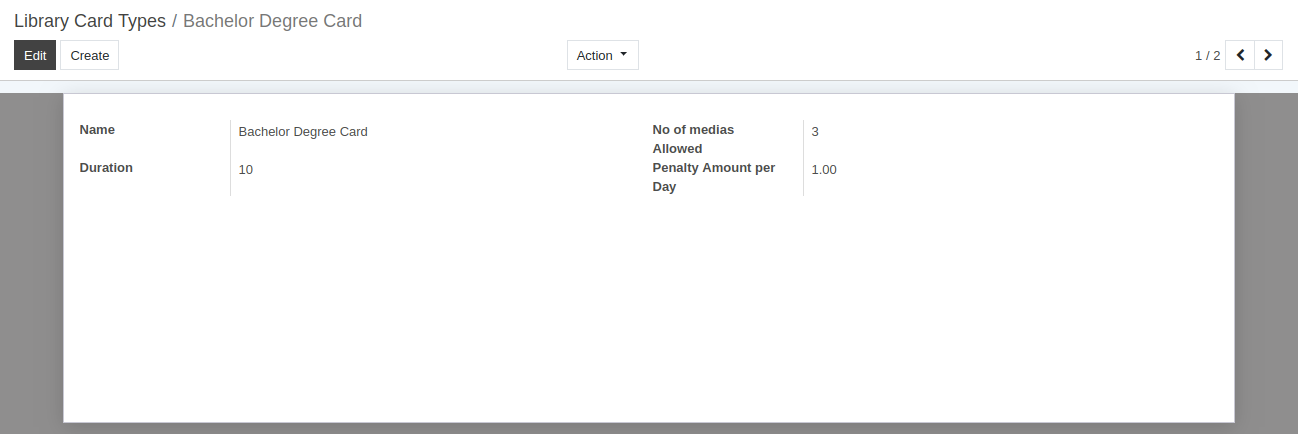
Details of Library Card Types Form:
Name :- Name is the title of library card type.
Number of medias Allowed :- Specify the number of medias allowed on a card.
Duration :- Duration is the number of days for which the media is allowed to be kept with the person.
Penalty Amount Per Day :- You can specify the penalty given per day to the person, who returns the media after due date in Penalty Amount Per Day field.
5.) Library Cards Allocation
We can create a library card and assigned to a person.
Go to .
Click on Create to create a new library card.
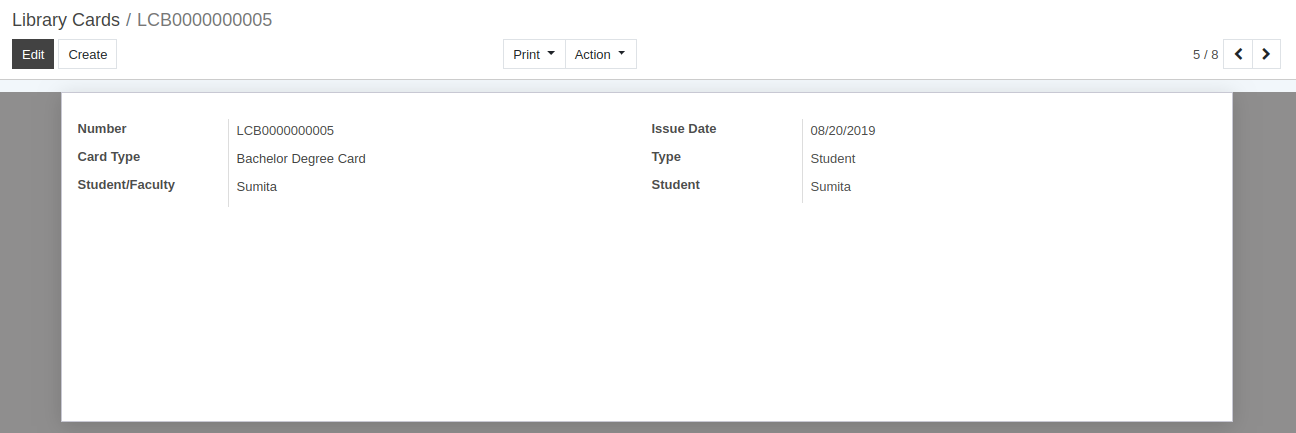
Details of Library Cards Form:
Number :- Number is the unique card number.
Issue Date :- Issue Date is on which date the card was issued to the person. By default todays date appears in this field.
Card Type :- Card Type is the type of card being created which can be selected/created from the list.
Type :- Type is either faculty or the student to whom the card is allocated. By default Student appears in this field.
Student/Faculty :- Based on the type field student or faculty can be selected from Student/Faculty field.
Student :- Select the Name of student to whom card is issued.
When a new library card is issued to a student, it can be allocated to student or faculty in their profile.
23. How to configure Student/Faculty Library Card and issue book.
Library Management:
1.) Configure Student/Faculty Library Card
We can create a library card and assigned to a person.
Go to .
Click on Create to create a new library card.
Details of Library Cards Form:
Number :- Number is the unique card number.
Issue Date :- Issue Date is on which date the card was issued to the person. By default todays date appears in this field.
Card Type :- Card Type is the type of card being created which can be selected/created from the list.
Type :- Type is either faculty or the student to whom the card is allocated. By default Student appears in this field.
Student/Faculty :- Based on the type field student or faculty can be selected from Student/Faculty field.
Student :- Select the Name of student to whom card is issued.
When a new library card is issued to a student, it can be allocated to student or faculty in their profile.
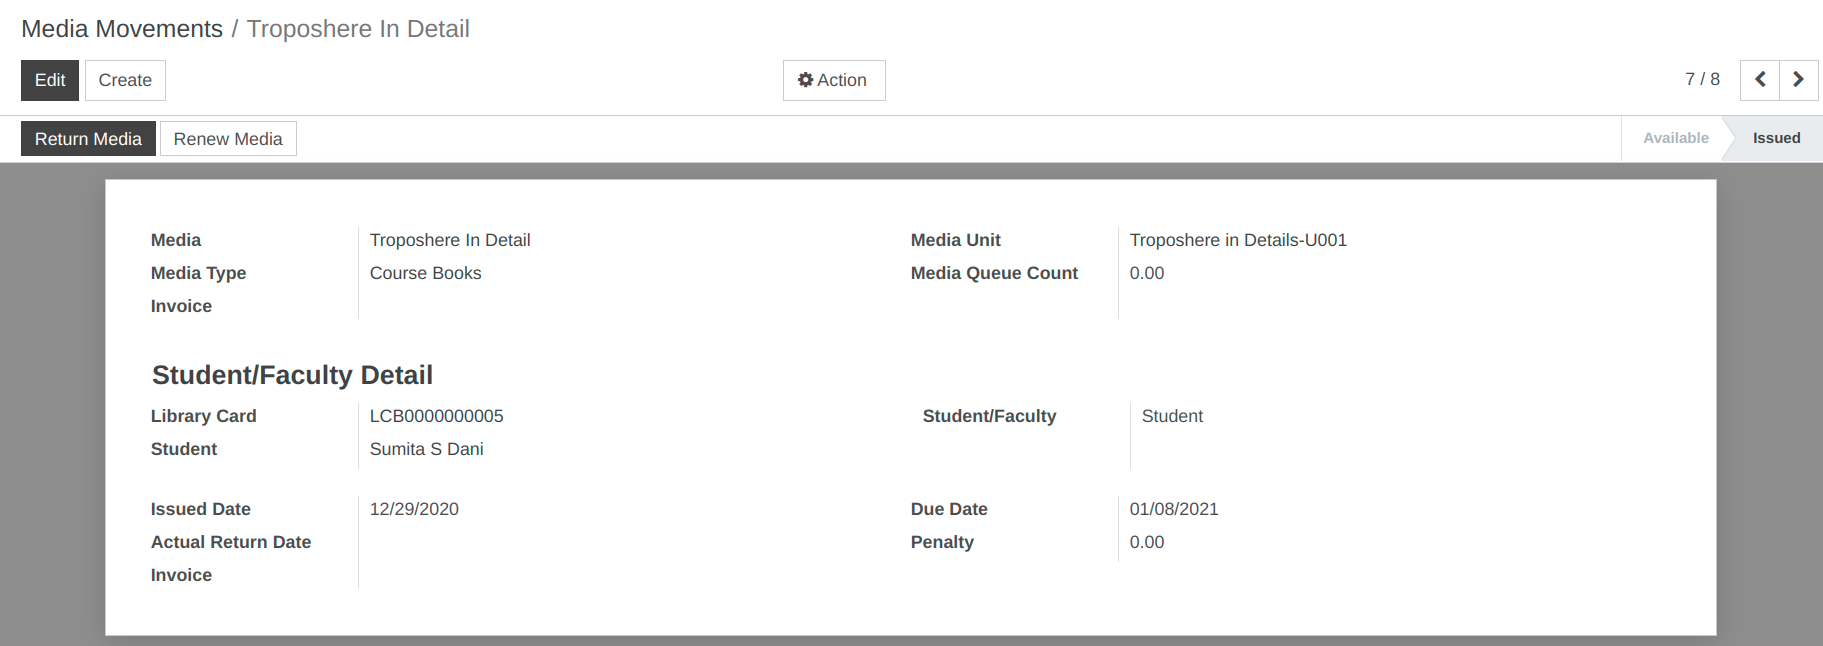
2.) Issue Book via Media Movement
OpenEduCat records the movements of all the Books in the system. Whenever any media unit is issued or retured its movement is recored in the media Movement.
Go To .
Click on Create to create a new media movement.
Details of Media Movement:
Media :- Select name of the media for media movement.
Media Unit :- Select media unit for media movement.
Media Type :- Select media type for media movement.
Media Queue Count :- Total media requests for media.
Invoice :- Penalty invoice reference
Library Card :- Library Card is the card to which media unit is issued.
Student/Faculty :- Student/Faculty specify the wheather the media unit is issued to student or faculty.
Student :- Based on selection in Student/Faculty name of student or faculty appears.
Issue Date and Due Date :- Issue Date and Return Date are the date during which media unit is issued and is to be returned. By default todays date appears in issue Date field.
Actual Return Date :- Actual Return Date is the date during which media unit is returned by the holder.
Penalty :- In case the media unit is returned late penalty is calculated by OpenEduCat based on no. of days late(Actual Return Date - Return Date).
Workflow of Media Movement:
1. Available
Initially when a movement is created its in
Availablestate.
2. Issued
Click on Issue Media button to issue a media unit. It Changes the state from
AvailabletoIssued.
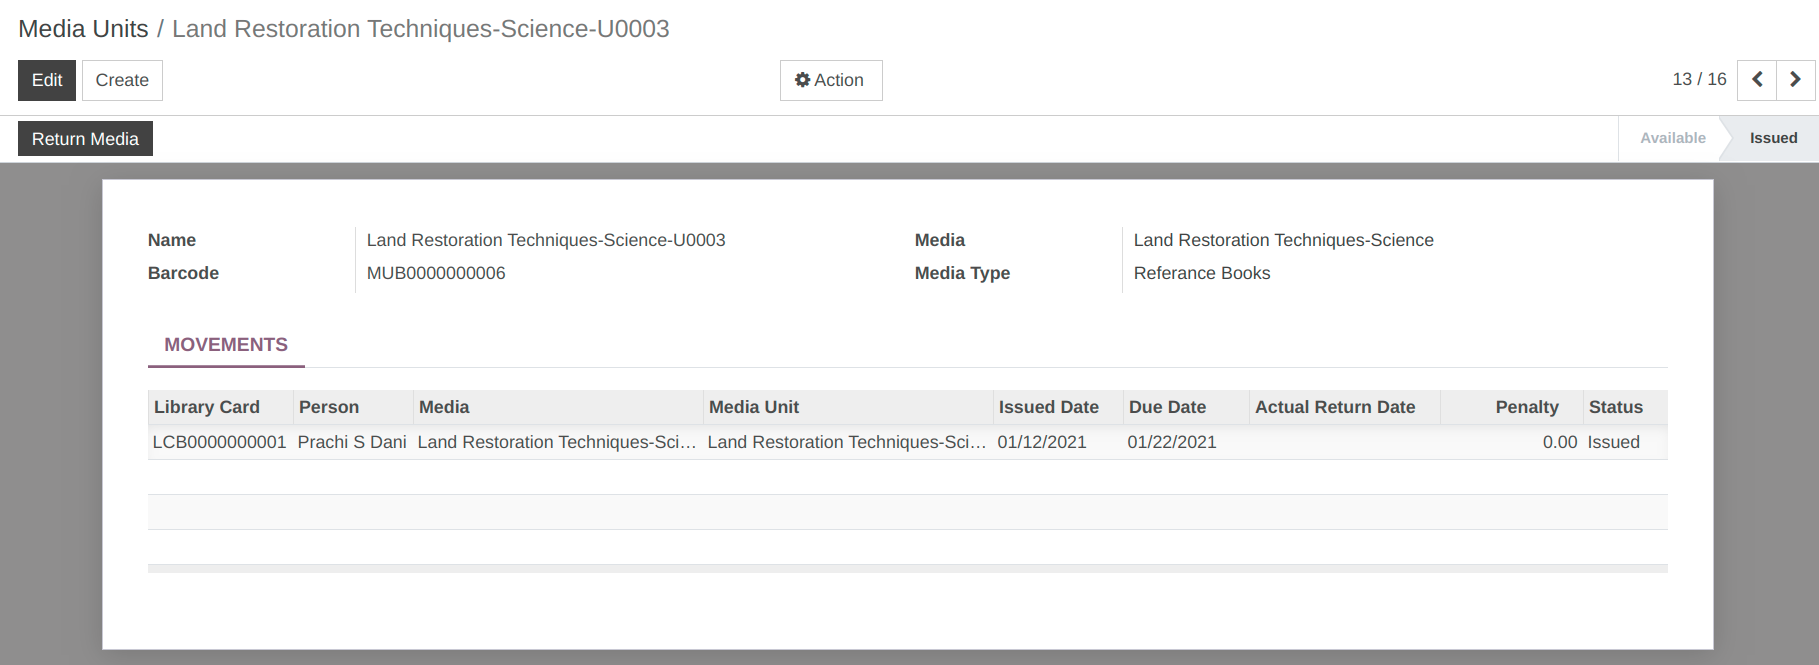
3.) Issue Book via Media Unit
When a new media unit is created, OpenEduCat assumes that media unit is available in library. So now a librarian can perform operations like issue media unit, return media unit etc..
Thus once a media unit is created, its default state is Available.
Go To .

Issue Media
Click on Issue Media to allocate the media unit to a person. It opens the below wizard. Here you can specify details related to the allocation.
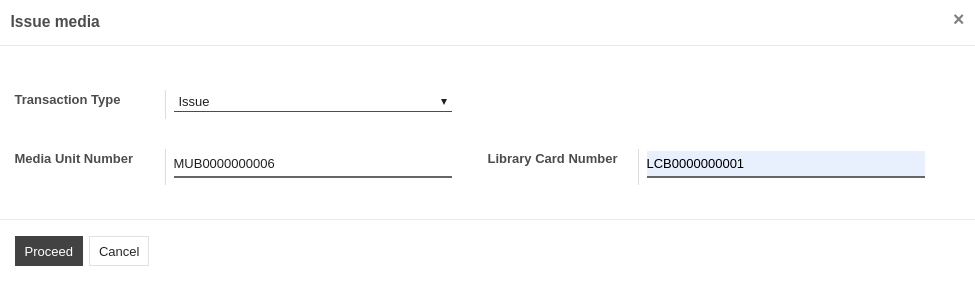
Details of Media Issue Wizard:
Transaction Type :- Select the Transaction Type whether the media unit is being issued or returned to a student or a faculty.
Media Unit Number :- Media Unit Number is the number of the media unit that is being allocated to a person. They are set automatically by OpenEduCat only when you click on Issue Media button.
Library Card Number :- Set the library card number of student or a faculty who want to issue this media unit.
Click on Proceed button and that media unit will be allocated to the person who has issued this unit.
4.) Issue Book Using Barcode
To Issue media using barcode, follow the below steps :-
Go to .
Click on Issue to issue media.
Details of Issue
First scan the value of media unit id for issue.

Then scan the library card id for issue.
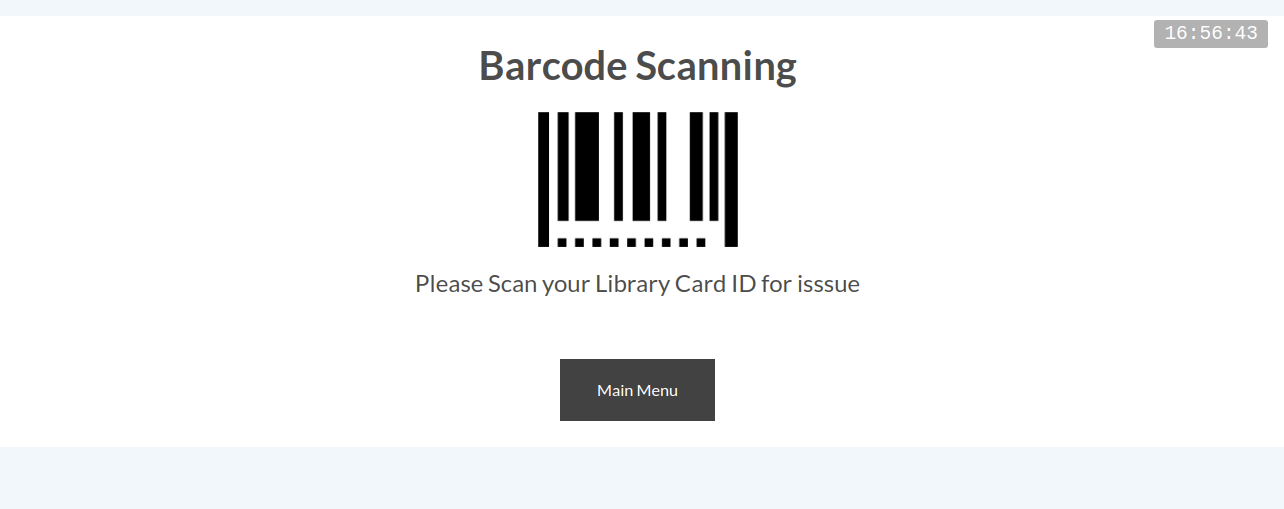
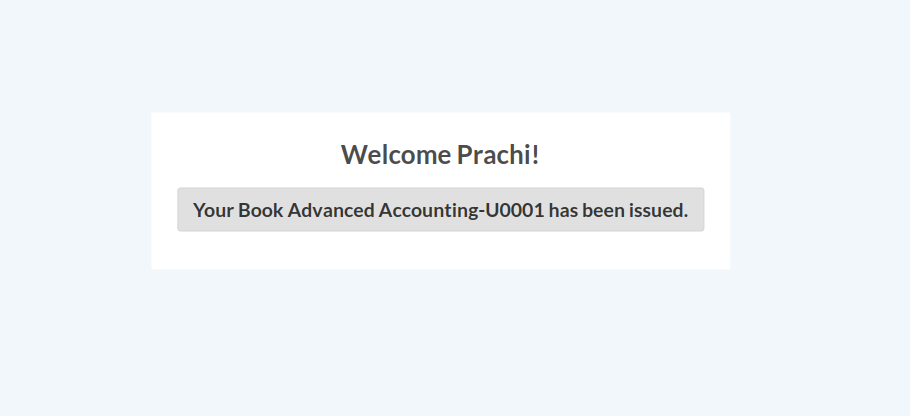
Then the success message will open after issuing the book.
24. How to configure Media and It’s unit and issue to Student & Faculty.
Library Management:
1.) Configure Media
To accommodate all the media details available in your library, you can create records of the medias.
Go To .
Click on Create to create a new media.
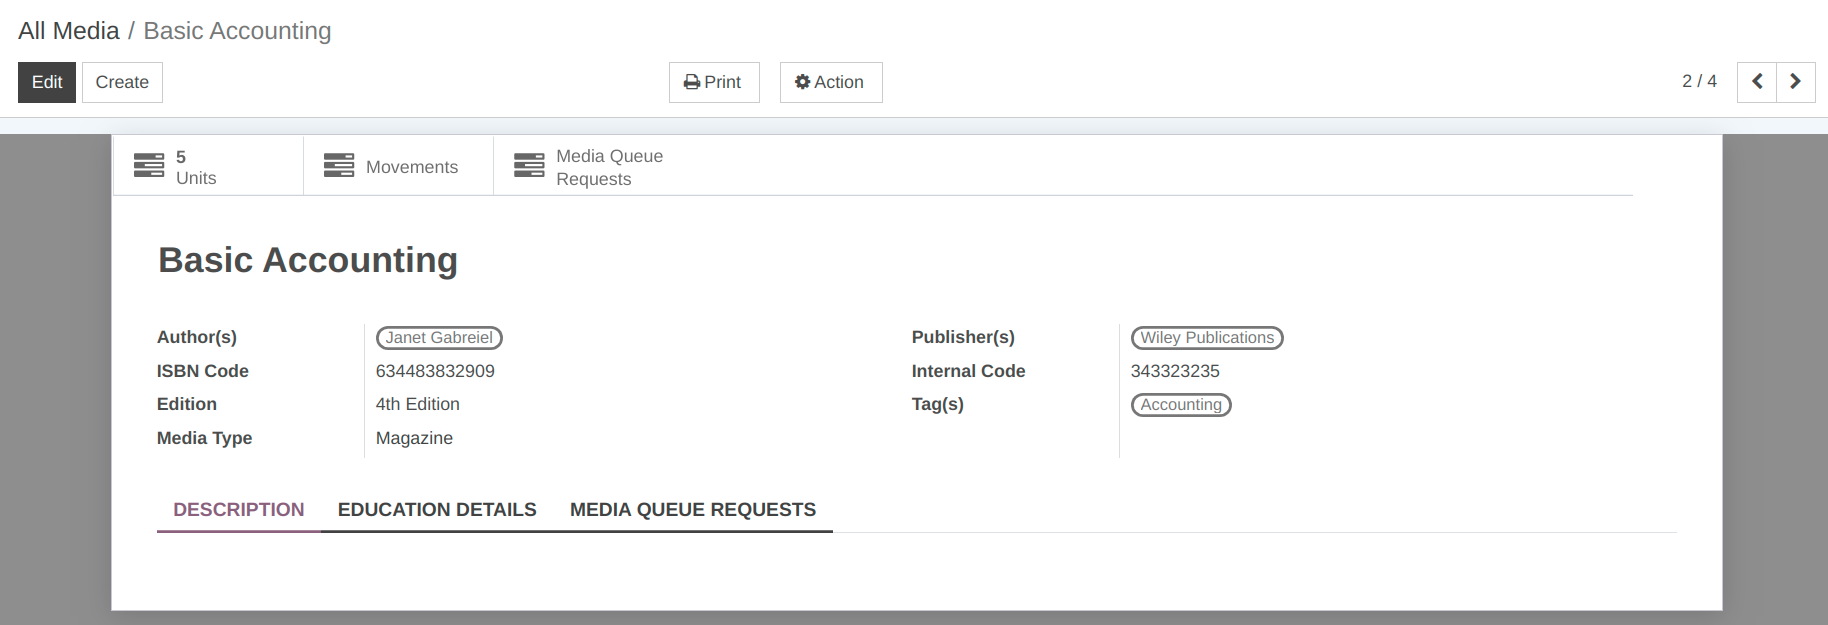
Details of Media Form:
Name :- Provide the name of the book in Name field. It is mandatory field so you have to provide the name here.
Author(s) :- Mention the name(s) of authors who has written the book in Authors field. You can select multiple authors here.
Publisher(s) :-Mention the name(s) of publication house(s) in the Publishers field.
ISBN and Internal Code :- You can provide ISBN and internal Code of the book in ISBN and Internal code field.
Edition :- Specify the edition of the book in Edition field.
Tag(s) :- Provide the appropriate tags in Tags field.
Media Type :- Select Media Type.
Pages in Media Form:
1. Description:
Set the description for the media.
2. Education Details:
Courses :- Select the courses for which this media is useful from the list of courses.
Subjects :- Select the subjects which are included in the media.

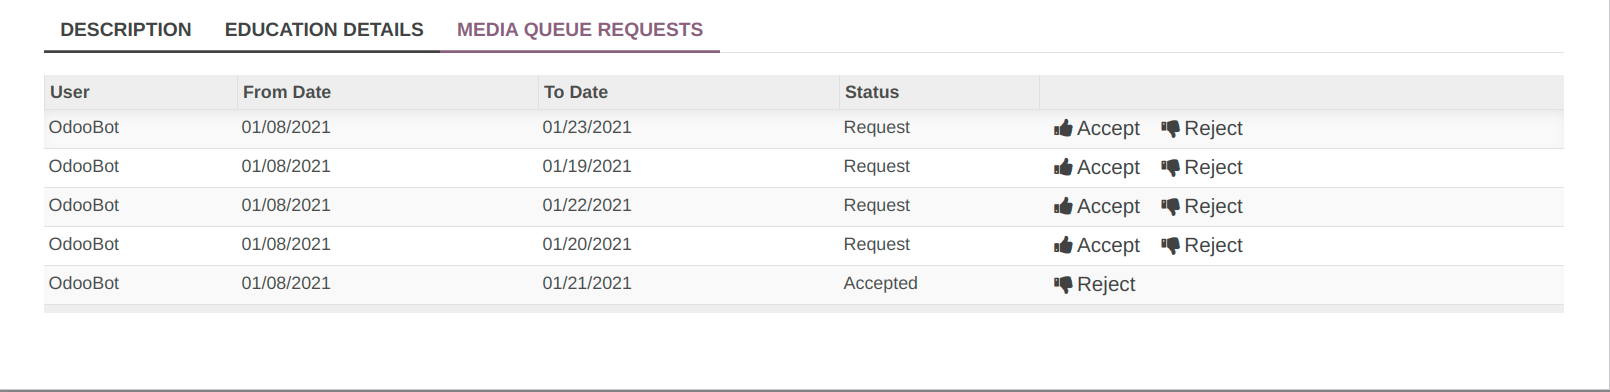
3. Media Queue Requests:
For those medias which are already occupied by some body else, and a request arises for the same, the Media request goes under Media Queue Request.
2.) Configure Media Unit:
When a new media unit is created, OpenEduCat assumes that media unit is available in library. So now a librarian can perform operations like issue media unit, return media unit etc..
Thus once a media unit is created, its default state is Available.
Go To .
Click on Create to create a new media unit.
Details of Media Units:
Name :- Provide the name for Media Unit.
Media :- Select the media from list for which media unit is created.
Barcode :- Provide the barcode of the media.
Media Type :- Select Media Type.
Issue Media
Click on Issue Media to allocate the media unit to a person. It opens the below wizard. Here you can specify details related to the allocation.
Details of Media Issue Wizard:
Transaction Type :- Select the Transaction Type whether the media unit is being issued or returned to a student or a faculty.
Media Unit Number :- Media Unit Number is the number of the media unit that is being allocated to a person. They are set automatically by OpenEduCat only when you click on Issue Media button.
Library Card Number :- Set the library card number of student or a faculty who want to issue this media unit.
Click on Proceed button and that media unit will be allocated to the person who has issued this unit.
25. How to request for a book in OpenEduCat.
Media Requests:
To request for a book in OpenEduCat, follow the below steps:
Go to .
Click on Create to create new request for a book.
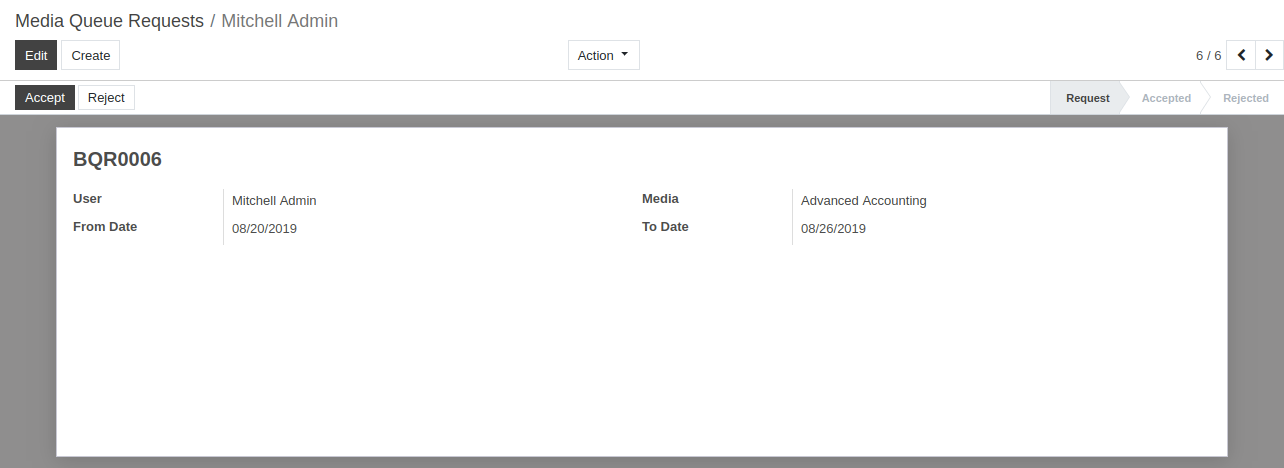
Details of Media Queue Requests:
Sequence Number :- It is automatically generated sequence number by OpenEduCat. By default ‘/’ appears here.
User :- User is the name of student/faculty who has requested for a media. By default the name of the person who is logged in appears in this field.
Media :- Media is the name of the book.
From Date :- From Date is the from which date the person wants to have media. By default todays date appears here.
To Date :- To Date is the last date till which person can keep that media with him.
Workflow of Media Queue Request:
By default the state is
Requestwhich means the book request is just created.Click on
Acceptbutton to accept request. It changes the state fromRequesttoAccepted.In case if you want to reject the request, click on Reject button. If you do so, the state will be changed to
Rejected.If media is in reject state and you want to request it again click on
Request Again
26. How to request for a new book in OpenEduCat.
Media Purchase Request:
Student or faculty can request for a new media. That is why you can create a new purchase media request.
Go to .
Click on Create to create a new media purchase request.

Details of Media Purchase Request Form:
Title :- Title is the name of the media.
Media Type :- Select Media type whether it is course Book or Rerence Book etc.
Course :- Course is the name of the course whose students can use this media.
Subject :- Specify the subject of media.
Author(s) :- Specify the name of author in Author field.
Publisher(s) :- Publisher is the name of the publisher of this media.
Requested By :- Requested By is the name of student/faculty who has requested for a media. By default the name of the person who is logged in appears in this field.
Edition :- Specify the edition of the media you want to have in library.
Workflow of Media Purchase Request:
Default state of the media request is draft. Click on Request Media button for confirming the book request. It changes the state from
DrafttoRequested.Click on Accept to accept the request. It changes the state from
RequestedtoAccepted.Click on Reject to reject the request. It changes the state
Rejected.
27. How Admin can manage Time Table in OpenEduCat.
Timetables:
1.) Sessions
OpenEduCat is fully integrated application which provides a facility to generate the sessions .
Go to . Click on Create to create a new session for the timetable.
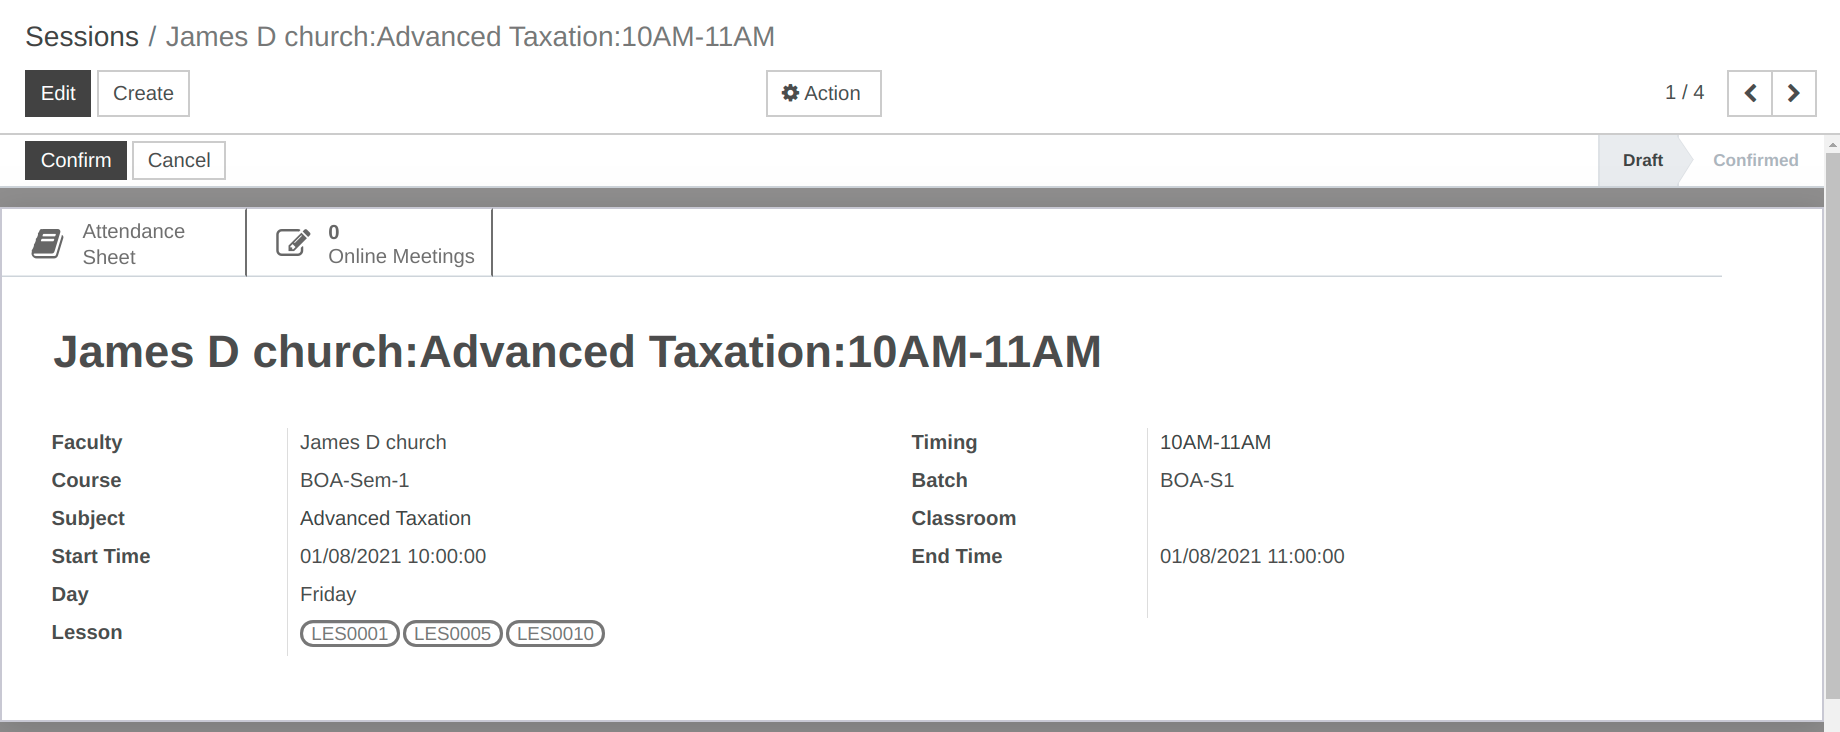
Details Of Session Form:
Faculty :- Name of the faculty to whom session is allocated.
Timing :-Specify the starting hour of the session.
Course :- Select a course from the list.
Batch :- Select the batch from the list.
Subject :- Select the subject held by the faculty.
Classroom :- Select the classroom in which the session will be held.
Start Time :- Specify the starting time of the session.
End Time :- Specify the ending time of the session.
Day :- It will automatically specify the day on which the admin is creating the session.
Here,we can see day wise time table as shown in image.

2.) Generate Sessions
OpenEduCat is fully integrated application which provides a facility to generate the sessions . Go to and the wizard will open for creating the sessions.
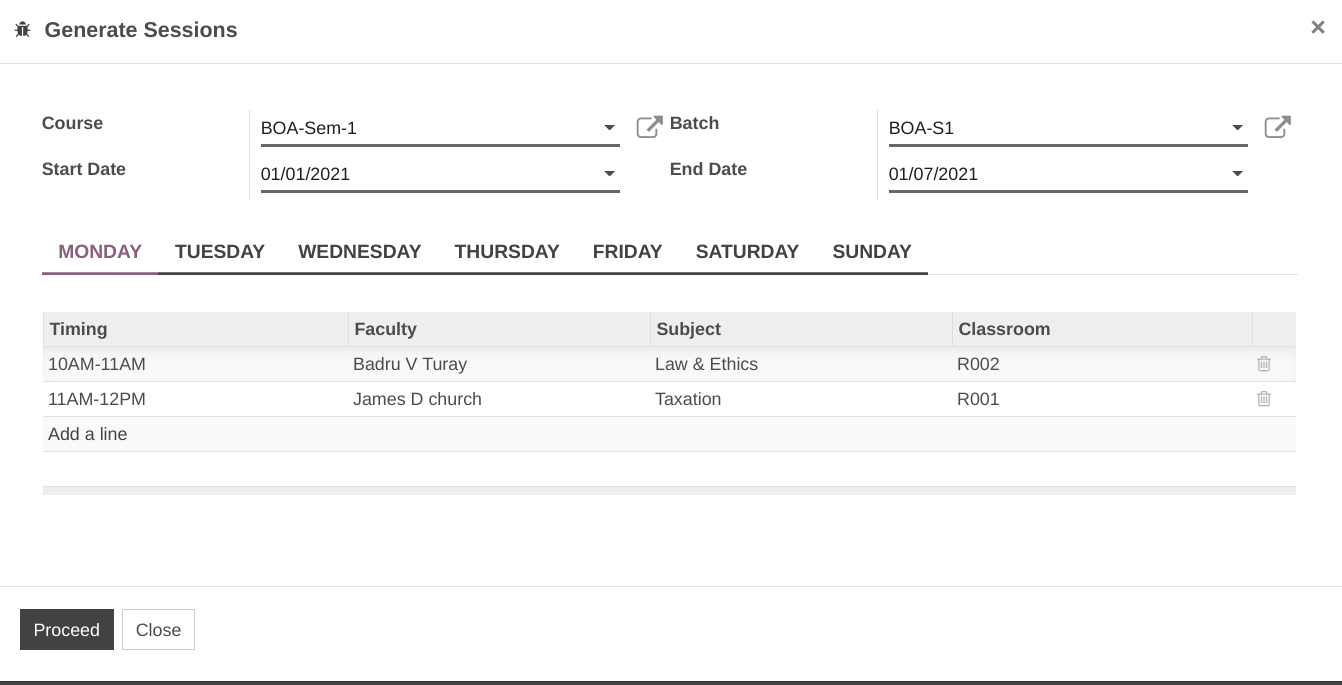
Details of Generate Sessions:
Course :- Select the course from the list.
Batch :- Select the batch from the list.
Start Date :- Specify the starting date of the session.
End Date:- Specify the ending date of the session.
Under this basic information of the timetable, you can provide the details of the timetable day-wise. It consists several information.
Day:- Select the day of the week.
Timing:- Select the timing of the session.
Faculty:- Select the faculty to which the session is allocated.
Subject:- Select the subject held by faculty.
Classroom:- Select the classroom in which session will be held.
Admin can also check the multiple sessions by applying filters according to their requirements. In this way admin can manage time table in OpenEduCat.
28. How to configure transportation in OpenEduCat.
Transportation:
1. Vehicles
Vehicles in transportation helps you to provide the start up data of each vehicle.Manage the details of registered vehicles for the institute.
Go to .
Click on Create to create a new Vehicles.
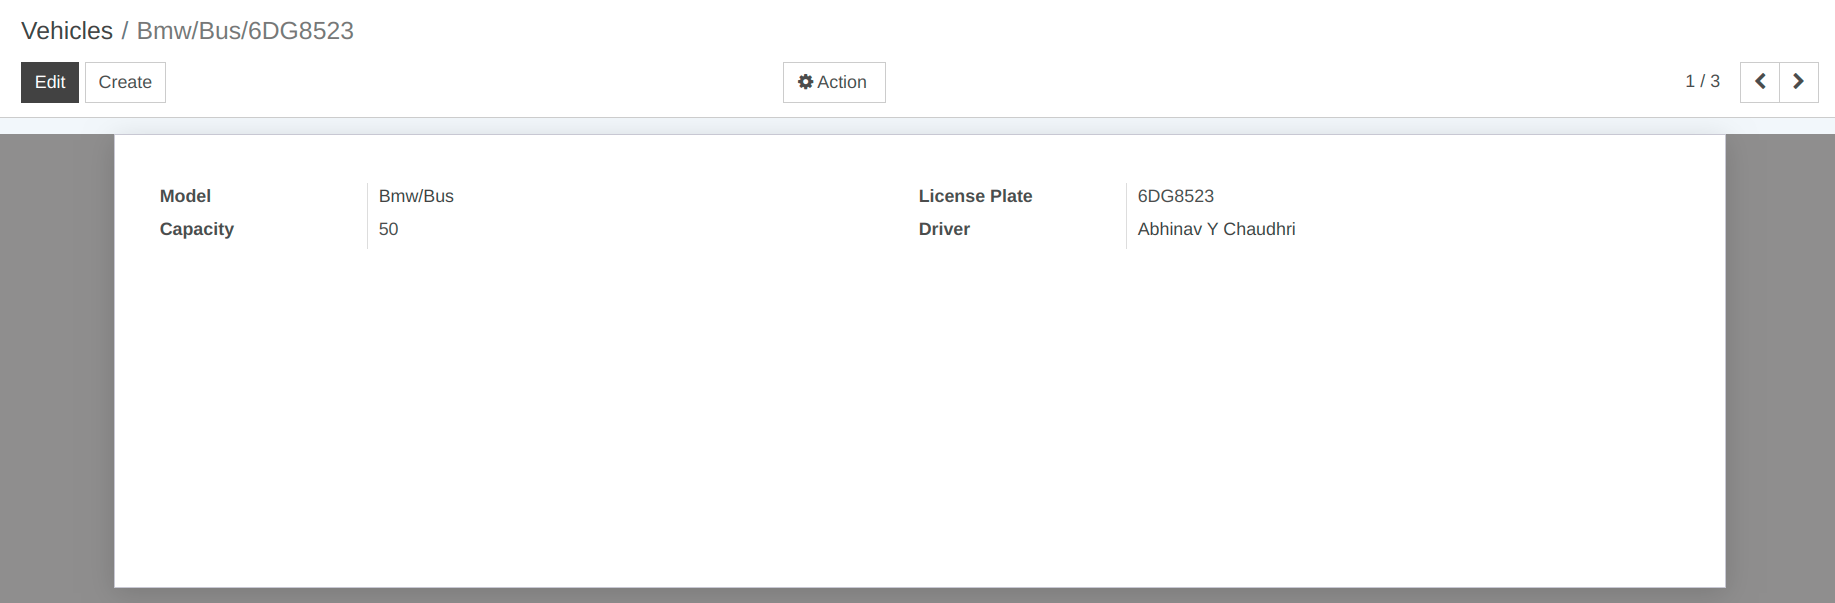
Details of Vehicles Form:
Model:-Select or create model for vehicle.
License plate:-Set license plate of vehicle.
Capacity:-Specify capacity of the vehicle.
Driver:-This is very important field. Though it is not mandatory, you should specify the name of the driver here.
2. Configure Routes
Configuration of routes in transportation helps you to provide the start up data of each route.
Go to .
Click on Create to create a new route.

Details of Routes Form:
Name :- Set Name of the routes. It will be displayed in whole system.
Vehicle :- Set vehicle number and vehicle name which is going to take route.
Cost :- Specify cost for particular route.
Stop(s) :- From the source location to destination location, there will be number of stops in between. You can select the list of stops here.
3. Configure Stops
Configuration of stops in transportation helps you to provide the start up data of each stop in each route.Specify the details of stops. These stops are used by the vehicles of the institute to pick up the students.
Go to .
Click on Create to create a new Stops.
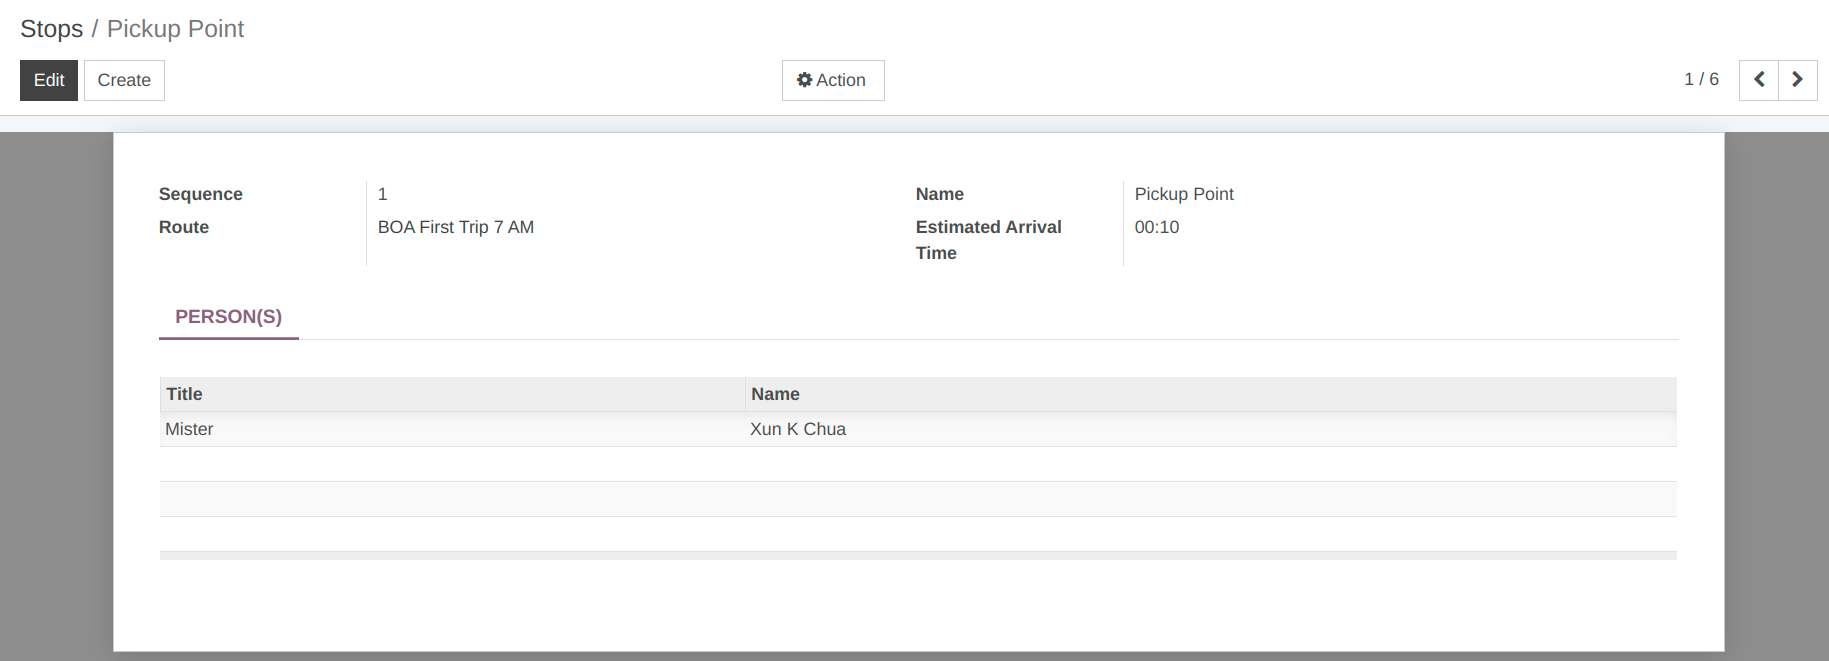
Details of Stops From:
Sequence :- Sequence is the number in which the stops will be followed.
Name :- Specify stop name.
Route :- Select route.
Estimated Arrival Time :- Specify arrival time to reach that particular stop.
Person(s) :- Select no of person who will be picked up from that particular stop.
4. Trips
Trips in transportation helps you to provide the start up data of each trip.
Go to .
Click on Create to create a new Trips.
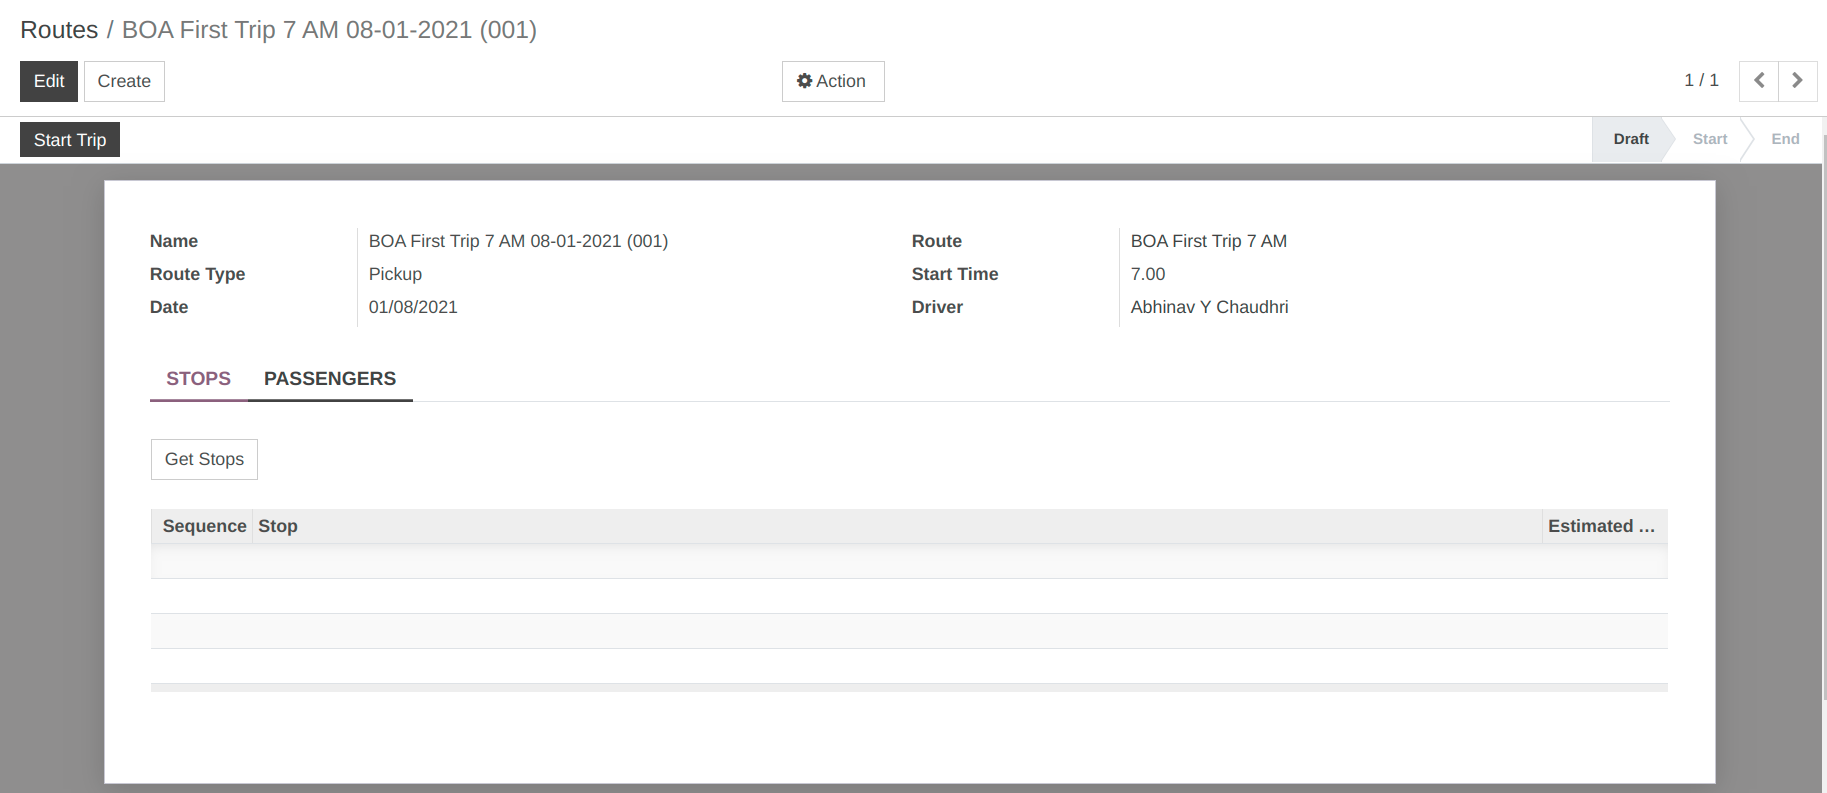
Details of Trip Form:
Name :- System set the name of trip.
Route :- Select route for the trip.
Route Type :- Select route type wheteher it is Pickup or Drop.
Start time :- Set starttime of the trip.
Date :- Set date of the trip.
Driver :- Select driver name who is going to take trip.
Pages in Trips:
1. Stops
After click on Get Stops.
You can see Different stops for particular trip under this tab.
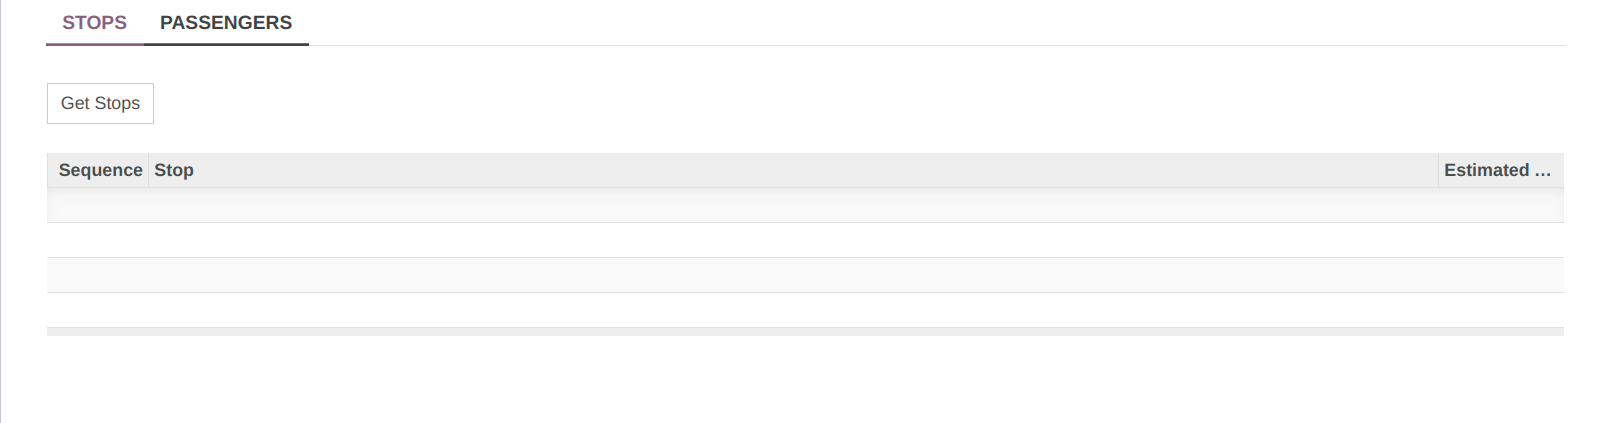
2. Passenger
You can see passenger details for particular trip under this tab.

Workflow of Trip:
1. Draft
Once the details are filled up in trip form, the state is Draft. Workflow of this form is started from here.

2. Start Trip
Click on Start trip button to start the trip. This changes the state of record from
DrafttoStart.

3. End trip
Click on End trip button to end the trip. This changes the state of record from
StarttoEnd.

29. OpenEduCat Learning Management System (LMS).
LMS:
OpenEduCat learning management system helps you to create your online course. Create your sections and course material in it.
1.) Course
OpenEduCat learning management system helps you to create your online course.
Configure Course
To configure the course, follow the below steps :-
Go to .
Click on Create to create a new Course.
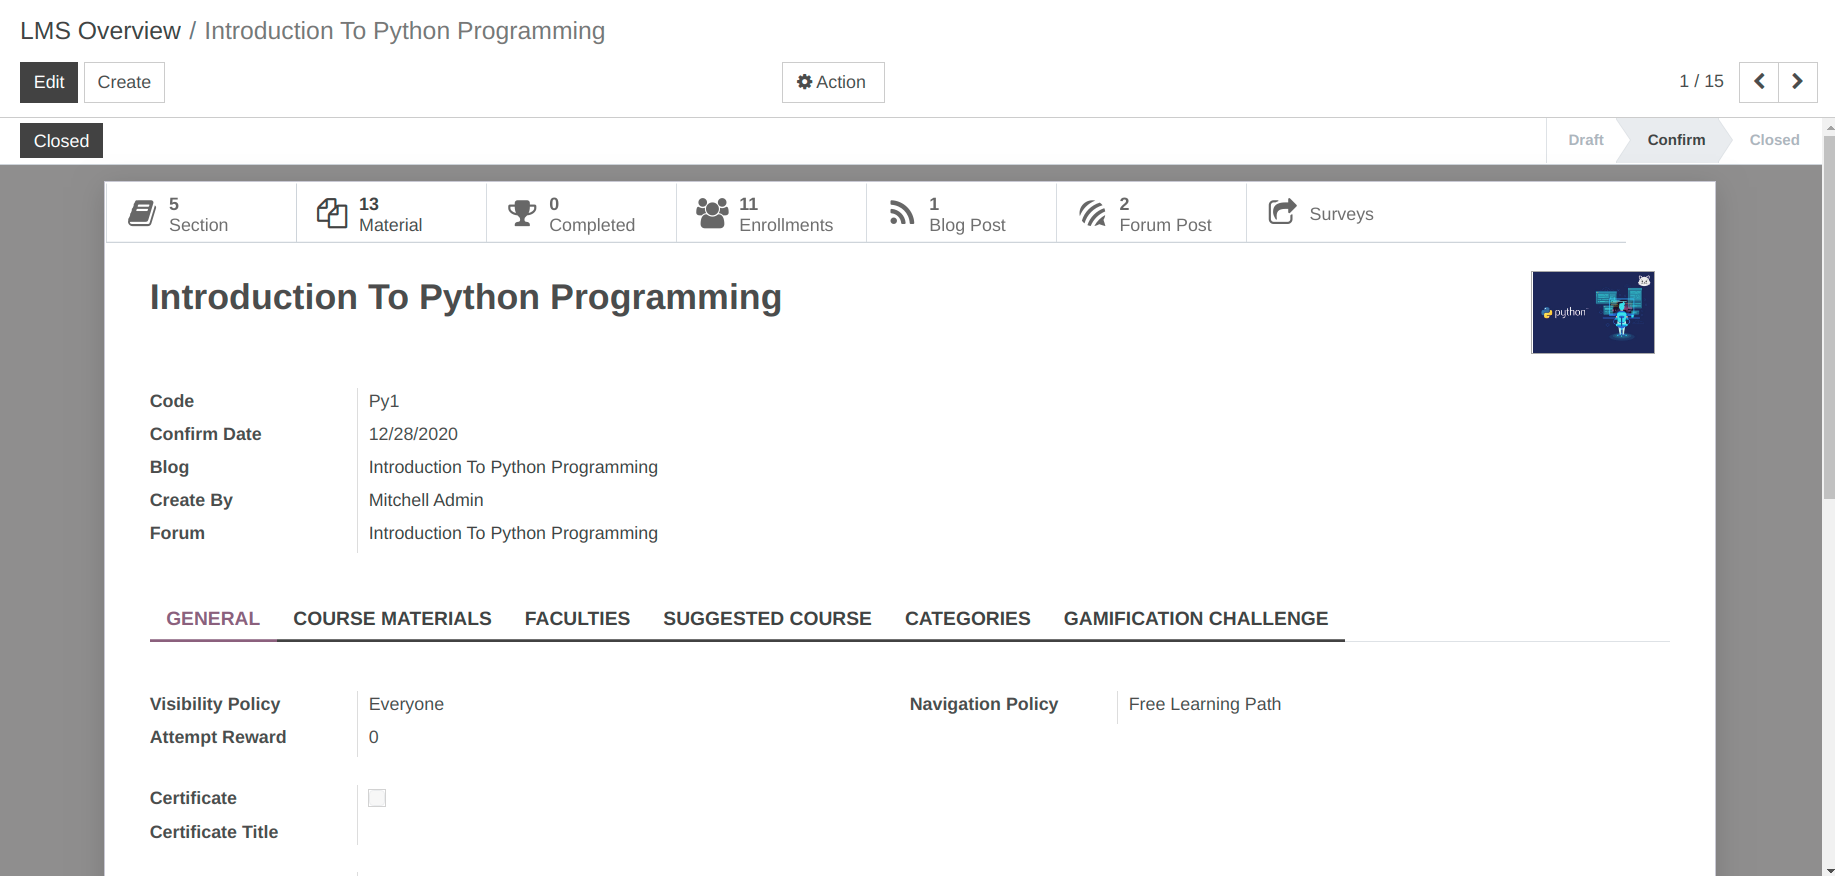
Details of Course Form:
Name :- Name of the course. It will be displayed in whole system.
Code :- Code of the course. Unique code for course.
Confirm Date :- Confirm date on that you have confirm and published your course.
Created By :- User who have create course and published.
Visibility Policy :- Visibility policy can be any of three 1. Everyone, 2. Logged in users, 3. Invited Users.
Navigation Policy :- It defines how user can navigate from one material to another. It can be either 1) free learning path 2 ) sequential learning path.
Short Description :- Short description of your course, just like tag line.
Full Description :- Full description to describe which type of content your course includes and target audience or any requirement of knowledge for this course, you can describe it here.
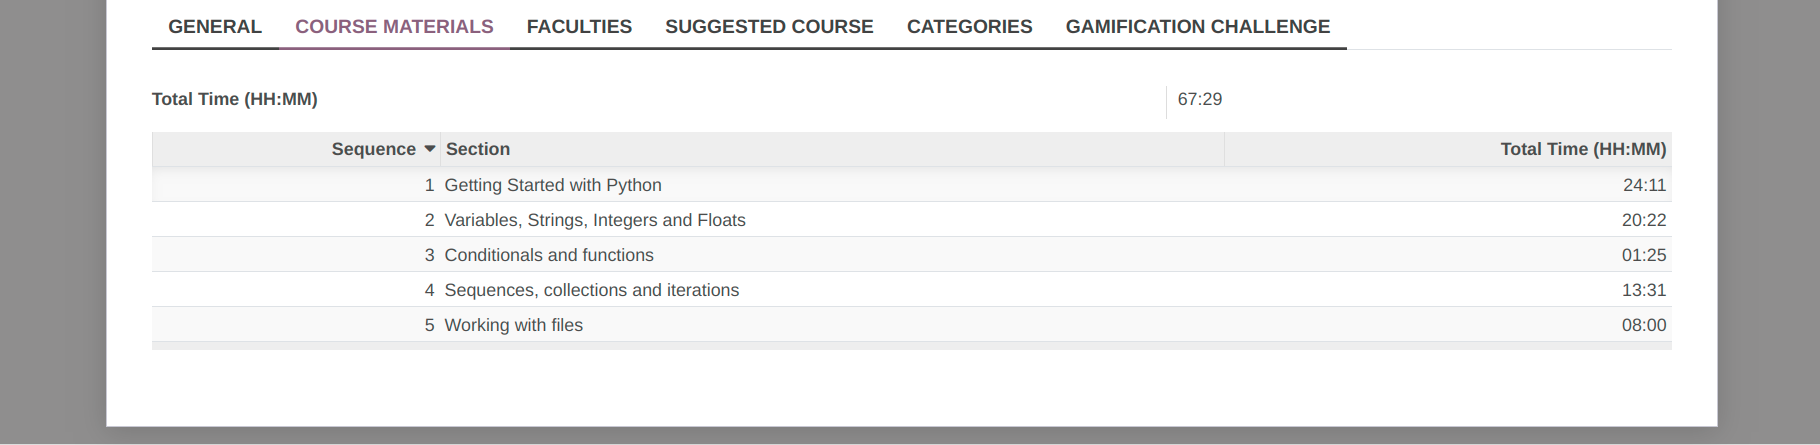
Pages in Course Form:
1. Course Materials
Sections and materials that are created under that course, Display sequence and time.
2. Faculties
List of all the faculties that are author of that course.

3. Suggested Course
Provide related or same course that you would suggest to user who enrolled for that.

4. Categories
Add your categories that you want to add, User can find course by this categories.

Section
Sections and materials that are created under that course, Display sequence and time.


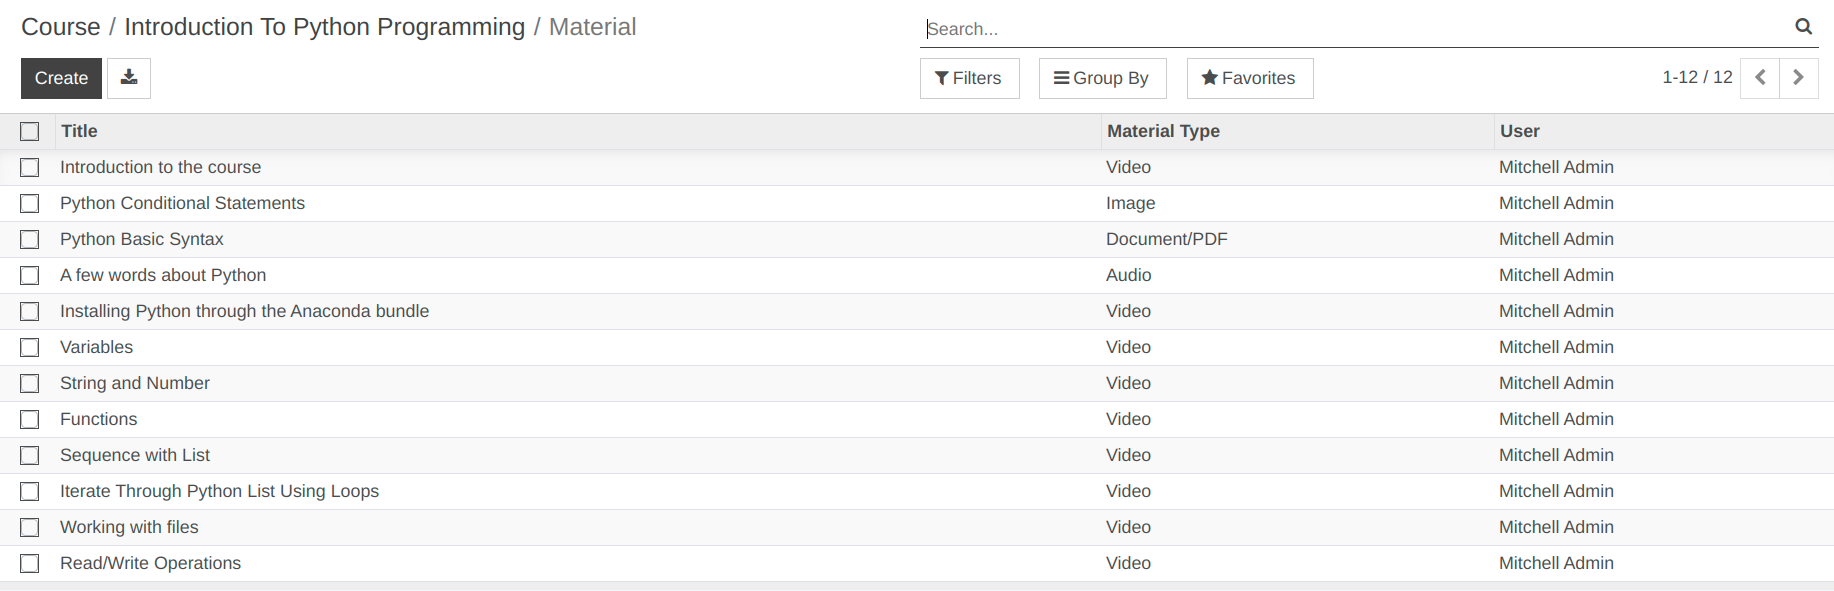
Material
Materials that are created under that course.

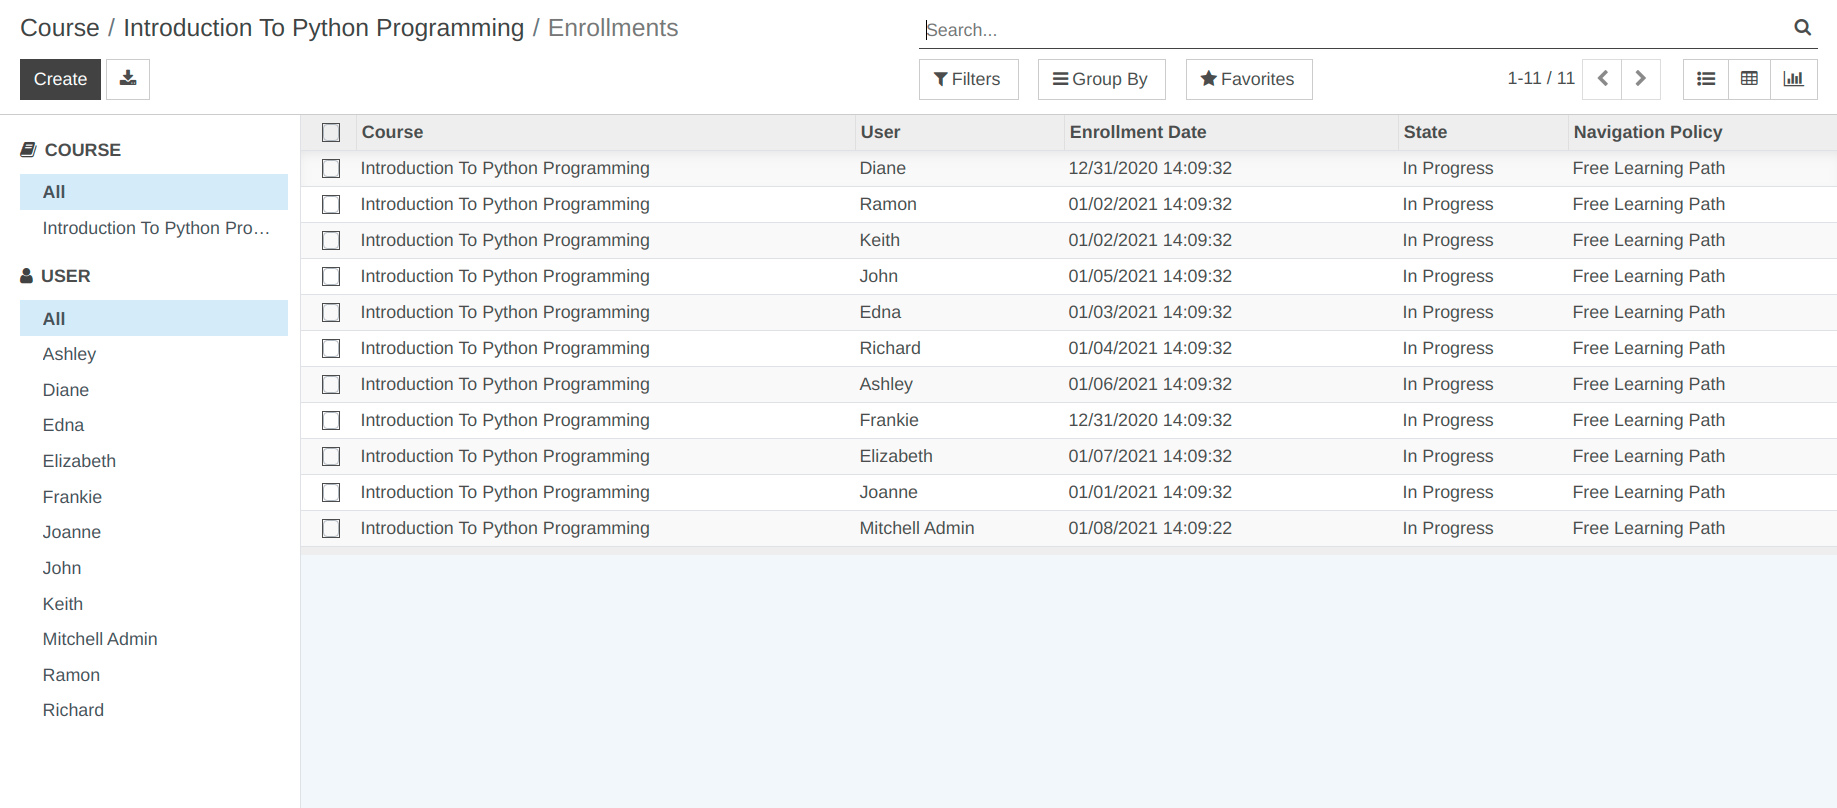
Enrollments
List of enrollments of the users who have enrolled for the course.

2.) Configure Material
Create your material to publish it online. Set your material type, add your content or url and publish it. To create the material, follow the below steps :-
Go to .
Click on Create to create a new batch.
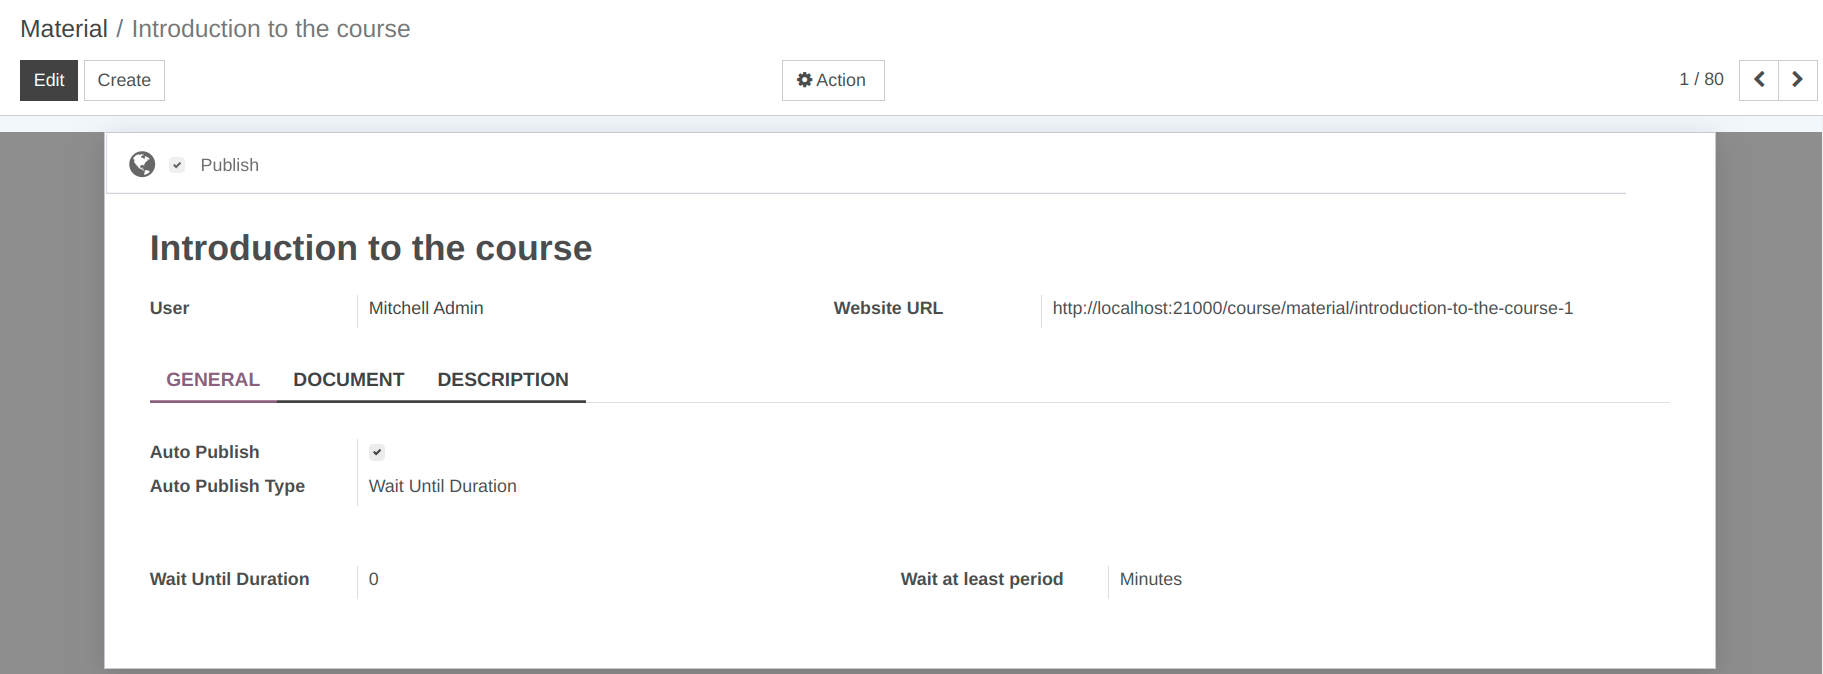
Details of Material Form:
Name :- Name of the course material. It will be displayed in whole system. The maximum size of the name is 32 characters.
User :- Logged in user name.
Website Url :- Url of the course material website.
Auto Publish :- Material auto publish to users who has enrolled for that course.
Auto Publish Type :- When auto publish has been selected ; it has two options - Wait until or wait until duration.
Wait Until :- This option has the date to select on auto publish.
Wait Until Duration :- Wait until duration provides more details, It categorises into waiting duration minutes, hours ,days, weeks, months and years
Wait at least period :- Select the time period from the list.
Auto Publish
Material auto publish to users who enrolled for that course

3.) Enrollments
Enrollment show the details of enrolled users who have enrolled for the particular course. To create the material, follow the below steps :-
Go to .
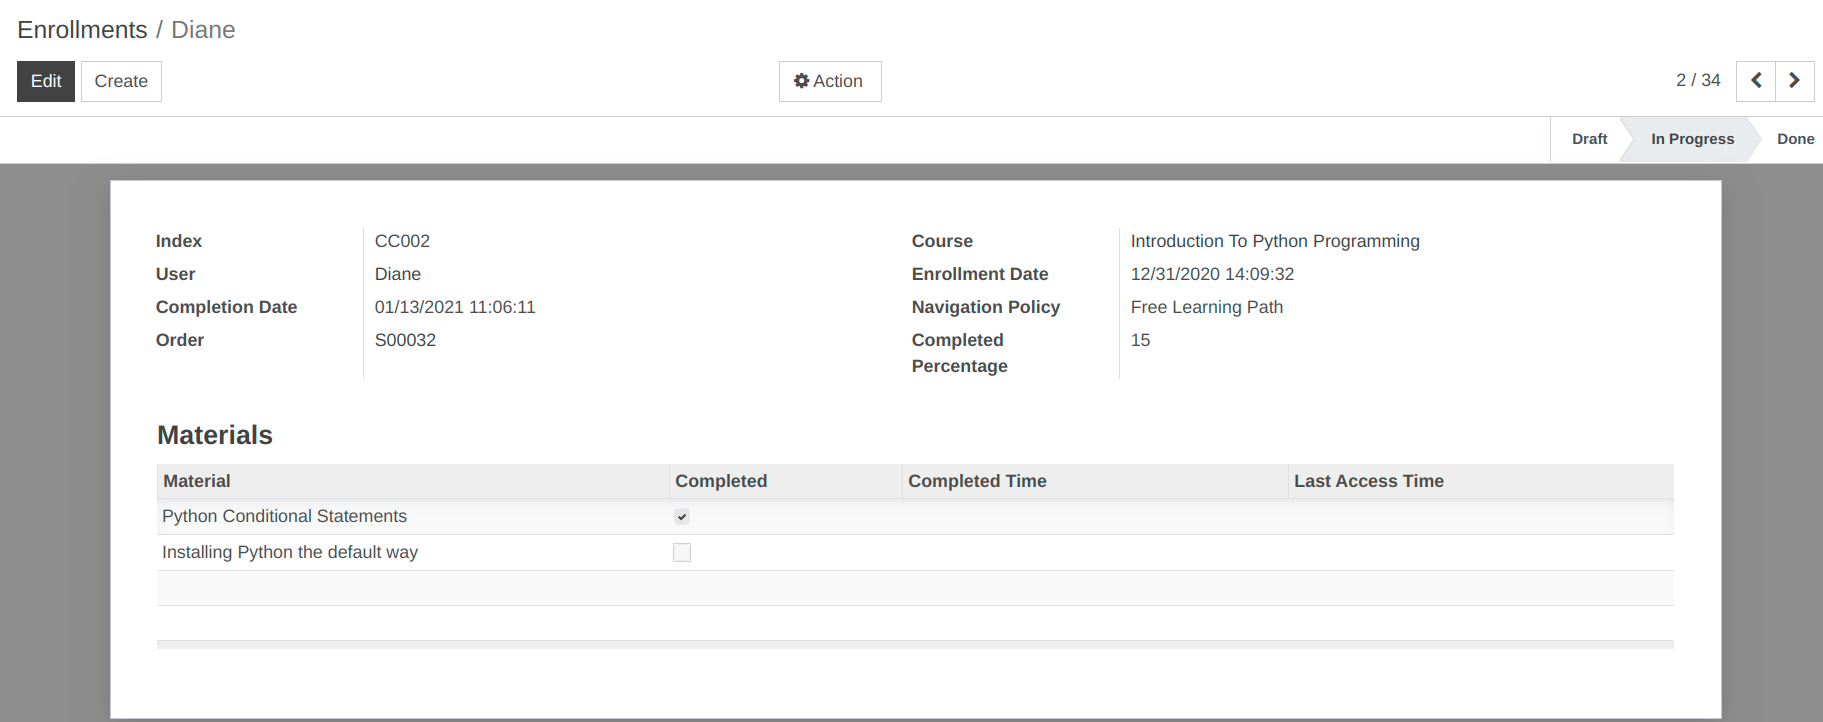
Details of Enrollment Form:
Index :- It is the one kind of Unique Identification number.
Course :- Name of the course in which user has registered.
User :- Name of the user who have registered for the course.
Enrollment Date :- Date on which user has enrolled for the course.
Completion Date :- Completion date on which user has completed course.
Navigation Policy :- Policy of course that user can navigate from one material to another.
Completed Percentage :- Value that show how many percentage of course user has completed.
Order :- sales order / quotation number
Material Line :- Material line to show which material user has viewed.
4.) Configuration
Configure Course Category:
Create your course categories to set categories on course. To create the category, follow the below steps :-
Go to .
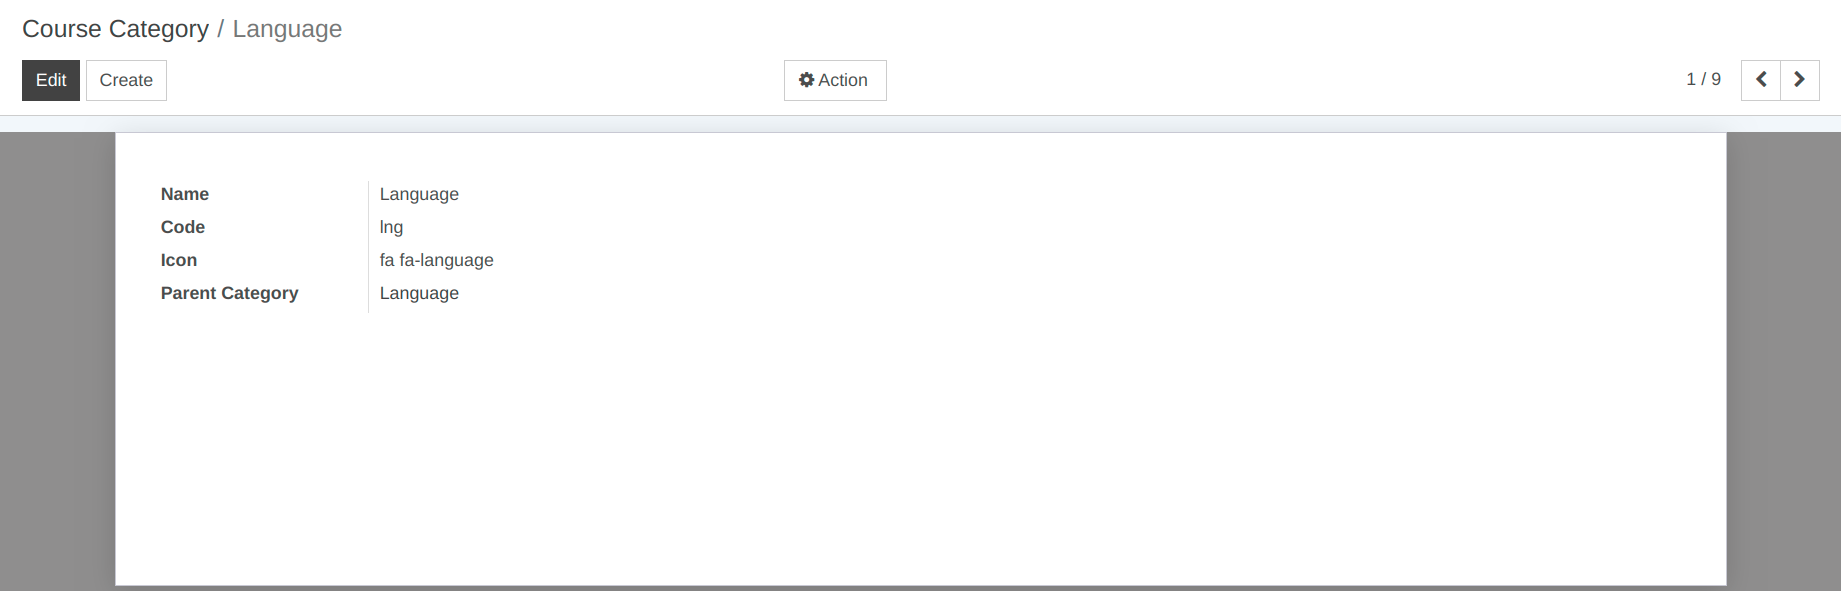
Details of Course Category Form:
Name :- Name of category.
Code :- Set unique code for category.
Icon :- Set favicon icon and which will be visible on home.
Parent Category :- Name of parent category if that category in under of any other category.
Description :- Add your description to tell about category.
5.) Gamification
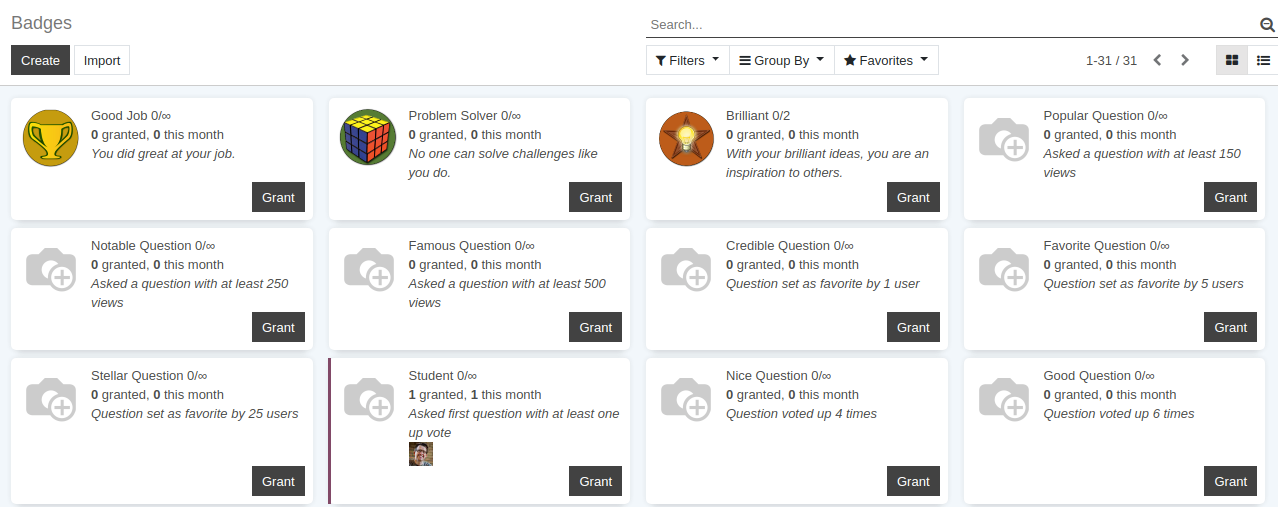
1. Gamification Badges
Go to .
2. Course Challenge Line
Create challenge line on your course. When challenge completed user will be assigned badge.
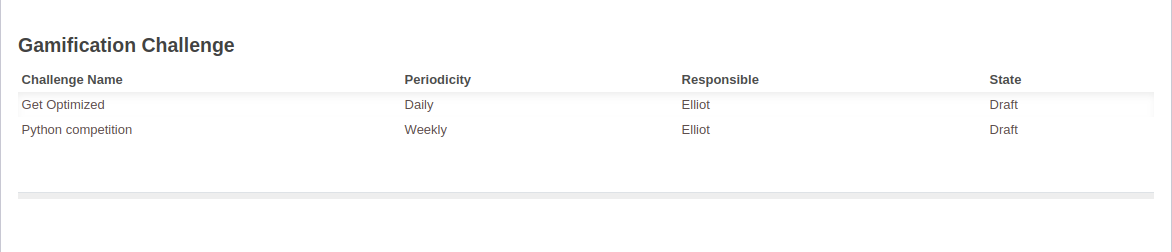
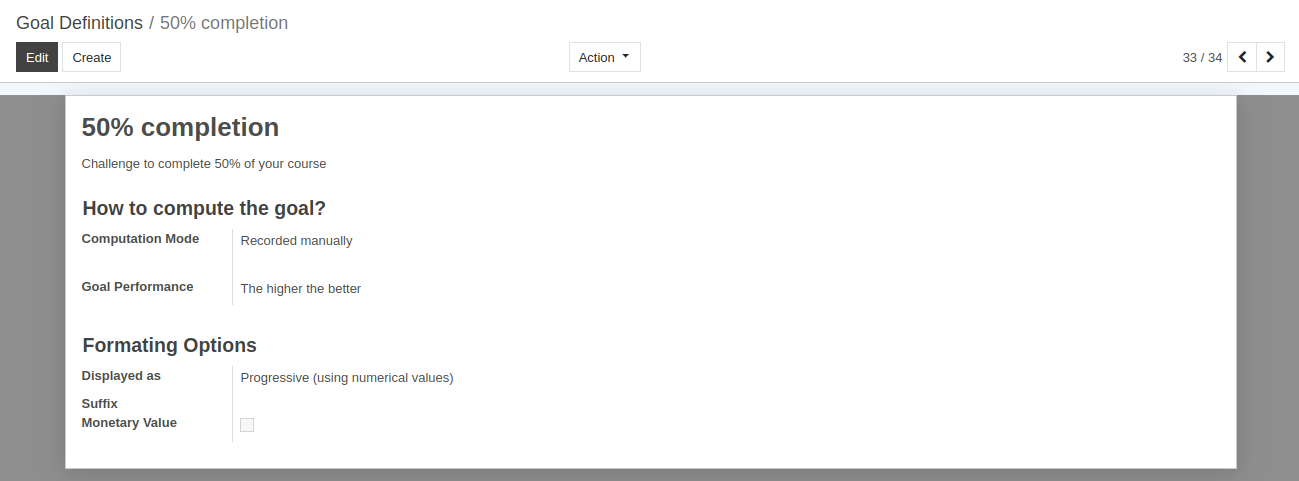
3. Challenge Definition
Create your challenge definition for when user should assign badge for particular achievement
Start Your Challenge
Start you challenge for achieve completion of course.
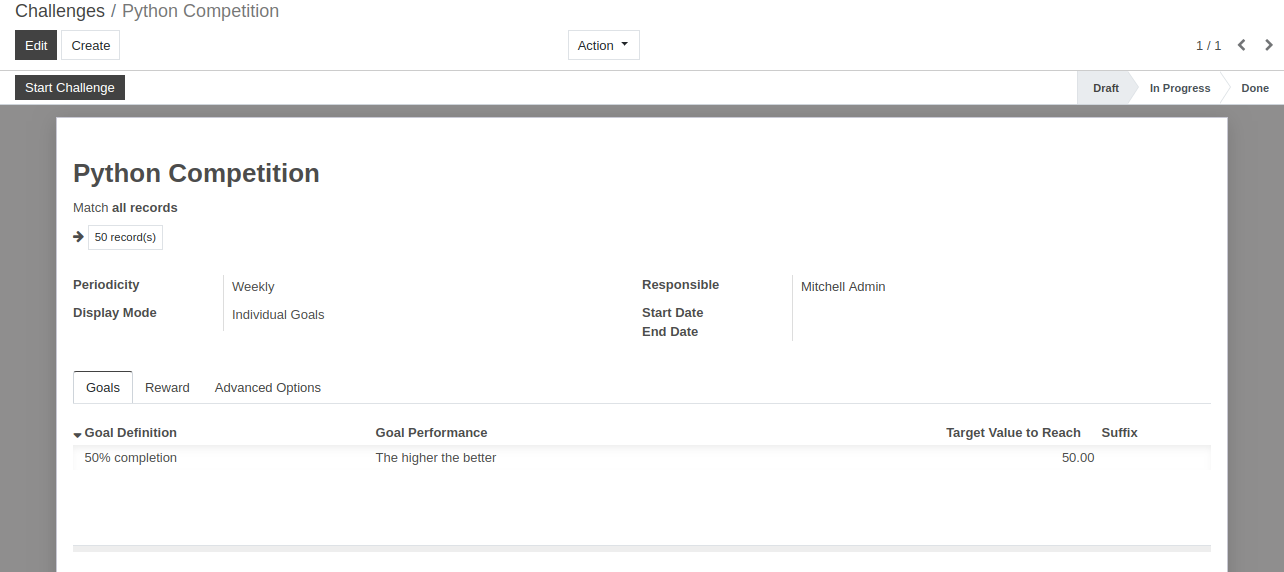
4. User Badges
It supports evaluations and motivations to users. Allows to create rewards for challenges.
30. How to create Alumni group in OpenEduCat
Alumni Group:
To configure Alumni group Go to .
Click on Create to create a new Alumni Group.
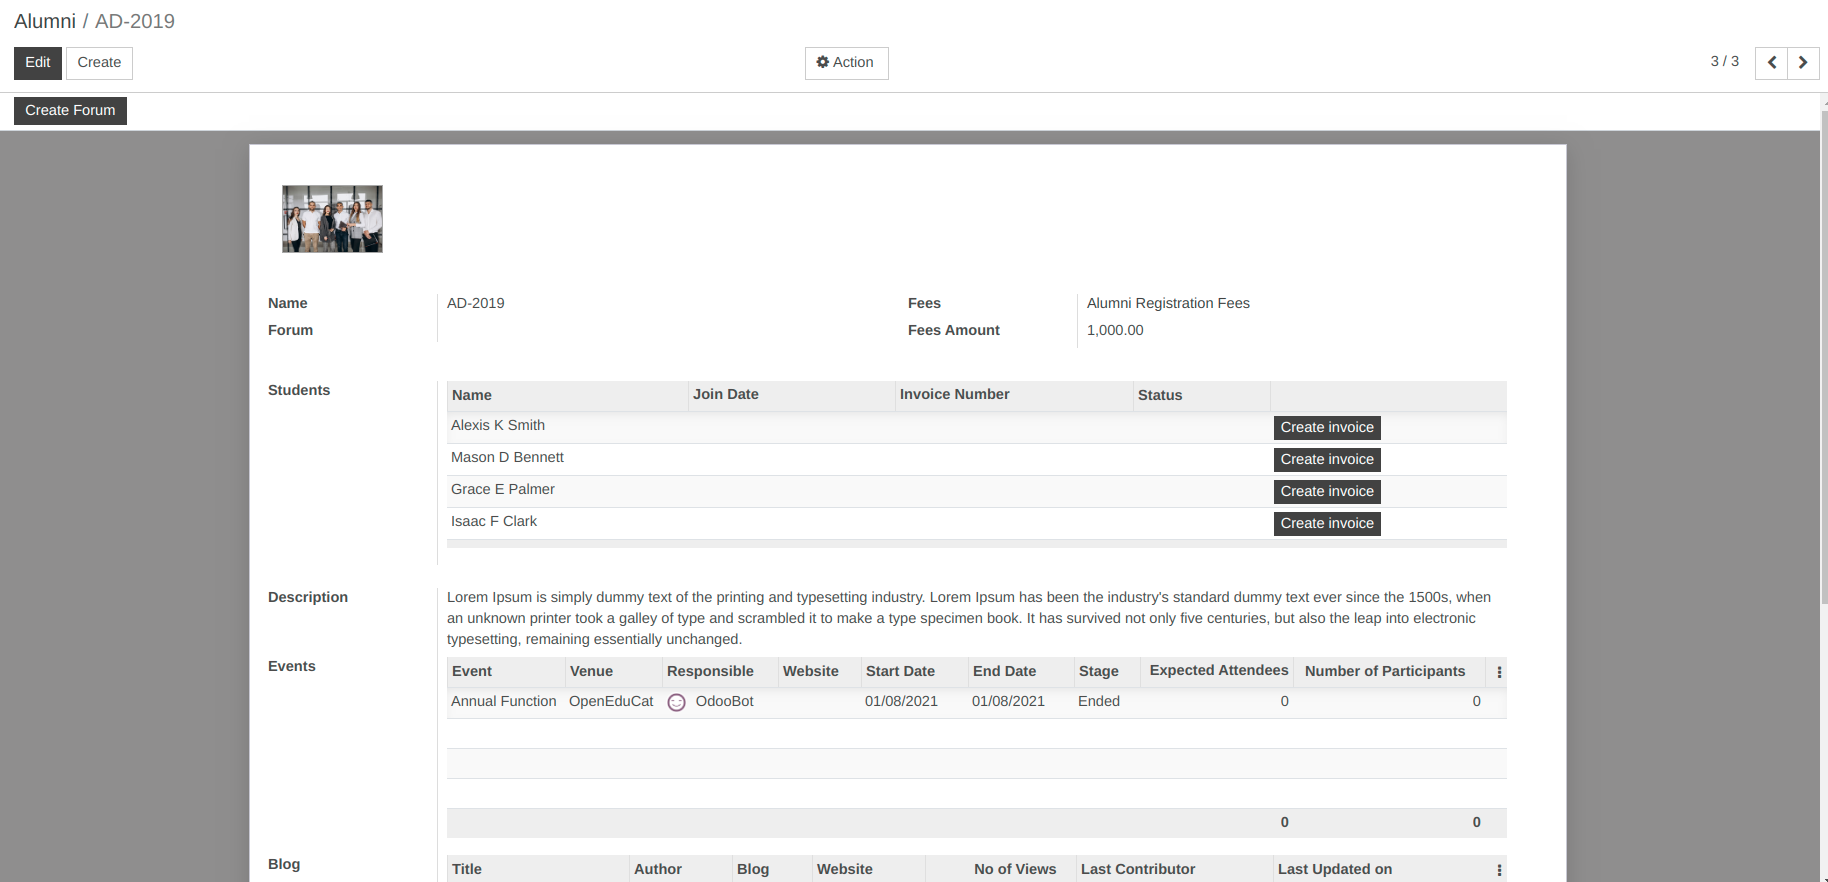
Details of Alumni Group:
Image :- You can upload a photograph of alumni group from the image widget on the top-left corner.
Name :- Set the name for the alumni group.
Fees :- Select or create a new fees term for the alumni group from the list.
Fees Amount :- Set the value for the fess term.
Forum :- On clicking the
Create Forumbutton, forum will be created of the alumni group.Students :- Students category supports to add individual student details in that alumni group.
Descriptions :- Set the description for the alumni group.
Events :- This category allows you to create the events for any alumni group.
Blog :- This category allows you to create the blog for any alumni group.
31. How the alumni students can post the job in OpenEduCat
Alumni Job
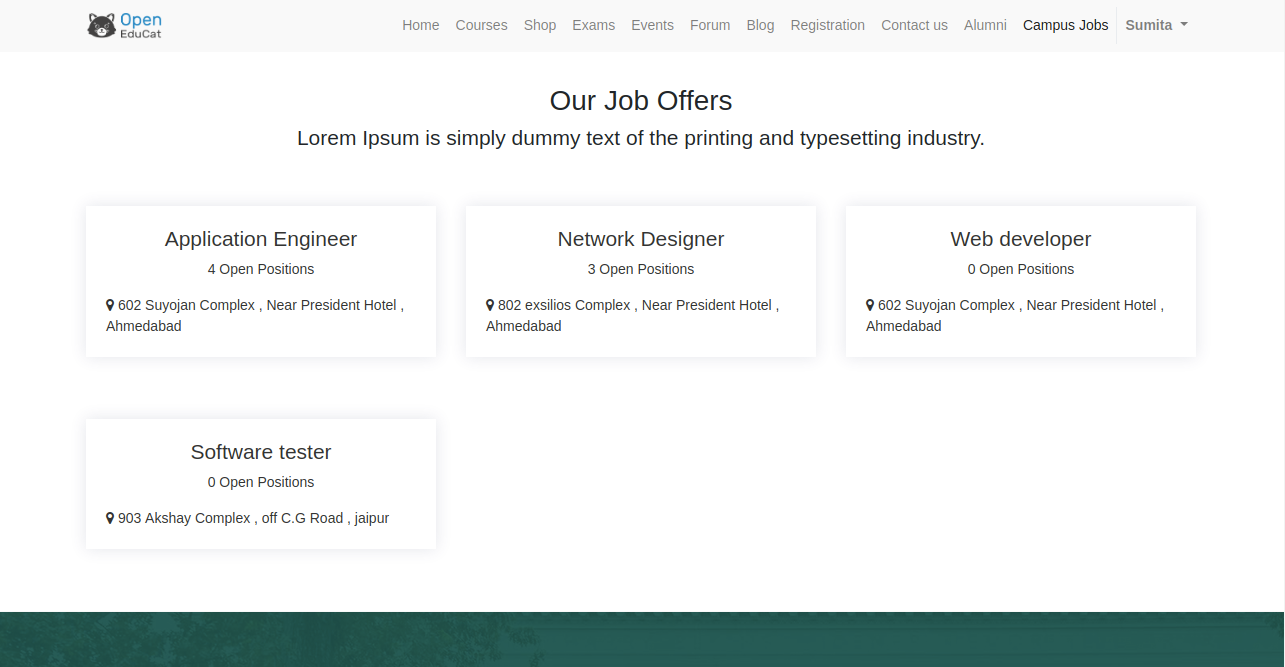
OpenEduCat allows the alumni students to post the job for the final year students and jobs are displayed on the website under Campus Jobs menu, from where student can apply for the job.
Go to .
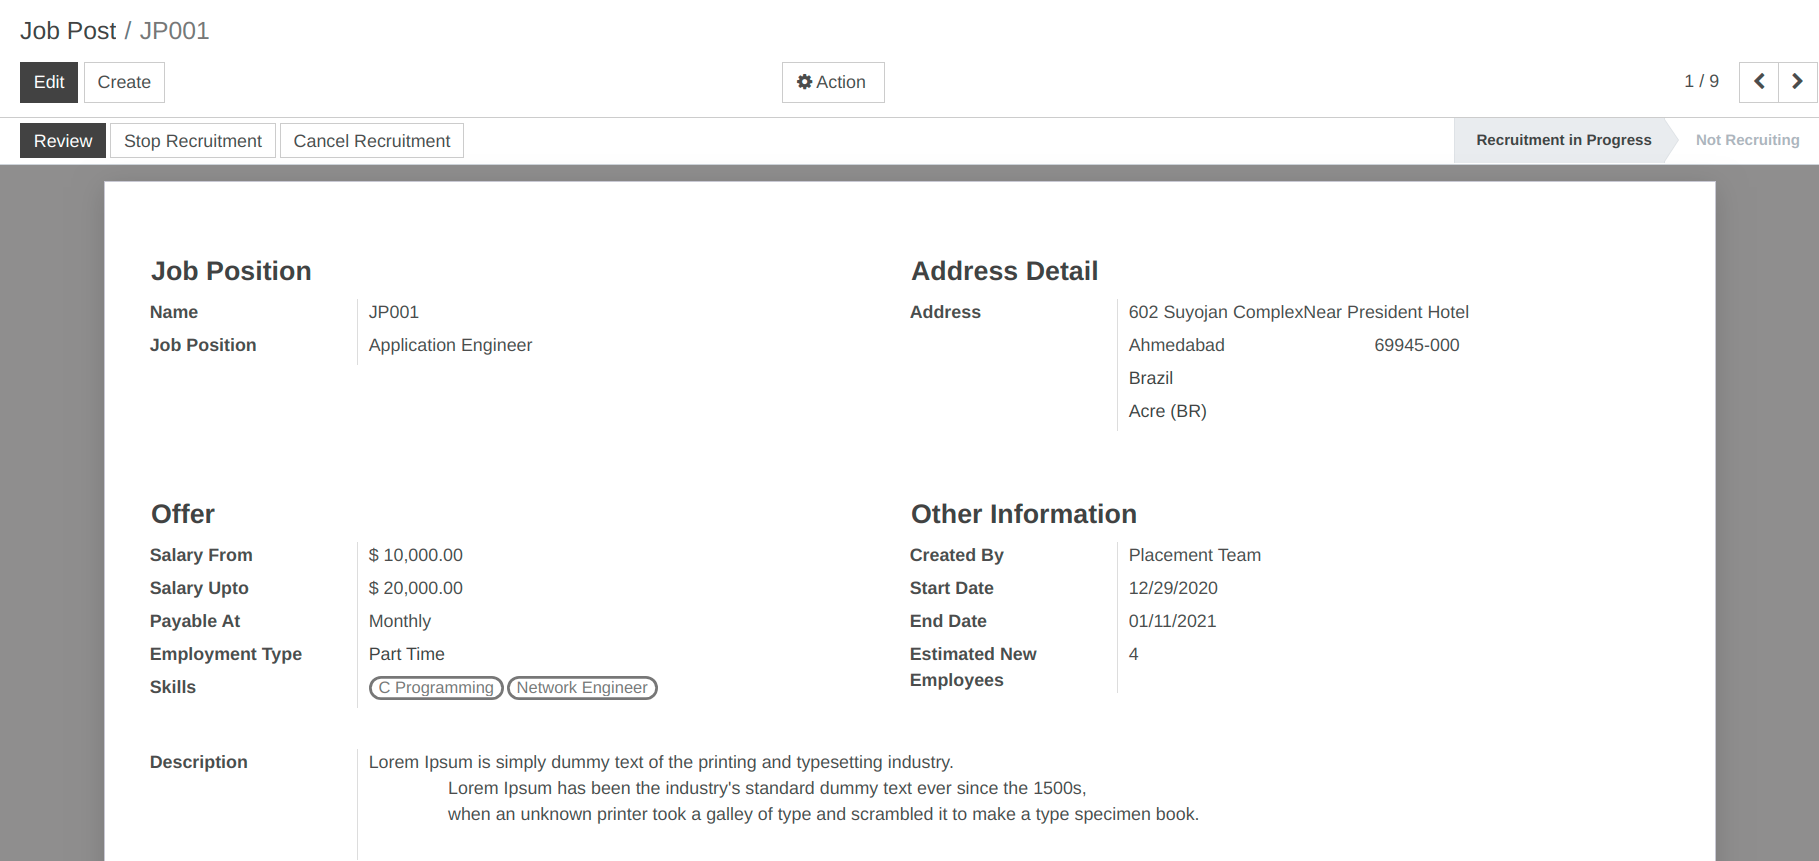
Click on Create to create a new Alumni Job.
Details of Alumni Job:
Name :- Name is the unique Job Post name.
Job Position :- Set the name for the job position.
Address :- You can add details like street, city, state, nation, zip code and country in the provided fields.
Salary From :- Set the starting salary for the job.
Salary Upto :- Set the ending salary for the job.
Payable At :- Set the salary pay structure either weekly, monthly or yearly.
Start Date :- Set the start date for the job post from which the applicant can apply.
End Date :- Set the end date for the job post till which the applicant can apply.
Estimated New Employees :- Set the number of the estimated new employees for the created job post.
Employment Type :- Select the employment type i.e. Full time, Part Time, Freelancing.
Skills :- Select the skills required for this job post.
Description :- Set the description for the job post.
Workflow of Job Post:
Once the details are filled up in the job post form and it is saved, the state is
Draft. Workflow of this form is started from here.Click on Start Recruitment button to start the recruitment for the created job post. This changes the state of record from
DrafttoRecruitment in Progress. Once we click on Start Recruitment button, this created job post can be displayed inActivity Announcementin Placement module.Click on Stop Recruitment button if the recruitment for the created job post is completed. It changes the state from
Recruitment in ProgresstoNot Recruiting. When we click on Stop Recruitment button, this job post will be deleted from theActivity Announcementin Placement module.
32. How to configure skills category and skills in OpenEduCat.
Configure Skills Category
Configuration of Skills category in Placement Management provides details of the Job Skill Category. To configure the skill category, follow the below steps :-
Go to . Click on Create to create a new skill category.

Details of Skill Category Form:
Name :- Set the name of the Skill Category. It will be displayed in whole system.
Code :- Set the code of the skill category. Unique code for skill category.
Configure Skills
Configuration of Skills in Placement Management helps us to provide the details of the skills and abilities for the job post.
Go to . Click on Create to create a new skill.

Details of Skills Form:
Name :- Set the name of the Skill. It will be displayed in whole system.
Code :- Set the code of the skill. Unique code for skill.
Skill Type :- Select the skill category for whom the skill is created.
33. How to create job post in OpenEduCat.
OpenEduCat Job feature provides placement for the graduates.
1.) Configure Job Type
Configuration of Job Type in Placement Management will let the user to create the job type options e.g. full time, part time, freelancing jobs. To configure the job type, follow the below steps :-
Go to .
Click on Create to create a new job type.

Details of Job Type Form:
Employment Type :- Set the name of the Employment Type.
Code :- Set the code of the Employment Type.
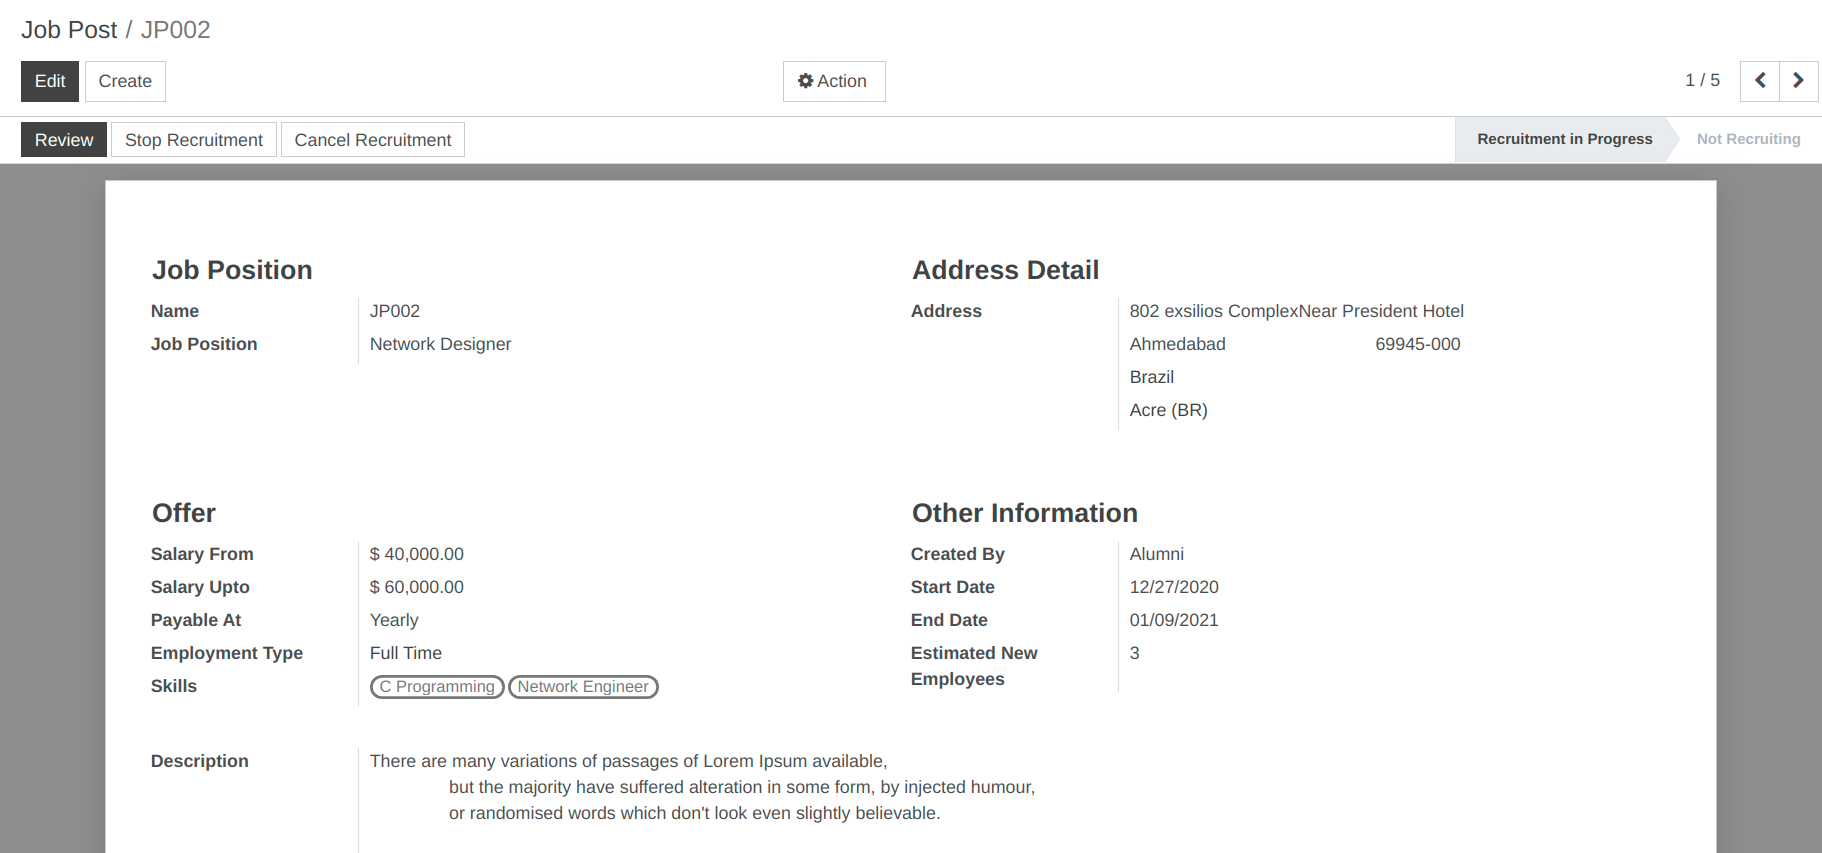
2.) Job Post
OpenEduCat provides feature to post the job for placement.
Go to .
Click on Create to create a new job post.
Details of Job Post Form:
Name :- Name is the unique Job Post name.
Job Position :- Set the name for the job position.
Address :- You can add details like street, city, state, nation, zip code and country in the provided fields.
Salary From :- Set the starting salary for the job.
Created By :- Select the option who created the job.
Salary Upto :- Set the ending salary for the job.
Payable At :- Set the salary pay structure either weekly, monthly or yearly.
Start Date :- Set the start date for the job post from which the applicant can apply.
End Date :- Set the end date for the job post till which the applicant can apply.
Estimated New Employees :- Set the number of the estimated new employees for the created job post.
Employment Type :- Select the employment type i.e. Full time, Part Time, Freelancing.
Skills :- Select the skills required for this job post.
Description :- Set the description for the job post.
Workflow of Job Post:
Once the details are filled up in the job post form and it is saved, the state is
Draft. Workflow of this form is started from here.Click on Start Recruitment button to start the recruitment for the created job post. This changes the state of record from
DrafttoRecruitment in Progress. Once we click on Start Recruitment button, this created job post can be displayed inActivity Announcementin Placement module.Click on Stop Recruitment button if the recruitment for the created job post is completed. It changes the state from
Recruitment in ProgresstoNot Recruiting. When we click on Stop Recruitment button, this job post will be deleted from theActivity Announcementin Placement module.
34. How students can apply for a job in OpenEduCat.
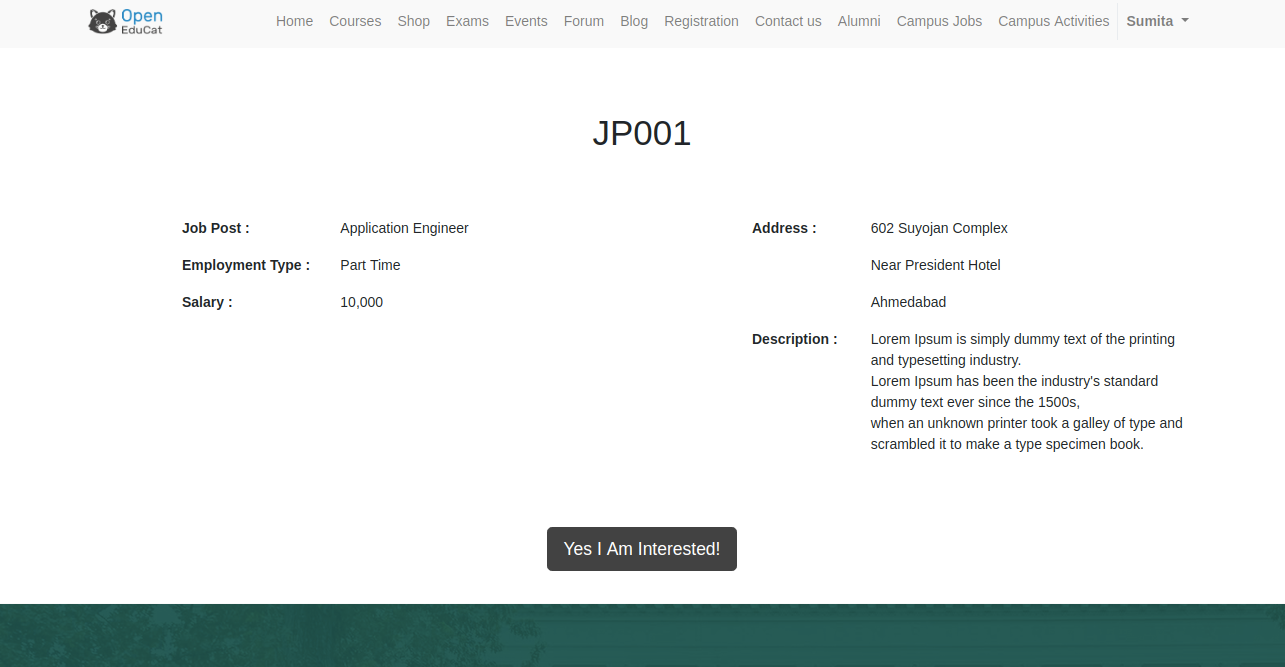
Job Posts created in OpenEduCat are displayed under Campus Job menu on the website. Any student can apply for the job by logging into their account.
First student will login into their account and go the Campus Job menu.
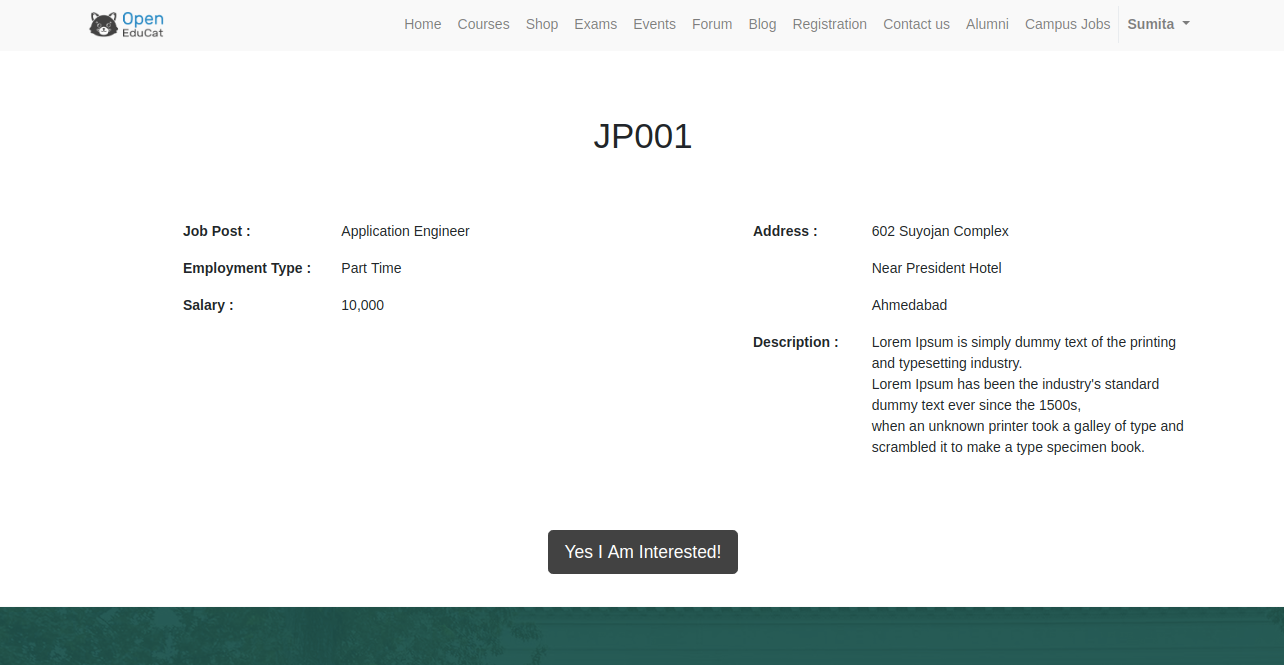
Then the student can apply for the job according to their skills and click on
Yes I Am Interested!button.
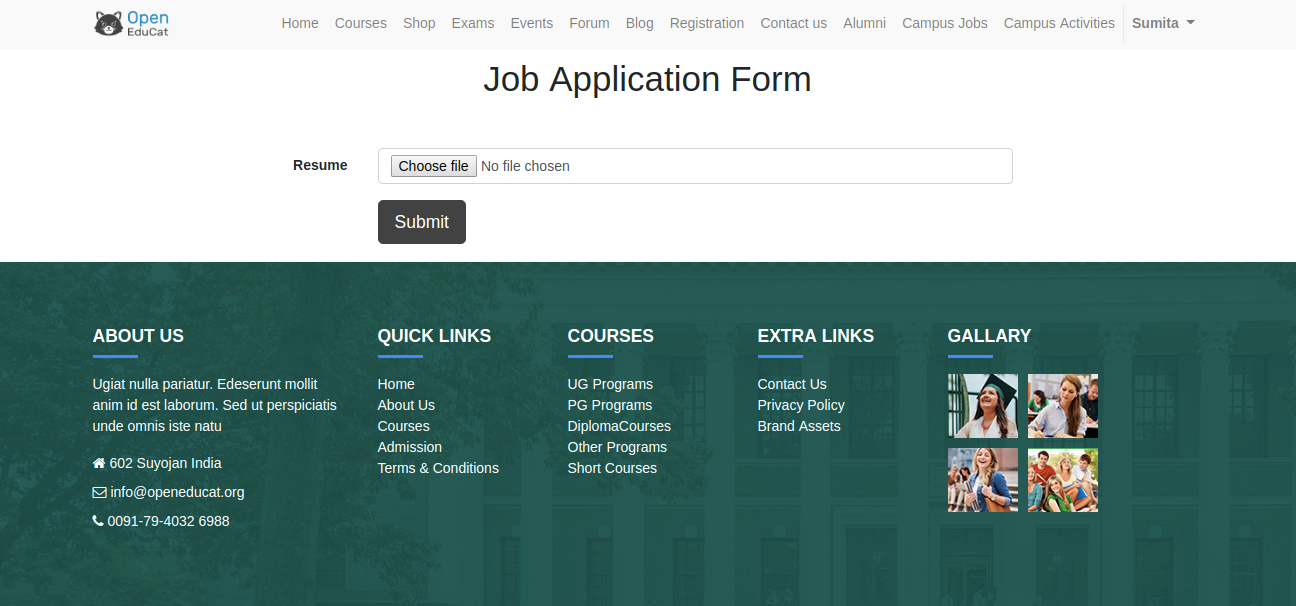
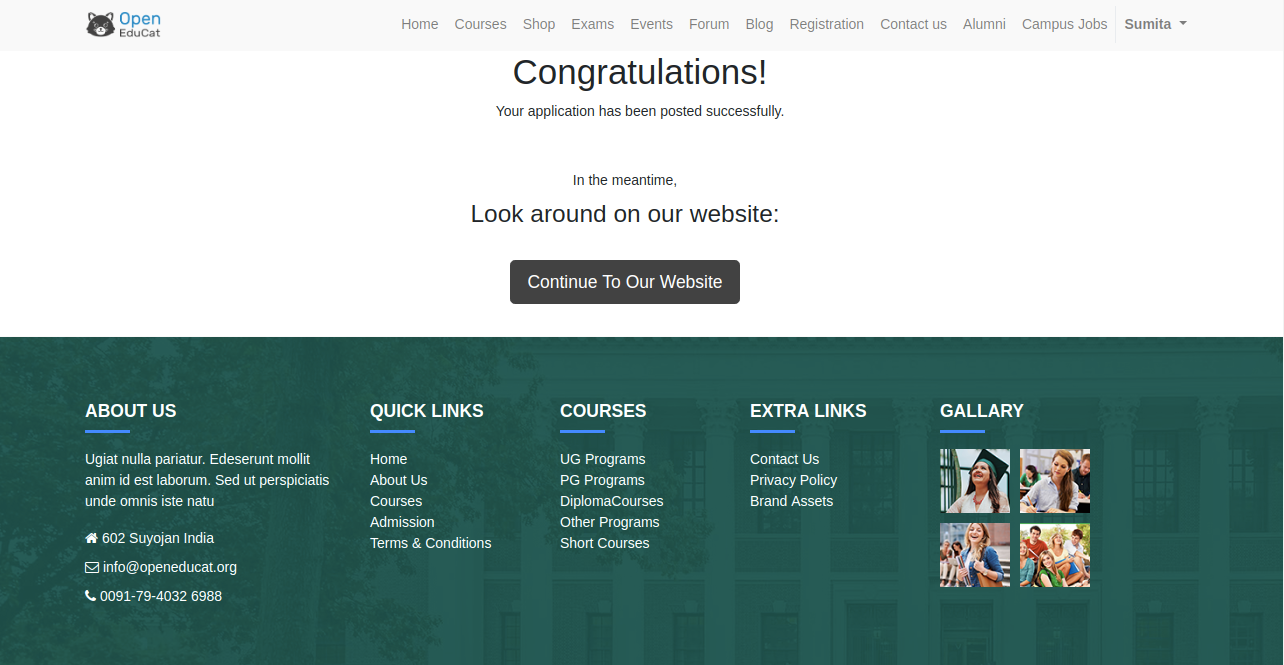
Then student can upload their documents to apply for the job and click on the
Submitbutton.

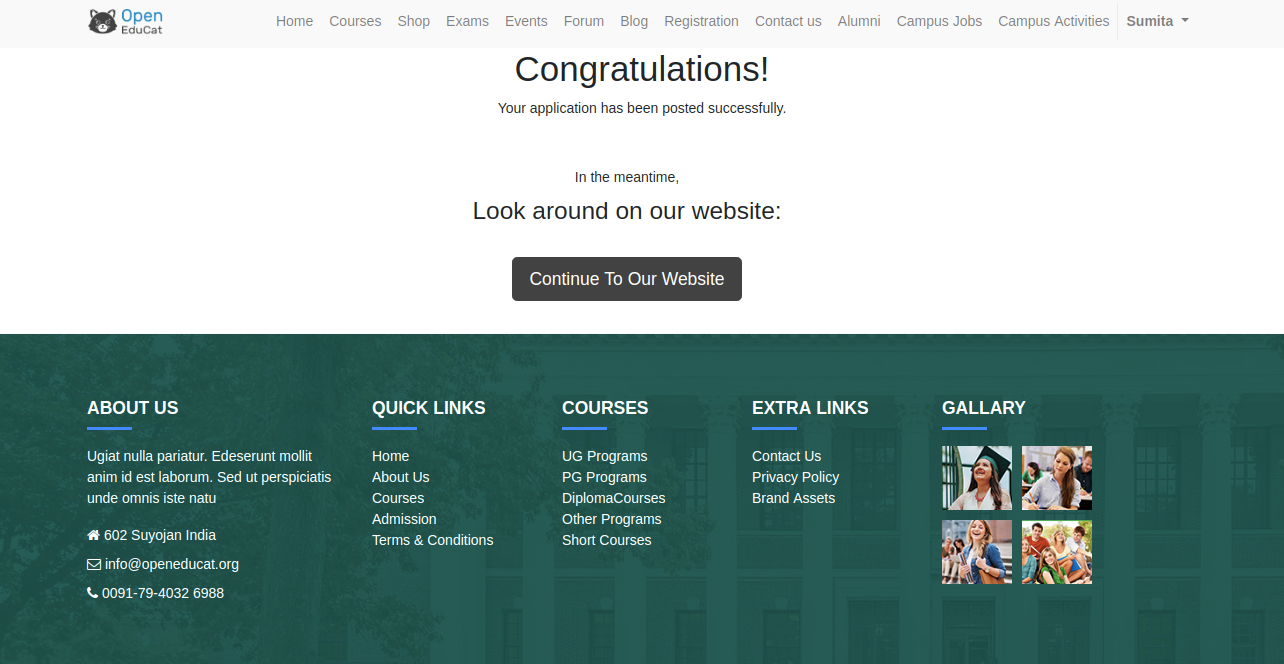
Then the confirmation message will be displayed.
Admin can see the applicant under Job Applicant menu in the Job module.
35. How to manage placement in OpenEduCat.
Placement Team
OpenEduCat provides functionality of a dedicated team which works throughout the year to provide better placement to all the students in their area of interest. OpenEduCat allows you to store the details of the Placement Team ,their team leader and their team members.
Go to .
Click on Create to create a new Placement Team.
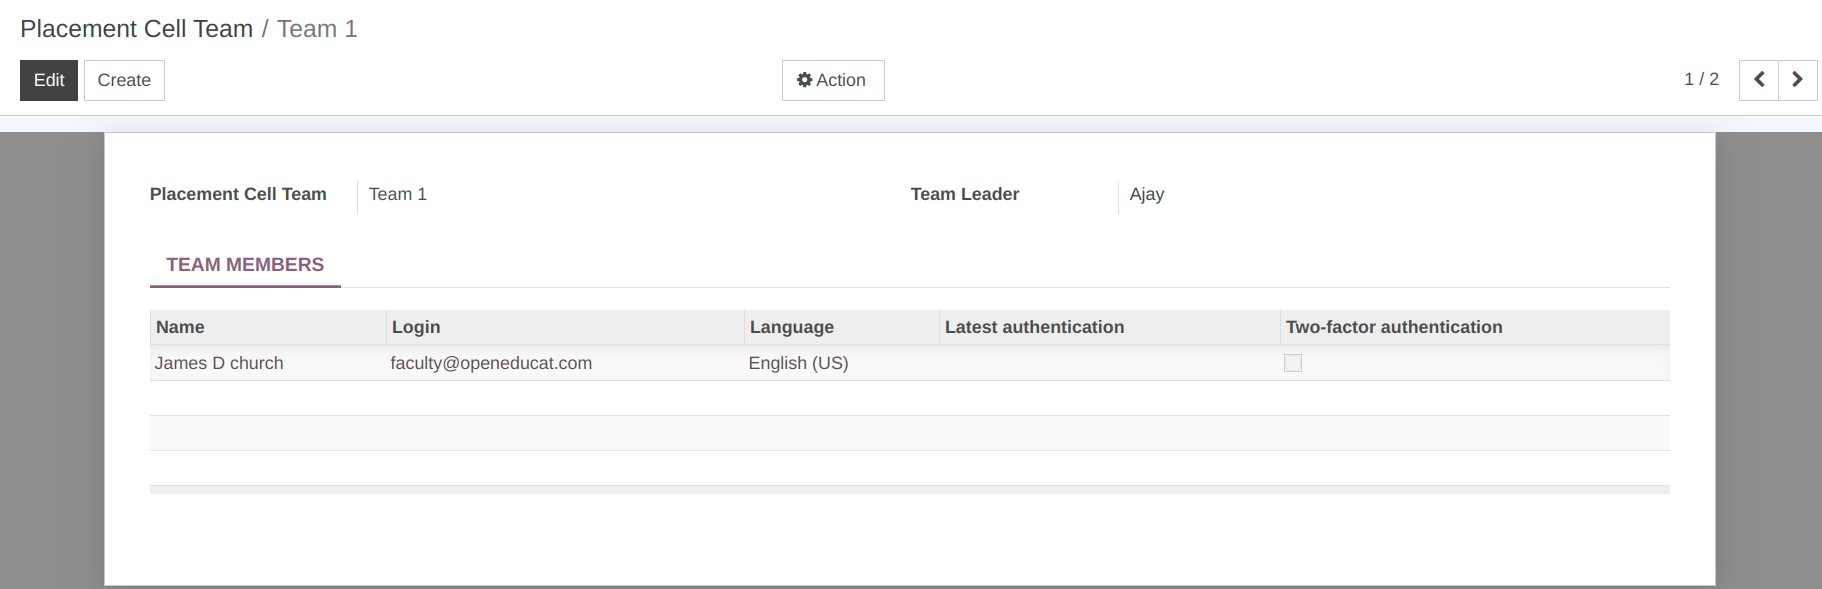
Details of Placement Team Form:
Placement Cell Team :- Set the name of the Placement Cell Team.
Team Leader :- Select the leader of the placement cell team .
Team Members :- Select the team members for whom the placement cell team is created.
Announcement
OpenEduCat provides the feature to post the announcement of the Job Post by the placement team.
Go to .
Click on Create to create a new announcement for the Job.
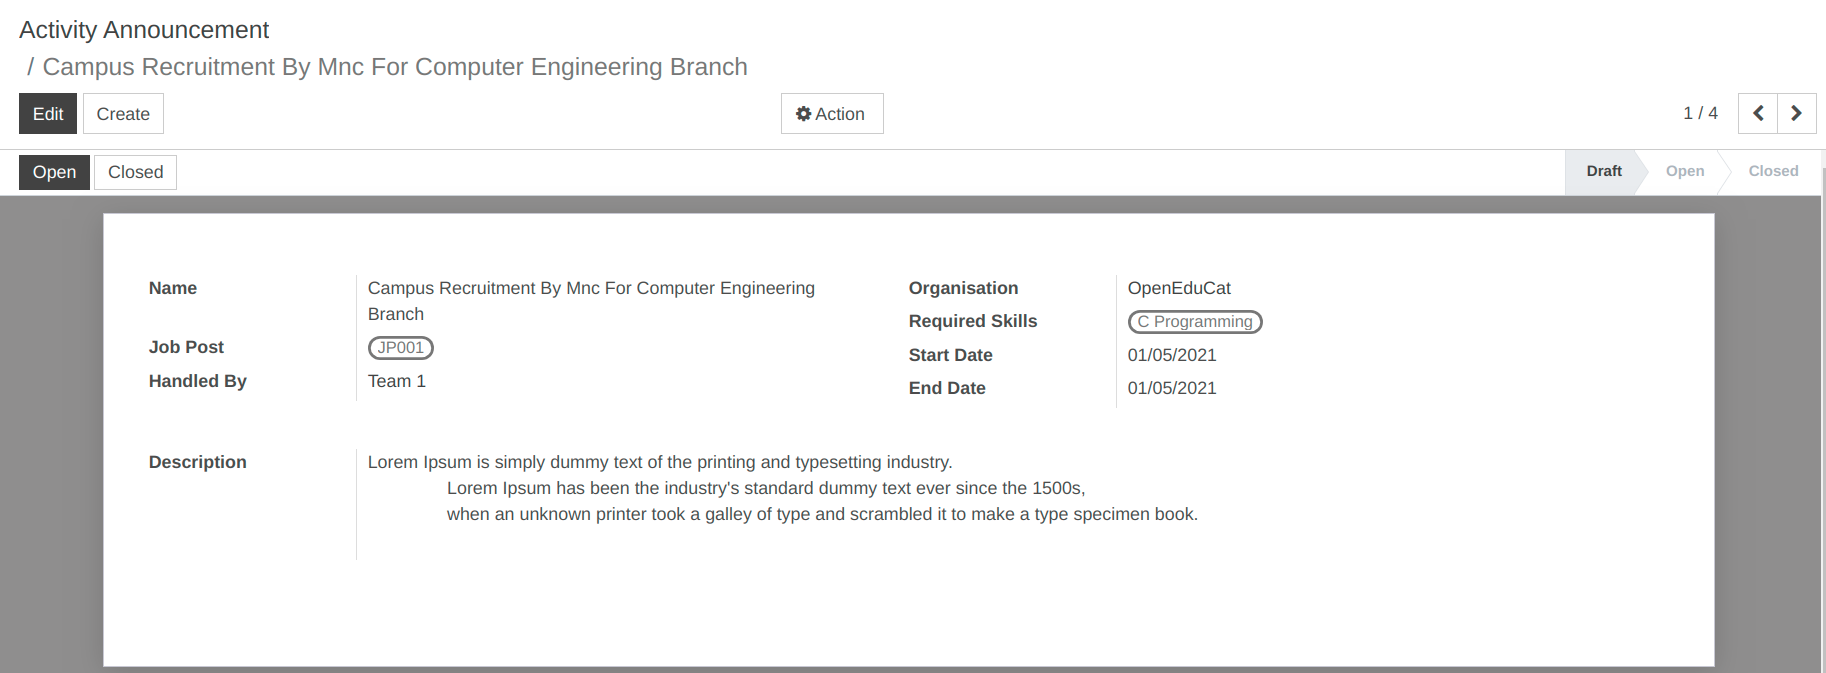
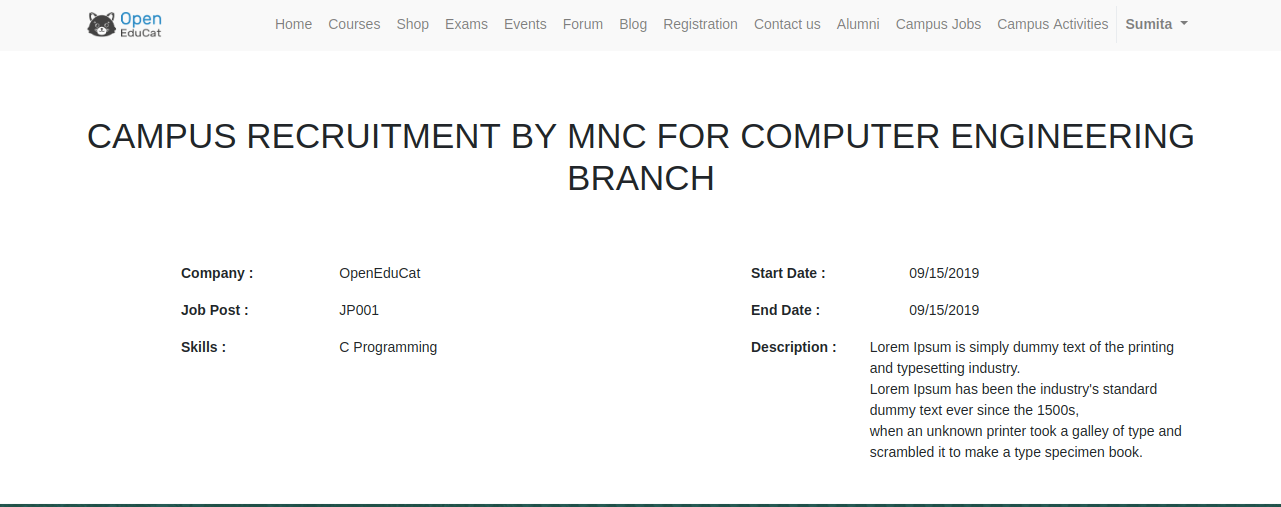
Details of Activity Announcement Form:
Name :- Set the name for the Announcement of the Job Post.
Organization :- Select the organization who posted the Job Post Announcement.
Job Post :- Select the Job Post.
Required Skills :- Select the required skills for the Job post.
Handled By :- Select the Placement Team who will handle this job post announcement.
Start Date :- Set the Start Date of the Job Post Announcement.
End Date :- Set the End Date of the Job Post Announcement.
Description :- Set the description for the Job Post Announcement
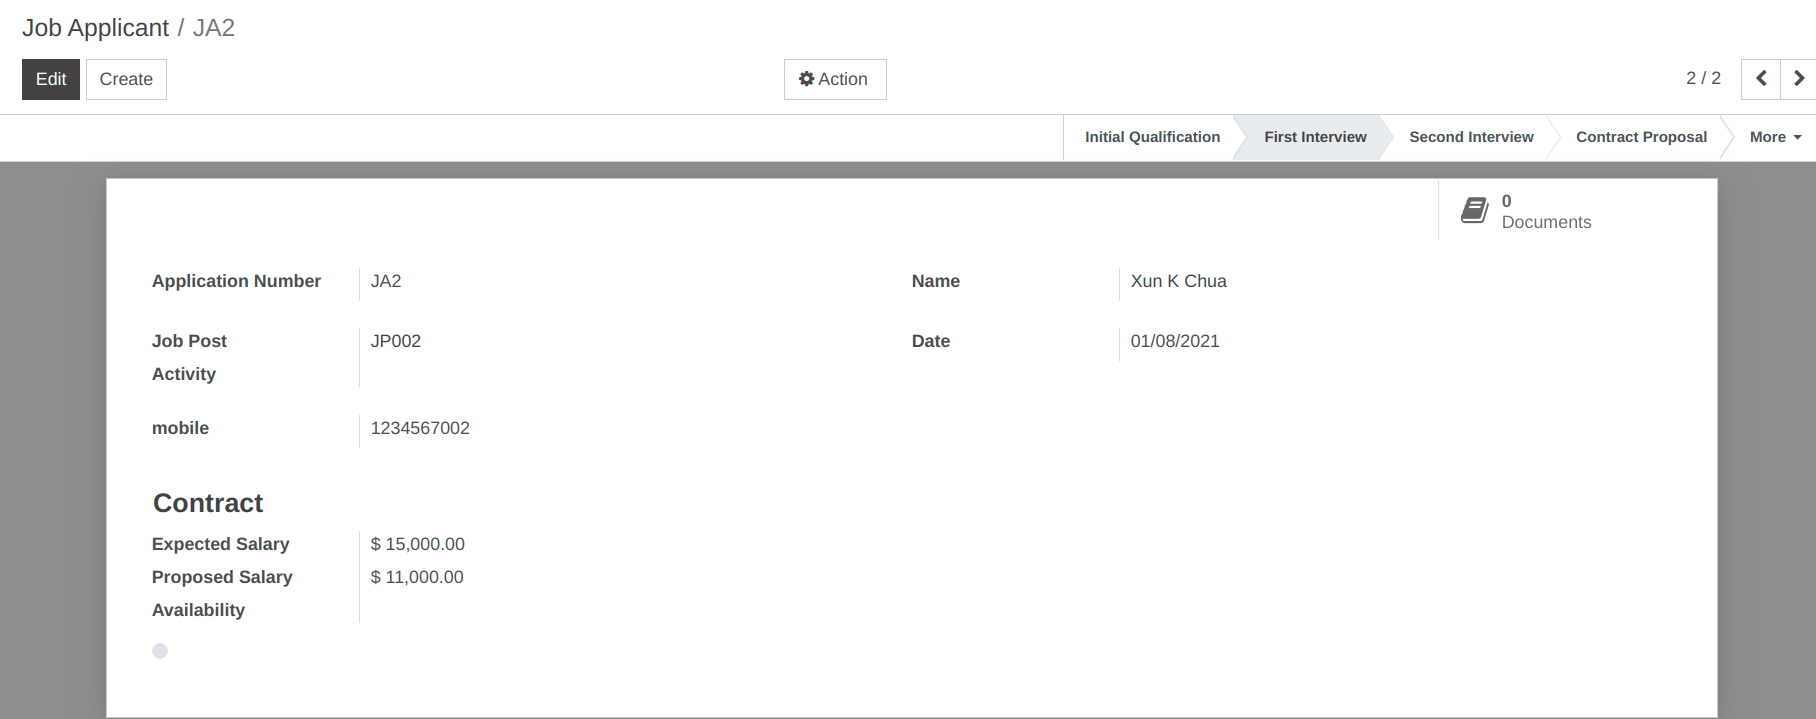
Job Applicant
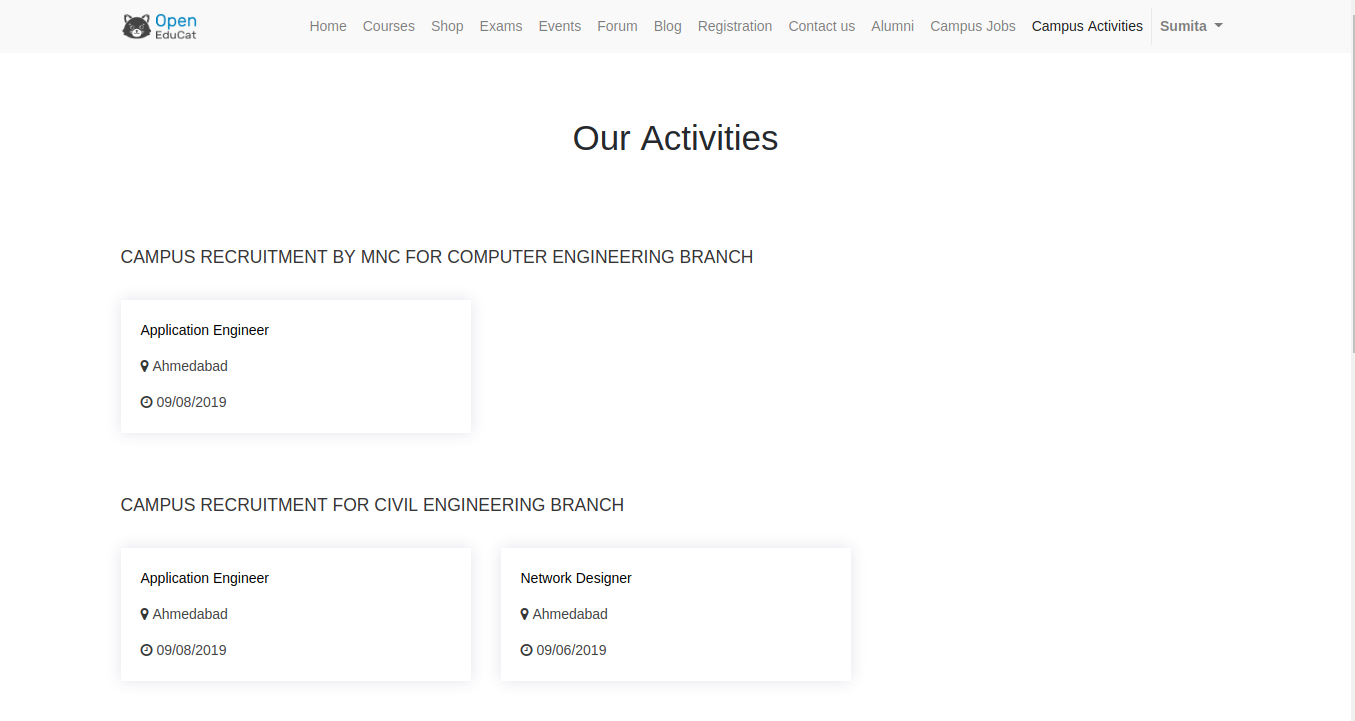
These created activity announcements are displayed under Campus Activities menu on the website. Any student can apply for the any activity announcement by logging into their account.
First student will login into their account and go the Campus Activities menu.
Then the student can see the details of the Activity in which she/he is interested.
Then the student can apply for the job under that activity according to their skills and click on
Yes I Am Interested!button.
Then student can upload their documents to apply for the job and click on the
Submitbutton.
Then the confirmation message will be displayed.
Admin can see the applicant under Job Applicant menu in the Job module.
36. How to create question bank in OpenEduCat.
Question Bank
Question Bank is a collection of different questions and answers.
You can go to
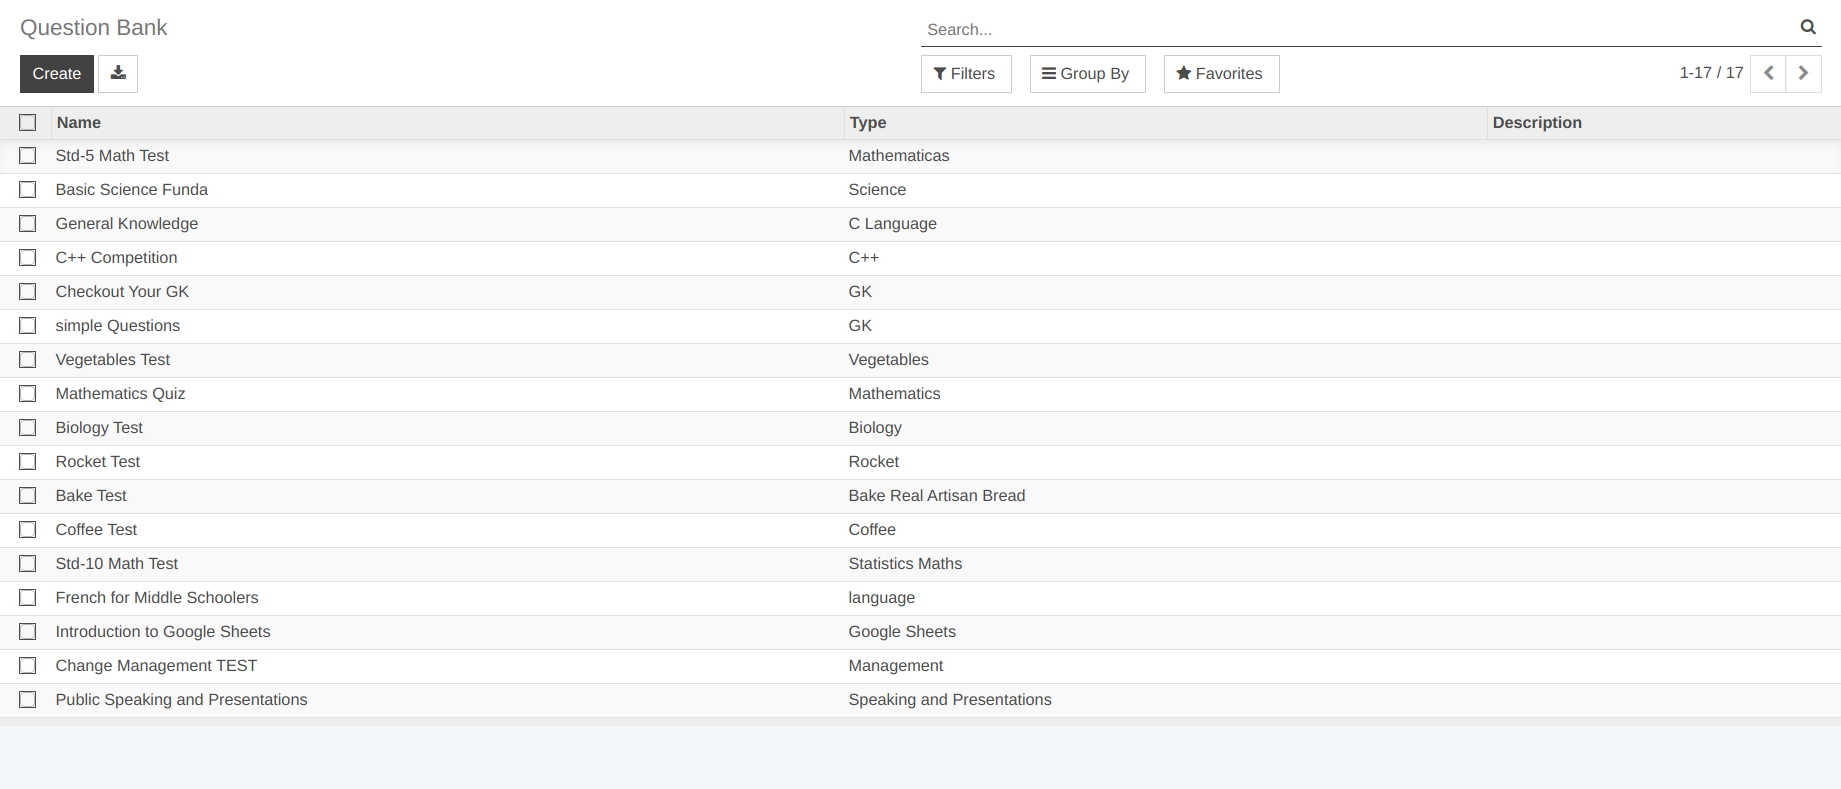
Question Bank Type
User can go to

Faculty can add multiple Question Bank Type.
Grades
Faculty can add grades. Which will be used for Quiz answers configuration.
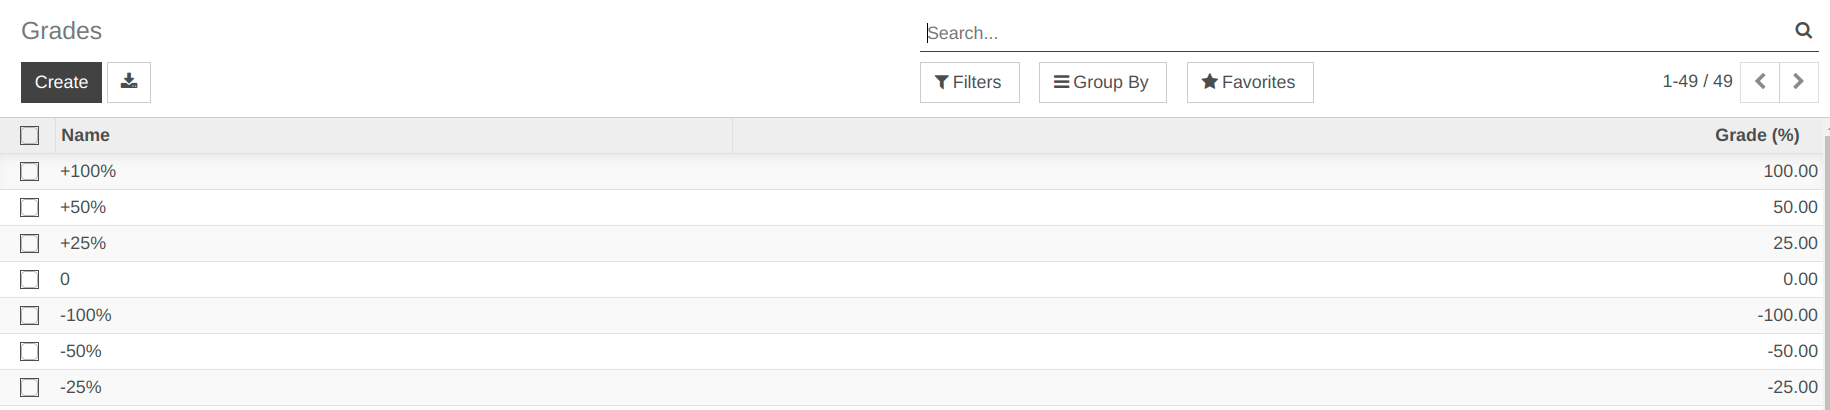
Create Question Bank
Once you click on
Createbutton you can create ‘Questions’ and ‘Answers’.

Details of Question Bank Form:
Name :- Set the name for the Question Bank.
Type :- Select the type for the Question Bank.
Pages in Question Bank Form:
1. Questions
You can add the questions and answers in this Question Bank.
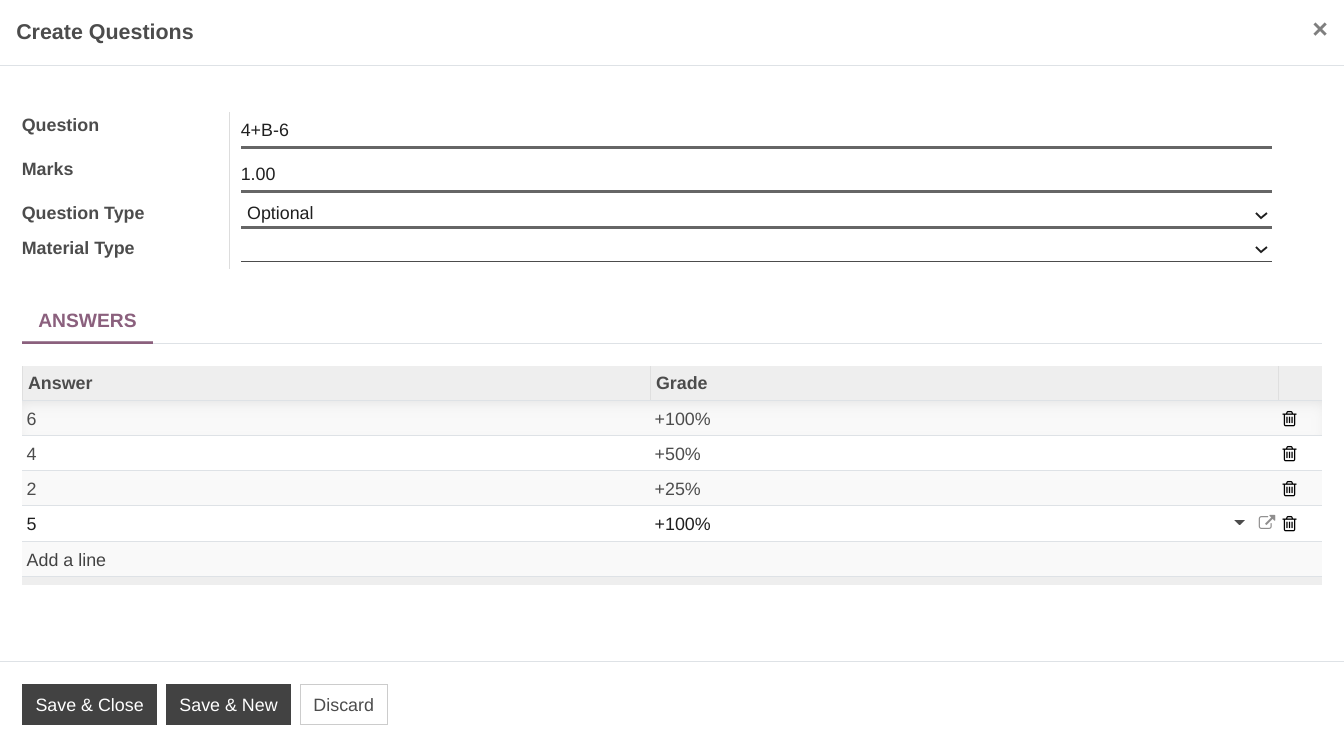
- For any question you can create answers and their grades.
Grades indicate the weightage of the answer. For Example …
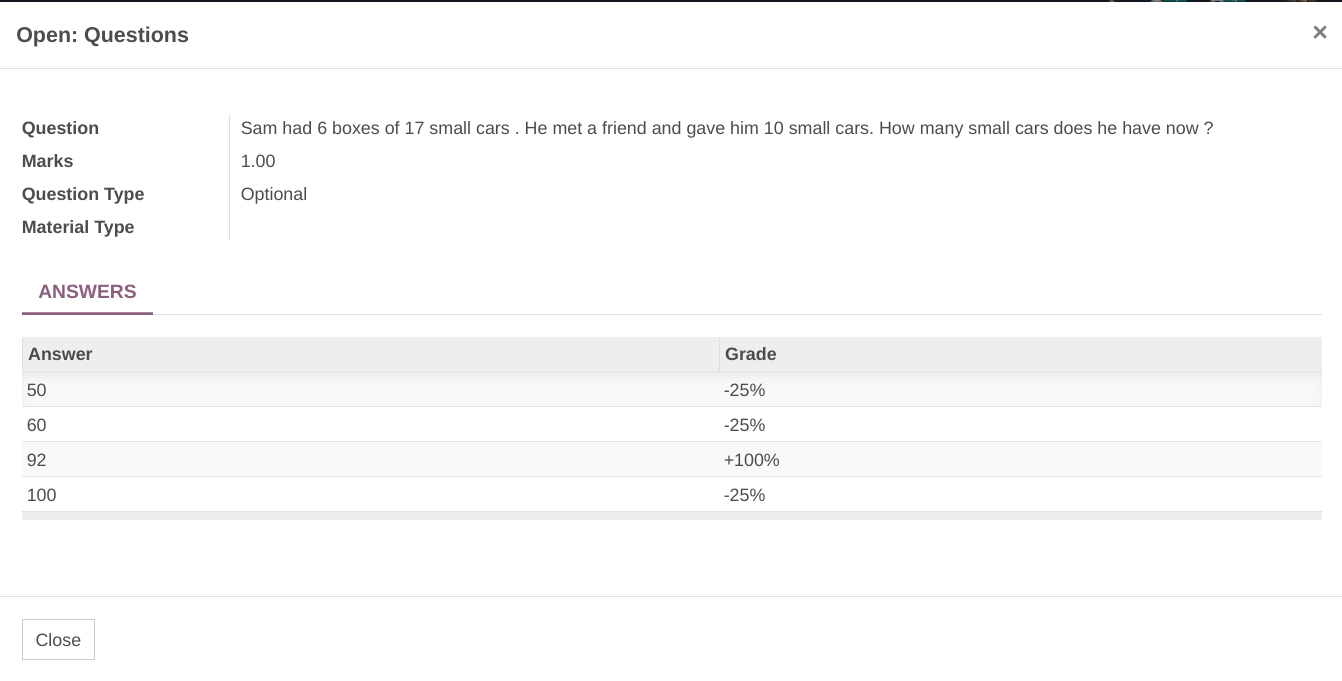
2. Description
Set the description for Question Bank.
37. How to configure quiz in OpenEduCat.
Quiz Categories
User can add multiple categories for Quiz / Exam.

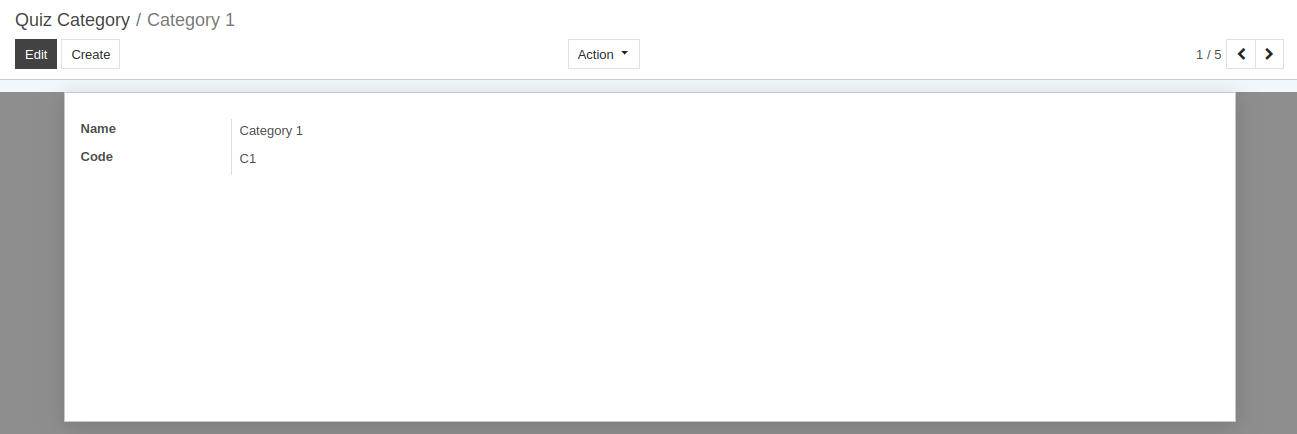
Details of Quiz Category Form:
Name :- Set the name for the Quiz Category.
Code :- Set the code for the Quiz Category.
Create Quiz
Faculty can create an exam/quiz; for quiz, faculty can go to .
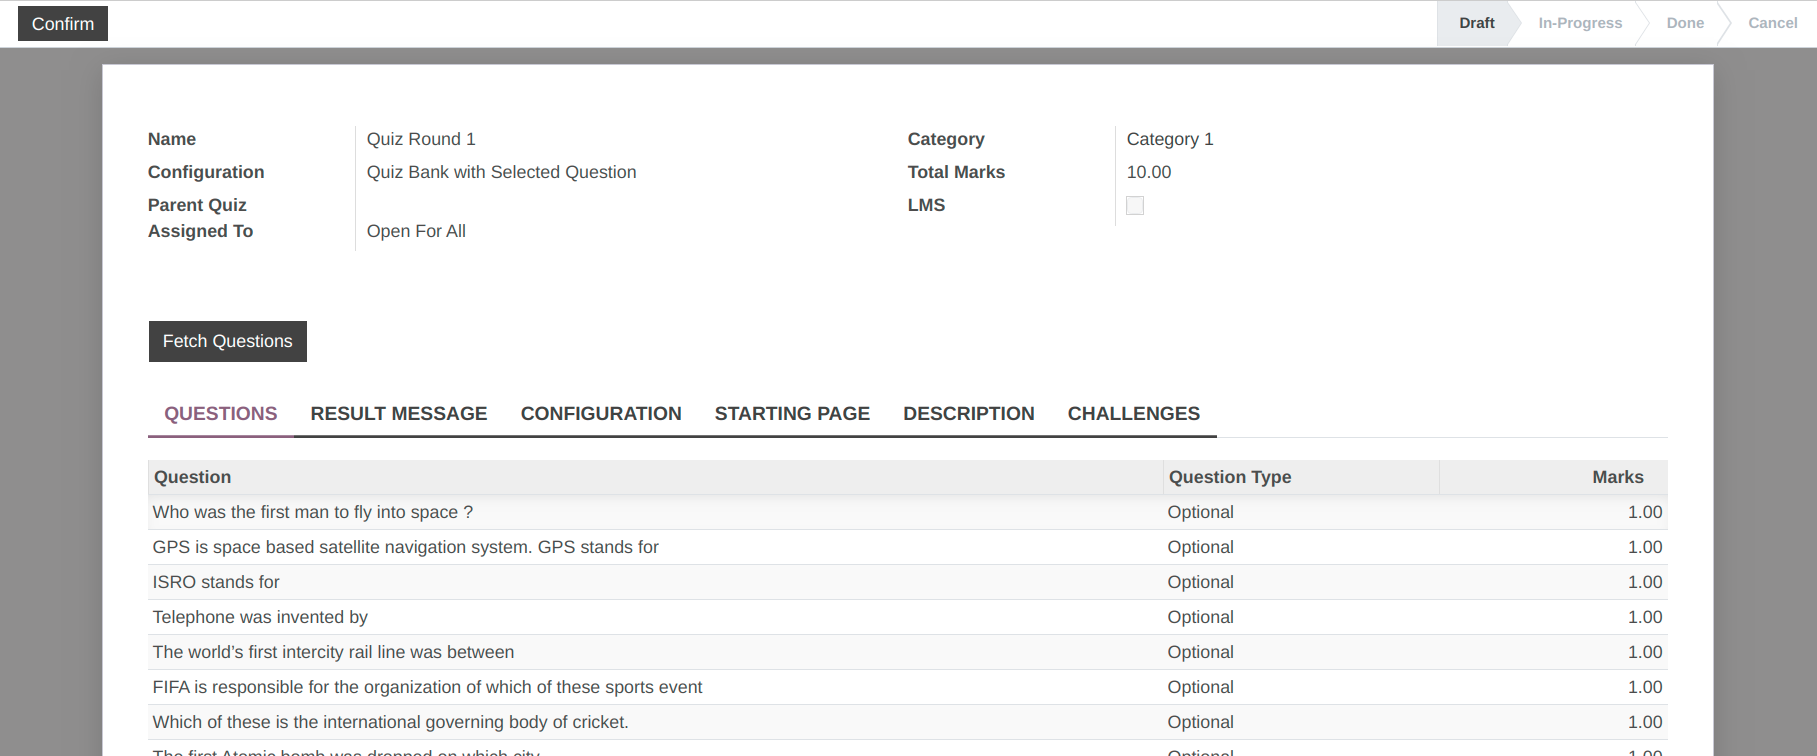
- Once you click on
Createbutton you can see the configuration field in quiz. - Configuration
- Faculty have three choices
Manual
Quiz Bank with selected questions
Quiz Bank with random questions
- Manual
Faculty can enter any question under ‘Questions’ Tab.
- Quiz Bank with selected questions
Faculty can select different questions from different ‘Question Bank’.
- Quiz Bank with random questions
Faculty can assign the number of questions and select Question Bank. It will generate random questions of exam for all attendees.
- Once you click on
Click on
Fetch Questions, then the wizard will open to add the questions for the quiz.

Configurations
- You can see various tabs in quiz form view
Questions
Result Message
Configuration
Starting Page
Description
Challenges
- Questions
User can enter questions based on selection of configuration field as above.
- Result Message
User can enter ‘Result From’ to ‘Result To’ and message. Here ‘Result From’ to ‘Result To’ is a percentage range.
If user get result from this percentage range, it will display the same message which is configured for that percentage range.
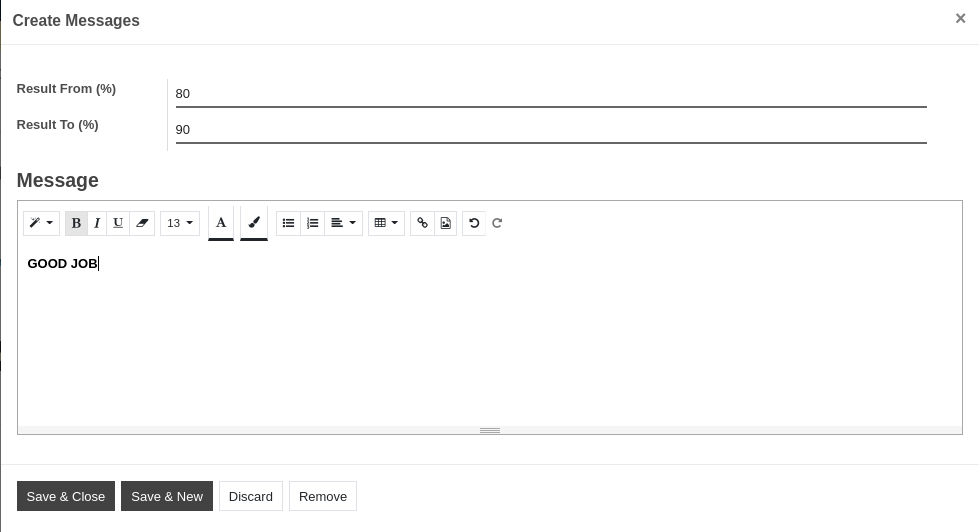
- Configuration
In configuration tab user can configure the exam rules and regulations.
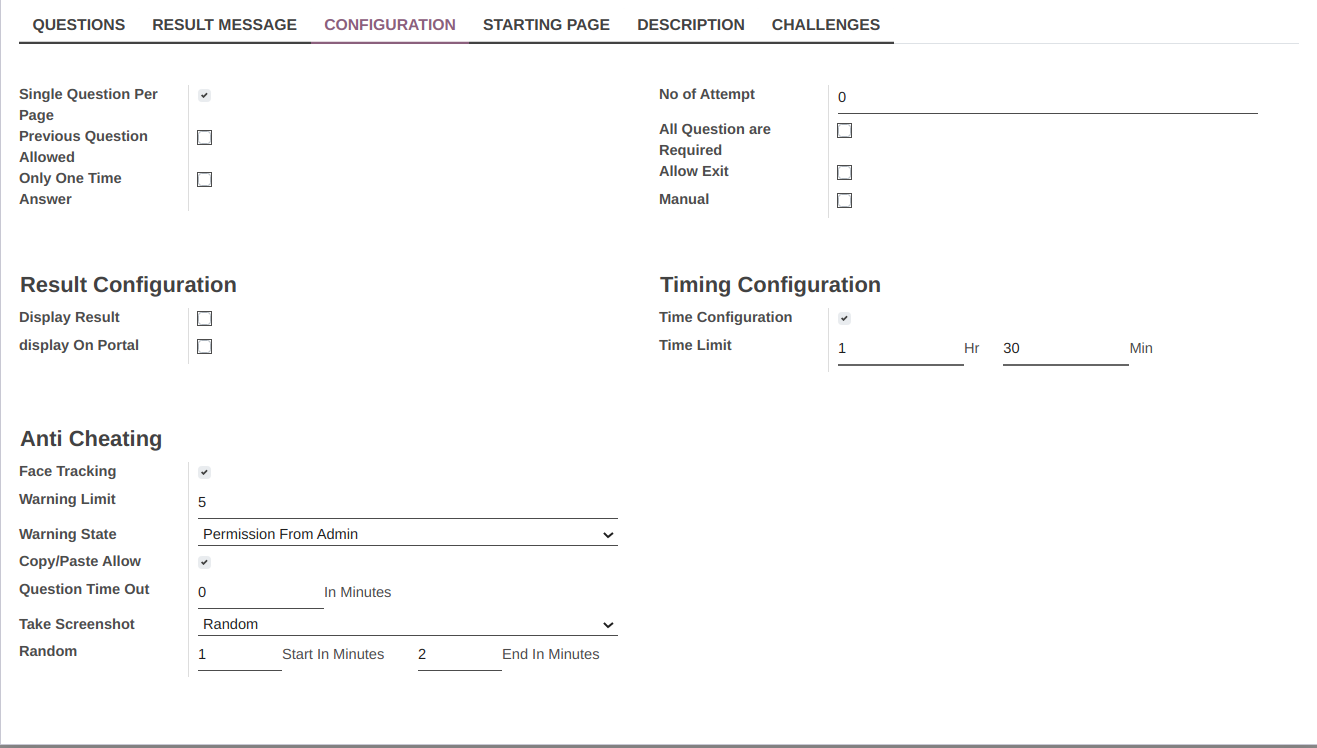
- Single Question Per Page
If this boolean field is set, It will reflect on exam page, per page single question.
- Previous Question Allowed
If this boolean is set, user can move back while exam.
- Only One Time Answer
If this boolean is set, User can give answer only once.
- No of Attempt
User can define that single user attempt this exam.
- All Questions are Required
If this boolean is set, user will have to give all the questions and answers while attempting exam.
- Allow Exit
If this boolean is set, user can allow to exit exam.
- Manual
If this boolean is set, user can check exam manually.
- Display Result
If this boolean is set, After attempting exam user can see their results.
- Display Right Answer
If this boolean is set, After attempting exam user can see their right attemptted answers.
- Display Wrong Answer
If this boolean is set, After attempting exam user can see their wrongly given answers.
- Display Not Attempt Answer
If this boolean is set, After attempting exam user can see their not attemptted questions and answers.
- Display On Portal
If this boolean is set, User can see result on portal.
- Time Configuration
If this boolean is set, User can set exam timings.
- Stating Page
Under starting page user can design exam starting page.

- Under starting page user can see the configuration of ‘Starting View’.
- Starting views
HTML ( User can design page using HTML)
Audio ( User can add audio file )
Video (User can add Video file )
As mentioned above if user configures any of the starting views, It will reflect on Quiz / Exam starting page.
- Description
User can set description under ‘Description’ tab. That description will reflect on exam website view.
- Challenges
User can define challenges under ‘Challenges’ tab.
You can define different Challenges and their badges inside the Challenges.
- Once user achieves that Goal/Challenge user will get those badges as per challenges.

38. How student can start quiz in OpenEduCat and get the results based on grades.
Student can attempt any quiz exam by logging into their account. Go to
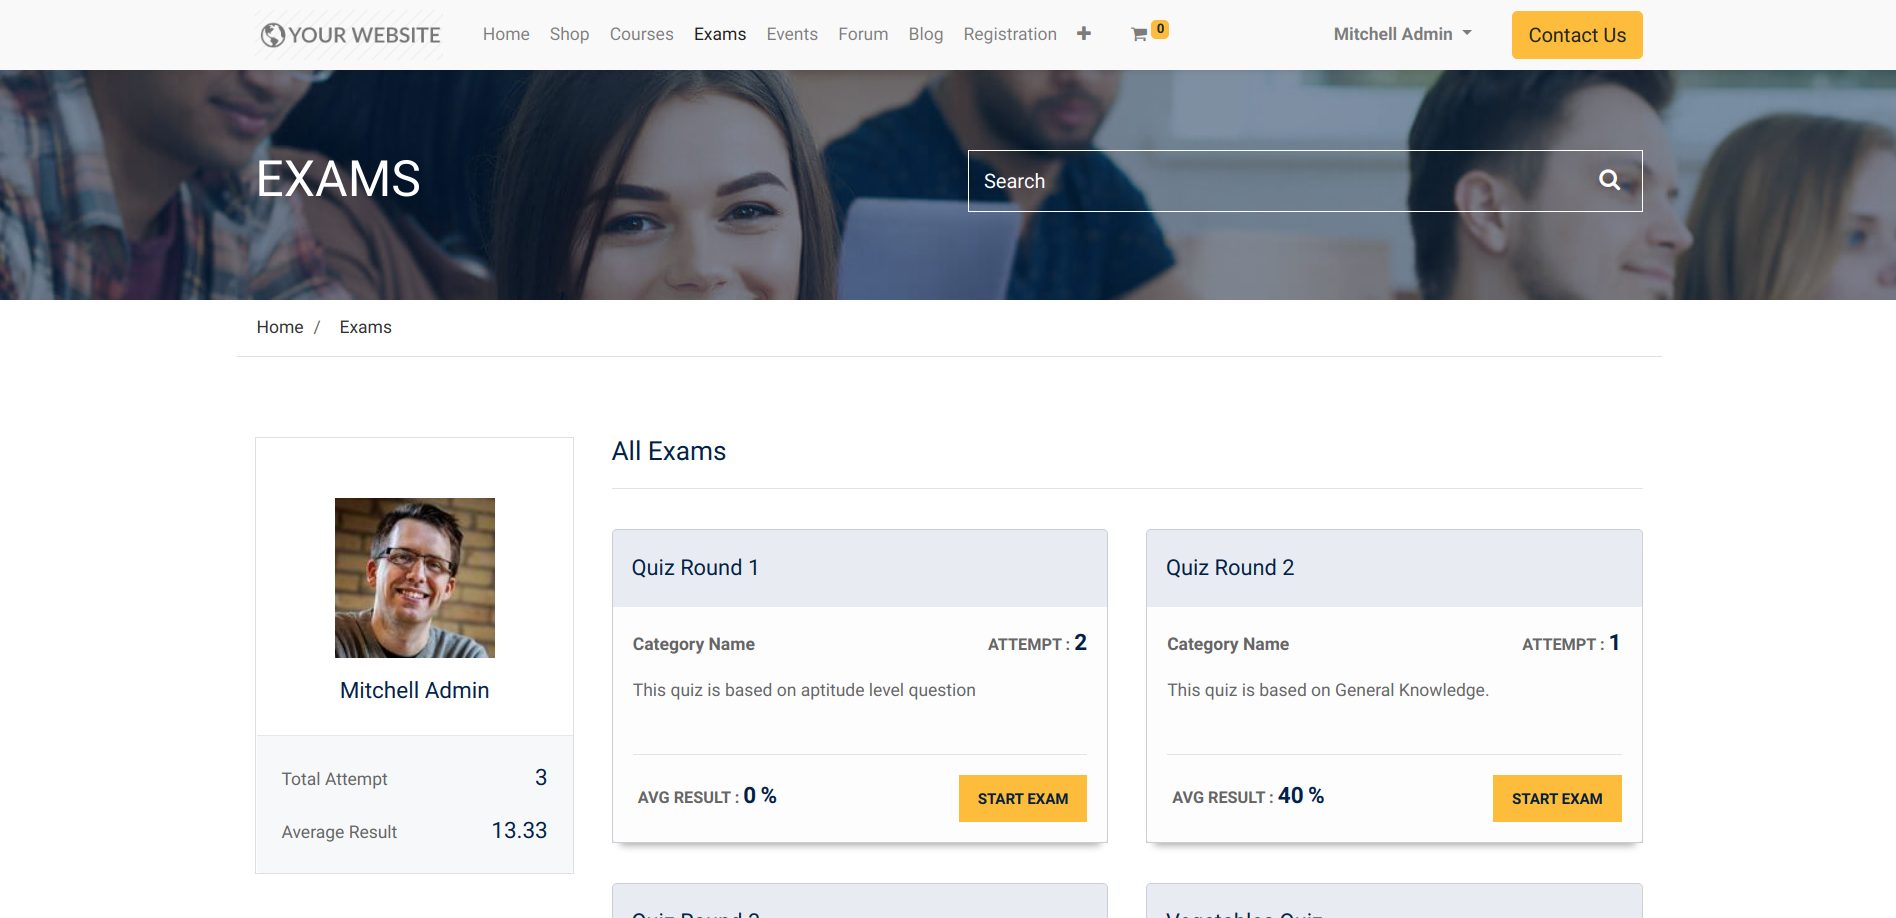
- User can start attempt exam, Using button
Start Exam - If Quiz is configured as single page single question
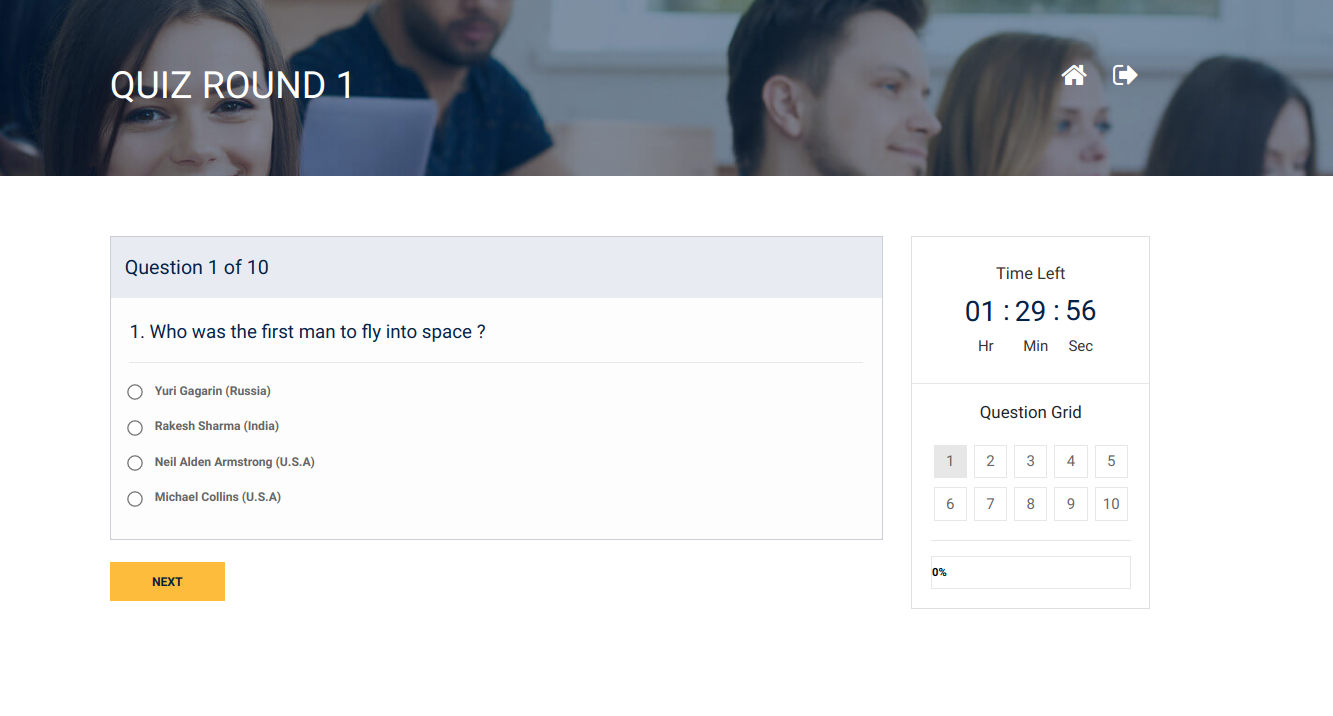
- If Quiz is not configured as single page single question
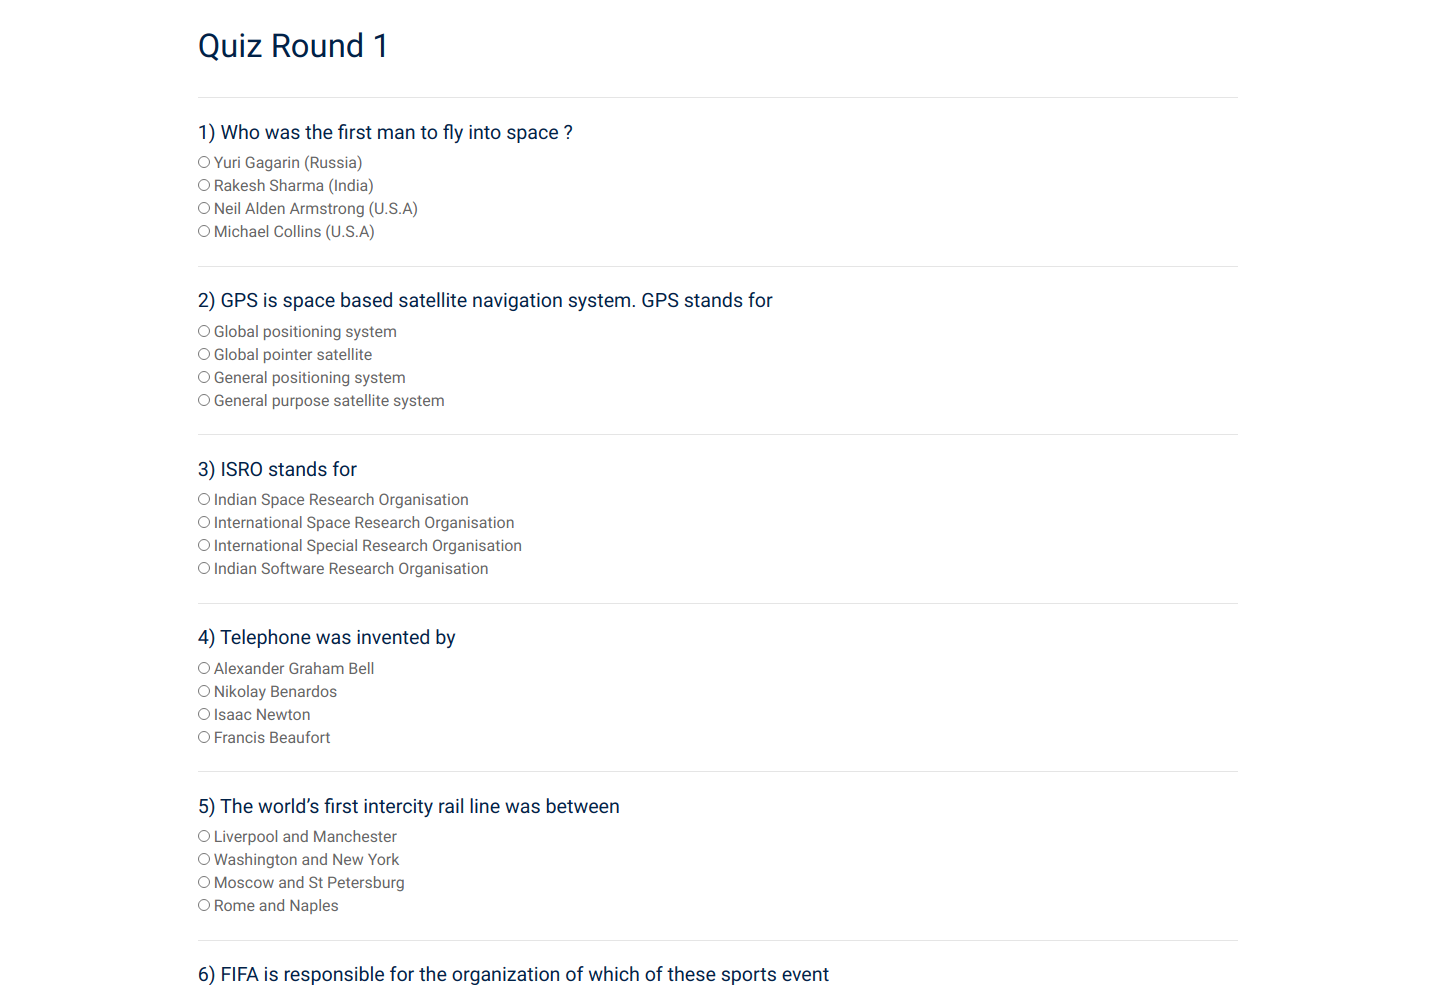
- User can start attempt exam, Using button
- Once quiz is finished user can see their result if faculty configured ‘show result’ in quiz.
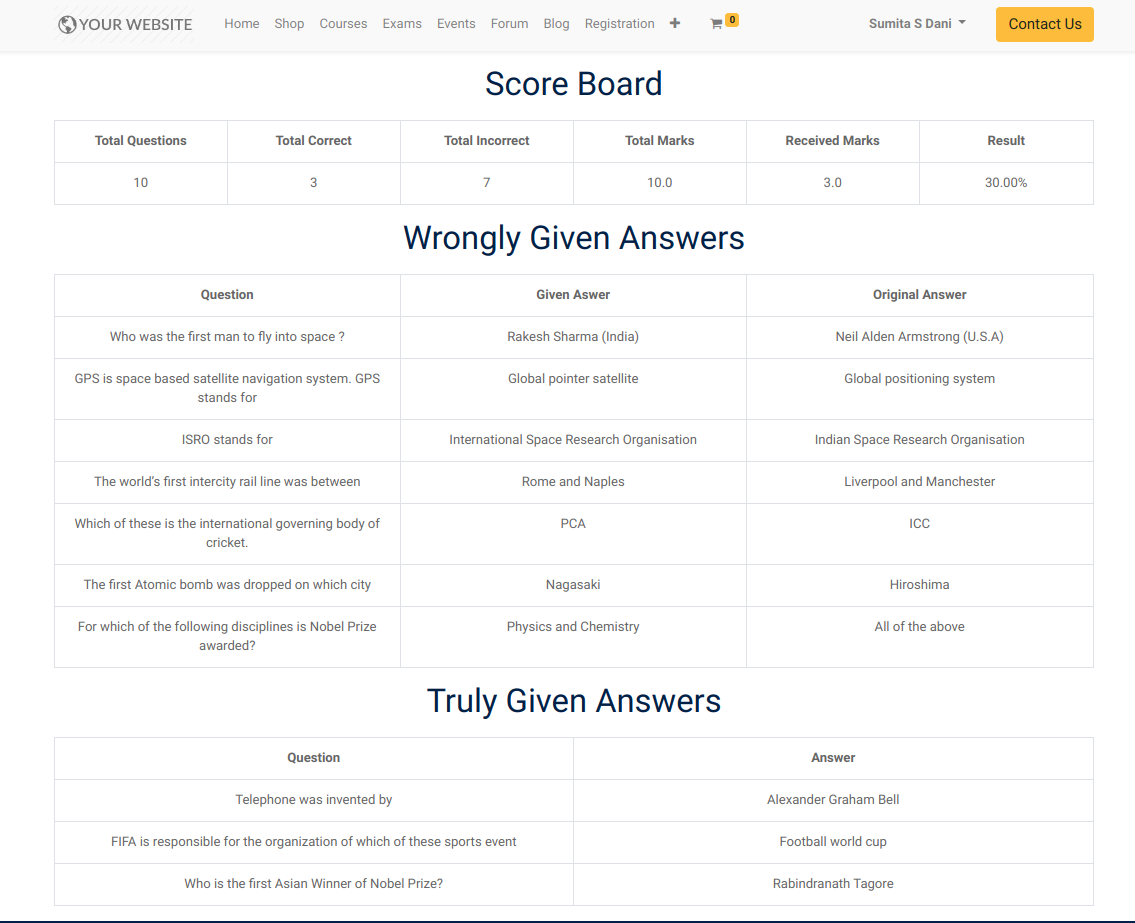
Results
- Faculty can see result from

39. How to create User For Backoffice Admin.
Go to menu .
Click on Create to create a new user.
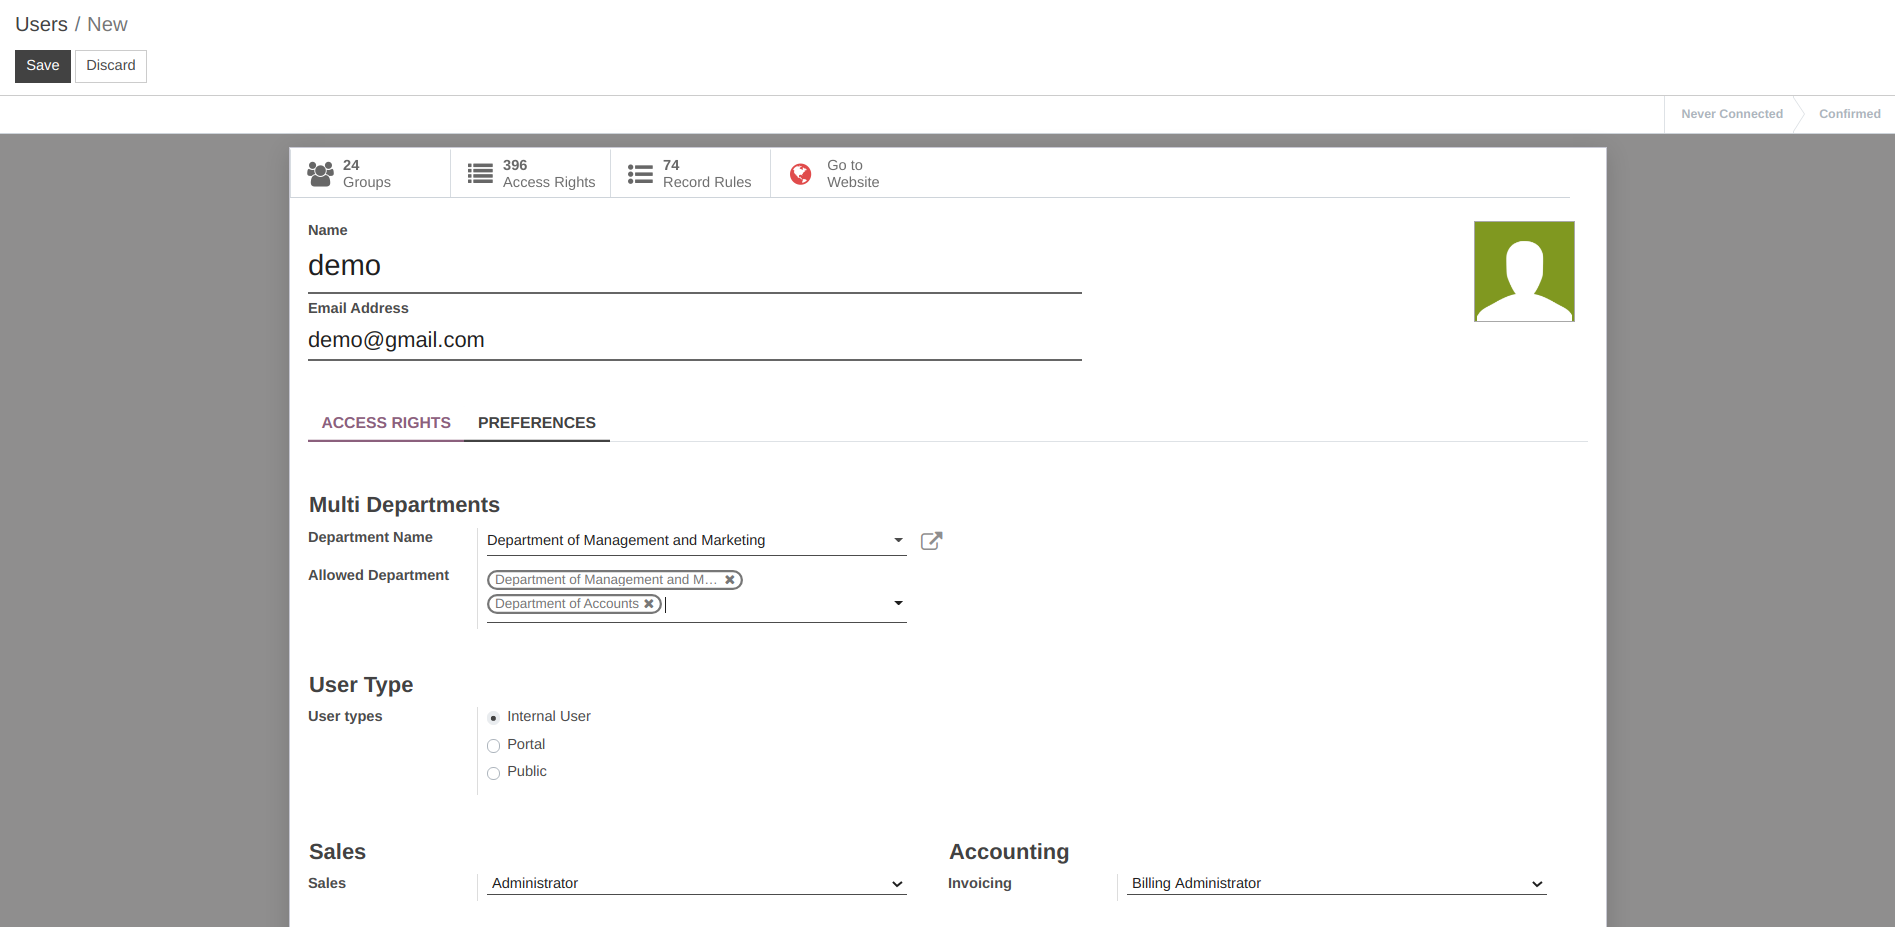
Name :- Name of the user. It will be displayed in whole system.
Email Address :- Add a Email Address of the user.
Access Rights
Multi Departments :- Fill the Multi Departments details under Multi Departments.
User Type :- Select a User Type.
Sales :- Select a Sales from the list.
Invoicing :- Select a Invoicing detail from the list.
Website :- Select a Website from a list.
Marketing :- Fill the Marketing details under Marketing.
Human Resources :- Fill the Human Resources details under Human Resources.
Administration :- Select a Administration from a list.
Other :- Fill the Other information.
Technical :- Give the Access to particular user under Technical.
Extra Rights :- Give the Extra Rights to particular user.
Click on Send an Invitation Emain it will send an email to user with username and password.

40. How to Configuring in Features
Go to menu . Here you can Configure and remove OpenEduCat Features.
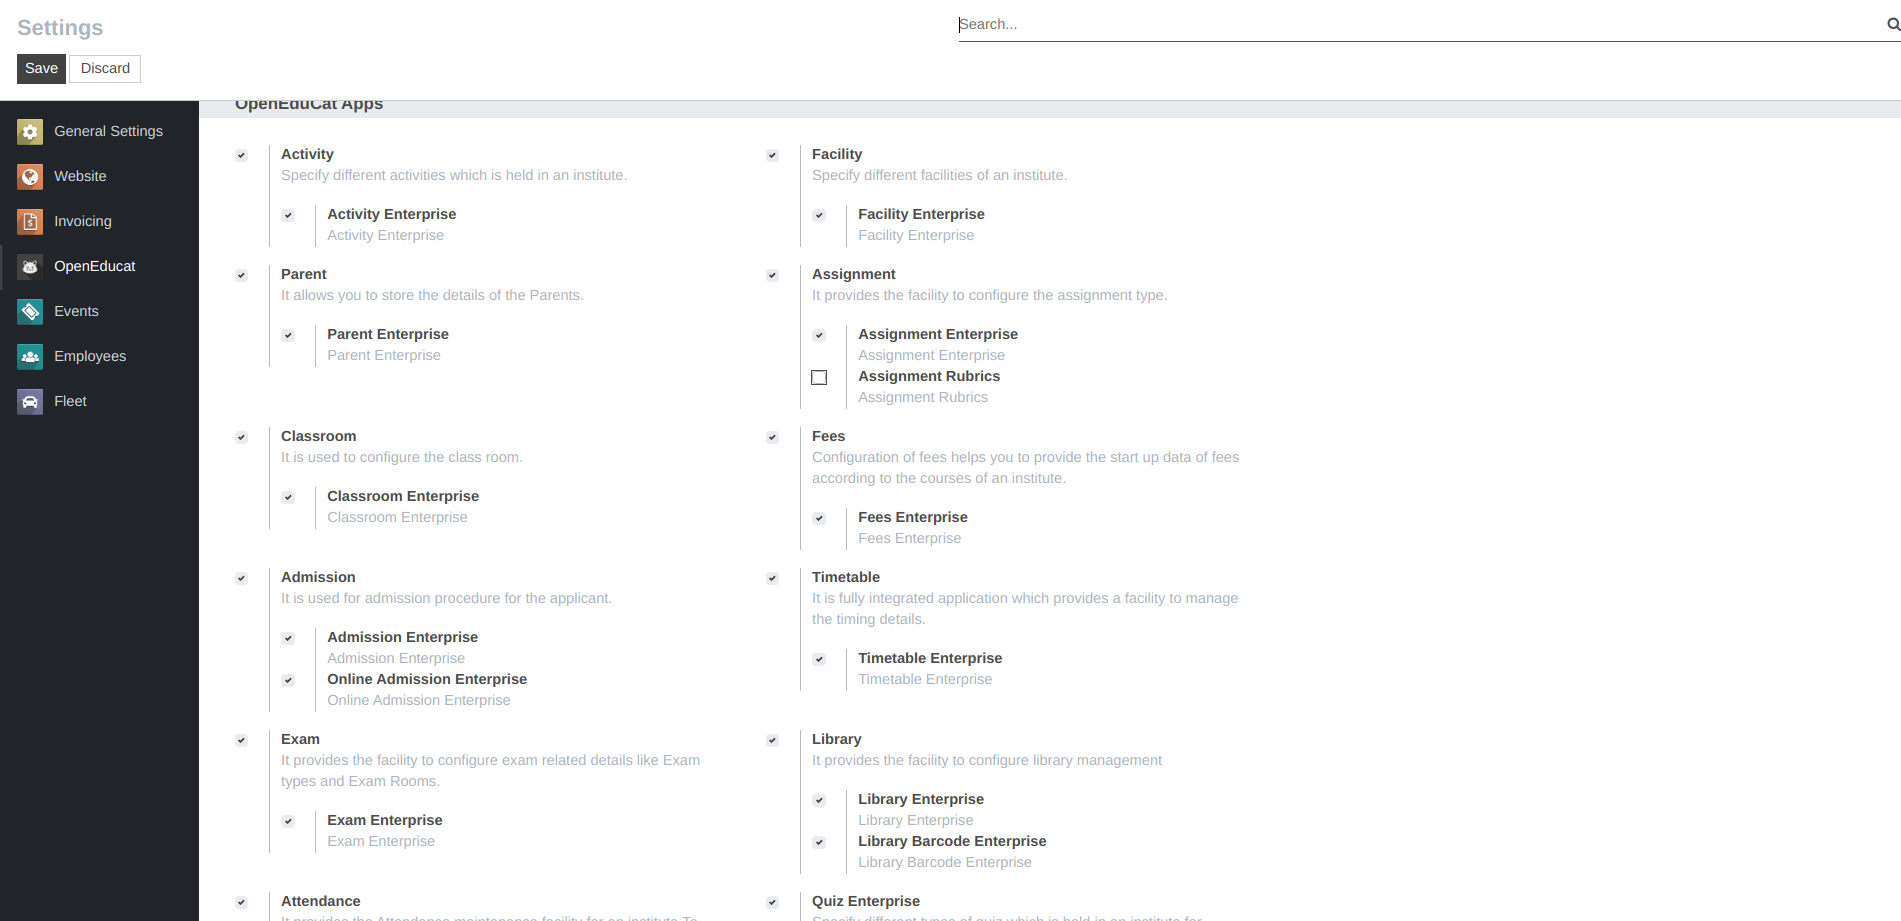
41. How to setup Accounting
Bank Accounts
Go to menu .
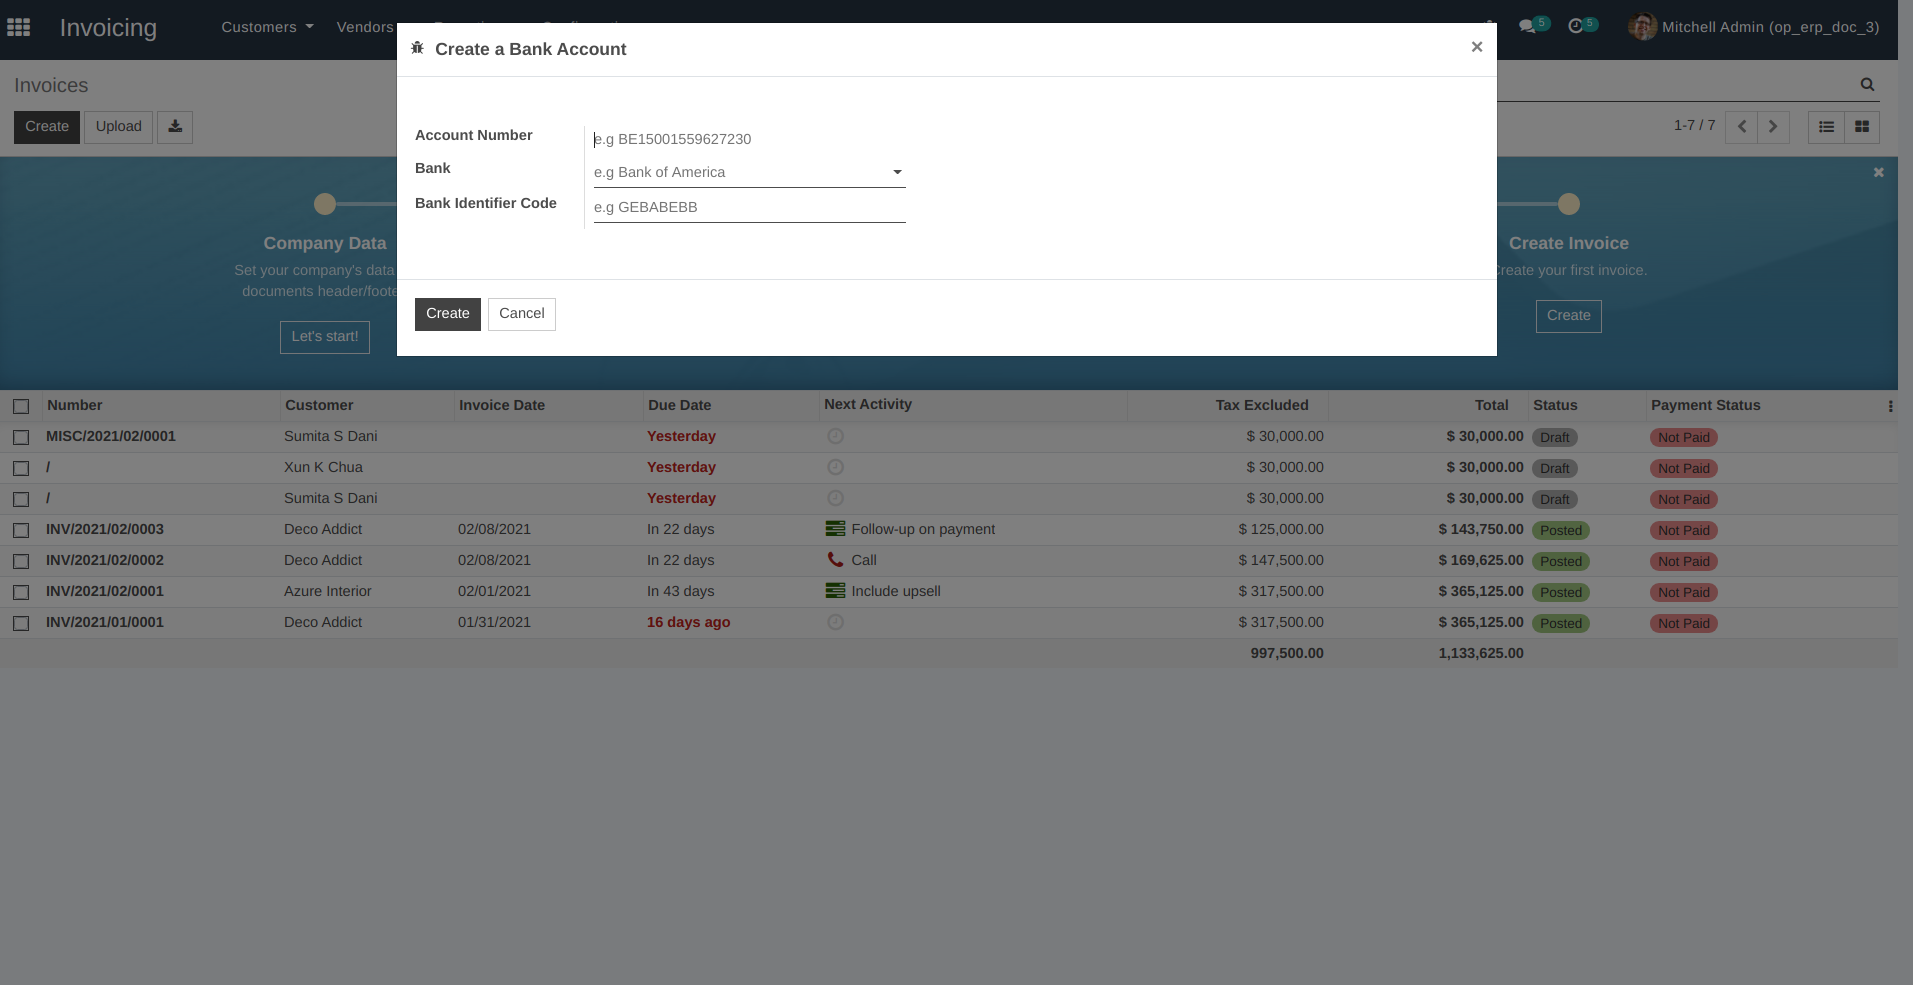
Account Number :- Add a Account Number of the bank.
Bank :- Select a Bank from the list.
Bank Identifier Code :- Add a Bank Identifier Code here.
Click on Create to add a new Bank Account.
Chart of Accounts
Go to menu .
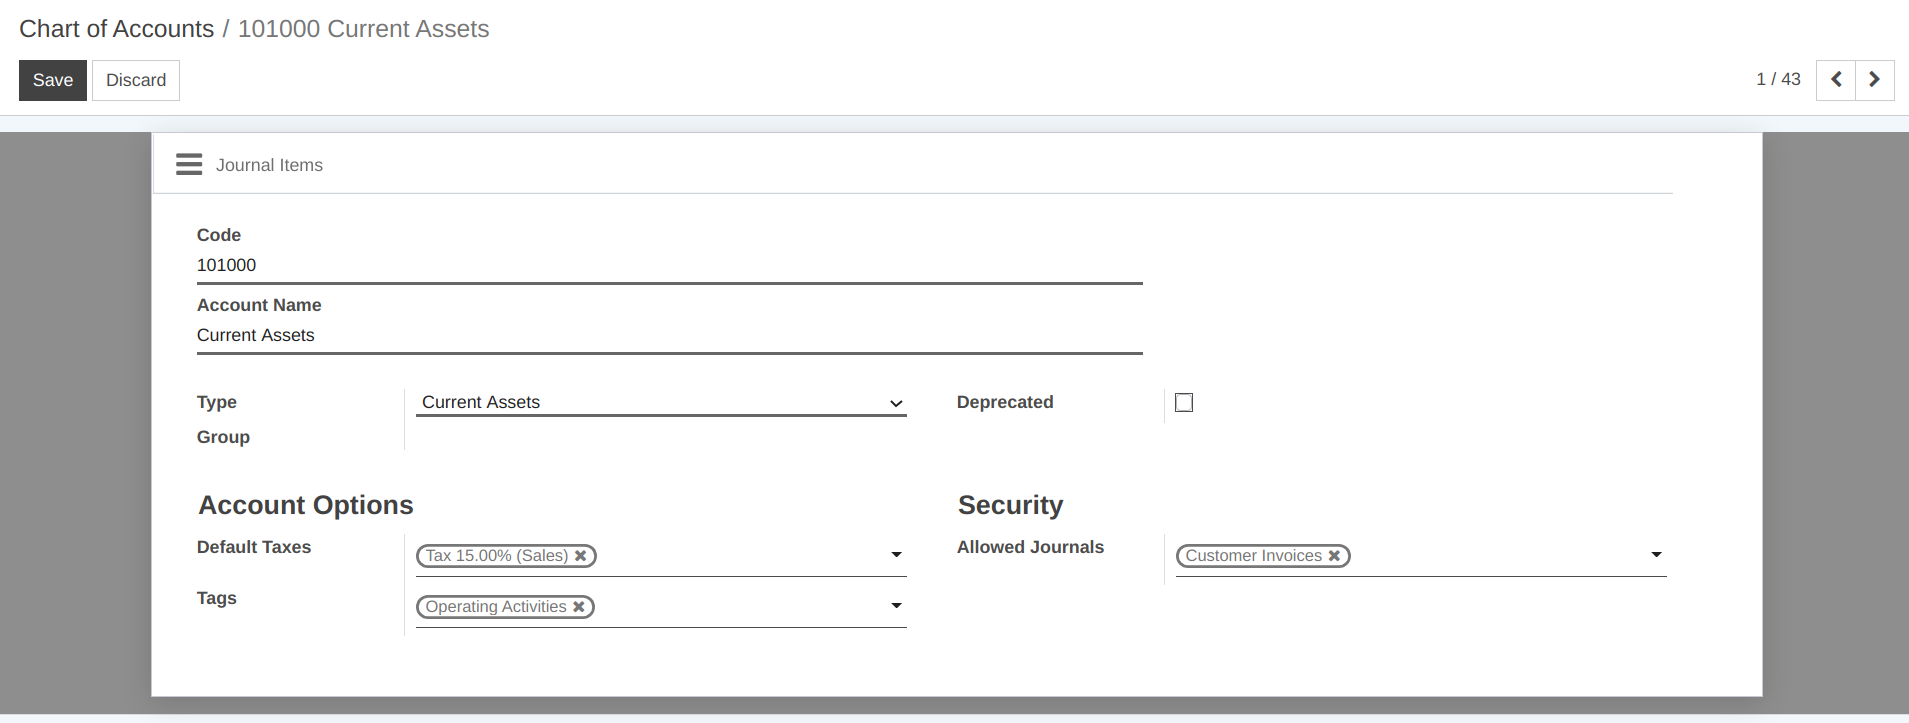
Code :- Specify the code of account.
Account Name :- Specify the Account Name.
Type :- Account Type is used for information purpose, to generate country-specific legal reports, and set the rules to close a fiscal year and generate opening entries.
Default Taxes :- Select the Default Taxes from the list.
Tags :- Optional tags you may want to assign for custom reporting.
Allowed Journals :- Define in which journals this account can be used. If empty, can be used in all journals.
Taxes
Go to menu .

Tax Name :- Specify the Tax Name.
Tax Type :- Determines where the tax is selectable. Note : ‘None’ means a tax can’t be used by itself, however it can still be used in a group. ‘adjustment’ is used to perform tax adjustment.
Tax Computation :- Select the Tax Computation from the list.
Tax Scope :- Restrict the use of taxes to a type of product.
Active :- Set active to false to hide the tax without removing it.
Amount :- Set Amount for tax.
Distribution for Invoices :- Distribution when the tax is used on an invoice.
Distribution for Credit Notes :- Distribution when the tax is used on a refund.
Journals
Go to menu .
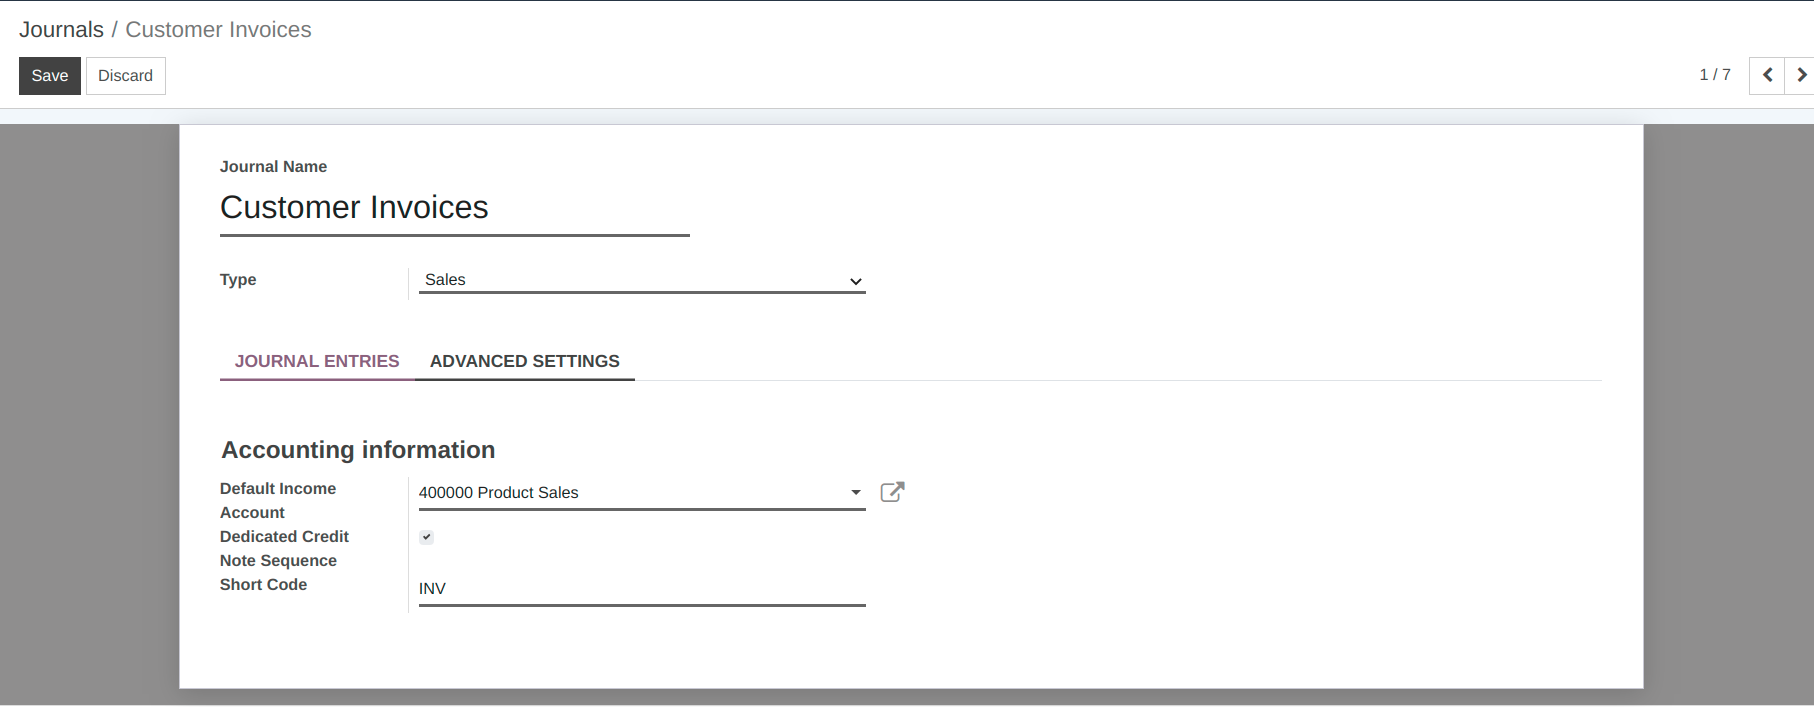
Journal Name :- Specify the Journal Name.
Type :- Select a journal type from the list.
Default Income Account :- Select a Default Income Account from the list.
Dedicated Credit Note Sequence :- Check this box if you don’t want to share the same sequence for invoices and credit notes made from this journal.
Short Code :- Shorter name used for display. The journal entries of this journal will also be named using this prefix by default.
How to create Customer
Go to .
Click on Create to create a new Customer.
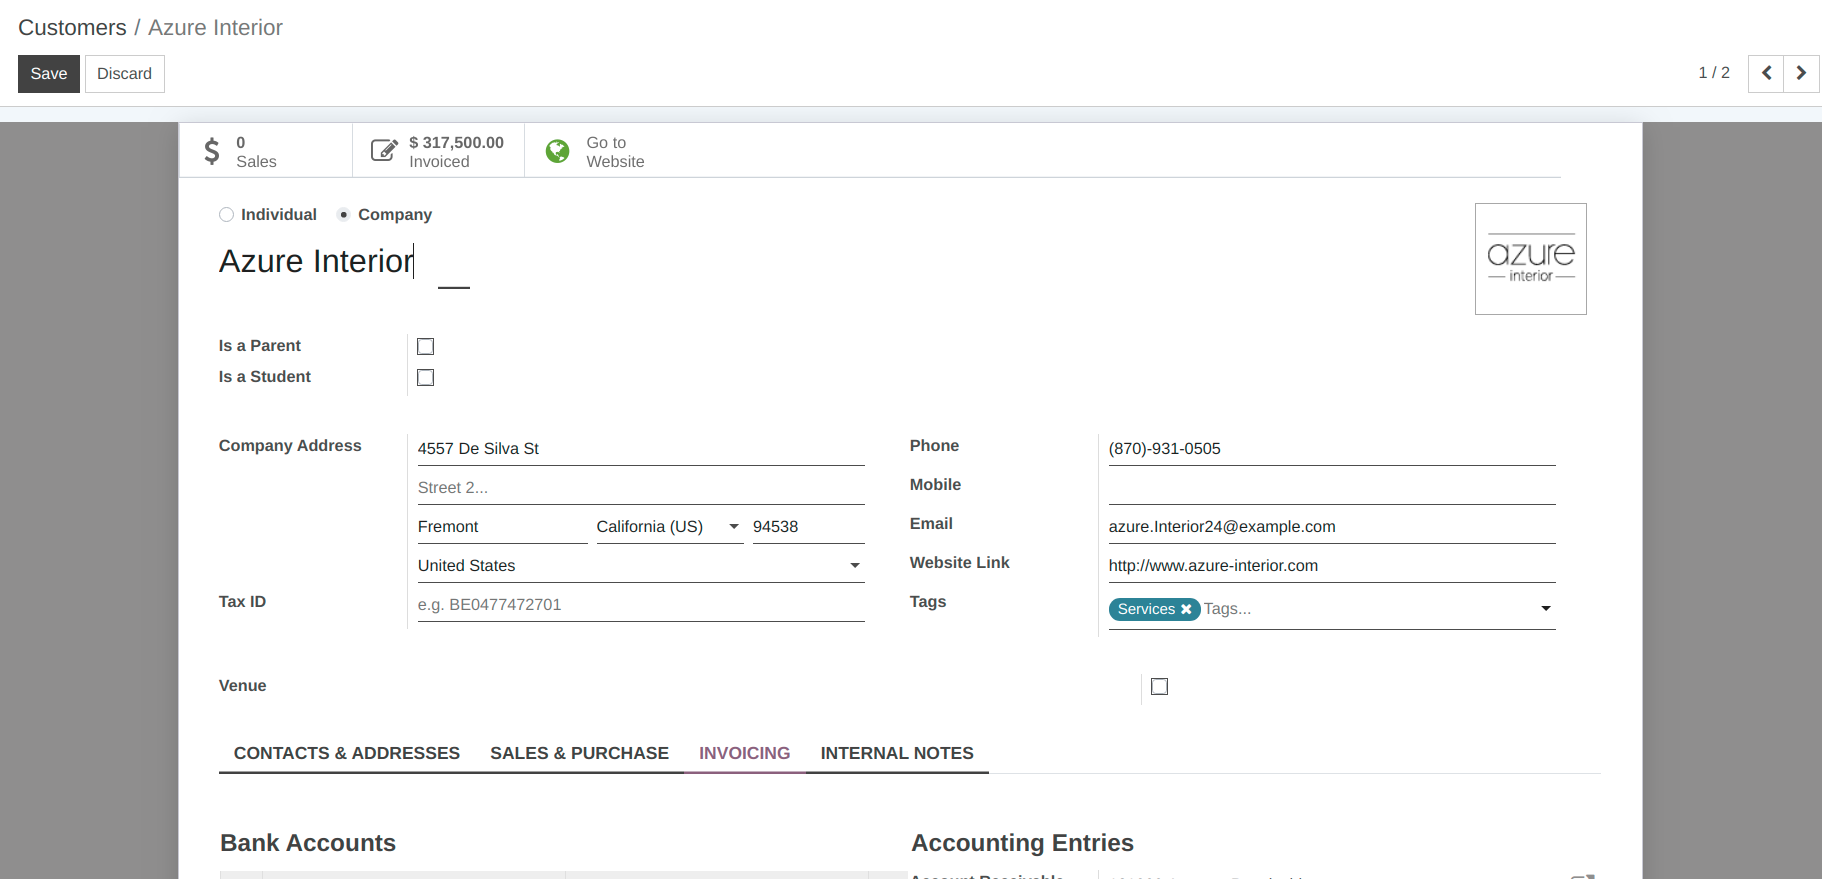
Name :- You can provide the name of the customer in the name field.
Photo :- You can upload a photograph of customer from the image widget on the top-right corner.
Company Address :- You can add Address details like street, city, state, zip code and country in the provided fields.
Tax ID :- Set the Tax ID of customer.
Phone :- Add the phone number of the customer.
Mobile :- Add the Mobile number of the customer.
Email :- Add the Email of the customer.
Website Link :- Add the Website Link of the customer.
Tags :- Select the tag of customer like sponsor or stakeholder.
Invoicing
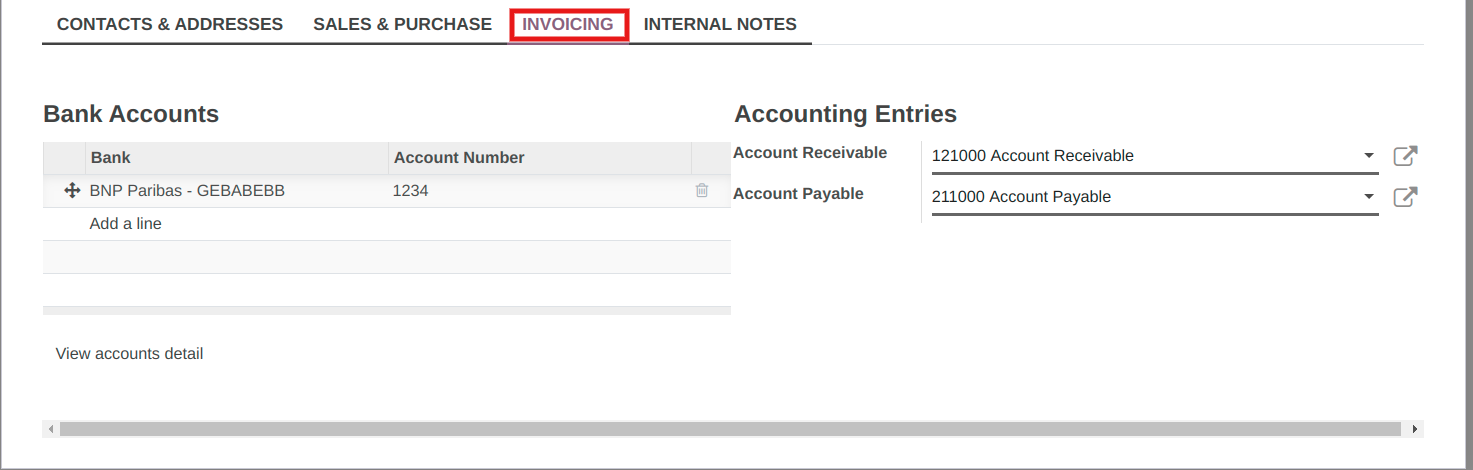
Bank Accounts :- You can add Bank Information in tha Bank Accounts field.
Accounting Entries :- You can select Receivable account in Account Receivable field and Payable Account in Account Payable field.
How to create Invoice
Go to .
Click on Create to create a new Invoice.
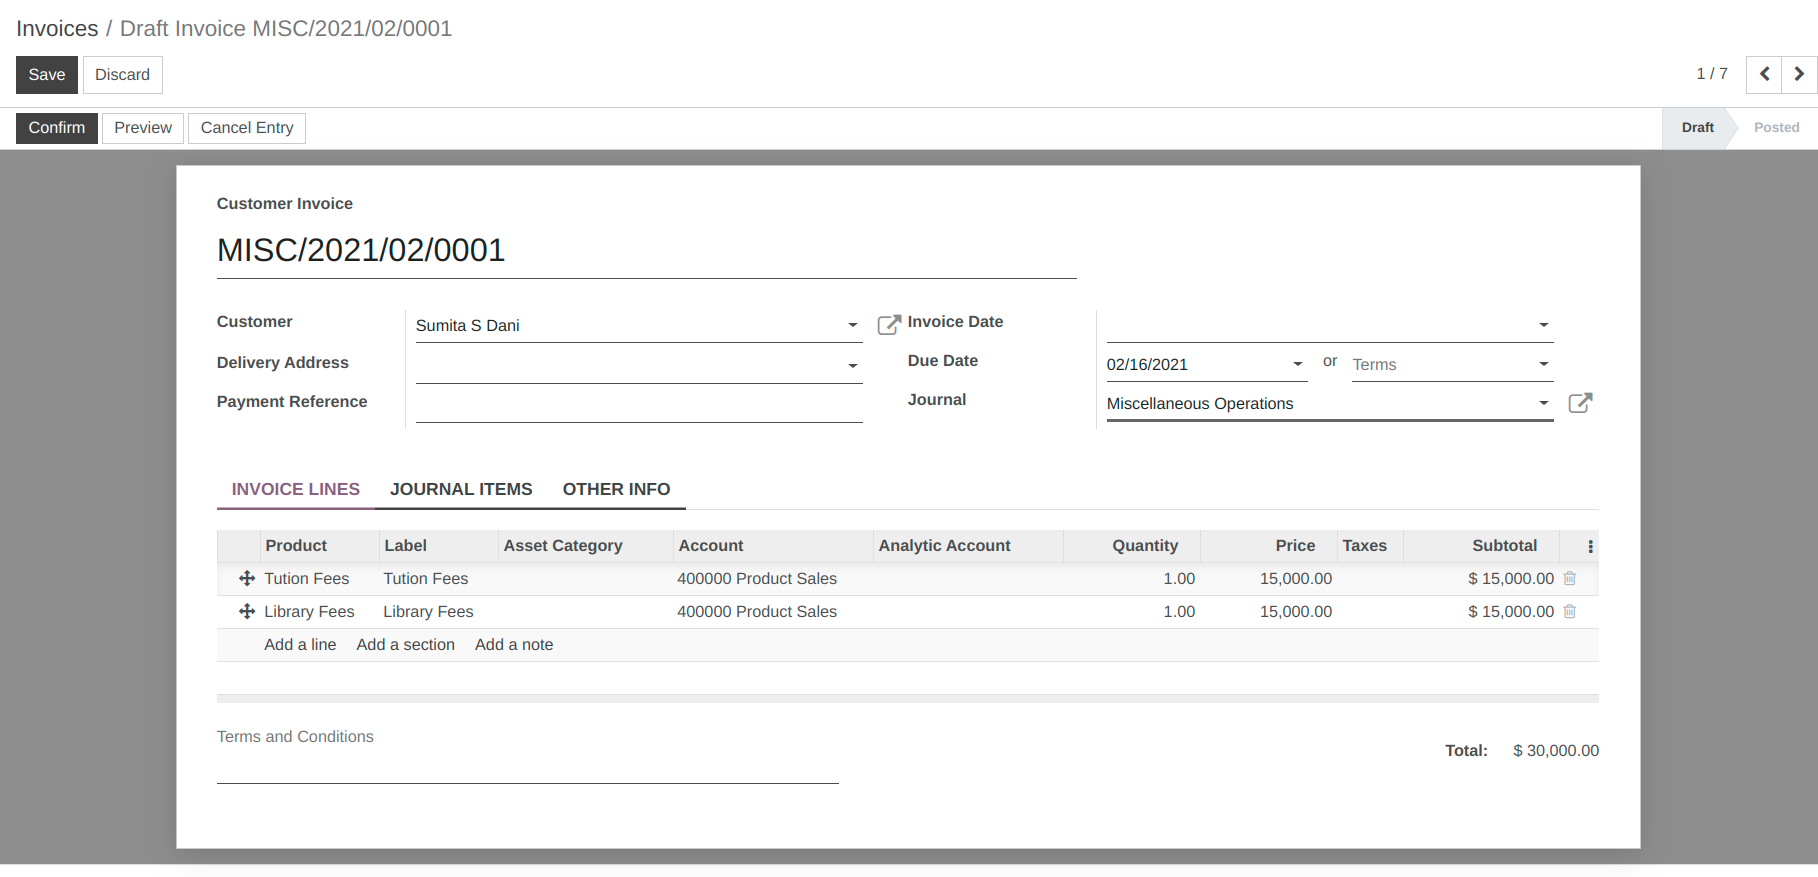
Customer :- Select the customer in customer field.
Delivery Address :- Delivery Address for current invoice.
Reference :- Add Reference number for current invoice.
Invoice Date :- Set Invoice Date in invoice date field.
Payment Terms :- You can set payment terms for current invoice.
Journal :- Select Journal in journal field.
Other Info
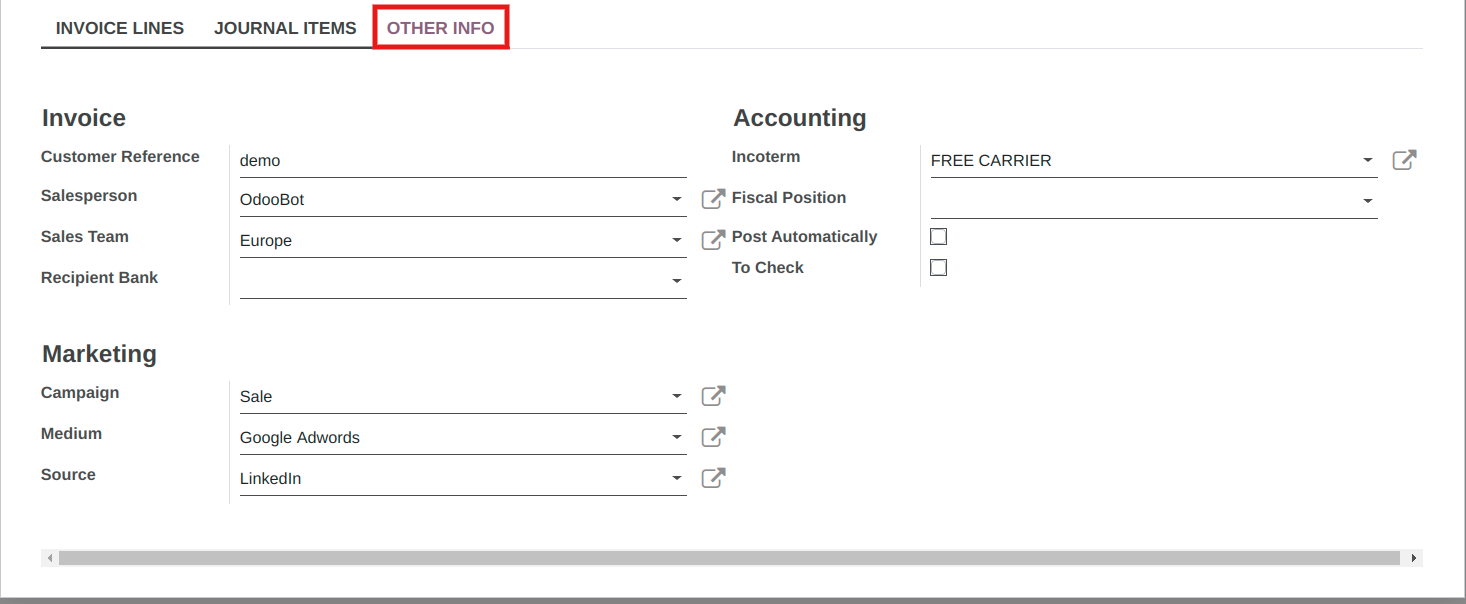
Salesperson :- You can select salesperson in this field.
Sales Team :- You can select sales team in this field.
Incoterm :- You can select incoterm in this field.
Payment Reference :- You can add payment reference in this field.
Recipient Bank :- You can select bank account in this field.
Campaign :- You can select campaign in this field.
Medium :- You can select marketing medium in this field.
Source :-You can select marketing source in this field.
How to create Vendor
Go to .
Click on Create to create a new Vendor.
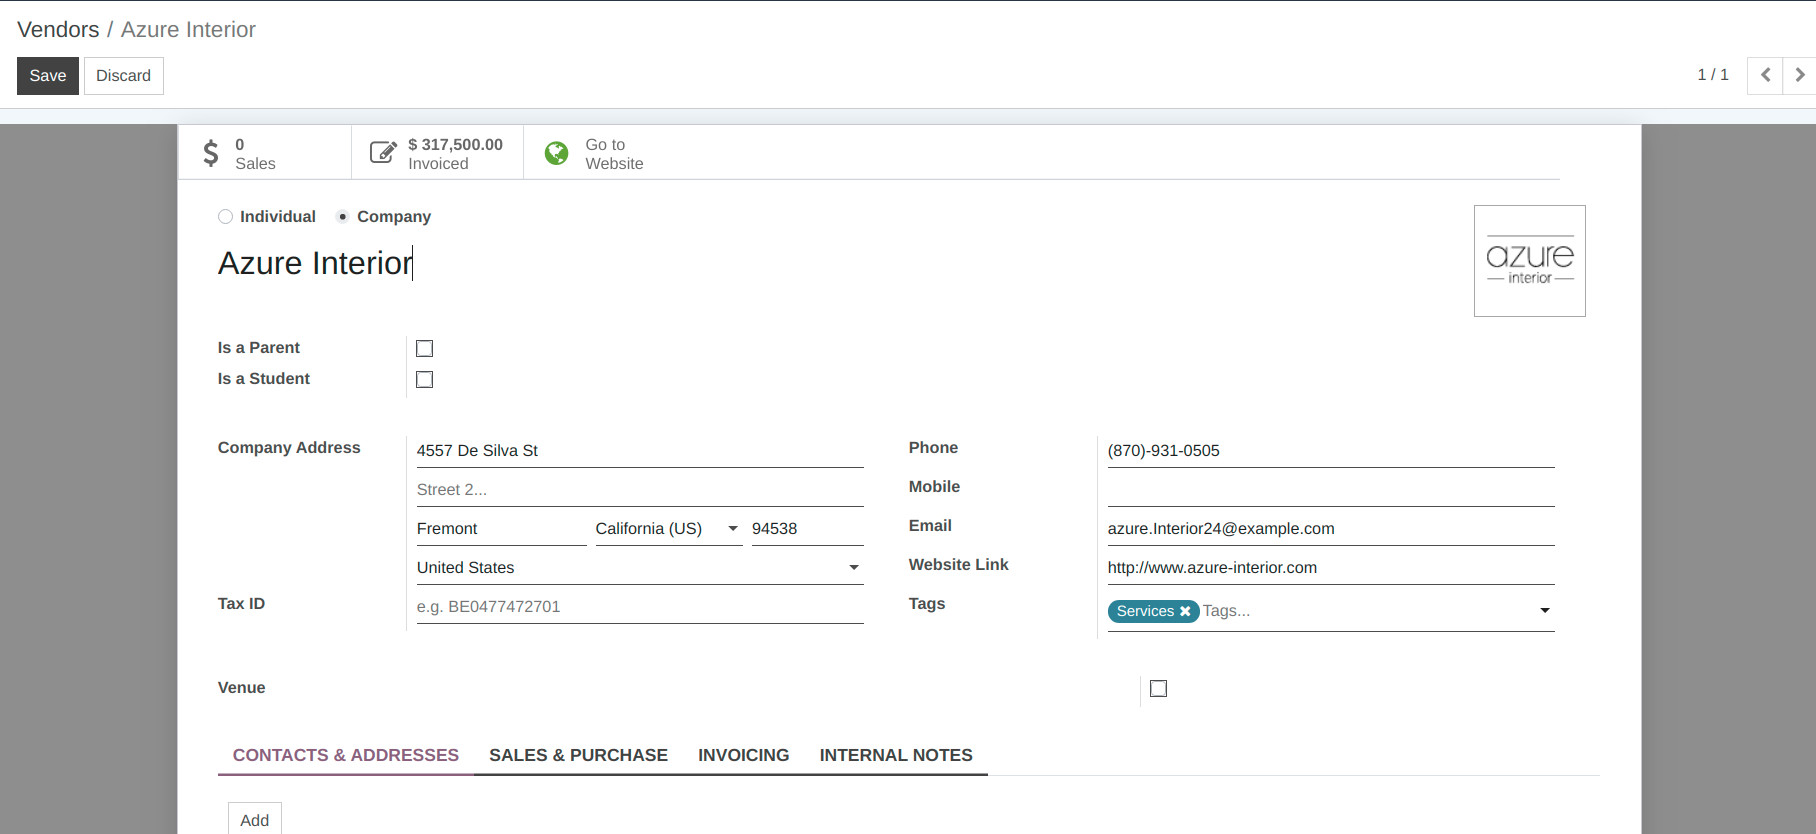
Name :- You can provide the name of the vendor in the name field.
Photo :- You can upload a photograph of vendor from the image widget on the top-right corner.
Company Address :- You can add Address details like street, city, state, zip code and country in the provided fields.
Tax ID :- Set the Tax ID of vendor.
Phone :- Add the phone number of the vendor.
Mobile :- Add the Mobile number of the vendor.
Email :- Add the Email of the vendor.
Website Link :- Add the Website Link of the vendor.
Tags :- Select the tag of vendor like sponsor or stakeholder.
Invoicing
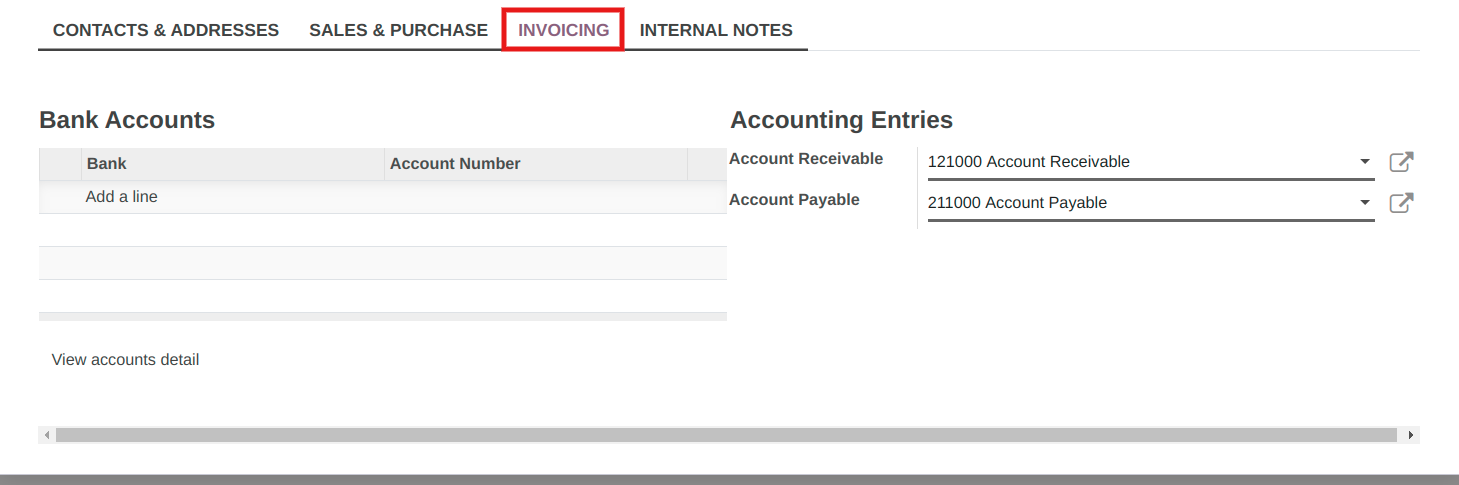
Bank Accounts :- You can add Bank Information in tha Bank Accounts field.
Accounting Entries :- You can select Receivable account in Account Receivable field and Payable Account in Account Payable field.
How to create Vendor Bill
Go to .
Click on Create to create a new Vendor Bill.
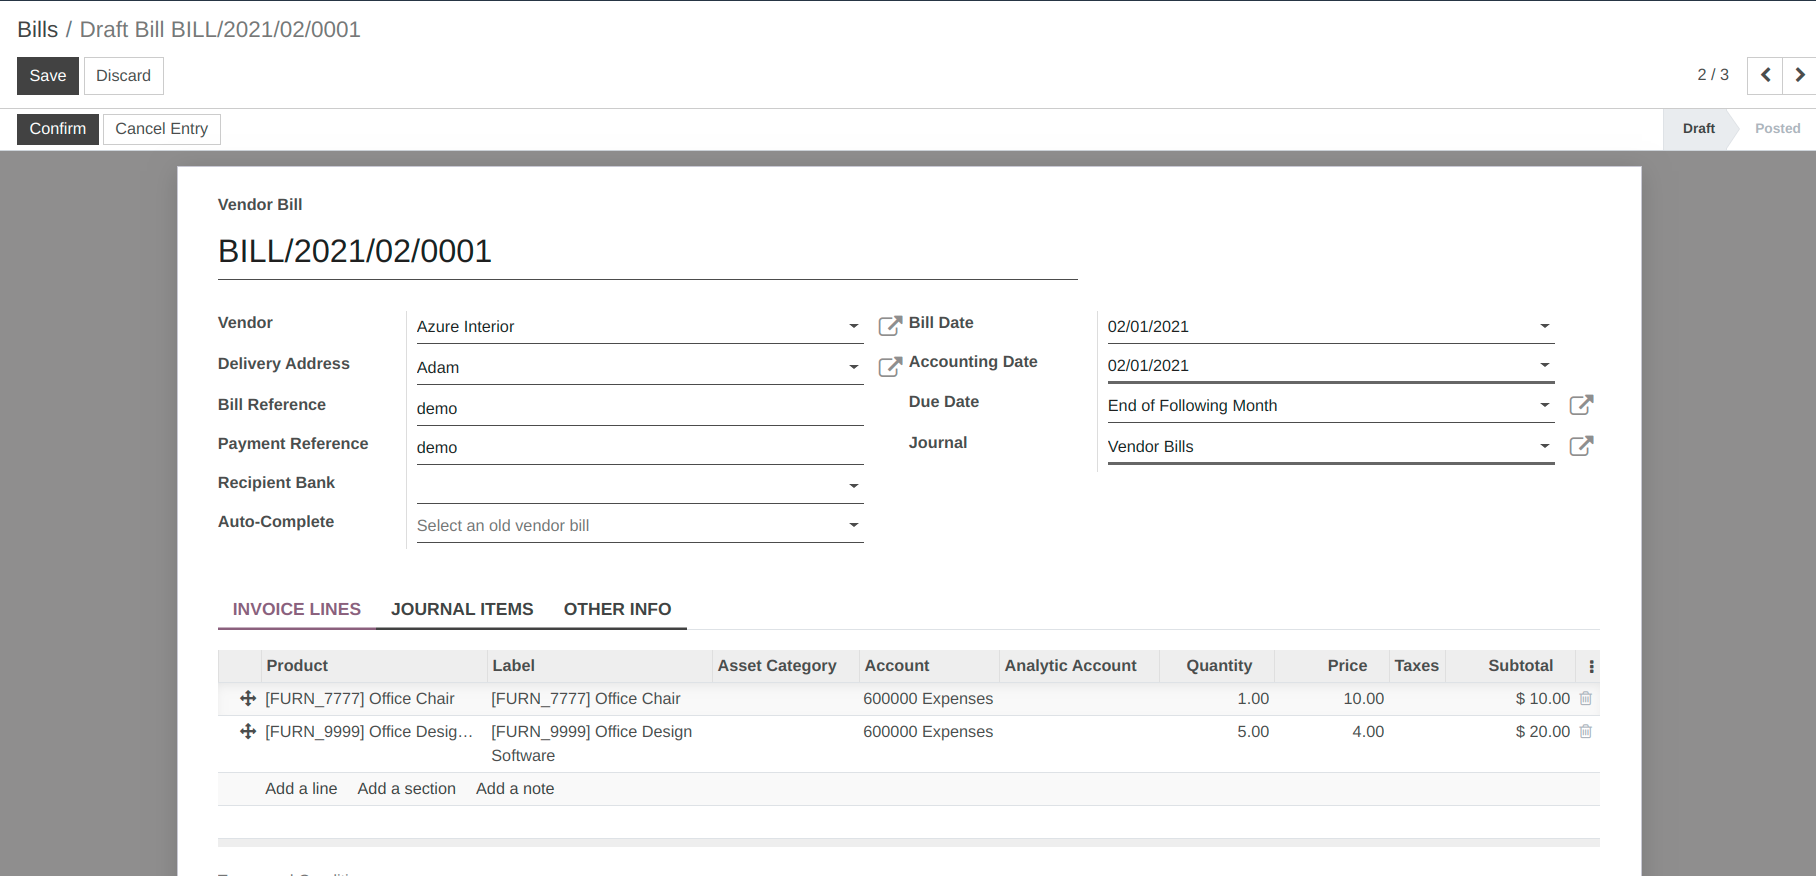
Customer :- Select the customer in Vendor field.
Delivery Address :- Delivery Address for current invoice.
Bill Reference :- Add Reference number for current bill.
Payment Reference :- Add Payment Reference number for current bill.
Recipient Bank :- You can select bank account in this field.
Bill Date :- Set Bill Date in Bill date field.
Accounting Date :- Set Accounting Date in Accounting date field.
Journal :- Select Journal in journal field.
Other Info
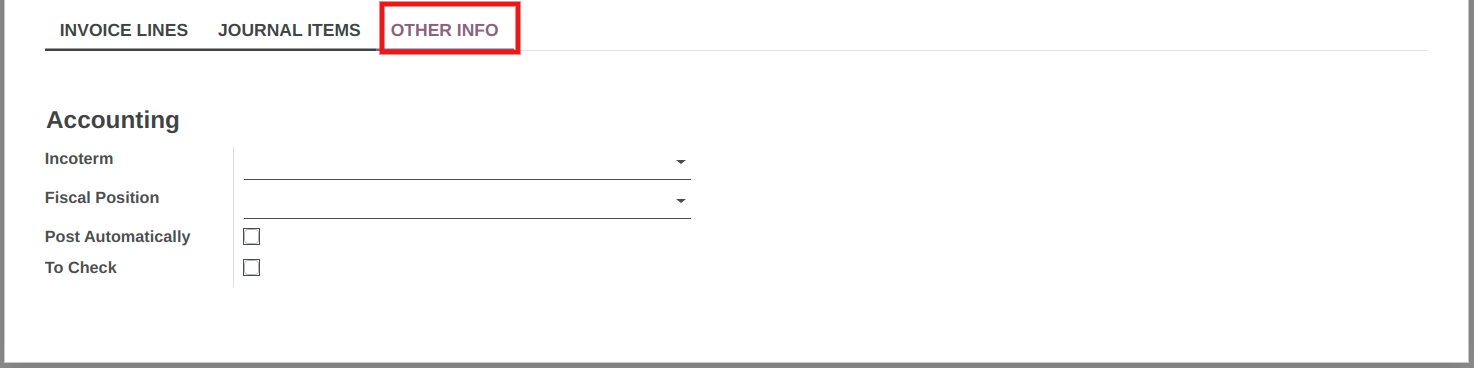
Incoterm :- International Commercial Terms are a series of predefined commercial terms used in international transactions.
Fiscal positions :- Fiscal positions are used to adapt taxes and accounts for particular customers or sales orders/invoices.
Post Automatically :- If this checkbox is ticked, this entry will be automatically posted at its date.
To Check :- If this checkbox is ticked, it means that the user was not sure of all the related information at the time of the creation of the move and that the move needs to be checked again.
42. Setting up Outgoing Email
Configuration steps for Outgoing Email Setup
Go to mailtrap.io and Login with your google account.
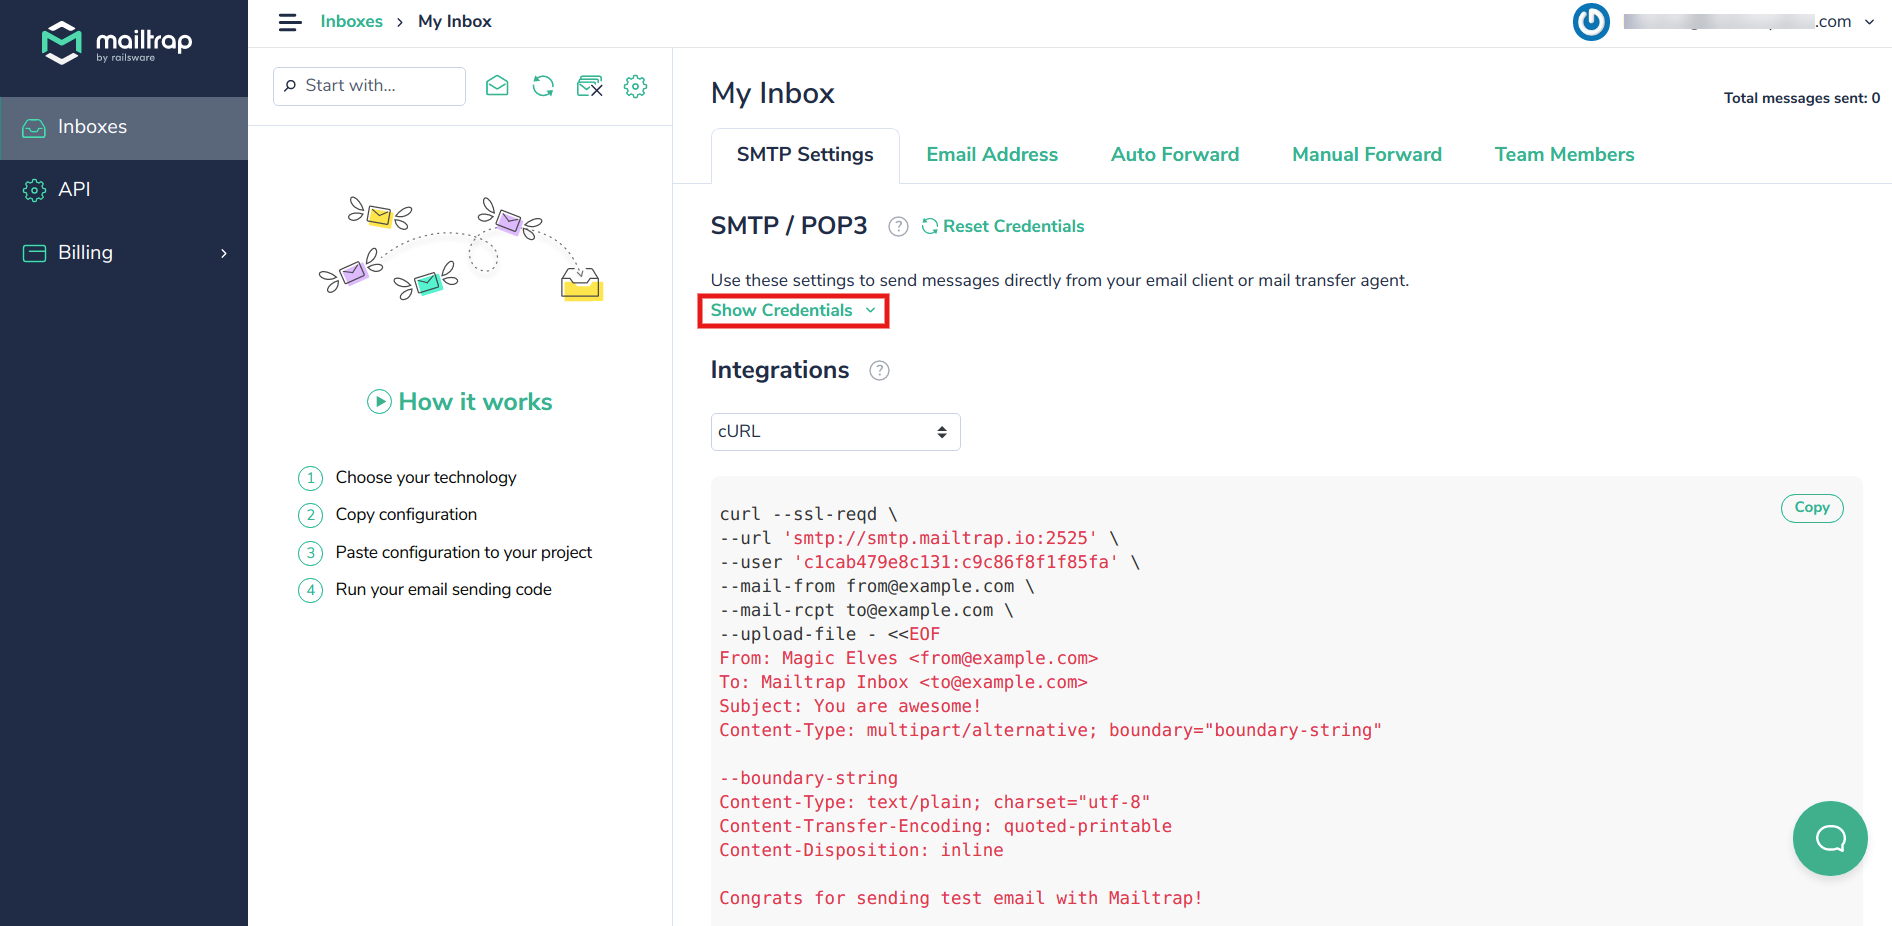
Click on Show Credentials. and Save your Host, Username and Password as it will be used further.
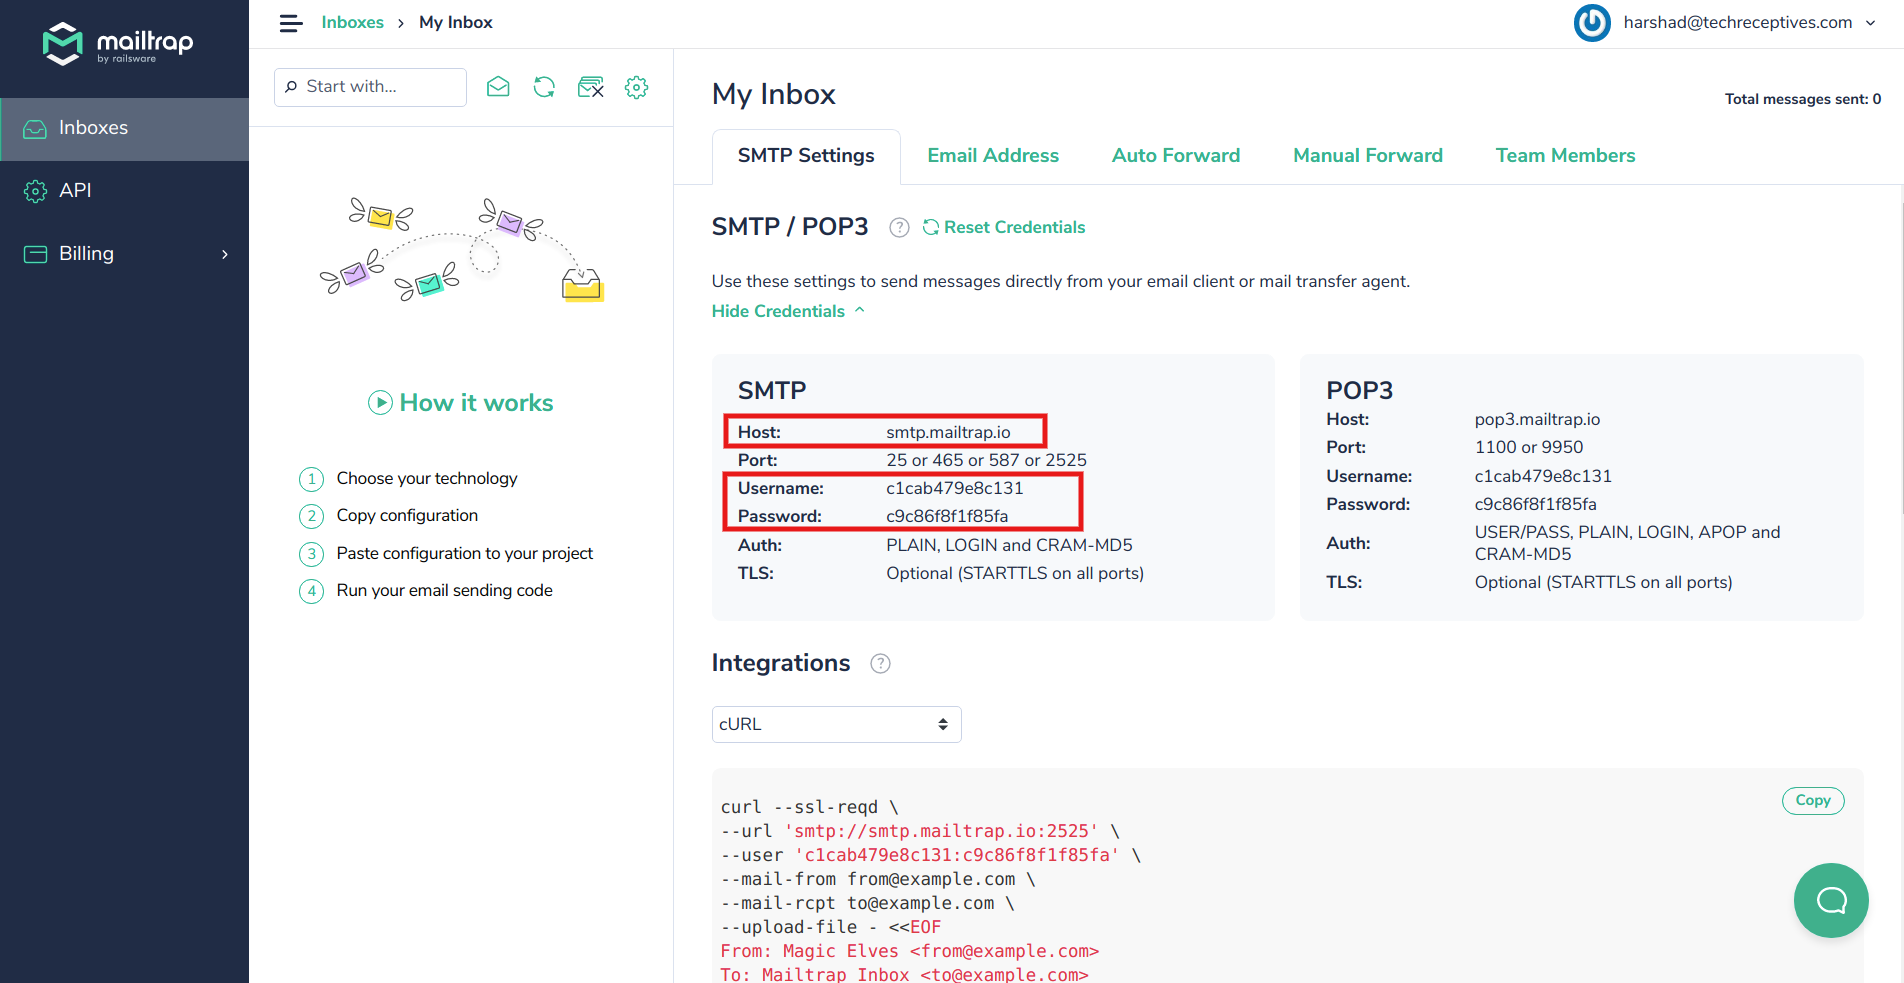
Setting up Outgoing Email in OpenEduCat
Go to Settings –> Technical –> Outgoing Mail Servers.
Click on Create to create a new Email Server.
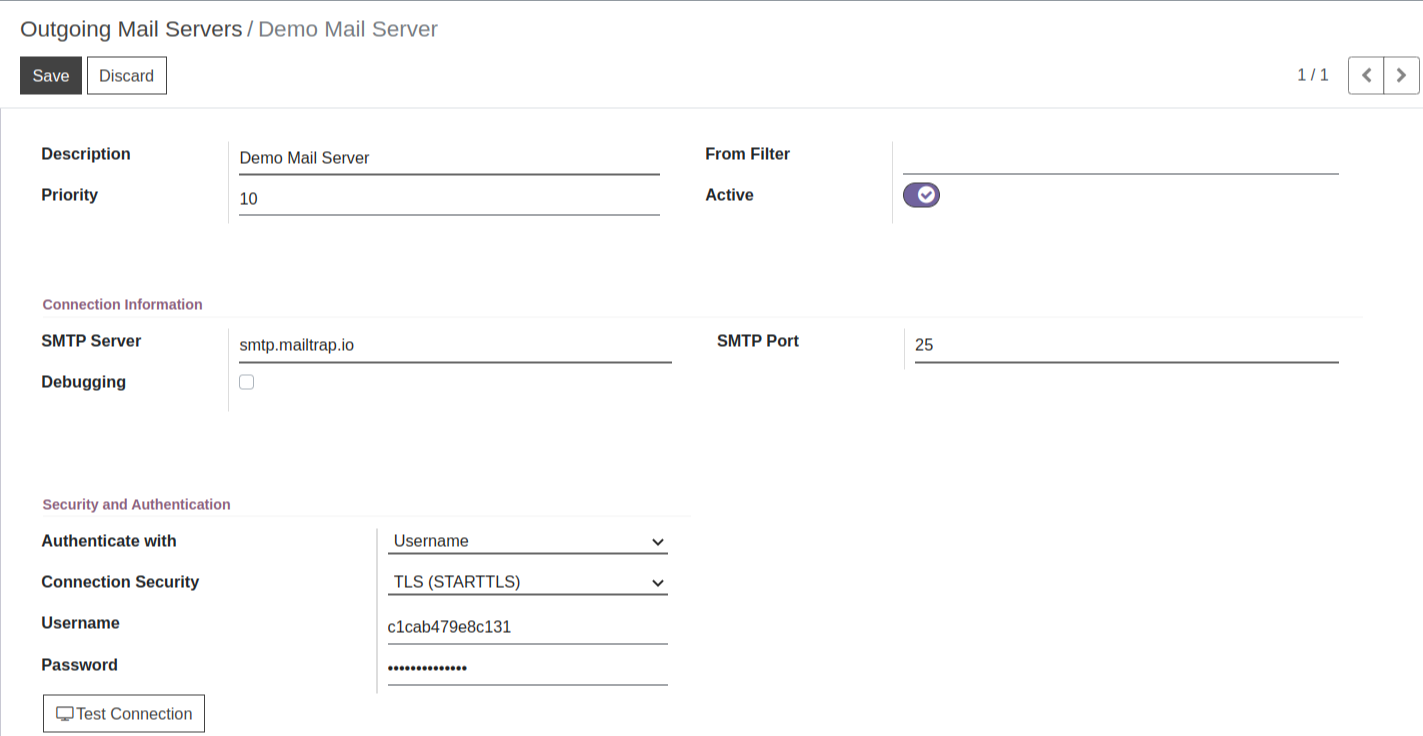
Description :- Set Description for mail server.
Priority :- Set Priority for mail server, Default Priority is 10.
SMTP Server :- Copy and Paste Host from mailtrap here.
SMTP Port :- Usually 465 for TLS.
Connection Security :- Sessions are encrypted with TLS(STARTTLS) through a dedicated port.
Username & Password :- Copy and Paste Username & Password from mailtrap here.
Click on Test Connection.
43. Setting of Translation
How to Active Particular Language
Go to .
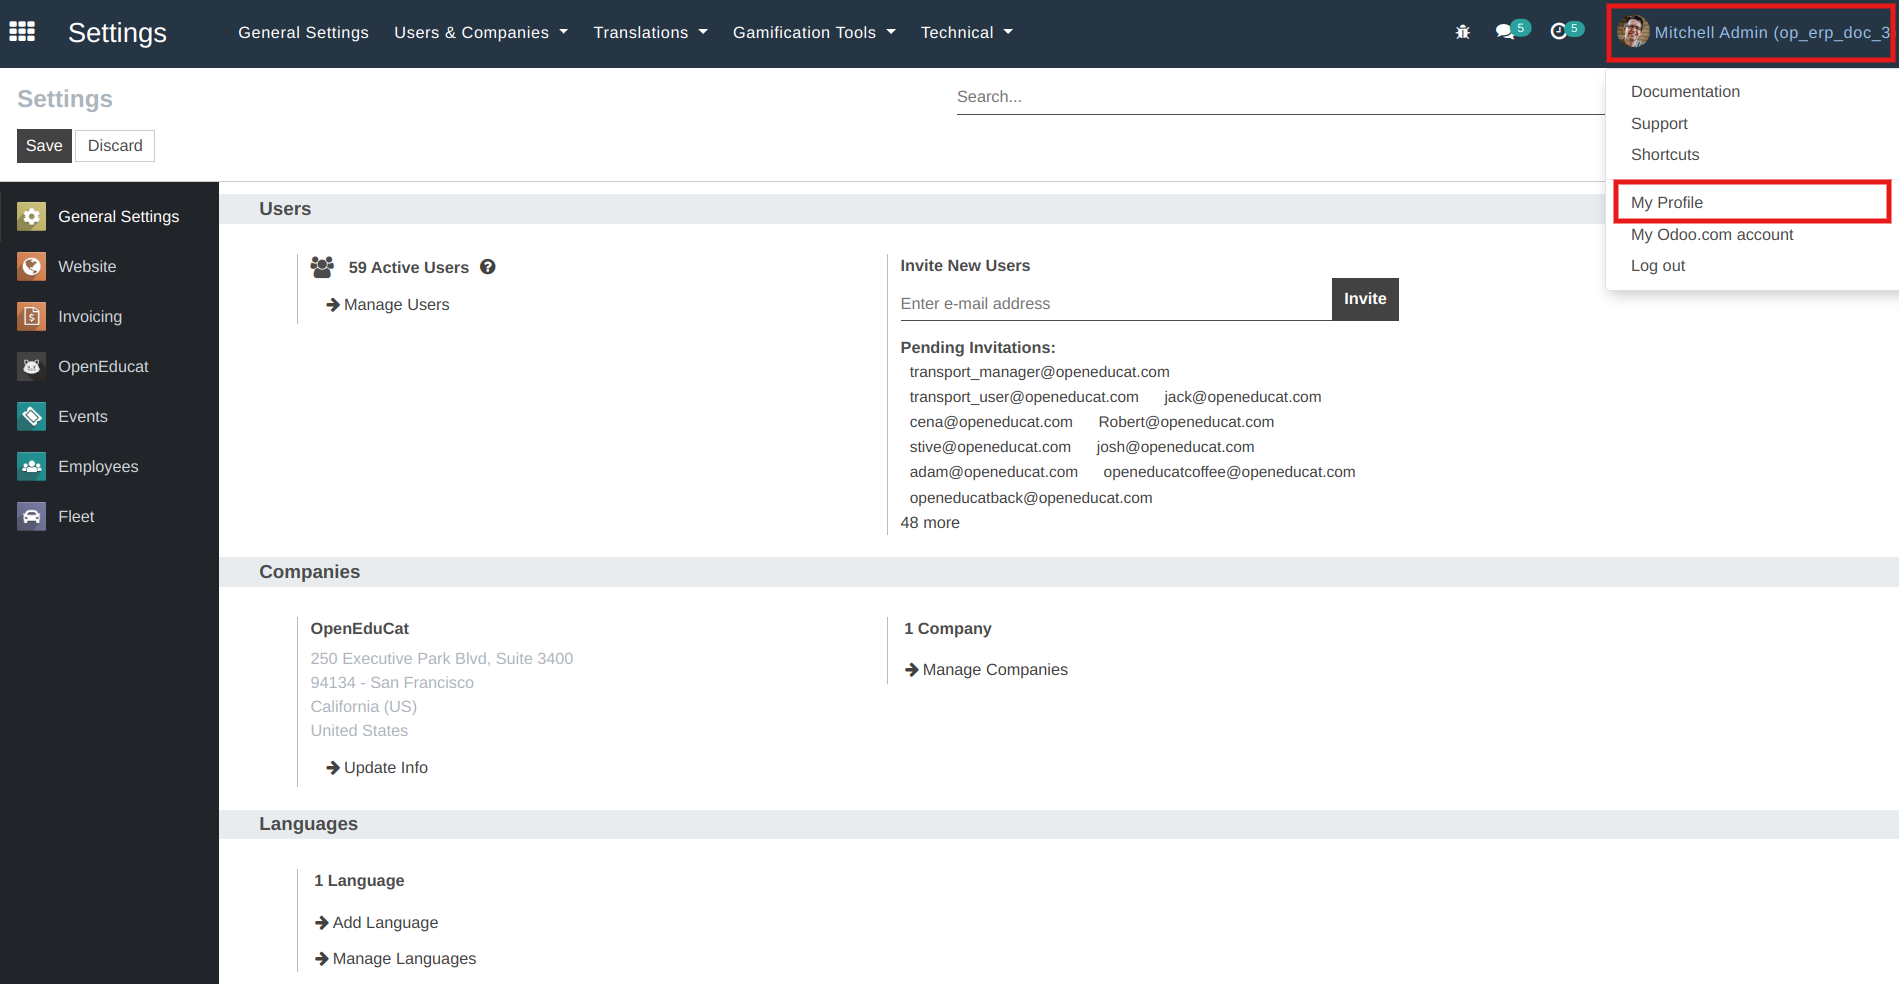
Click on More Languages button.
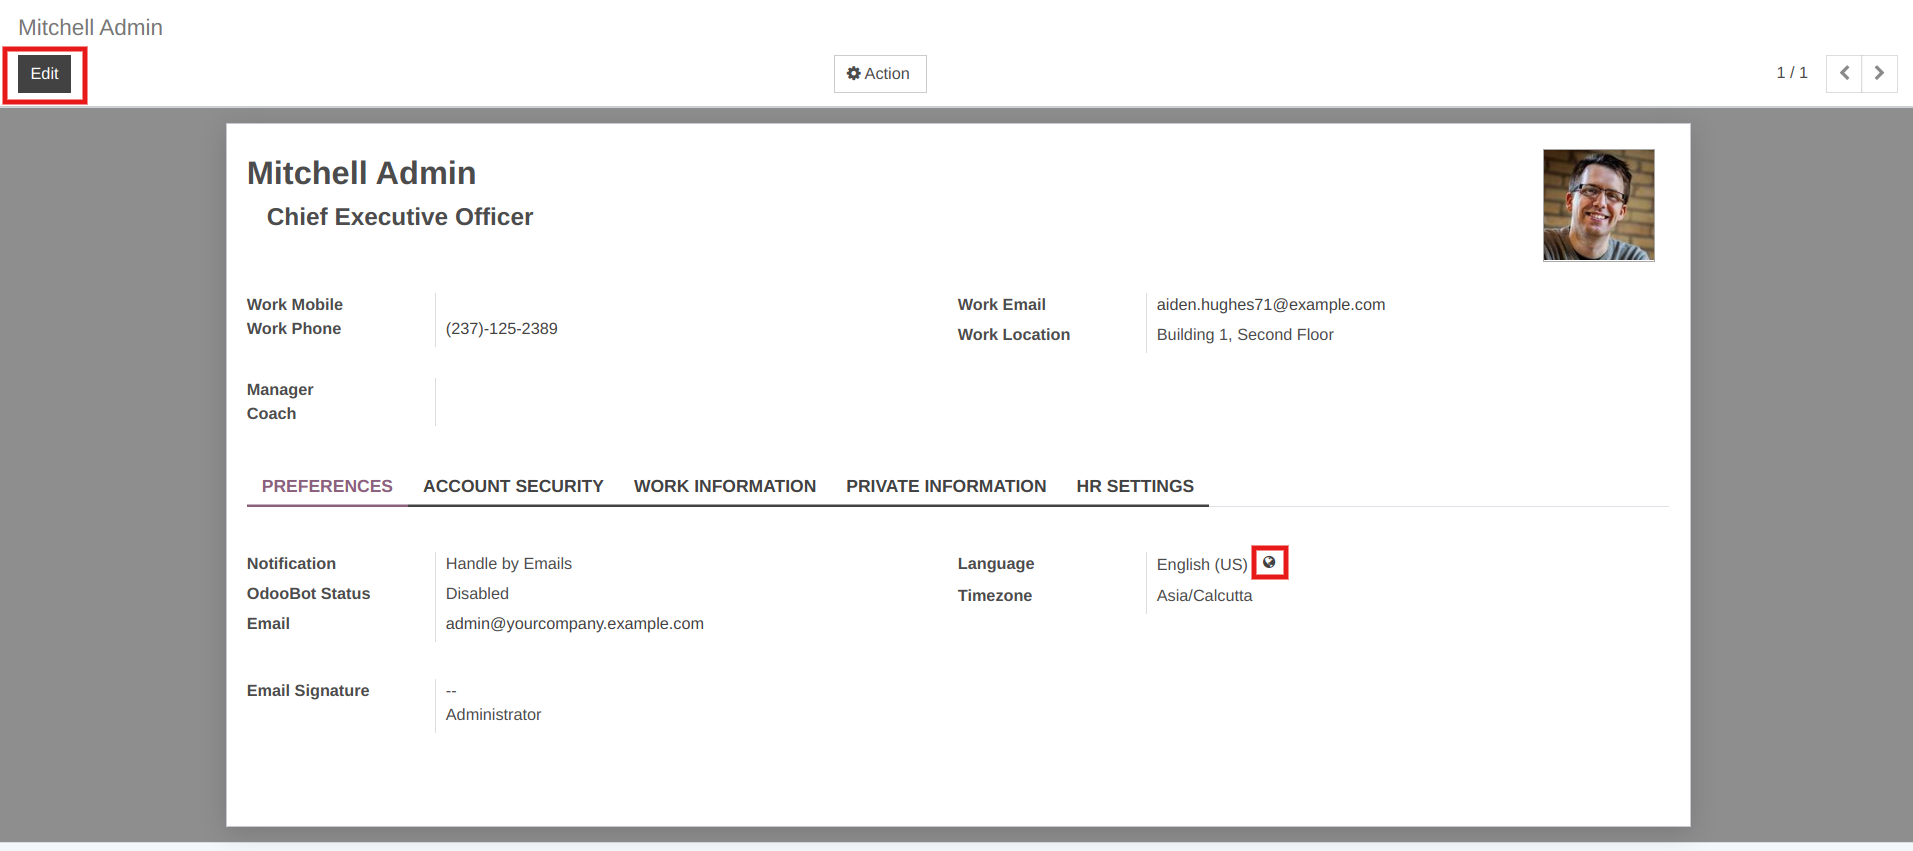
Select the language you want to use.
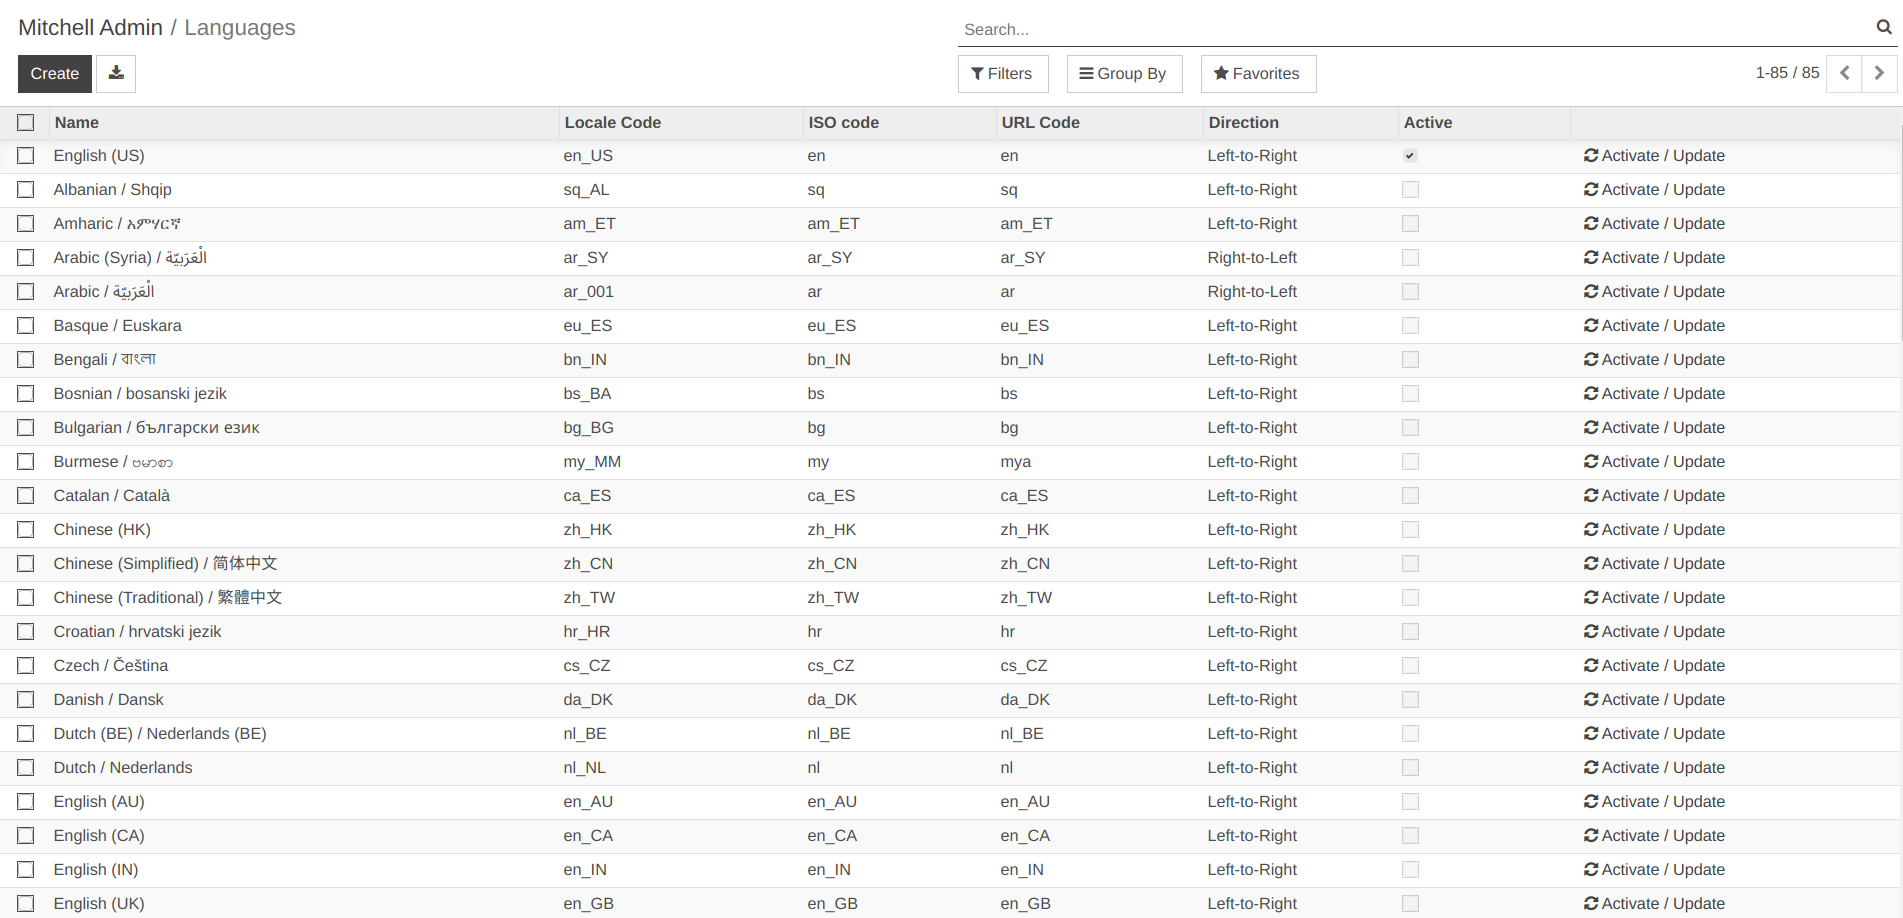
Click on Activate and Translate button and a wizard will open.

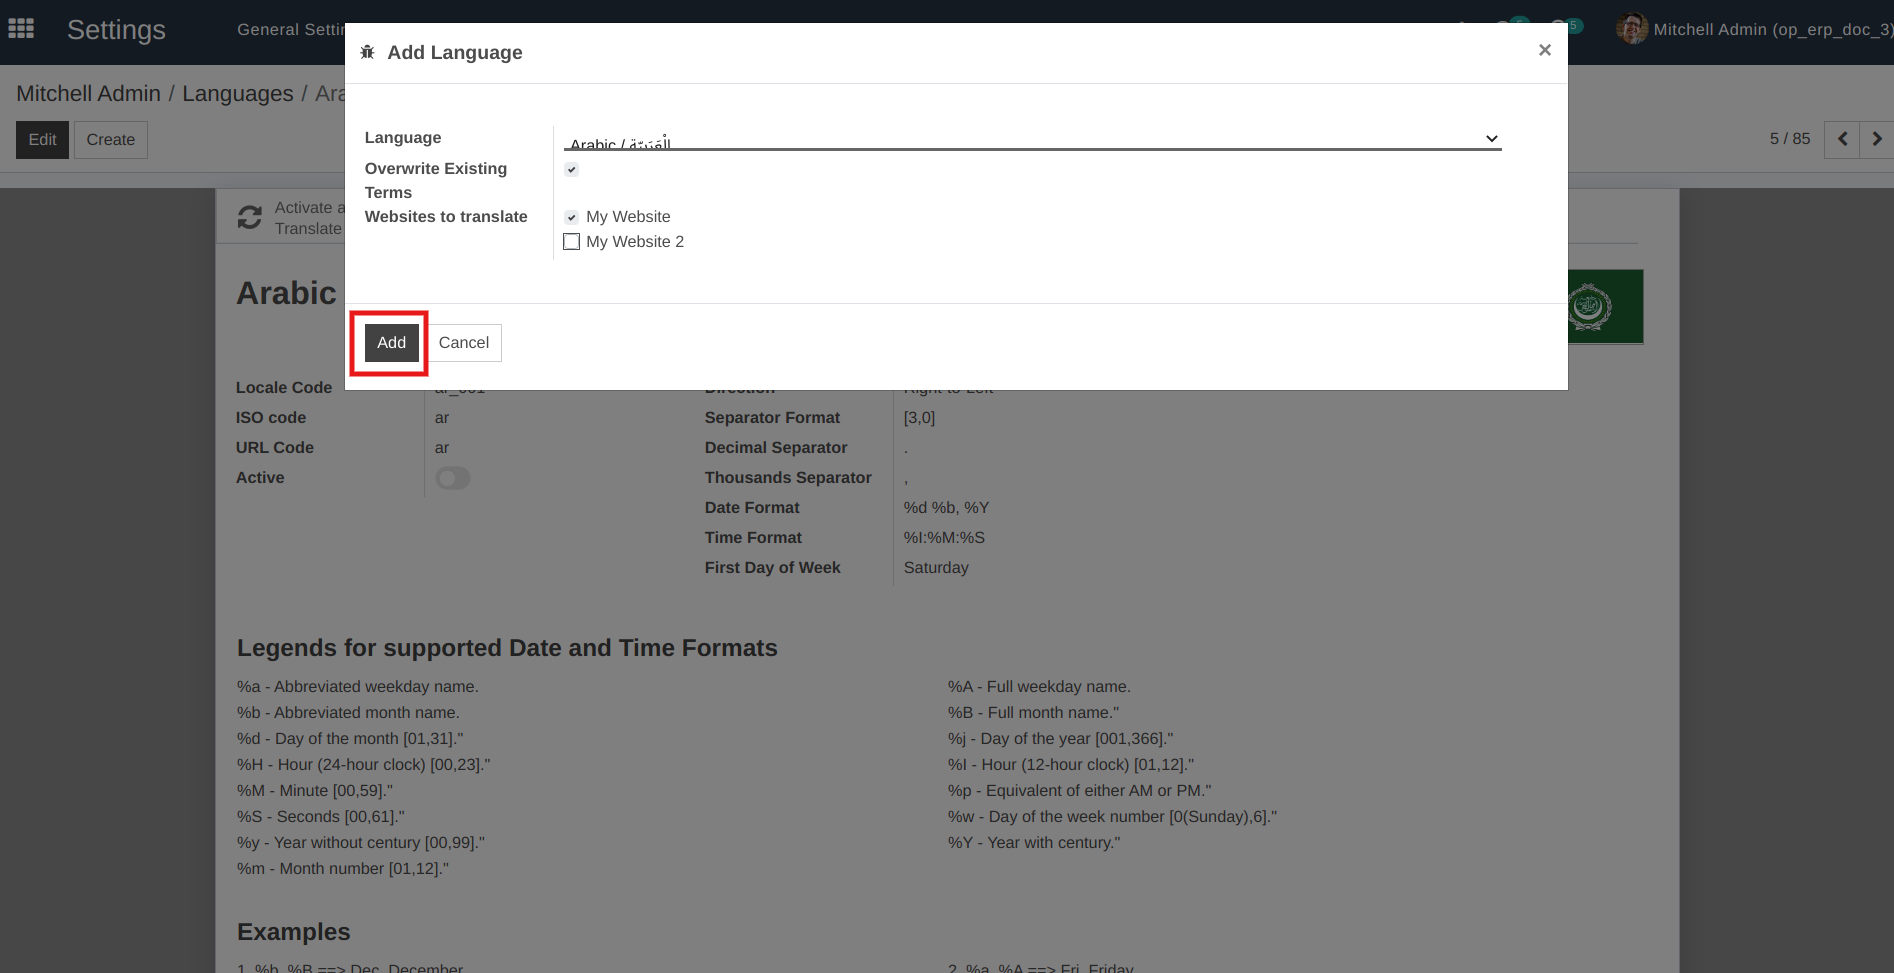
Overwrite Existing Terms :- If you want to Overwrite Existing Terms click on Overwrite Existing Terms checkbox.
Websites to translate :- If you want to translate websites click on Websites to translate checkbox.
Then click on
Addbutton.
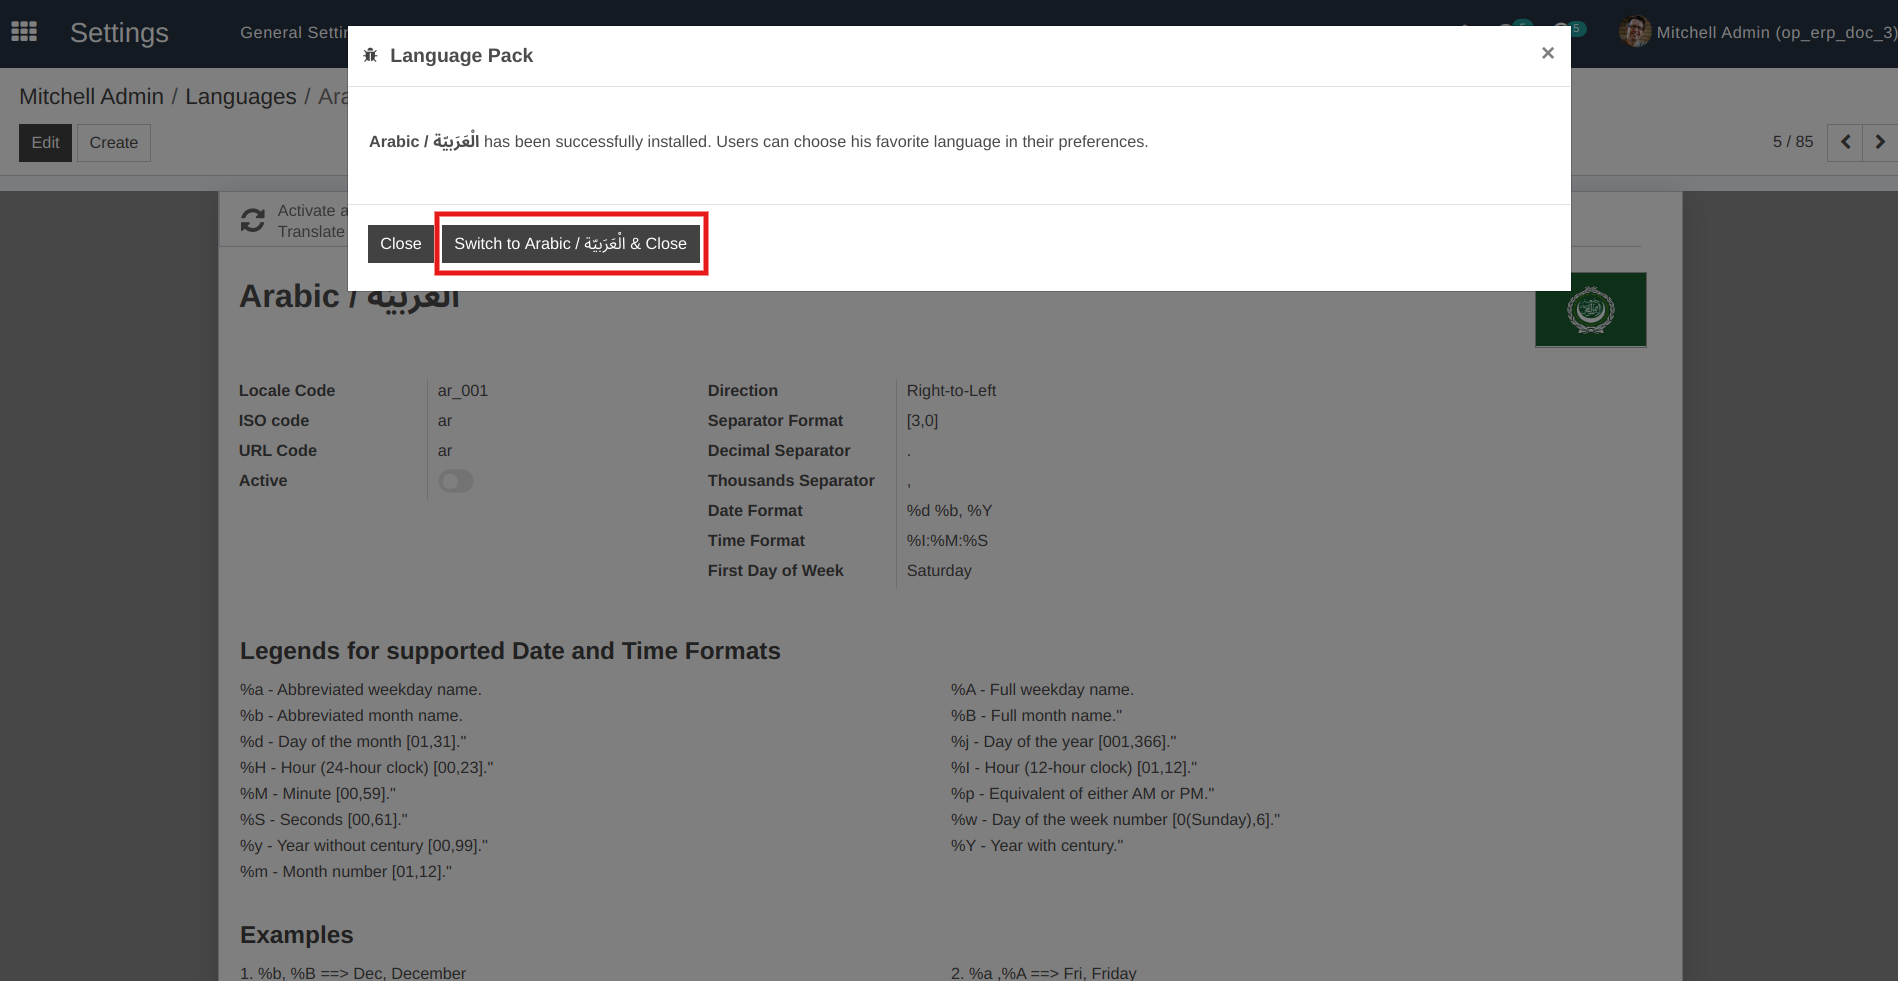
Click on Switch to Your Language & Close.
44. How to create parent user
To create Odoo users for parents, follow the below steps:
Go to
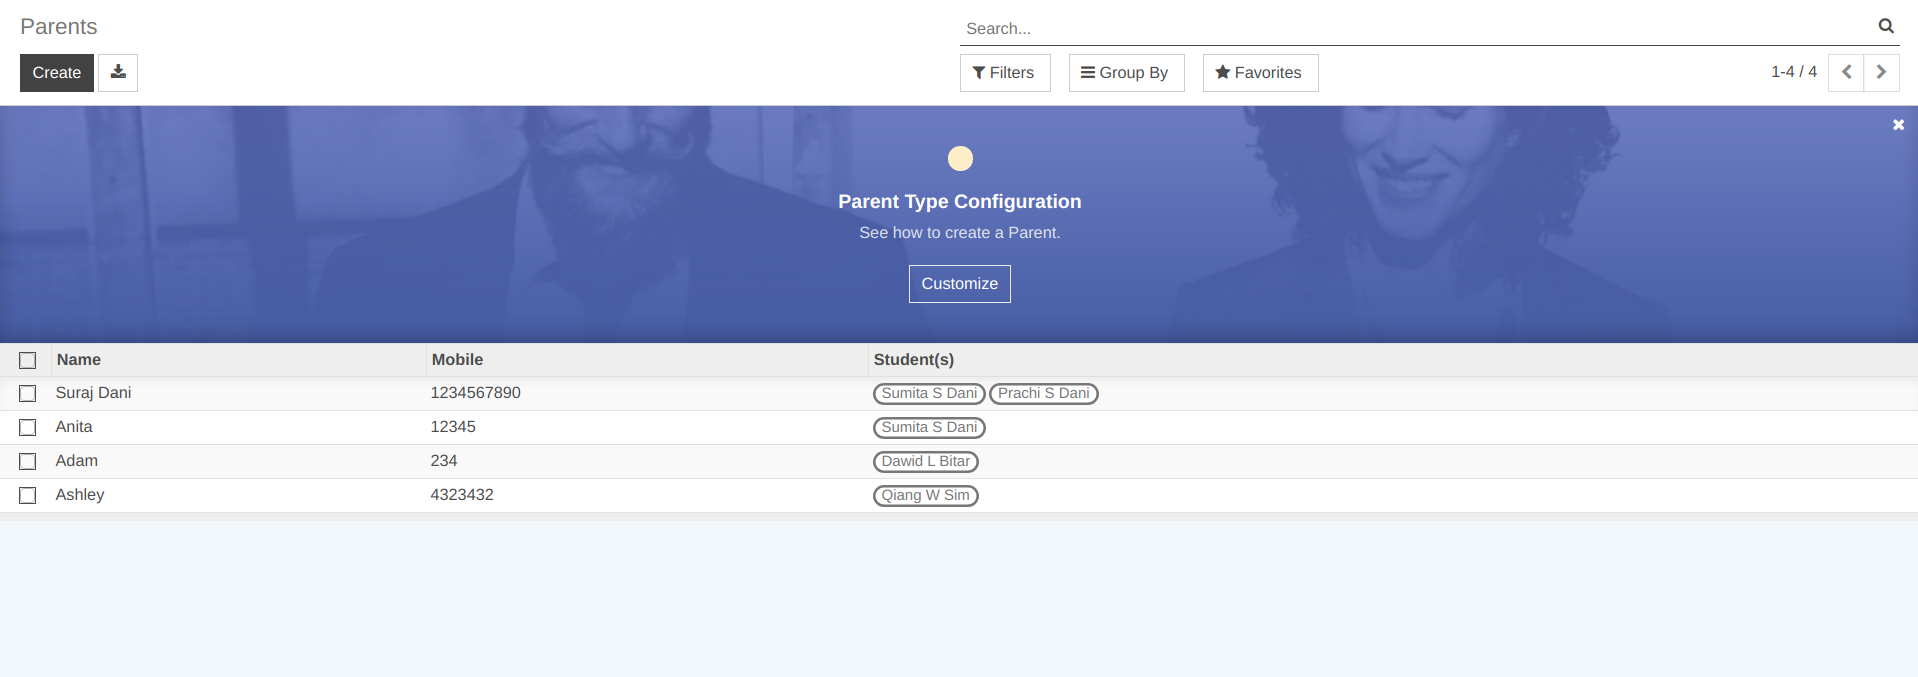
Select the parent profile of which you want to create Odoo user.
Click on Create Parent User to create Odoo user for parent in Openeducat.
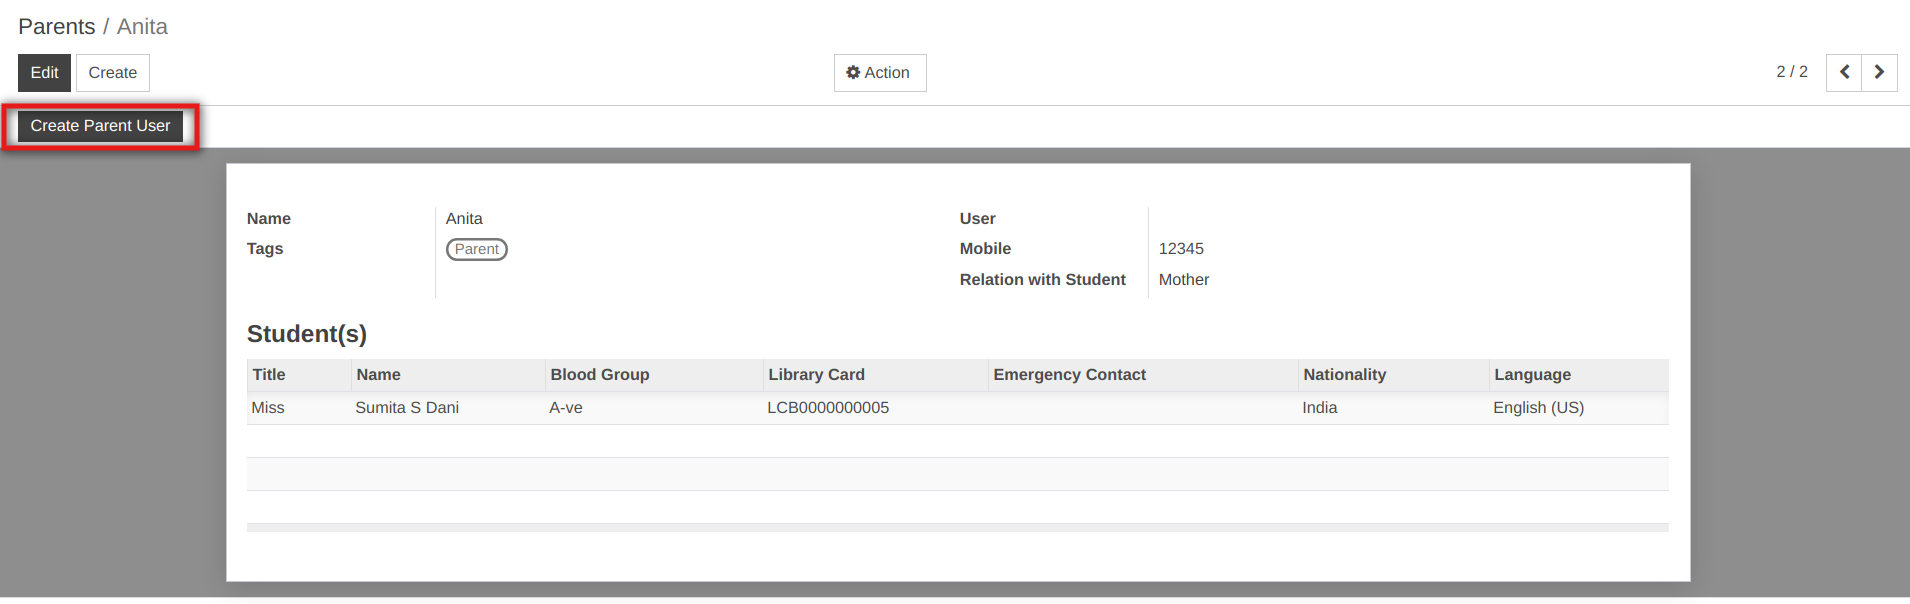
45. How to configure website
When you install the core module you can see website configuration page.

Click on Let's do it.
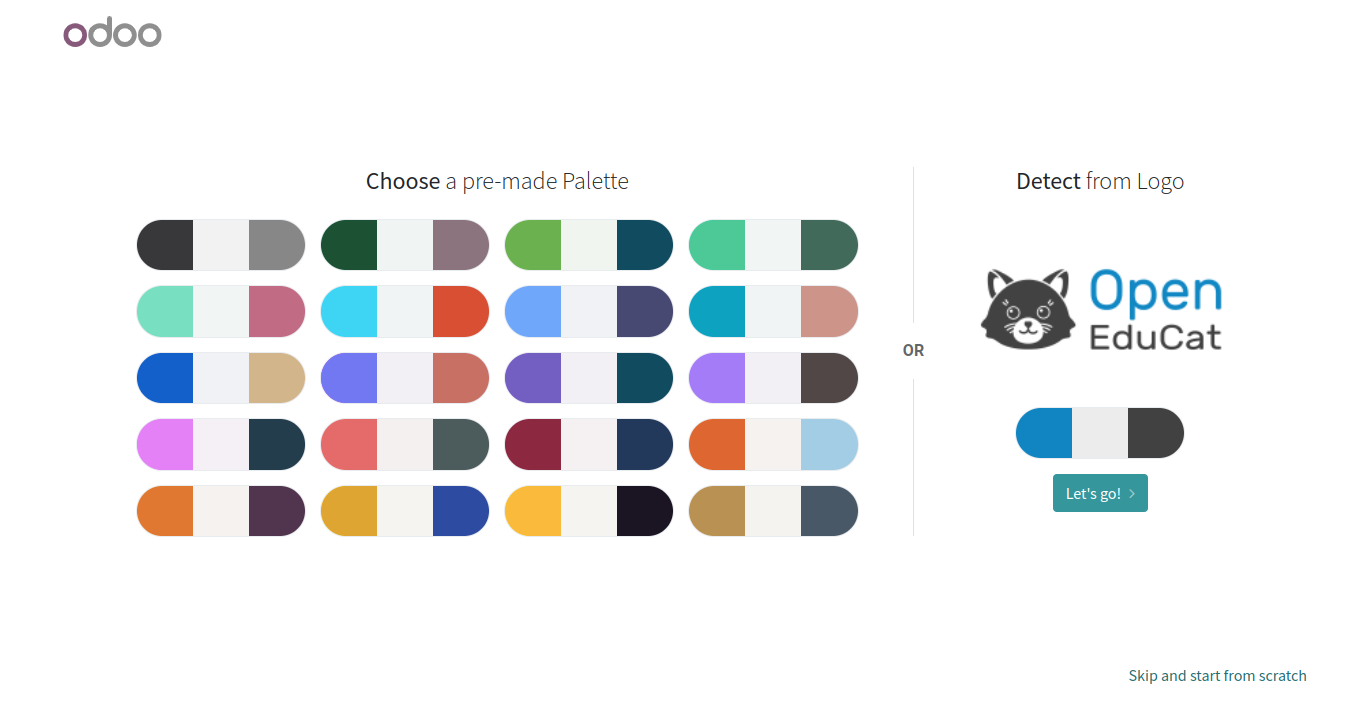
Here you can choose a pre-made palette or detect from Logo.
Choose the palette and click on Let's go! button.
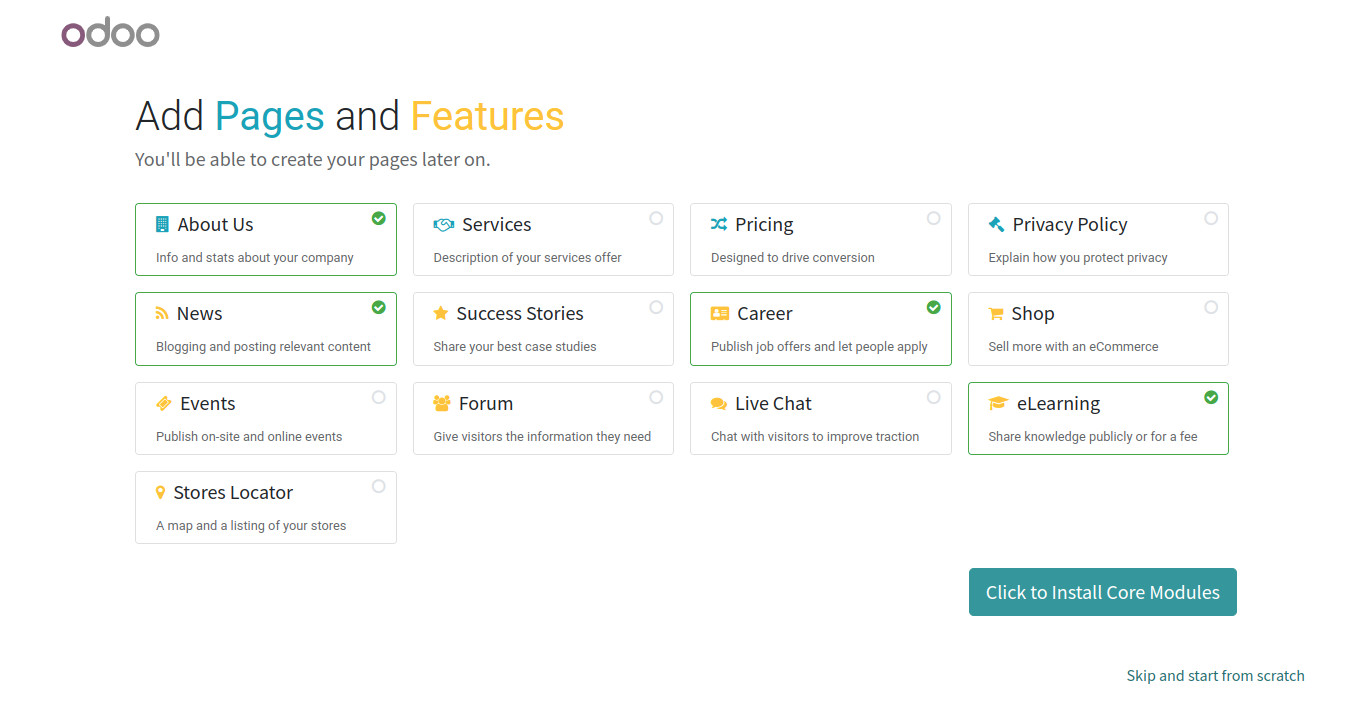
Here you can select and add pages and features in your website.
After select the pages and features click on Click to install core modules button.
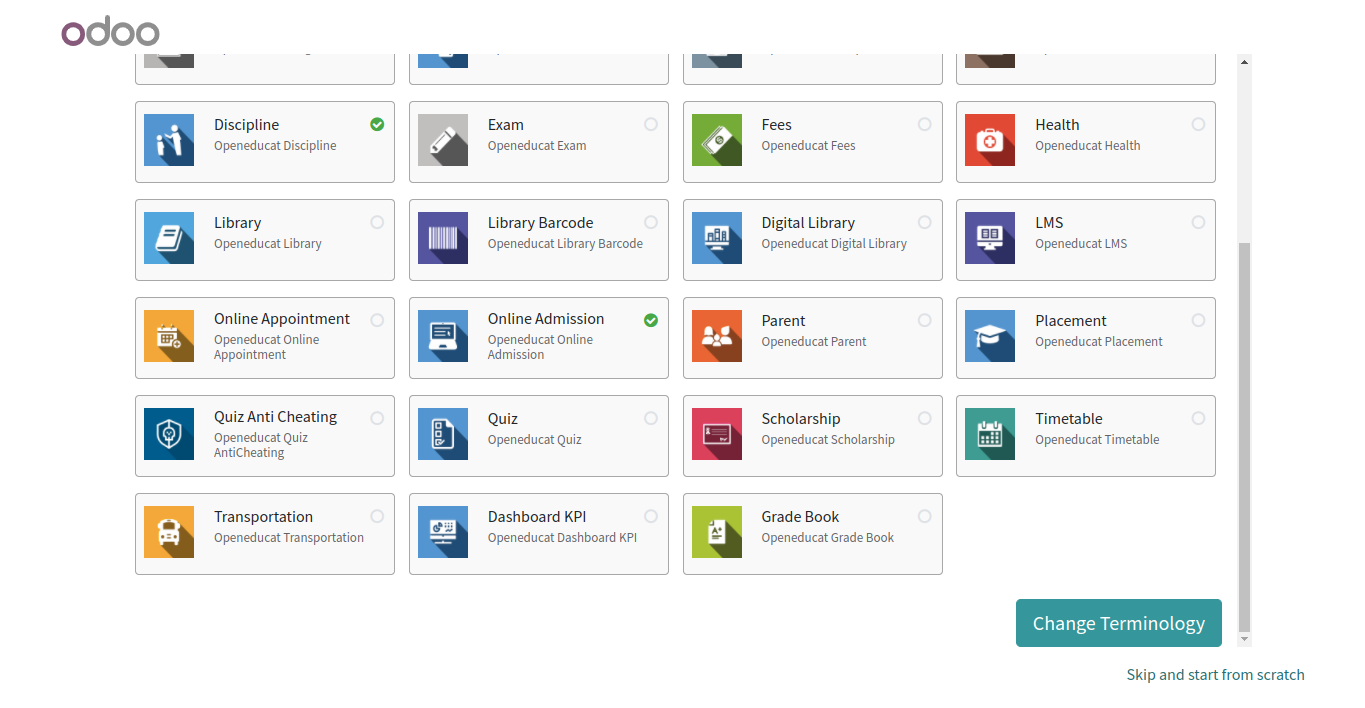
Here you can select the modules which you want to install.
After select the modules click on Change Terminology button.

Here you have to select the terminology you want to change.
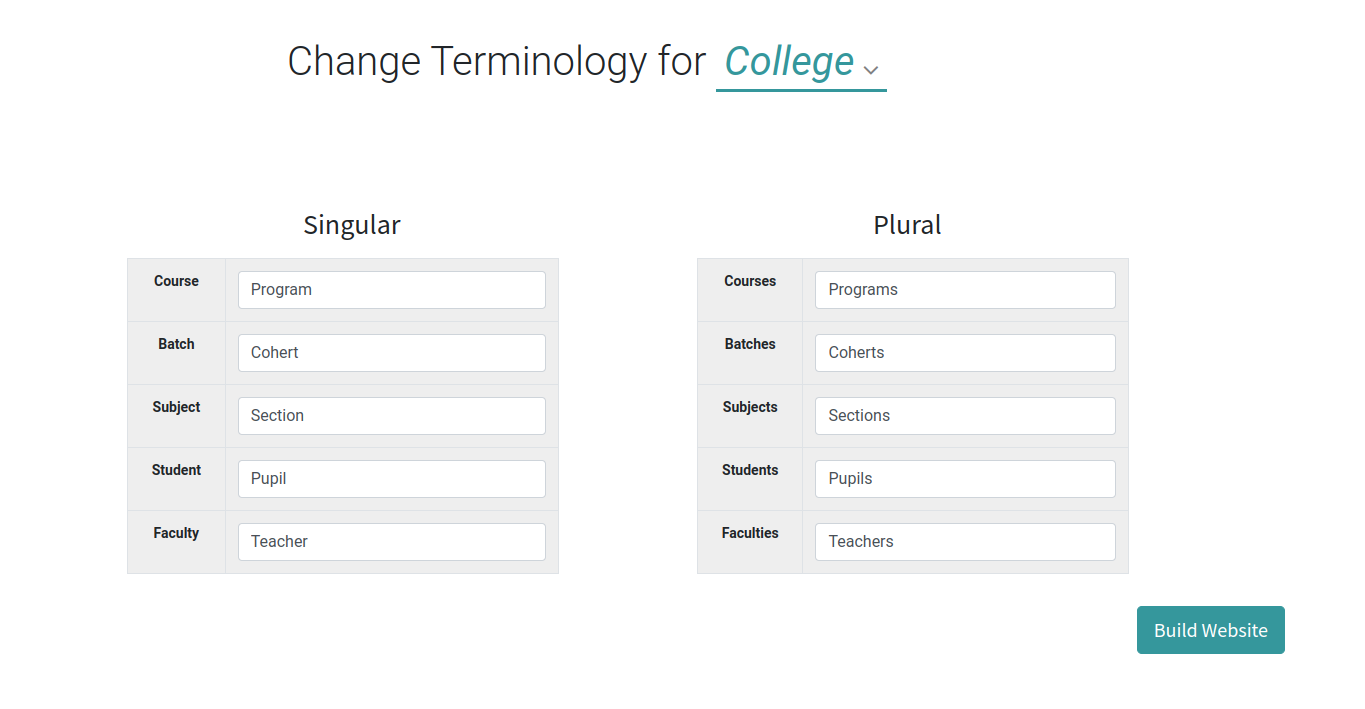
Here you can change the terminology.
Add your terminology and click on Build Website button.
It will take some time.